
How to take long exposure photos
With my long exposure work getting a bit more attention, I am getting asked more often about how I take these images and what equipment I use. So I thought I would write this article to provide information about my tools and process while out in the field.
I will start off by saying, I won't be covering the post-processing stage here. I recently wrote an article covering how I took a long exposure RAW image out of the camera to the final retouched photo which can be found here: Editing Sunset at the South Bank.
I will cover below what are, in my opinion, the three most important aspects to achieving successful long exposure photos which are the location/conditions, the equipment needed and technique but it should go without saying that practice and learning from your own experience is at least equal to and arguably more important than the information below. This post is just designed to provide someone enough information to get started with long exposure photography.
The right Location and Conditions
I explained in a previous post which can be found here that long exposure photography can be used as a compositional technique as the moving elements like clouds and water can create fantastic lead in lines or areas of interest.

Fujifilm X-T10 | XF18-55mm | 18mm | 90 Secs | f/16 | ISO200
So how does this relate to the location and conditions? The location is important as it can provide the moving elements for example, water along a river or by the coast. If the location does not lend itself to long exposures, the weather conditions, although less predictable can solve the problem by providing some moving clouds in the sky.
All of that being said, static subjects can be equally important and should not be forgotten, be it a bridge across a river or foreground interest in a landscape. Long exposure photography still requires a well-composed image.
Tip: Using websites or apps such as MeteoEarth or yr.no you can see what direction the wind and clouds are moving and the type of cloud cover. Armed with this information, you can pick your location specifically to ensure the clouds are moving towards or away from you rather than from side to side as this creates much stronger images when taking long exposures.
The Right Equipment
There are two areas that need particular focus when taking long exposure images. Firstly, the light. Long exposure images when there is still too much ambient light are only made possible by tricking the camera's light meter into thinking it is darker than it is so the camera opens the shutter for longer to let more light in. To achieve this, a neutral density filter can be placed in front of the lens to reduce the light hitting the sensor.
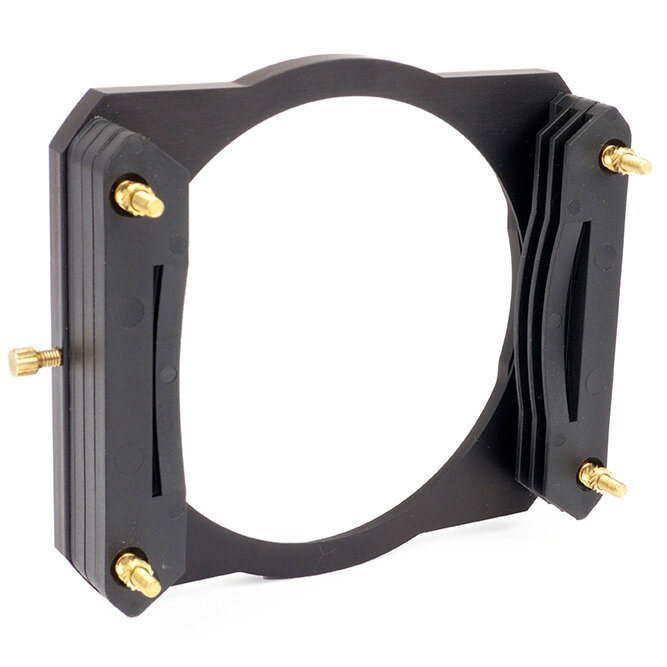
Currently, I am using the Formatt-Hitech 85mm filter system. More information can be found here. I use a filter system as it can be used with multiple lenses without the need to buy multiple filters. These systems are also ideal for using graduated filters when there is a need to balance a bright sky and a darker foreground.

The adapter ring shown here enables the filter holder above to be used with different lenses. All that is needed is the right adapter to fit the thread size on the lens. The size is measured in mm and can usually be found on the very front of the lens itself.

This is the neutral density (ND) filter itself to fit the holder above. I use a 10-stop filter that essentially reduces the light entering the lens and sensor by 10 stops. Here is an article to help understand what a "stop" is in relation to camera exposure.

Using one of the more professional kits in the industry, as shown above, can be expensive. If you are just starting out and want to dip your toe in the long exposure water then buying a screw in filter like this one is a great way to start as it can be a much more cost-effective option. Just be aware that you will need one of these for each of your lenses that have a different thread sizes.
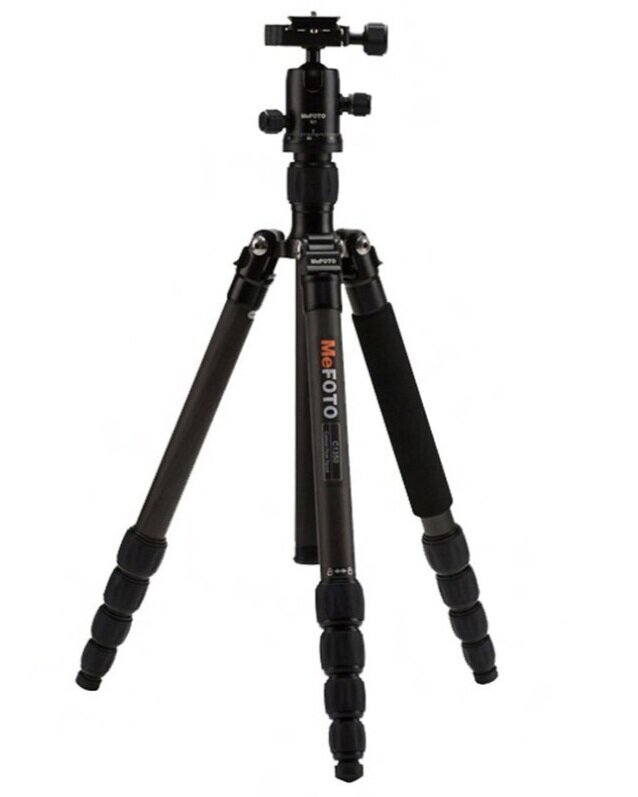
Next up, is the second area to cover which is camera stability. When the shutter is open, it is imperative that the camera stays absolutely still. This is where a sturdy tripod comes in. I use the MeFOTO tripod below as it is light but strong and collapses down quite small which is useful as I walk around London. This isn't a recommendation as such but if you are shopping around for a mid-range, capable tripod, the MeFOTO range is worth checking out.

A cable release, as shown below is usually required once you start taking images above 30 seconds and need to switch the camera to its bulb mode. Regardless of exposure time, by using a cable release you avoid physically touching the camera when the image is taken so to avoid camera shake. In addition, when taking a long exposure in bulb mode, the cable release can be locked in place which means not having to hold the button down and makes the entire process much more comfortable for the photographer.
Tip: If using a cable release, I still tend to use a 2 or 10-second timer as this forces the camera to have just a little time to settle and any vibration stopped by the time the picture is taken. This is particularly useful when using a longer focal length as any vibration is exaggerated when fully zoomed in.
The Right Technique
So, you have found your location and readied your equipment. Your filter holder is on and cable release attached, then what now? You have to actually take the shot so below I will walk through the process I generally use to capture the image and expose it correctly.

Compose: Mount the camera on the tripod, compose the image and set the focal length when using a zoom lens.
Set Aperture: Set the desired aperture. When in doubt, start with around f10 but it really should be set based on the depth of field you need and the amount of ambient light available.
Focus: Set the focus, be it auto-focus or manual, this is the right time to do it as when the filter is attached, there may not be enough contrast for the camera to focus later. Make sure when the focus is set, set it to manual to prevent the camera trying to focus again when taking the shot.
Turn off IS: Some cameras will auto-detect being on a tripod, others won't. Whatever method works, make sure image stabilisation is turned off as the system may cause the image to be soft or blurry.
Capture exposure time: Without any filters attached and with the exposure time set to auto, take a test image and if exposed correctly, make a note of the exposure time the camera used e.g. 1/10th second.
Fit Filter: Whether you have a filter system or screw in filter, now is the time to attach the filter to your lens. Be careful not to move anything on the lens especially if using a zoom.
Calculate Exposure time: Using a long exposure conversion tool or app, calculate the correct exposure needed for the filter you intend to use. I use an app called "LE Calculator". With this app you can see what exposure time you need based on the filter you have the and exposure time you were provided by the camera. The image shows based on the 1/10th second exposure and using a 10-stop filter, I need to have an exposure time of 1m 42s.
Bulb Mode: Next you need to set you camera to bulb mode so you can control how long the camera shutter is open for.
Set timer: As I mentioned earlier, this part is optional but I usually set a 2 or 10 second timer just to force a small break into the process to allow the lens to settle just in case there is a tiny vibration from when I was setting up the camera. The camera has to be totally still!
Take image: Now, using the cable release, take the exposure for the time provided by the calculator tool you have used. When the time is up you should have a correctly exposed long exposure image. If your camera does not provide an on screen timer, you might want to ready your phone to measure the time.
The process above may look daunting at first and quite involved but with a little practice, it will become easier and you should end up doing some of these without thinking.
Tip: If taking long exposure images during sunrise or sunset, the light levels can change very quickly so your required exposure time may change while you are taking the shot itself. Experience will help here but be prepared to add a few seconds to the exposure if the light levels suddenly reduce or remove a few seconds if the light quickly increases.

Fujifilm X-T10 | XF18-55mm | 21mm | 280 Secs | f/9 | ISO200
So that's about it. I think I have captured the important points and I hope it provides some useful information for someone starting up with the long exposure technique. If I have forgotten anything, feel free to leave a comment and I will update the post.