
Tips for Photographing the Woodland in Spring
I think I’m starting to sound like a scratched record as I’ve said it so many times over the last few weeks, but I’ll say it one more time; thank goodness winter is coming to an end! It has been the worst winter for woodland photography since I first started to point my lens towards the trees. I prefer calm, relaxed conditions when I photograph the woodland and the high winds and relentless rain has meant I’ve lacked the motivation to pick up my camera and head to the woodlands over the last couple of months. Now winter is finally coming to an end and with spring just around the corner, I’m now looking forward and planning for another season of fresh green leaves and colourful carpets of woodland flowers.
So, in a bid to share some of the lessons I’ve learned over the last few years, I’ve listed a few tips that I feel can help anyone trying to get the most from their springtime woodland photography.

Get to know the woodland you plan to photograph
Starting with the big one. Scouting! This, in my opinion, is the most important thing any photographer can do when looking to photograph a spring woodland. Knowing where those colourful wildflowers will appear and having some compositions in mind means that when the time comes and conditions are right, you can head to the woodland prepared with some ideas as to what to photograph.
It’s worth noting that when all the fresh flowers and leaves appear, the woodland transforms and can look very different compared to its lifeless, wintry self. So, although it’s great to head into the woodland with some previously scouted compositions in mind, be prepared to change things up if the shot you planned is no longer on.
2. Be prepared to revisit your chosen woodlands
The thing about the woodland in spring is that it’s not always easy to tell when the colour will appear. It can happen in just a matter of days. So, when you’ve found the areas of woodland you plan to focus your attention on, be prepared to revisit a few times so you catch the growth at the perfect time. For this reason, it’s also worth thinking about trying to find local woodlands to photograph, that way you can keep a closer eye on how things are progressing.
Below are three photos of the same scene spanning just two weeks. Look how fast the woodland bloomed into life.


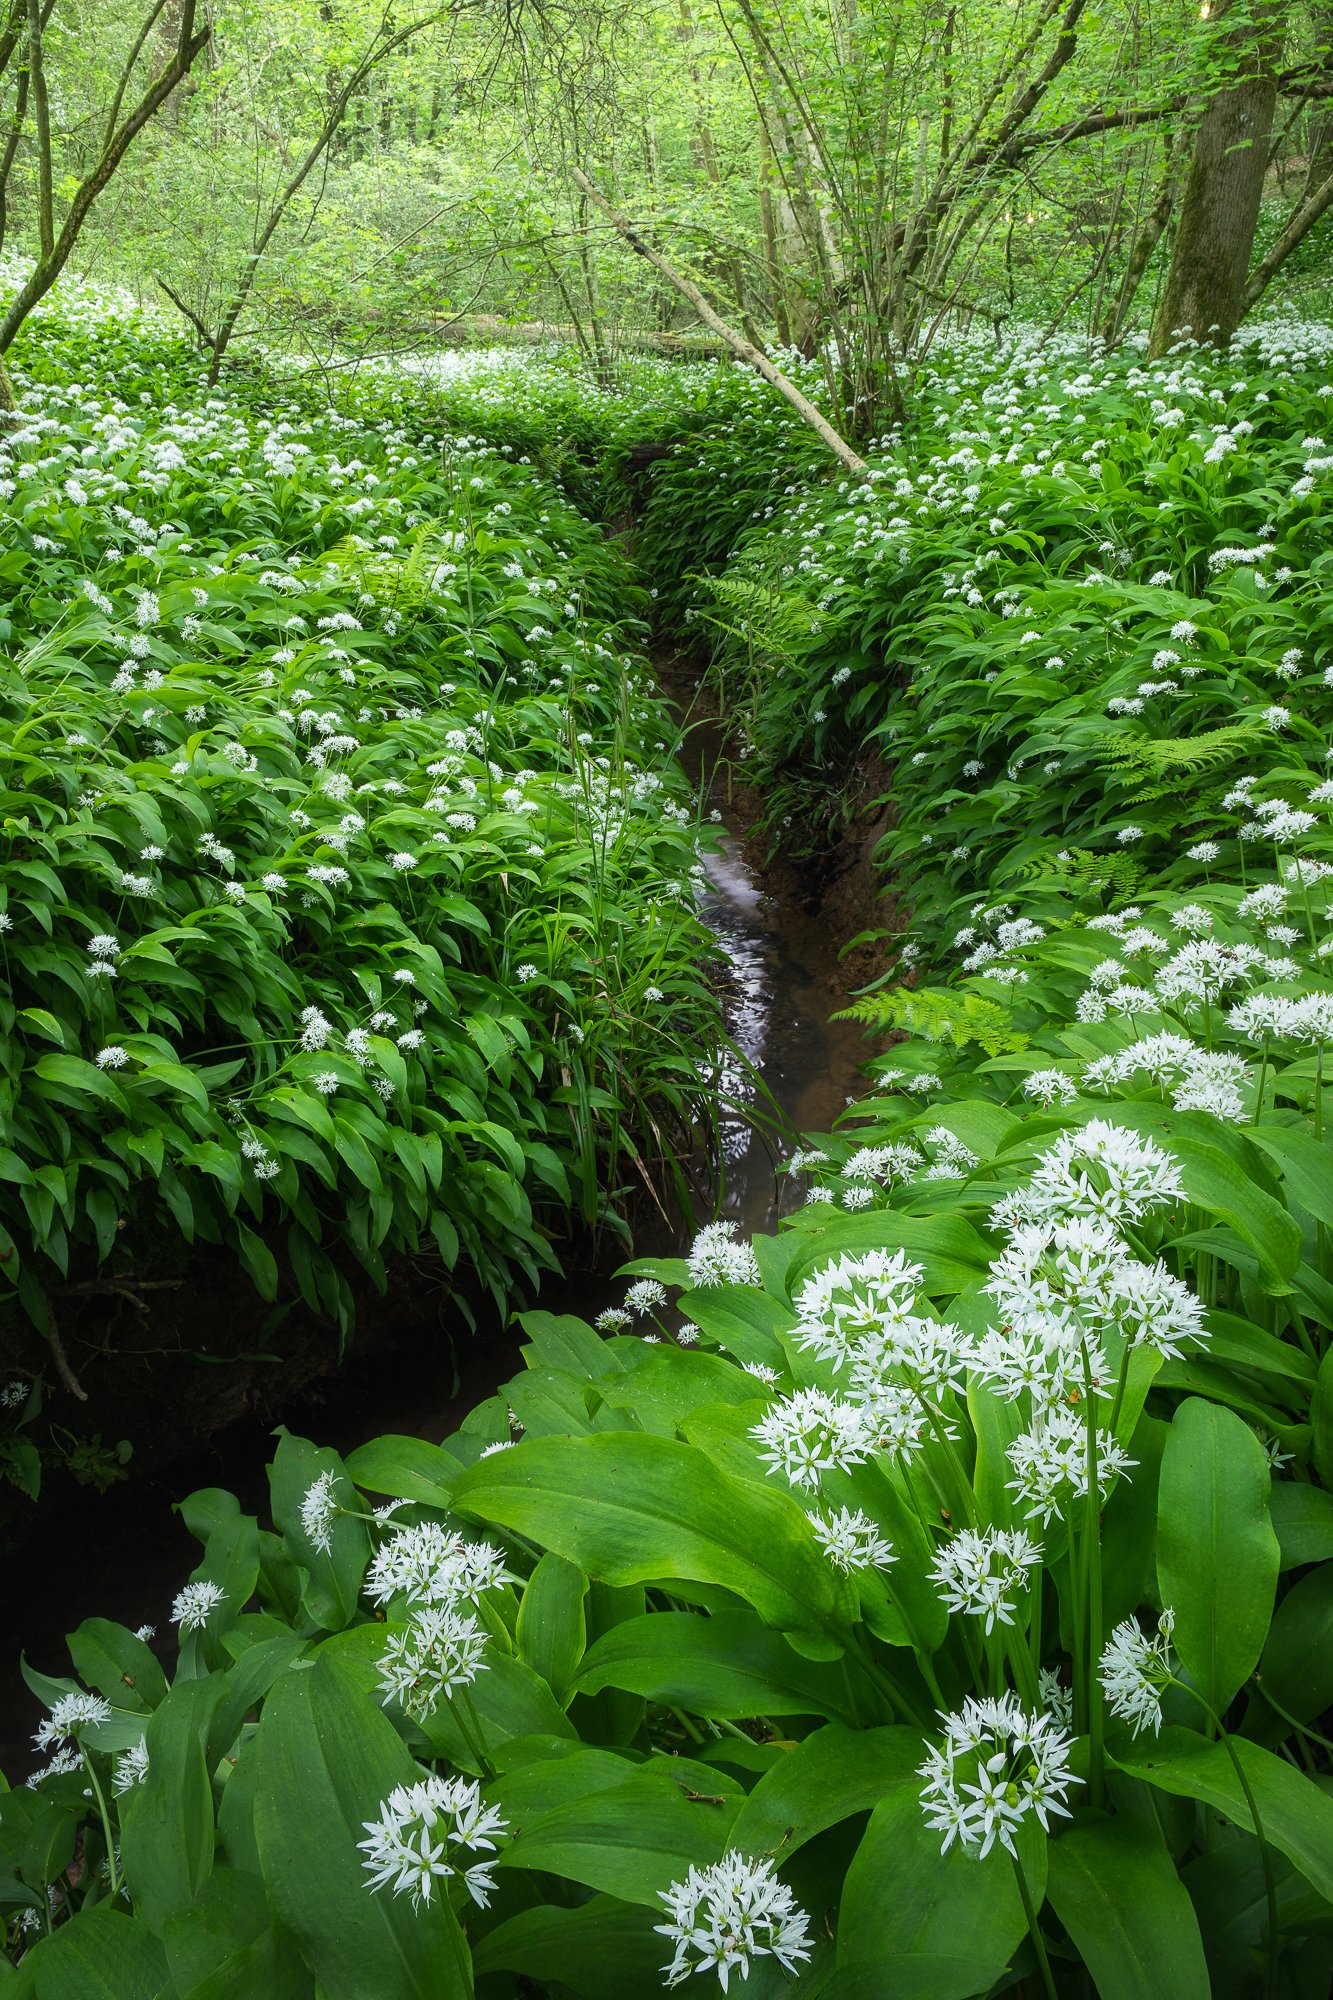
3. Embrace the woodland’s natural disorder
When I first started woodland photography, the number one springtime photo I wanted to take was the iconic uncluttered carpet of bluebells surrounding a bunch of perfectly straight beach trees. For some, it’s the holy grail of springtime woodland photography. Fast forward a few years, and as my woodland photography has progressed, I’ve learned to embrace the clutter and am now much happier seeking compositional order in a natural disorder. I am immeasurably more satisfied when I find a composition I like after working harder on the arrangement.

4. Learn to spot the telltale signs of a misty morning
Like 99% of all other woodland photographers, I love a misty woodland. Along with removing distracting backgrounds and defusing the light, having mist or fog while photographing the woodland can add atmosphere and a sense of mystery to the images.
Although it is never foolproof, it helps if you can identify the telltale signs of a foggy morning when checking your favourite weather app the night before a shoot. In a nutshell, the chances of encountering a misty forest significantly increase when there is little or no wind, humidity is in the high 90s, and the dew point matches the temperature. The weather being the weather means that even when all the signs are there, it doesn’t always work out the way you plan.

5. No mist, no problem
The thing about foggy or misty conditions is that even when all the signs are there, more often than not, it doesn’t happen. So, my advice to anyone photographing woodland is to embrace the woodland whatever the conditions.
Misty mornings aside, my ideal conditions for photographing woodland is in soft, defused light. Personally, I struggle when the light is strong and direct but the great thing about living in the UK is that there are plenty of cloudy days and even when the sun is out, it typically won’t be long before a cloud floats in and tempers the harsh light.
Another challenge when photographing woodland is that it can be quite dark and if there is any sky visible between the trees, it will likely be the brightest thing in the shot and appear very distracting. In foggy conditions, this is less of a problem as the light will be defused but when it’s clear, I will typically find a composition without any sky, using the thicker foliage or the undulations in the landscape as a backdrop to the image.
6. Use a polarising filter to give the colours a bit of punch
If like me, you enjoy photographing the woodland early in the morning or in damp, rainy conditions, you will almost certainly come across wet, reflective leaves in your scene. Reflective light can be very distracting in your woodland photos. This is where a circular polarising filter (CPL) can come to the rescue. A CPL filter works by blocking the reflective light from entering your lens, which means less glare and more punchy colours in your woodland images. This effect is practically impossible to replicate when processing your photos back at the computer, so, to get the very best quality pictures in these conditions, it’s definitely worth mounting a CPL onto the end of your lens.
Just a word of caution. A common mistake many photographers make is to automatically turn the CPL all the way; removing all reflective light from the image. This can result in flat, highly saturated pictures. My advice is to rotate the filter back and forth until there is a good balance between eliminating the distracting reflections and retaining some of the life in the scene. Taking it one step further, photograph the scene with and without the filter mounted so you can choose the picture you like best later.
7. Photograph the small scenes
When the woodland comes alive with new growth in spring, there can be an abundance of smaller scenes to photograph and one thing I’ve been trying to do more often is to get much closer and photograph the finer details. With so much texture and patterns on offer, once you get the camera up close to these smaller scenes, you will be able to tap into a wealth of photographic opportunities and although getting down that low can often be a little tough on the back, by slowing down and taking your time to compose the image properly, you will undoubtedly capture some beautiful, intimate woodland photos.
At the time of writing, I don’t own a macro lens as I don’t want to carry yet another piece of camera gear. Instead, I invested just a few pounds in a set of extension tubes which I mount between my camera and the lens. These allow me to focus much closer for a fraction of the price (they cost me about £30). Extension tubes may not be as good as a high-quality macro lens, and you typically lose a stop of light when using them, but they are the next best thing in my opinion and incredibly handy for the odd occasion where you want to get a little closer to your subject.

8. Embrace the vibrant greens
Photographing the plethora of beautiful colours can be a wonderful experience, however as quickly as they appear, they will be gone again, and you will be left with an abundance of vibrant green tones across the woodland. I love to include those fresh leaves in my images, but having a single colour across the entire frame can result in an image that lacks interest or dynamism. One approach I take to make more interesting photos is to use the strong lines created by the trees to break up the colour and add structure to the composition. This is the approach I took for the photos below and they remain some of my favourite springtime woodland photos I’ve taken.


9. Leave no trace
Over the last few years, so many people have rediscovered the beauty of their local woodlands, and I love to promote the benefits of woodland photography, but all this footfall is having a big impact on these important natural spaces. That’s why, through effective education and following a few simple principles, these popular places can still be visited and enjoyed, but remain protected for future generations to experience.
Our actions directly impact these natural spaces, and one key example is the English Bluebell. Bluebells are a protected species in the UK and picking or digging them up is illegal, but not many people know just how fragile they are. Bluebells can take years to recover from the damage caused by people trampling over them just to take a selfie, and if their leaves are crushed, they can be weakened (as they can no longer photosynthesis). This can all be avoided if everyone sticks to the woodland pathways.
Nature First is just one of many organisations trying to help us woodland photographers to keep these natural spaces safe and they have a few simple principles to follow. By doing so, we can all do our part to preserve our beautiful woodlands.
Prioritize the well-being of nature over photography.
Educate yourself about the places you photograph.
Reflect on the possible impact of your actions.
Use discretion if sharing locations.
Know and follow rules and regulations.
Always follow Leave No Trace principles and strive to leave places better than you found them.
Actively promote and educate others about these principles.

I hope you found that somewhat useful and if you’re looking for some more woodland photography-related articles to read, check out these three I’ve posted below.


Until next time.
Trevor