
How I Process My Landscape Photos Taken with the DJI Mini 3 Pro
When I first decided to buy a drone to use for landscape photography, I had to consider the pros and cons of each model available at the time. For example, the larger Mavic models typically have a more capable camera, but the smaller, sub 250g Mini models have fewer restrictions on where they can be flown. After weighing up the pros and cons, I eventually chose the DJI Mini 3 Pro. I’ve already published a post covering my thoughts on this drone, and you can read a full review from a landscape photographer’s perspective here: DJI Mini 3 Pro | A Landscape Photographer’s Review.
Following on from the review I wrote about this drone, I published a second post demonstrating the different camera settings I use while out taking landscape photos with the Mini 3 Pro. DJI Mini 3 pro Camera Settings for Landscape Photography.
You can find both of my previous DJI Mini 3 Pro blog posts below:


So, given that I’ve written a review of the Mini 3 Pro and published a blog post detailing the settings I use to take landscape photos, what’s this blog post all about then? When I published my previous post, I had a few messages asking for a bit more detail as to how I process the Mini 3 Pro raw files and although there are countless different approaches one can take, I decided to write this post detailing the steps I took from raw to final edit using a photo I took recently in low light conditions.
Before I start, I wanted to make two points. Firstly, this post is aimed at those wanting to get their files ready to be printed. The techniques I use to sharpen and overcome noise in the image aren’t really going to benefit you if you plan to just share your drone photos on social media.
The second point to make is that both this and the camera settings for landscape photography post above applies to those using the DJI Mini 3, Mini 3 Pro and the recently released Mini 4 Pro. Features may vary from model to model, but overall, their capabilities are very similar when it comes to taking landscape photos.
Step 1: Taking the photo in the field
Let’s start with the original raw files I took in the field. This is Arundel Castle located in West Sussex and after sunset came and went without much fanfare, I decided to hang back just a bit longer to take a photo during blue hour. It’ll not win any awards but with the low light conditions, I figured this image was a good candidate to use for this processing blog post.

Raw files as shown in Adobe Lightroom. DJI Mini 3 Pro | 24mm Pano | 1/6th and 1/3rd Second | f/1.7 | ISO100
In terms of camera settings, I used the 48mp setting in PRO mode when taking this photo to get the highest resolution. I knew from previous experience that there would be some noise in the files, so I decided to take two pictures, manually adjusting the shutter speed for each. The first image was exposed for the castle at 1/6th of a second, and the other was exposed for the sky at 1/3rd of a second.
Step 2: Increase detail and reduce noise in Adobe Lightroom
As I expected, there was some noise in the sky when viewing the raw file at 100%. So, before I merged the bracketed images, that noise needed to be dealt with. Even though I can see the noise at 100% here on my screen, I’m not too sure how well that comes across on yours, so here’s a 100% and 200% crop demonstrating the noise I can see in the sky. I know the 200% crop isn’t representative in the real world but it’s just to help visualise the noise. If you still can’t see it, you’ll just have to trust me that it is there.


There seems to be a plethora of noise reduction software hitting the market recently and among those, Adobe released its own AI Denoise feature in Lightroom and Camera Raw. Having tried some of the other tools available, in my opinion, Adobe’s AI Denoise is as good as, if not better than many of the other options out there. Plus, its baked into Lightroom making for an easier workflow.
AI denoise is a part of Adobe’s Enhance feature (located in the Photo menu along the top). Along with denoising an image, it also improves raw files by enhancing the details and reducing artefacts. It can, however, only be used with raw images so needs to be applied before using the Photomerge-HDR function in the next section.

To remain consistent across both the under and over-exposed raw files, I ran them both through the Enhance feature, being careful not to add too much noise reduction as overuse can have unintended consequences.
Below is a side-by-side comparison of the original and enhanced files. With any hope, you will be able to see the refined edges and enhanced definition on the right-hand side.
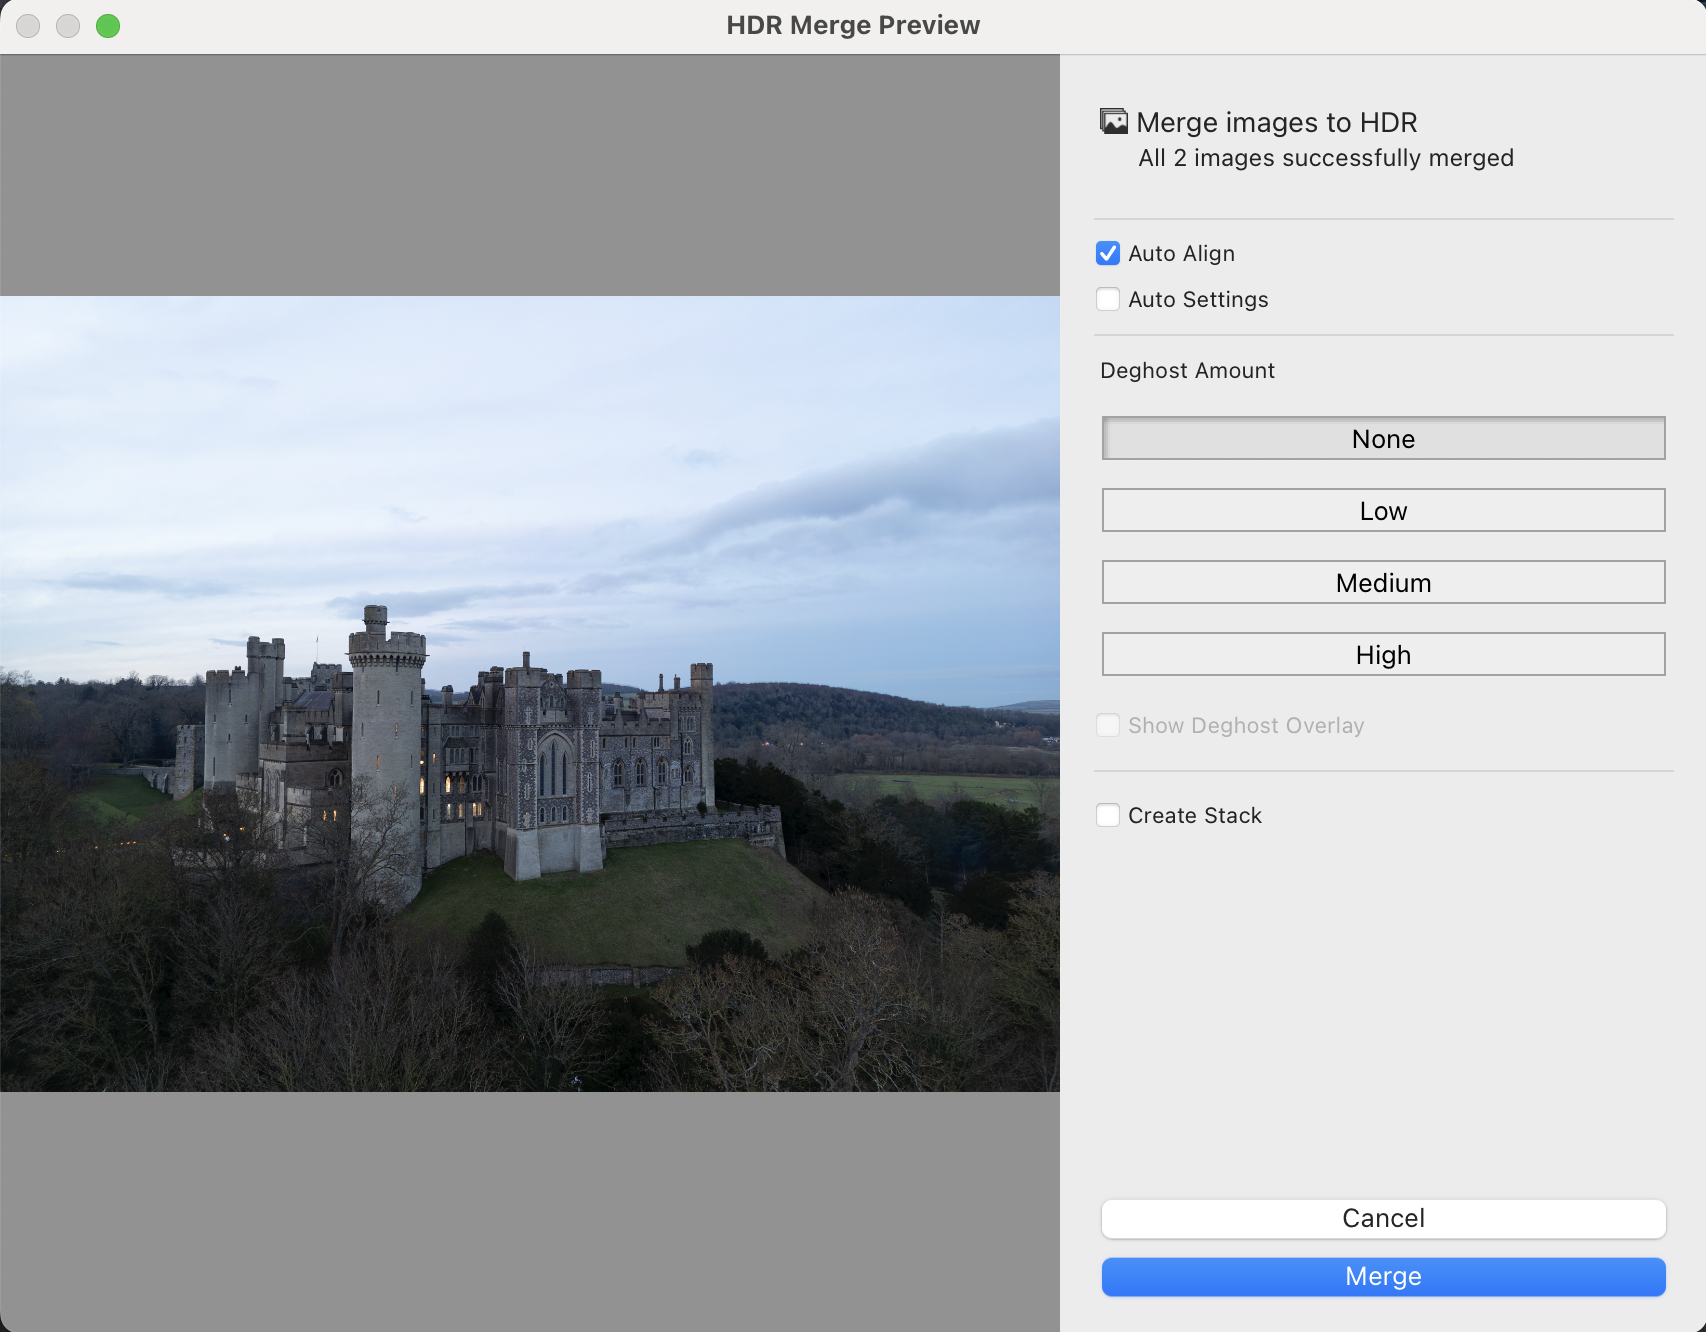
Step 3: Merging the bracketed image files in Adobe Lightroom
With the two new DNG files created by the Enhance feature, I selected them both and used the Photomerge-HDR option in the Photo menu (or via a right-click on the photo). I typically use the settings you see below and once finished, a new HDR DNG file is created. This new file will have less noise in the shadow areas and more detail that can be recovered in the brighter areas, resulting in a cleaner, editable image.
Step 4: Editing the image in Adobe Lightroom
Now, with the image file prepared, it’s time to edit.
This post isn’t a tutorial as to how best to edit a photo as everyone’s style will be different. However, what I have highlighted below is the Detail panel showing that I have applied minimal sharpening in Lightroom and for the small amount that is applied, I have increased the masking to ensure it only applies to the areas of high contrast such as the castle edges, excluding large parts of the image such as the sky.

Step 5: Sharpening in Adobe Photoshop
A note on sharpening. Opinions vary as to when to apply it. During the edit or only when the file is being outputted for a particular use case such as web, socials or print. This is just my approach, and I don’t for one minute suggest it is right for everyone. I will typically add some sharpening when editing, call it a “base sharpening” if you will. This is typically fine for all of my online needs but If I feel I need to add any more sharpening for print, I will do so when preparing the file before sending it to the printer.
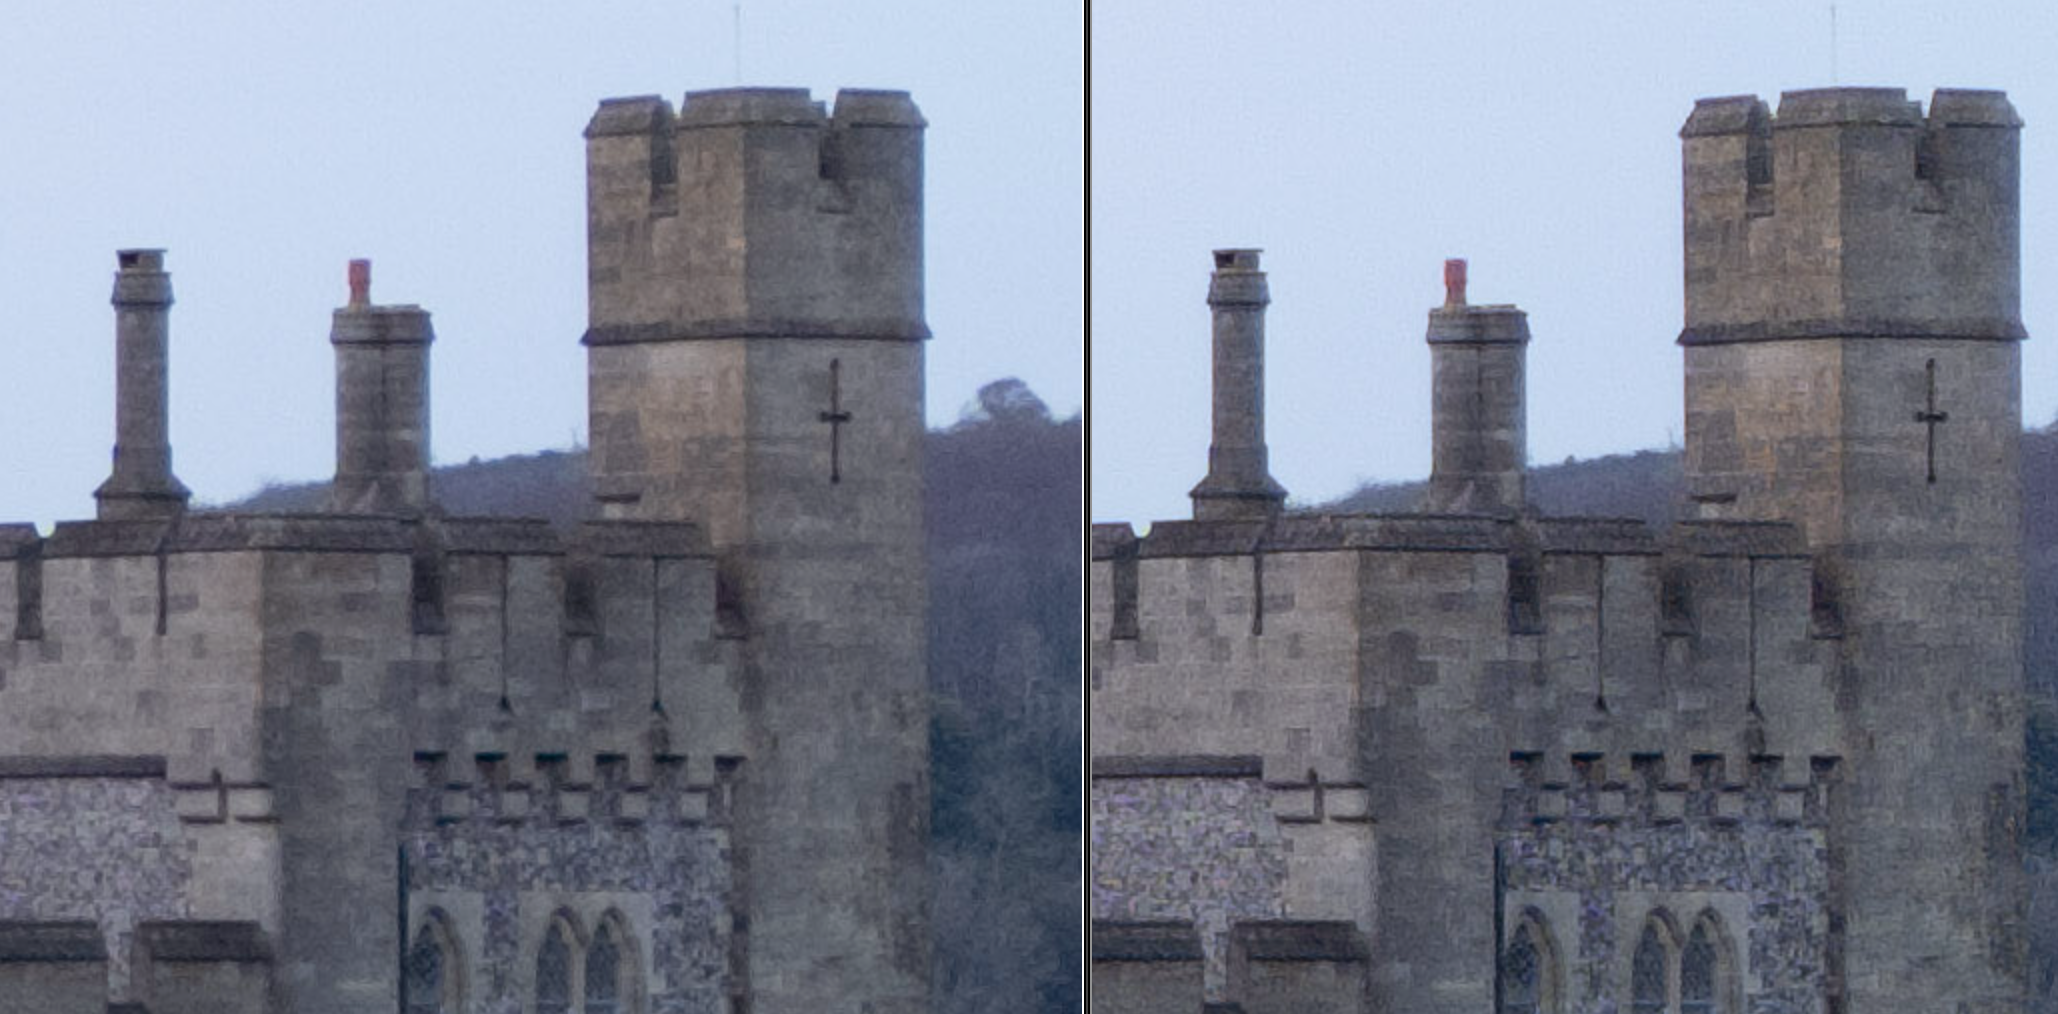
Not being a big fan of how Lightroom sharpens my raw files, I apply just a small amount of sharpening using the Details panel before I finish it off properly in Photoshop. For this, I use the High Pass filter. It’s a great tool to detect the edges (or high contrast areas) in a frame, which, when combined with a contrast-boosting blending mode applied to those edges, sharpens the photo without affecting the areas with less contrast, such as the sky.

First up, create a duplicate layer and then, from the menu, select Filter - Other - High Pass. Here, you will decide how much sharpening you want to add by adjusting the Radius amount. Choosing the right number depends on the resolution of the file and how much sharpening you want to add. Typically, I stick between 1-2 pixels at this stage with the view that I can add more later if needed. If you start to see colour artefacts in the preview, you’ve probably taken it way too far. Experiment with the radius yourself to get the effect you like. Once I’m happy with the thickness of the edges detected by the High Pass filter, I then hit OK.
Next, I use the Overlay blending mode for the same layer. This blending mode will hide the grey areas and add contrast to the edges highlighted by the High Pass filter, resulting in a clean, sharper file. Hopefully, you can see the effect by comparing the before and after images in the screengrab below.

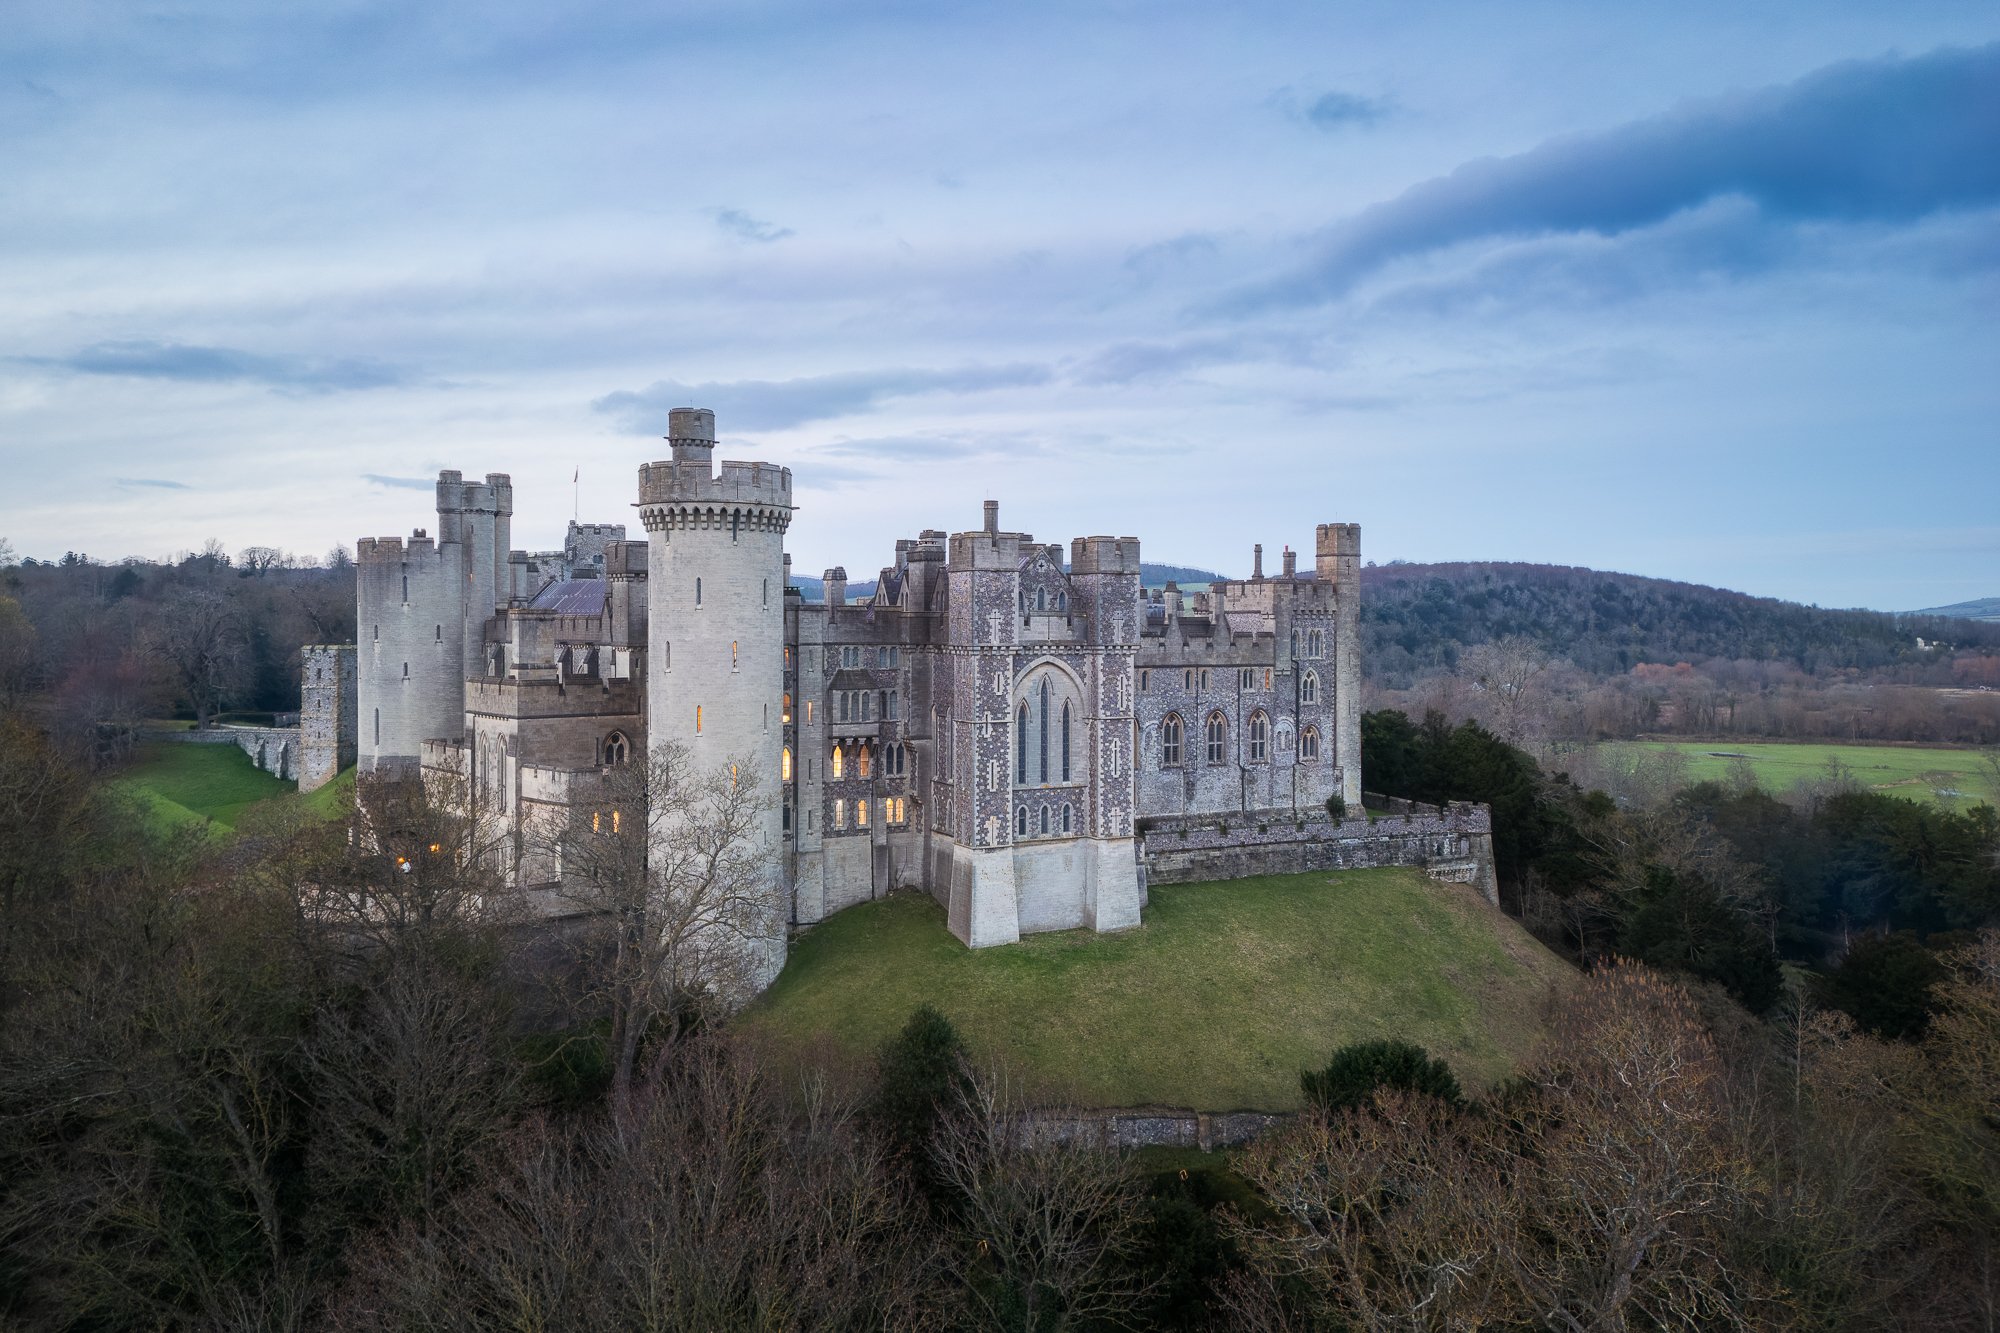
The final image, ready to print
After a few Photoshop tweaks that include the spot healing brush to remove a few distracting lights and a final 3:2 crop back in Adobe Lightroom, here is the final photo with more clarity and less noise than before.
As with all processing methods, this approach, which works for me, may not work for everyone, but in some way or another, I will use some or all of these steps when processing my drone photos.
Having said all of that, the proof is in the pudding, so, next up, I plan to print this and a few other photos I’ve taken with my drone to see how the quality holds up at different sizes. If I can find a way to communicate that process in this blog format, I’ll post a follow-up article on that soon.
I hope you found this article useful, and if you have any tips or tricks or can suggest any improvements to my workflow, feel free to leave a comment below.
Until next time.
Trevor