
BLOG ARCHIVE

2019 | A Photographic Year in Review
My photographic review of 2019 including a look back at some of my favourite photos and events that took place throughout the year and finishing up with some thoughts about 2020.
Well, that’s it. Another year passes and as I sit here preparing to write this post, having just celebrated Christmas with my family and friends, I now embark on the quest to quietly reflect on 2019 and contemplate where I want to take my photography and what I want to achieve in 2020.
2019 was, as usual, a busy year for me both in my personal and photographic life. I kicked off 2019 with a focus on getting myself in shape which apart from the obvious health benefits of shifting a few pounds, can really help when heading out and lugging around a big, heavy camera bag for hours on end. There was, however, one downside. As we all know, there are only so many hours in the day so I had to take the decision to prioritise work, family and health over photography. This didn’t mean my photography stopped, not at all, but the number of opportunities to get out with my camera would inevitably be impacted.
It wasn’t all bad, I still made over 40 photography related trips into London during 2019 and still managed to shift a few pounds! Not too shabby.
Below are a few of the photographic highlights of mine that took place during the past year.
Printing my own photos
Previous to 2019, I would occasionally print photos via a professional photo lab but with the desire to print my work more and knowing the benefits it may bring to my photography, in March 2019, at the Photography Show in Birmingham, I brought my first professional printer so I could try my hand at printing my own photos at home.
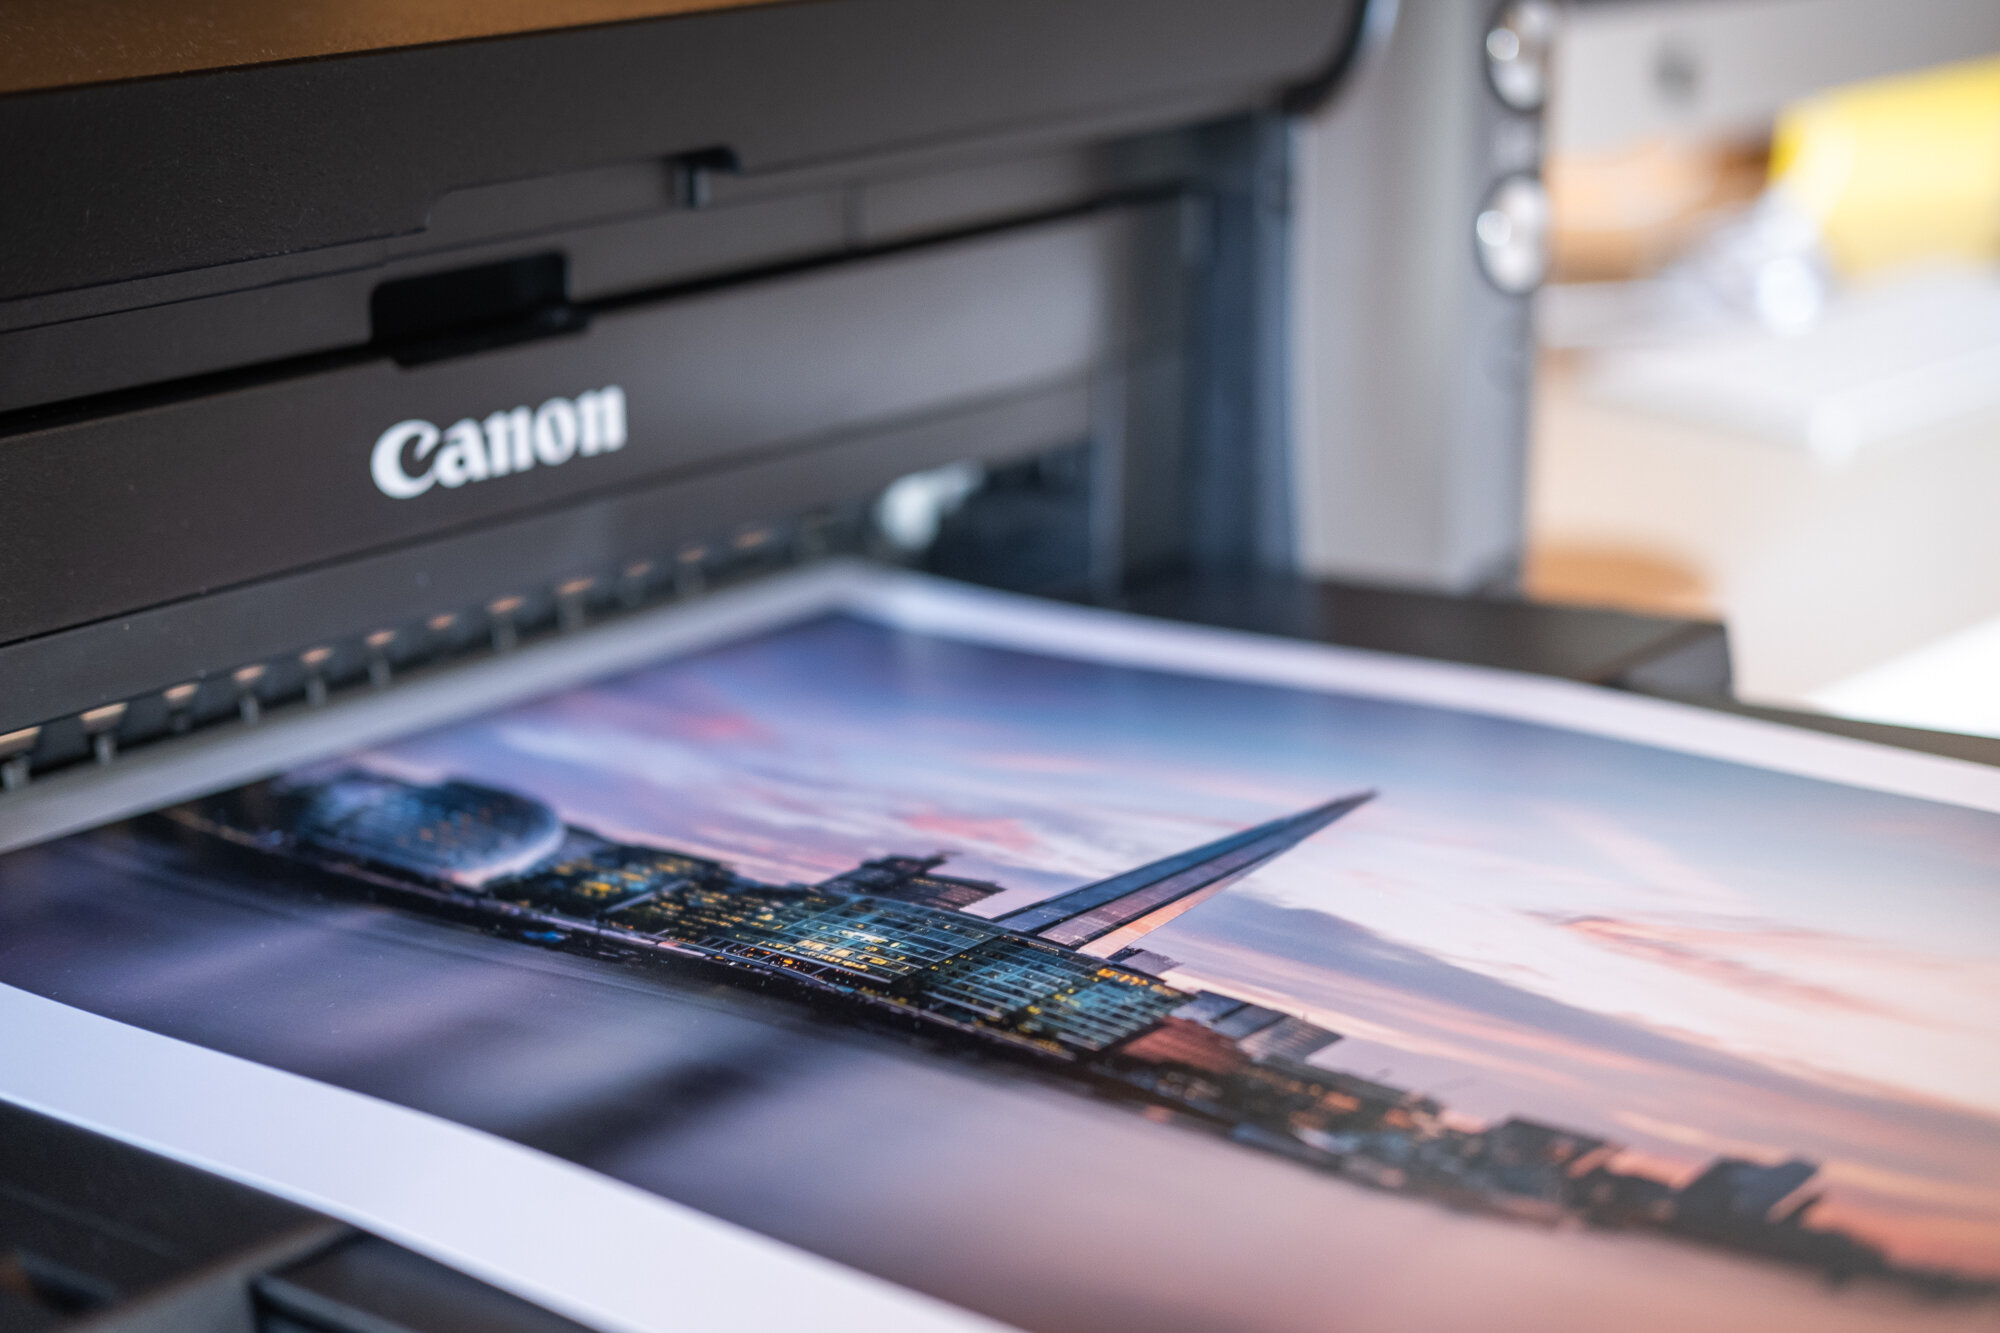
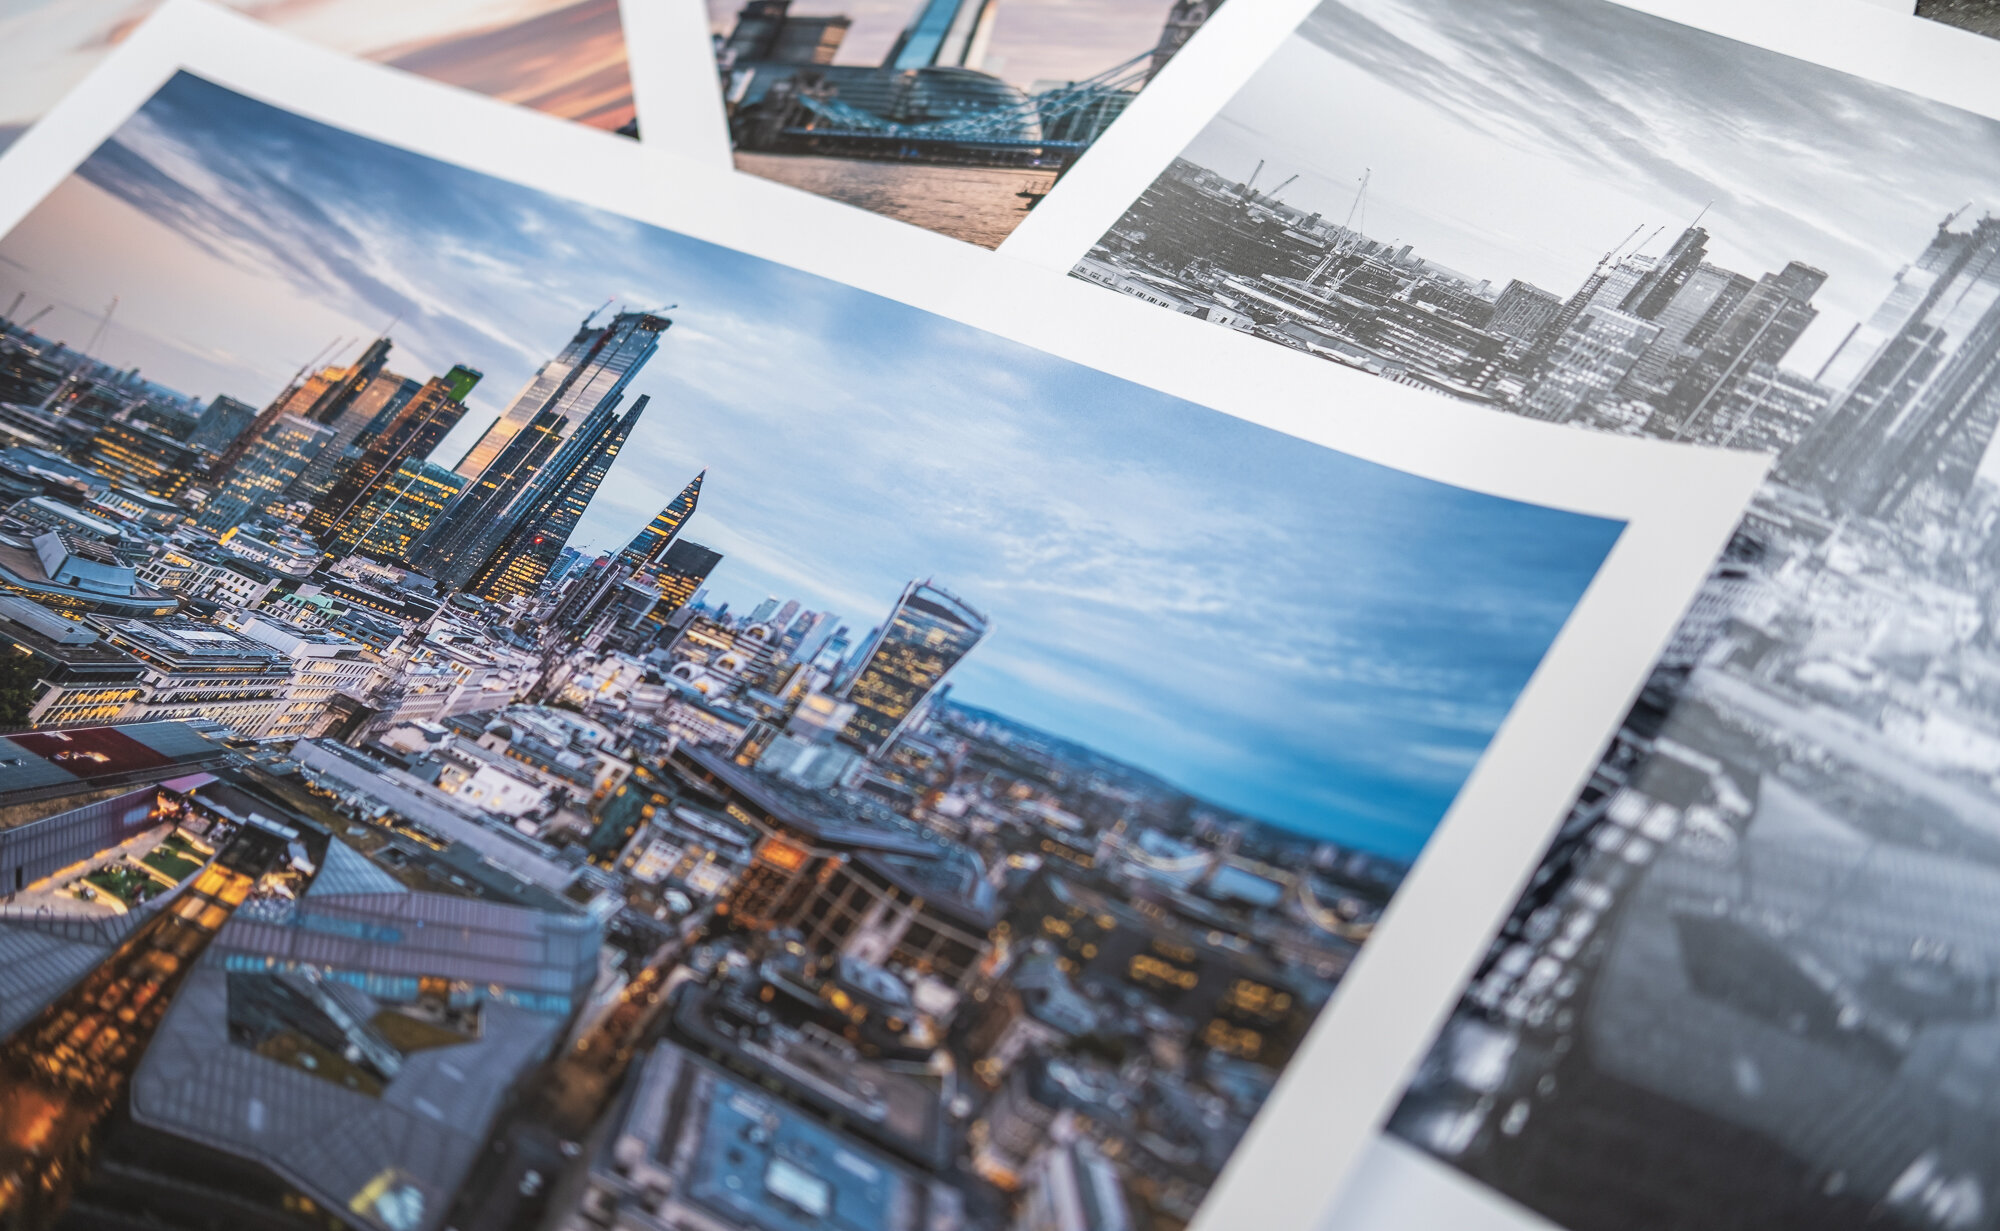
It was a bit of learning curve but once I got to grips with proofing and printer profiles I cannot emphasise enough how important printing images has become for me. Not only am I able to appreciate my images in a larger, more tactile form but it provided me with the ability to better critique my work.
Whether you use a professional print lab or decide to do what I did and print at home, I cannot recommend enough that you print out some of your best work!
In 2019, I wrote an article about my simplified home printing process which you can read more about here.
Mental Health and Why Photography Matters
The hidden role photography can play in our lives is something I have only just started to explore in 2019 and it has really opened my eyes to the subject. After diving a bit deeper into the positive effects having a creative outlet can have on people that fight various degrees of inner darkness, I decided that this is something I want to continue to pursue and help raise awareness where I can. You can read more in my first post on this topic here.
On-Location Photographing Ghent
One of the photographic highlights for me in 2019 was visiting the charming city of Ghent. I spent an enjoyable few days exploring the city and managed to grab a cracking sunrise along the river. Two of the photos I took during that sunrise shoot can be found further down, towards the end of this post.
Over the last couple of years, I have visited various cities in Europe including Paris, Venice and Bruges and 2020 will be no different with a trip to Amsterdam already booked in for May! If you wanted a recap on this trip to Ghent, pop over to my On Location travel post I wrote a few months ago: On Location | Photographing Ghent.
Weekly Photo Project
This was arguably the most significant photographic decision I made in 2019. I decided to start a new project which would combine my photography with an increasing desire to explore the storytelling side of the craft. I decided that I would post a new photo each week in the form of a blog post that would be accompanied by some kind of short story which I called Weekly Photo (I know, clever, right?) I’m reluctant to call this a project (such as a 365 or 52) as its not something I plan to complete. It has no end date. It is just a change of approach as to how I would be presenting my work going forward.

I embarked on this Weekly Photo journey because I was getting a bit fed up with feeding the social media machine, hunting for a new image each day was quite frankly, boring and I wanted to release photos on my own terms. Don’t get me wrong, I fully understand the important role social media plays for photographers but with this new approach, my website would now be the priority and social media became the supporting act.
There were, however, some unforeseen benefits that after only 30 posts (to date) I have already discovered. The most significant is how the need to curate and select the images to publish makes me think more carefully about what I like or dislike about my photos. Essentially, I now self-critique my photos more than I have ever done which helps me work out what does or doesn’t work and over time will help me become a better photographer.
Another, somewhat related plus side of this process and one that links to the first point above is that as I process and publish my weekly photos, I also print them. Printing my photos is a whole different ball game when it comes to inspecting my work as the physical print will show off any issues such as missed dust spots or distracting elements that I may have missed when viewing the photo on the screen.
Looking forward to 2020
So, what plans do I have for 2020? Well first off is to continue to build upon my Weekly Photos and refine my storytelling ability whilst sharpening my photographic skill set. Taking it even further, I plan to finally give my print store a serious go and offer limited edition, signed prints of a selection of my Weekly Photos and who knows, I may even create a calendar later in the year. I’ve had half-hearted attempts to offer prints in the past but never really promoted my store and this is something I have to learn to do more of if I really want a print store to work. I know it won’t allow me to give up my day job but it may help fund some of the expenditure photography requires and to have more of my work on other people’s walls would mean a lot to me. Anyone that parts with their hard-earned cash to buy my work is paying me the biggest compliment I can receive as a photographer.
Travel wise, I don’t have a great deal planned yet except a trip to Amsterdam in May where I will no doubt capture some travel shots and a sunrise shoot around the canals.
Now, I want to share a few of my favourite images from 2019, starting with some cityscapes of London, my sunrise shoot in Ghent and finishing up with my favourite city by the sea, Brighton.

Fujifilm XT2 | XF18-55mm | 20mm | 131 seconds | f/10 | ISO200
The photo above was featured in the third Weekly Photo post found here: THE SHARD AT SUNSET | WEEKLY PHOTO #3

Fujifilm XT2 | XF10-24mm | 17mm | 1/60th second | f/4.5 | ISO800

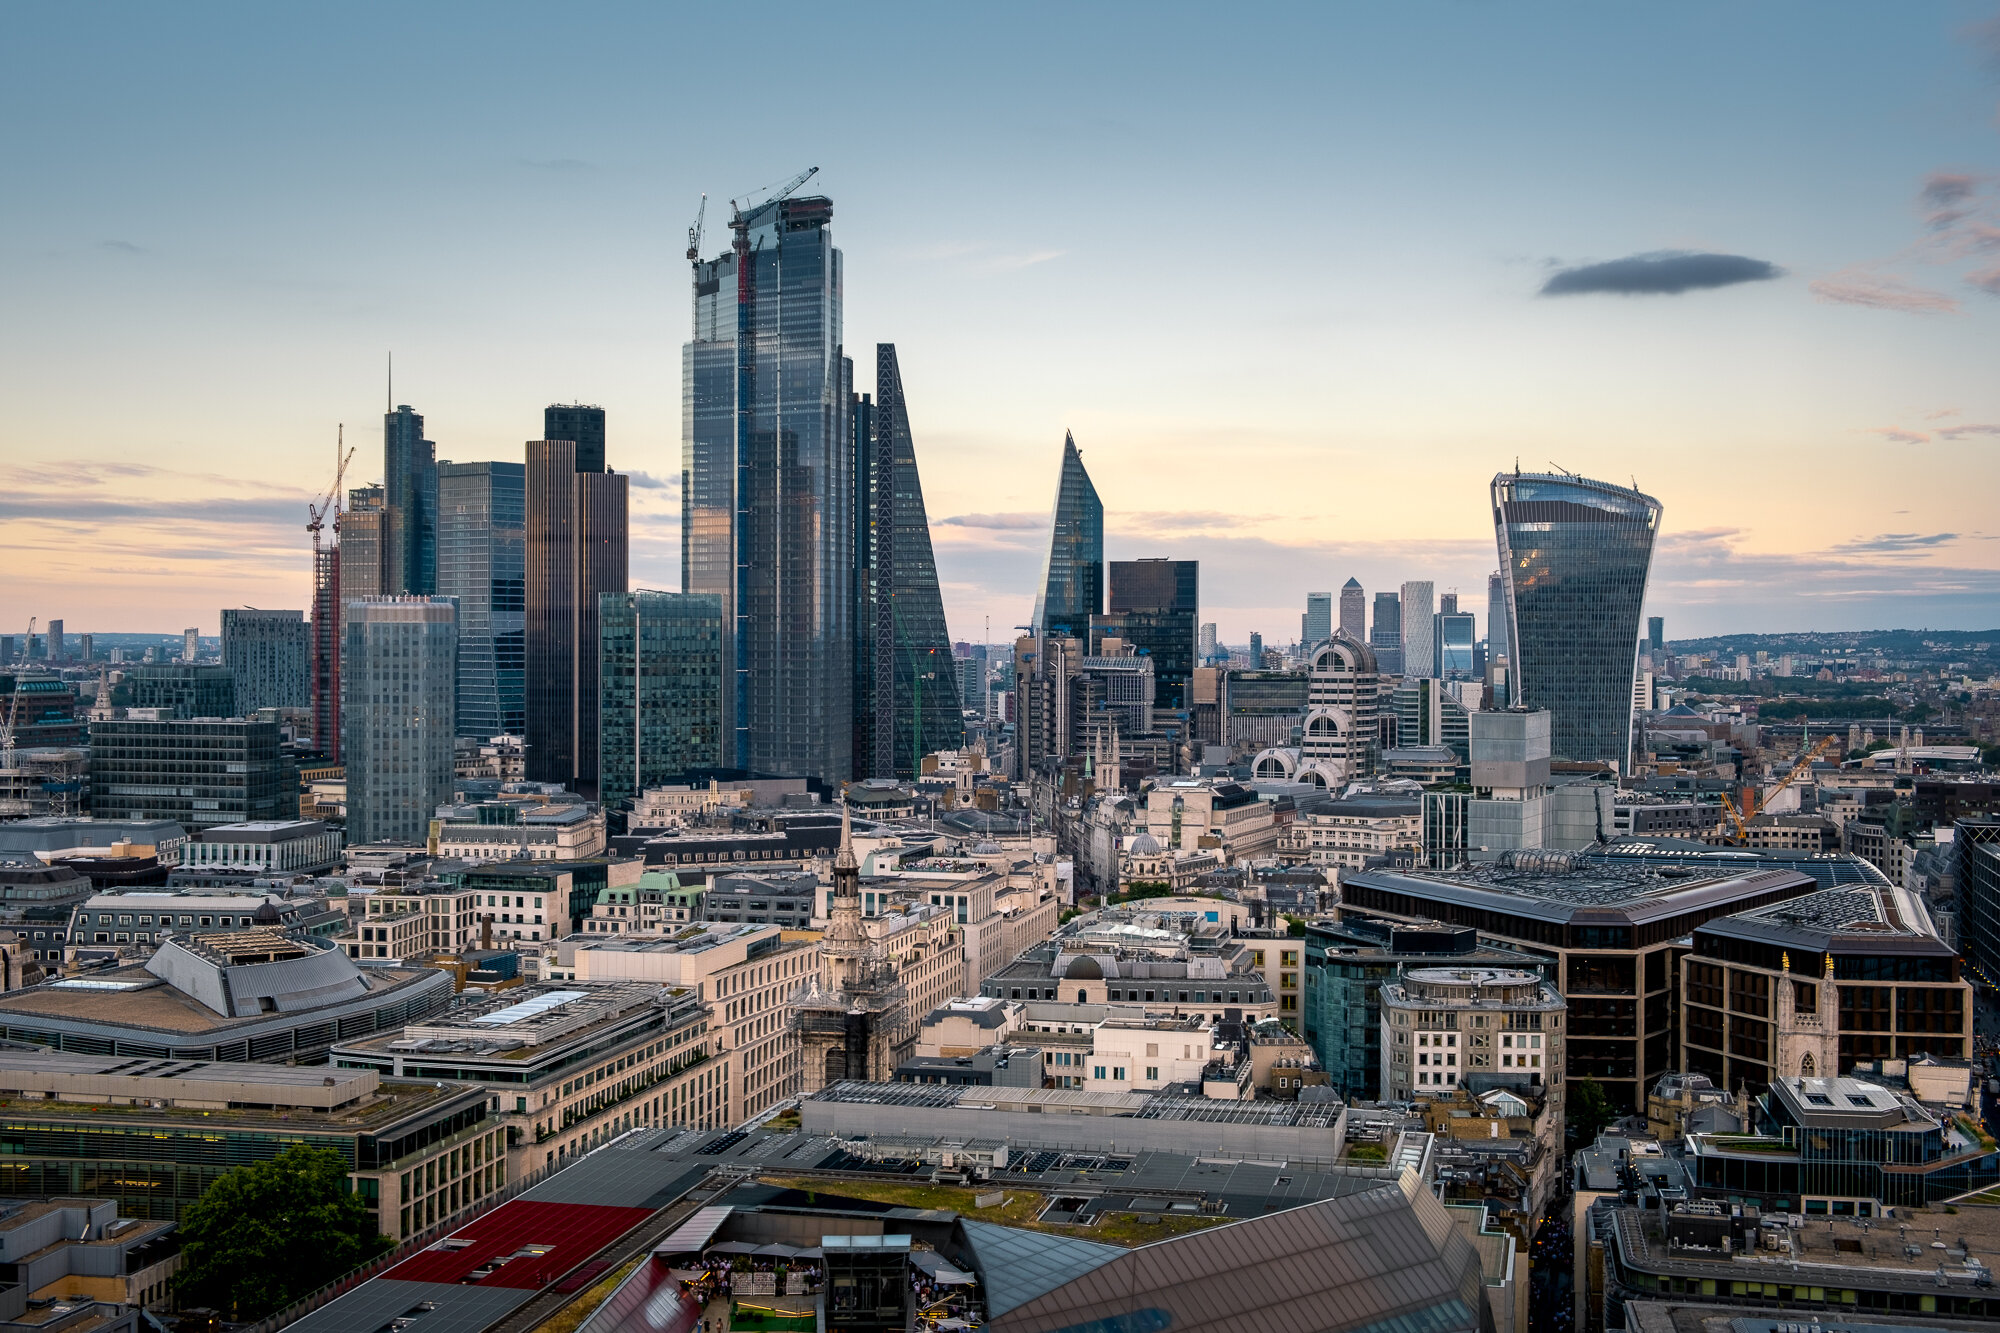
Fujifilm X-T30 | XF18-55mm | 18mm | 1/5th Second | f/5 | ISO160
The photo above was featured in the nineteenth Weekly Photo post found here: THE VIEW FROM ST PAUL'S | WEEKLY PHOTO #19

Fujifilm X-T30 | XF10-24mm | 10mm | 1/8 Second | f/8 | ISO160
The photo above was featured in the twenty-fourth Weekly Photo post found here: WESTERN TOWERS | WEEKLY PHOTO #24

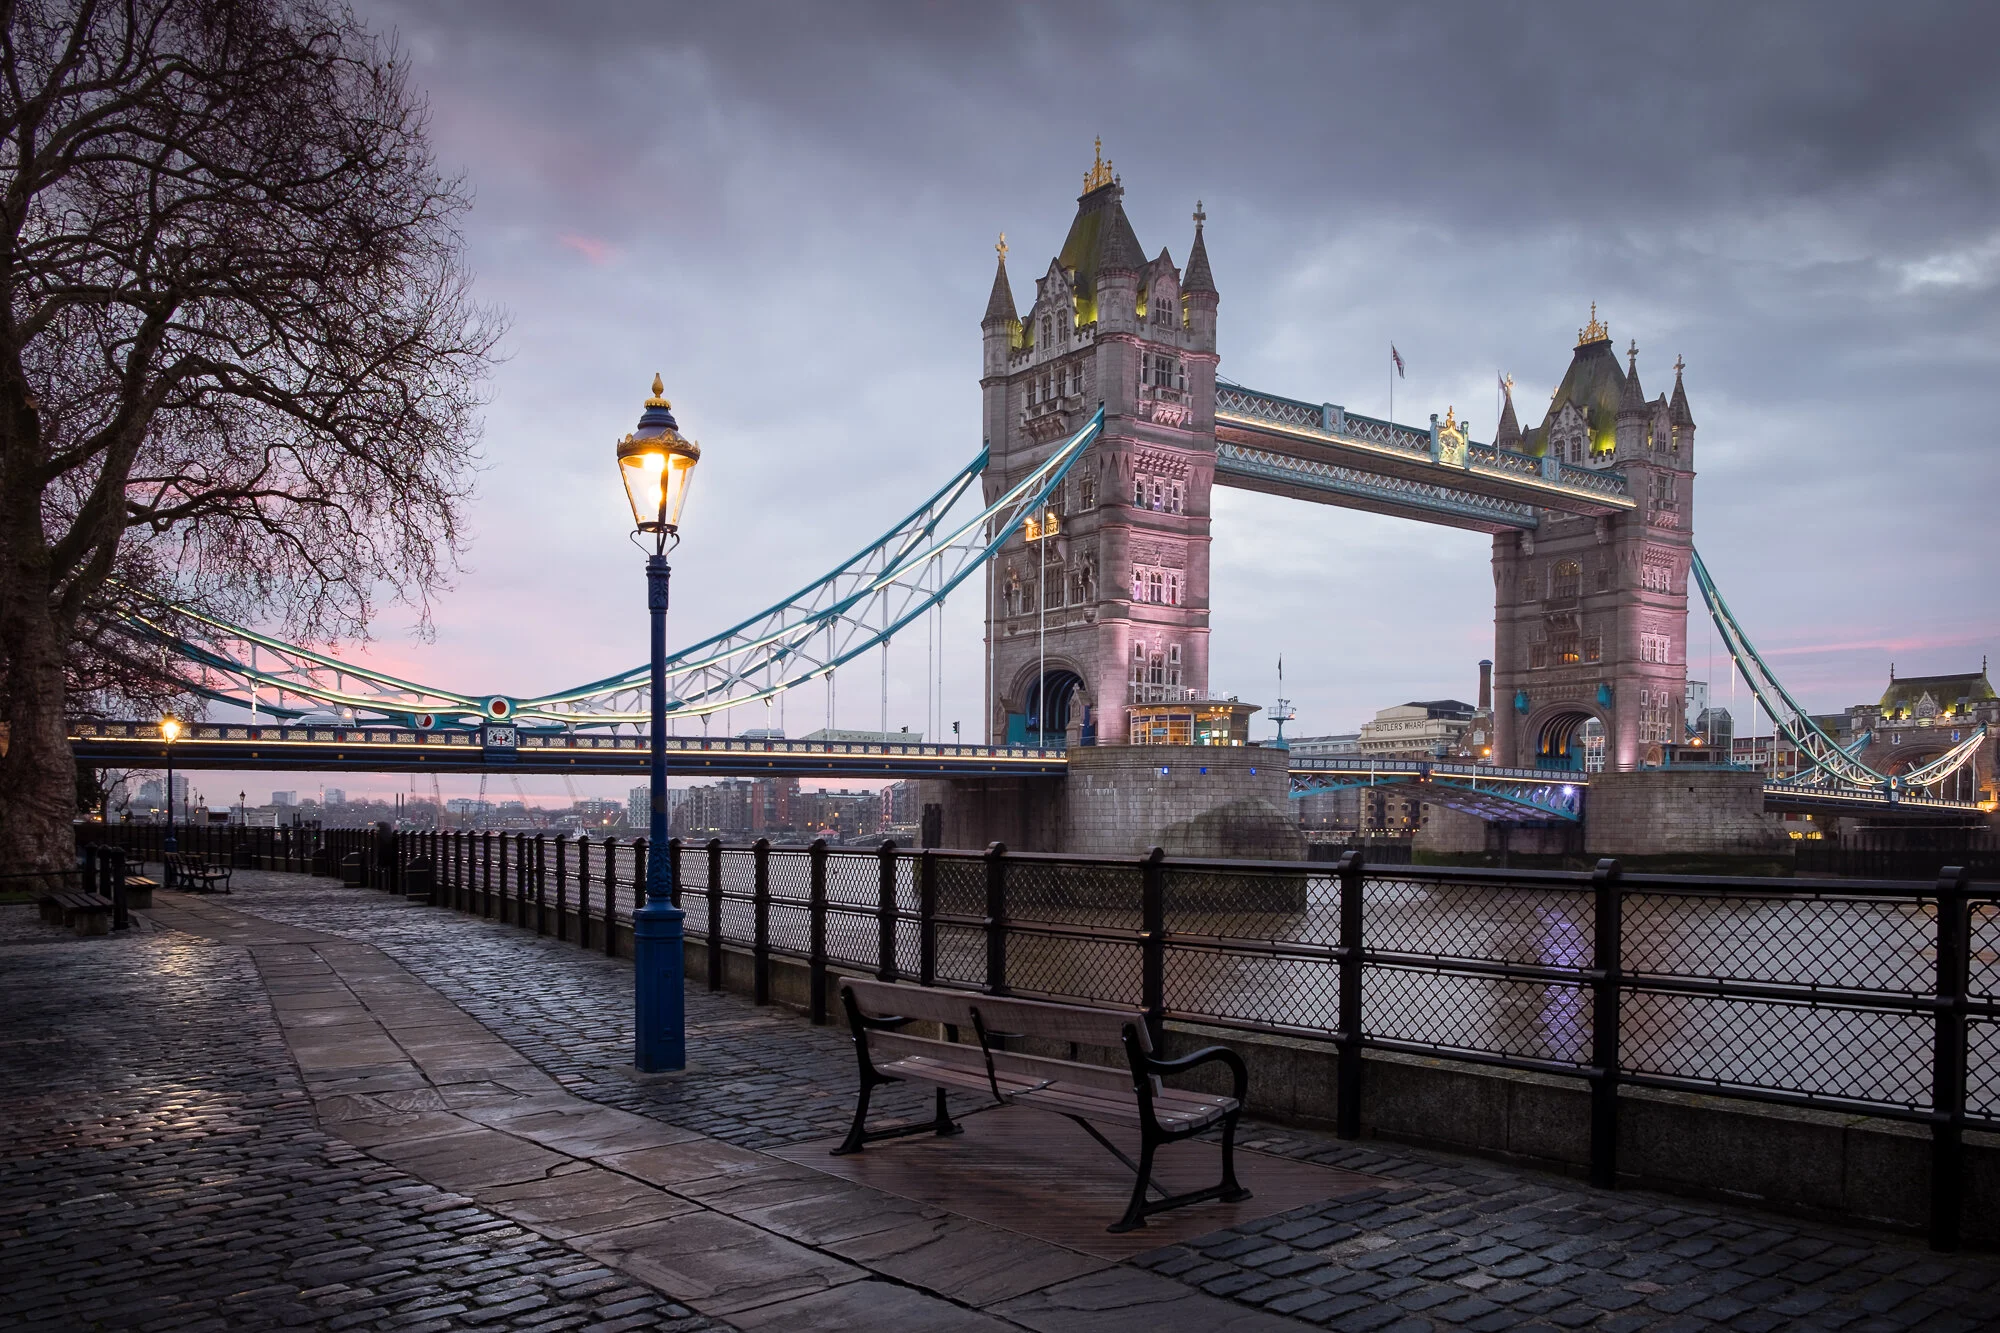
Fujifilm X-T30 | XF10-24mm | 17mm | 28 seconds | f/9 | ISO160
The photo above was featured in the ninth Weekly Photo post found here: ST KATHARINE DOCKS | WEEKLY PHOTO #9

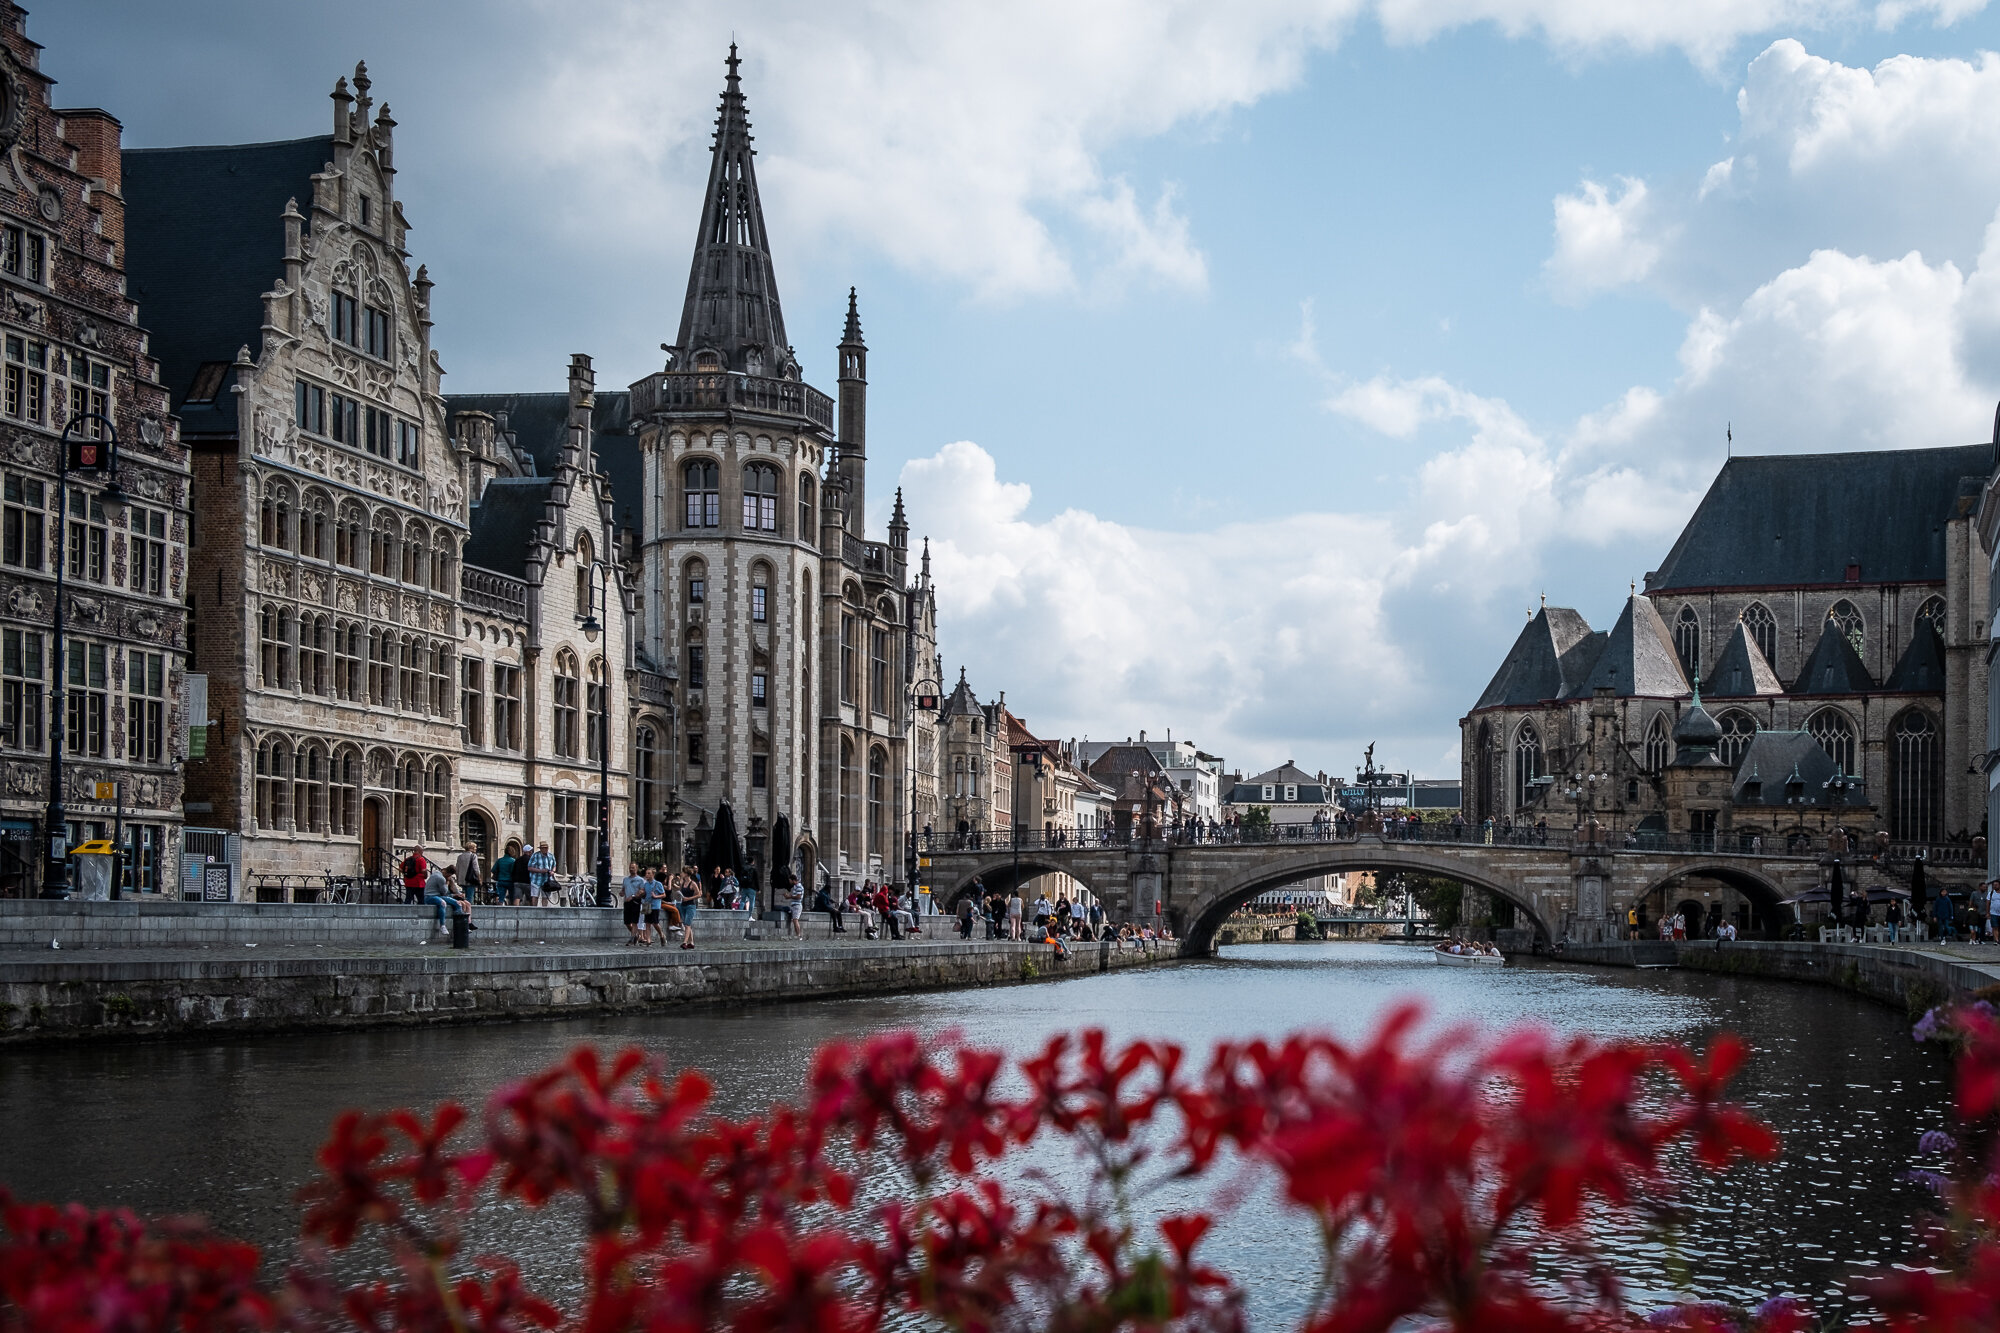
Fujifilm XT2 | XF18-55mm | 18mm | 2.6 Seconds | f/11 | ISO200
The photo above was featured in the twenty-second Weekly Photo post found here: A BLUE HOUR IN GHENT | WEEKLY PHOTO #22

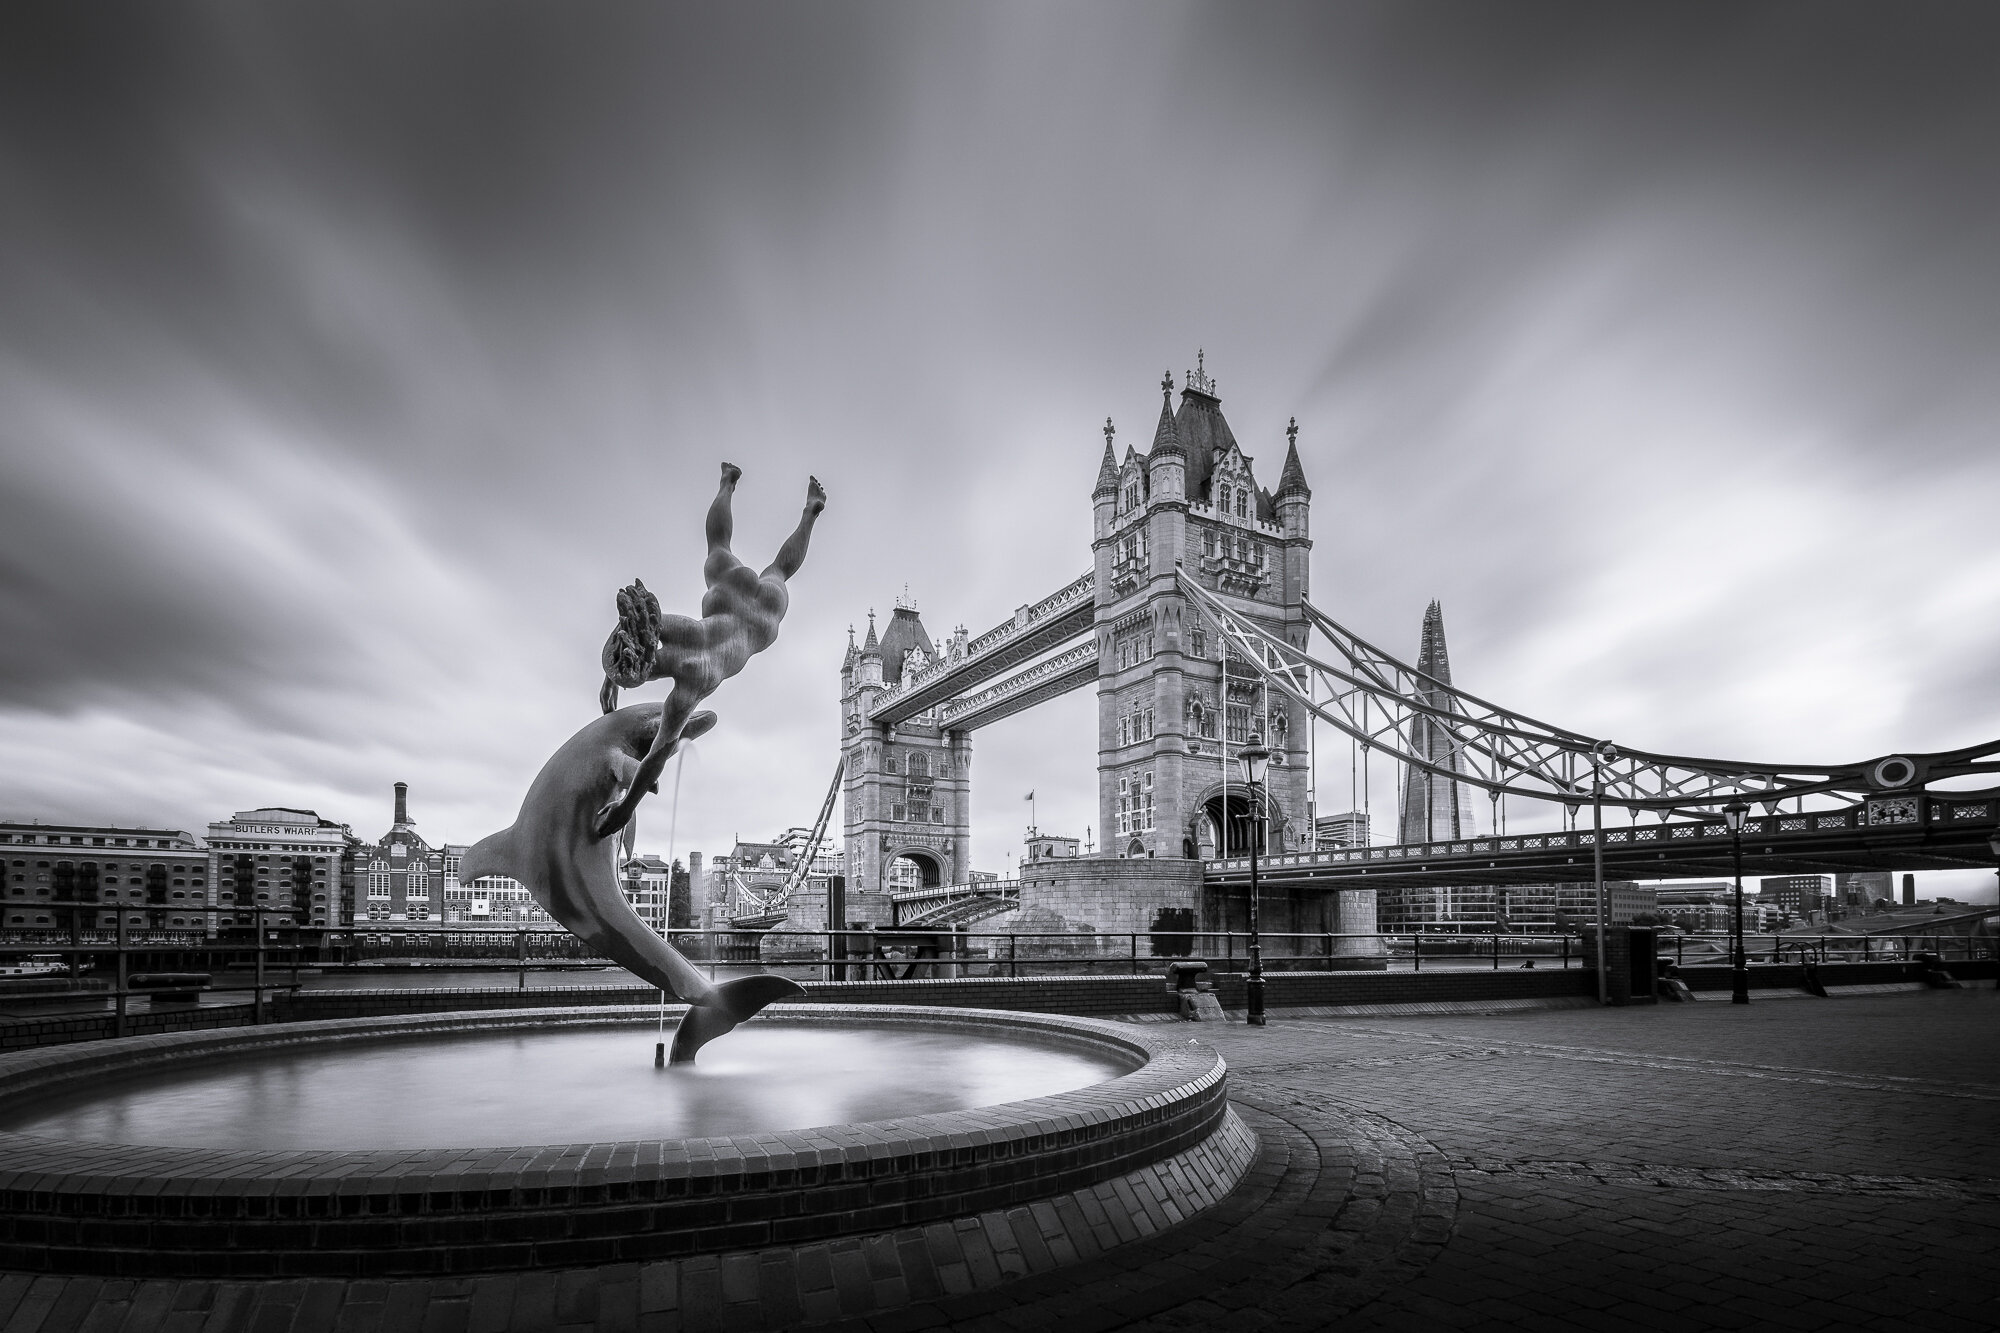
Fujifilm XT2 | XF10-24mm | 10mm | 1/6th second | f/7.1 | ISO200

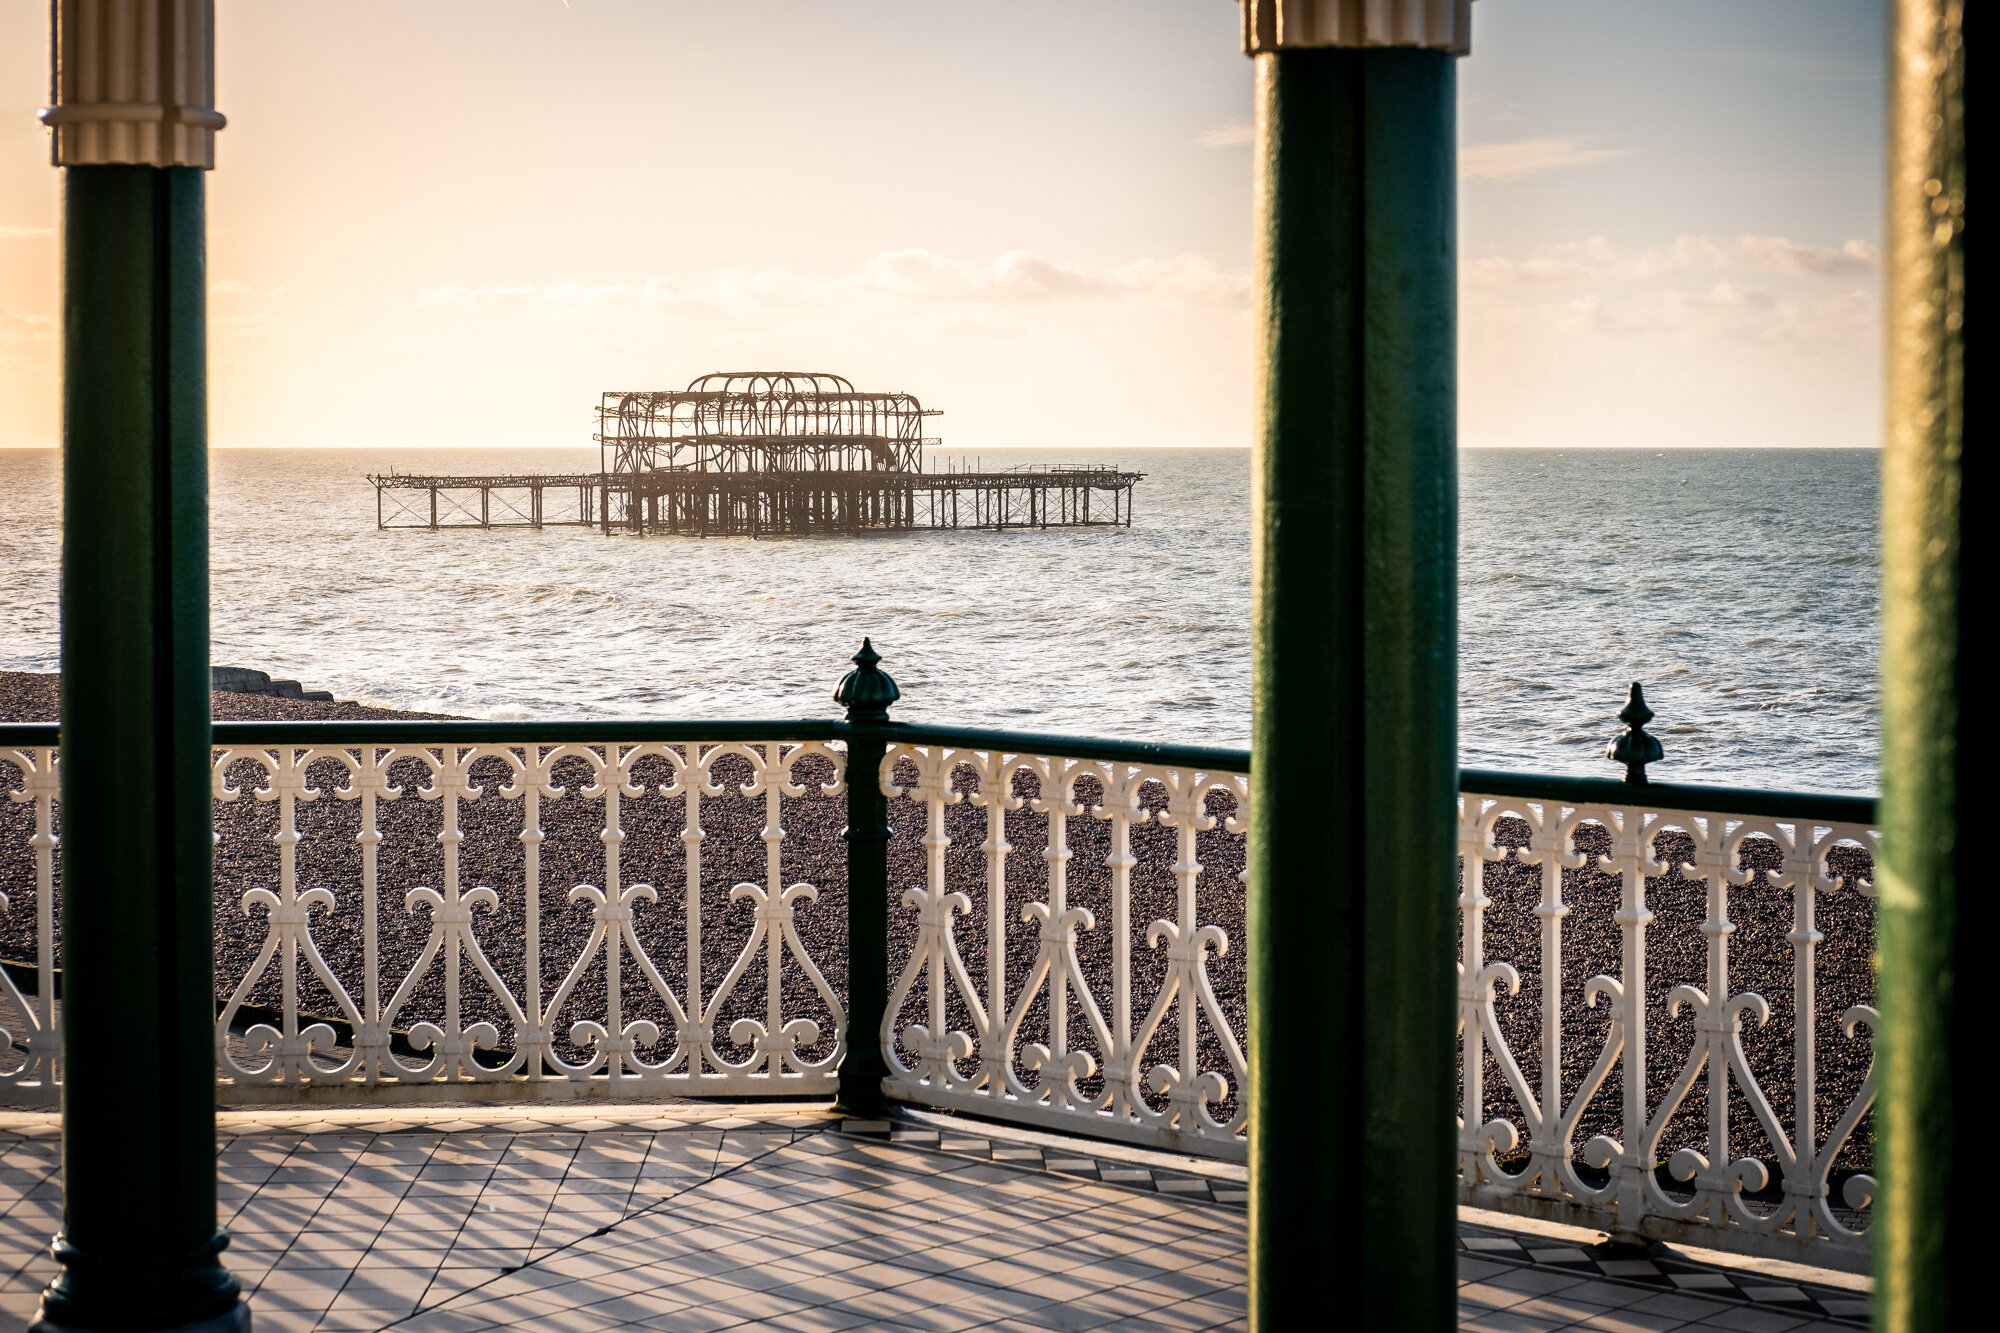
Fujifilm XT2 | XF18-55mm | 18mm | 1/5th Second | f/9 | ISO200
The photo above was featured in the twenty-fifth Weekly Photo post found here: SKELETAL REMAINS | WEEKLY PHOTO #25

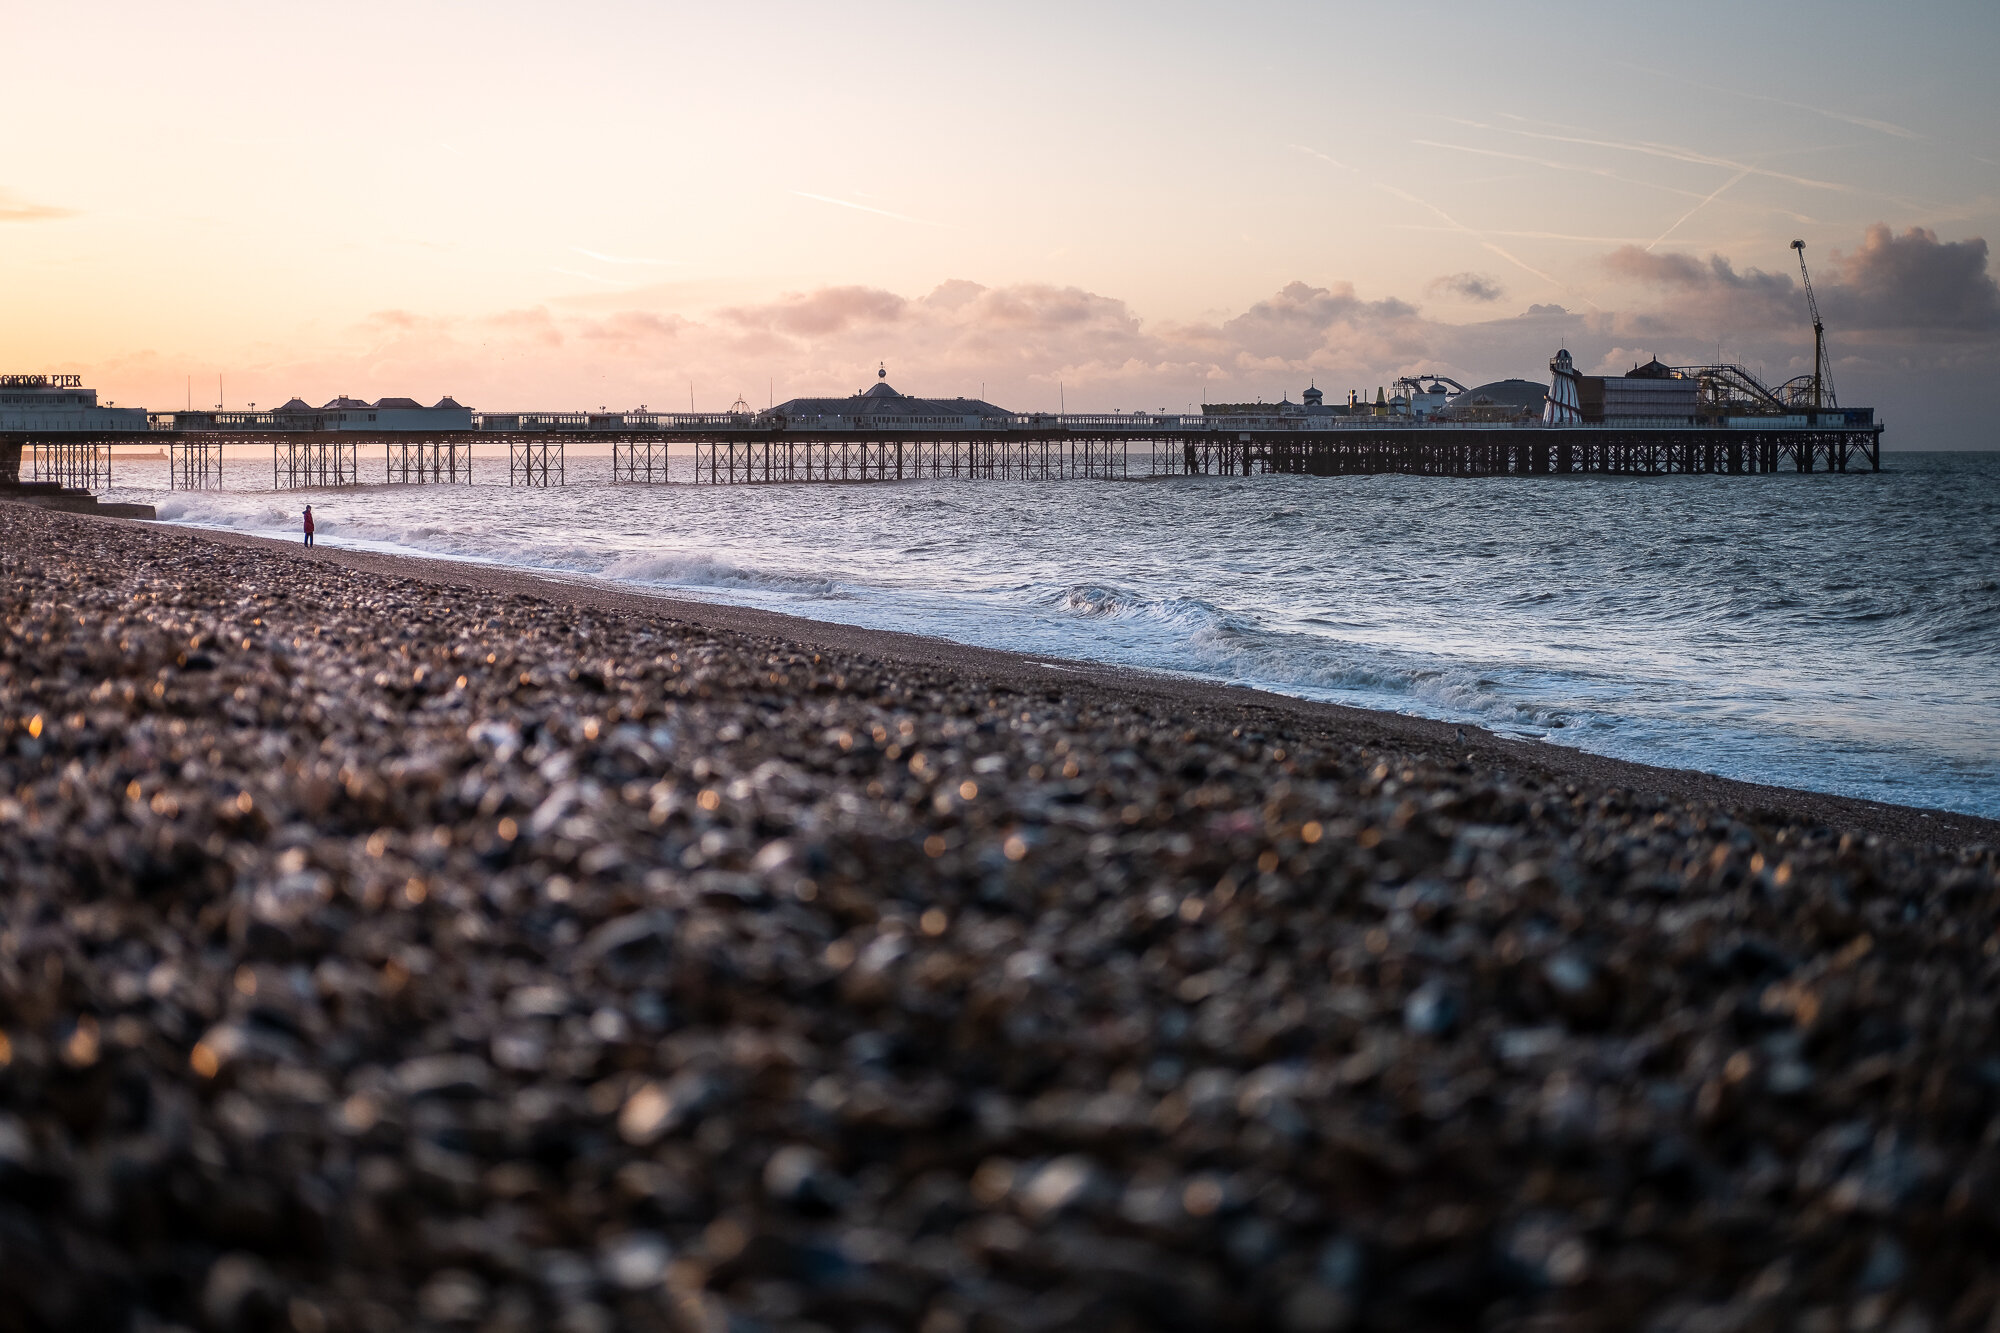
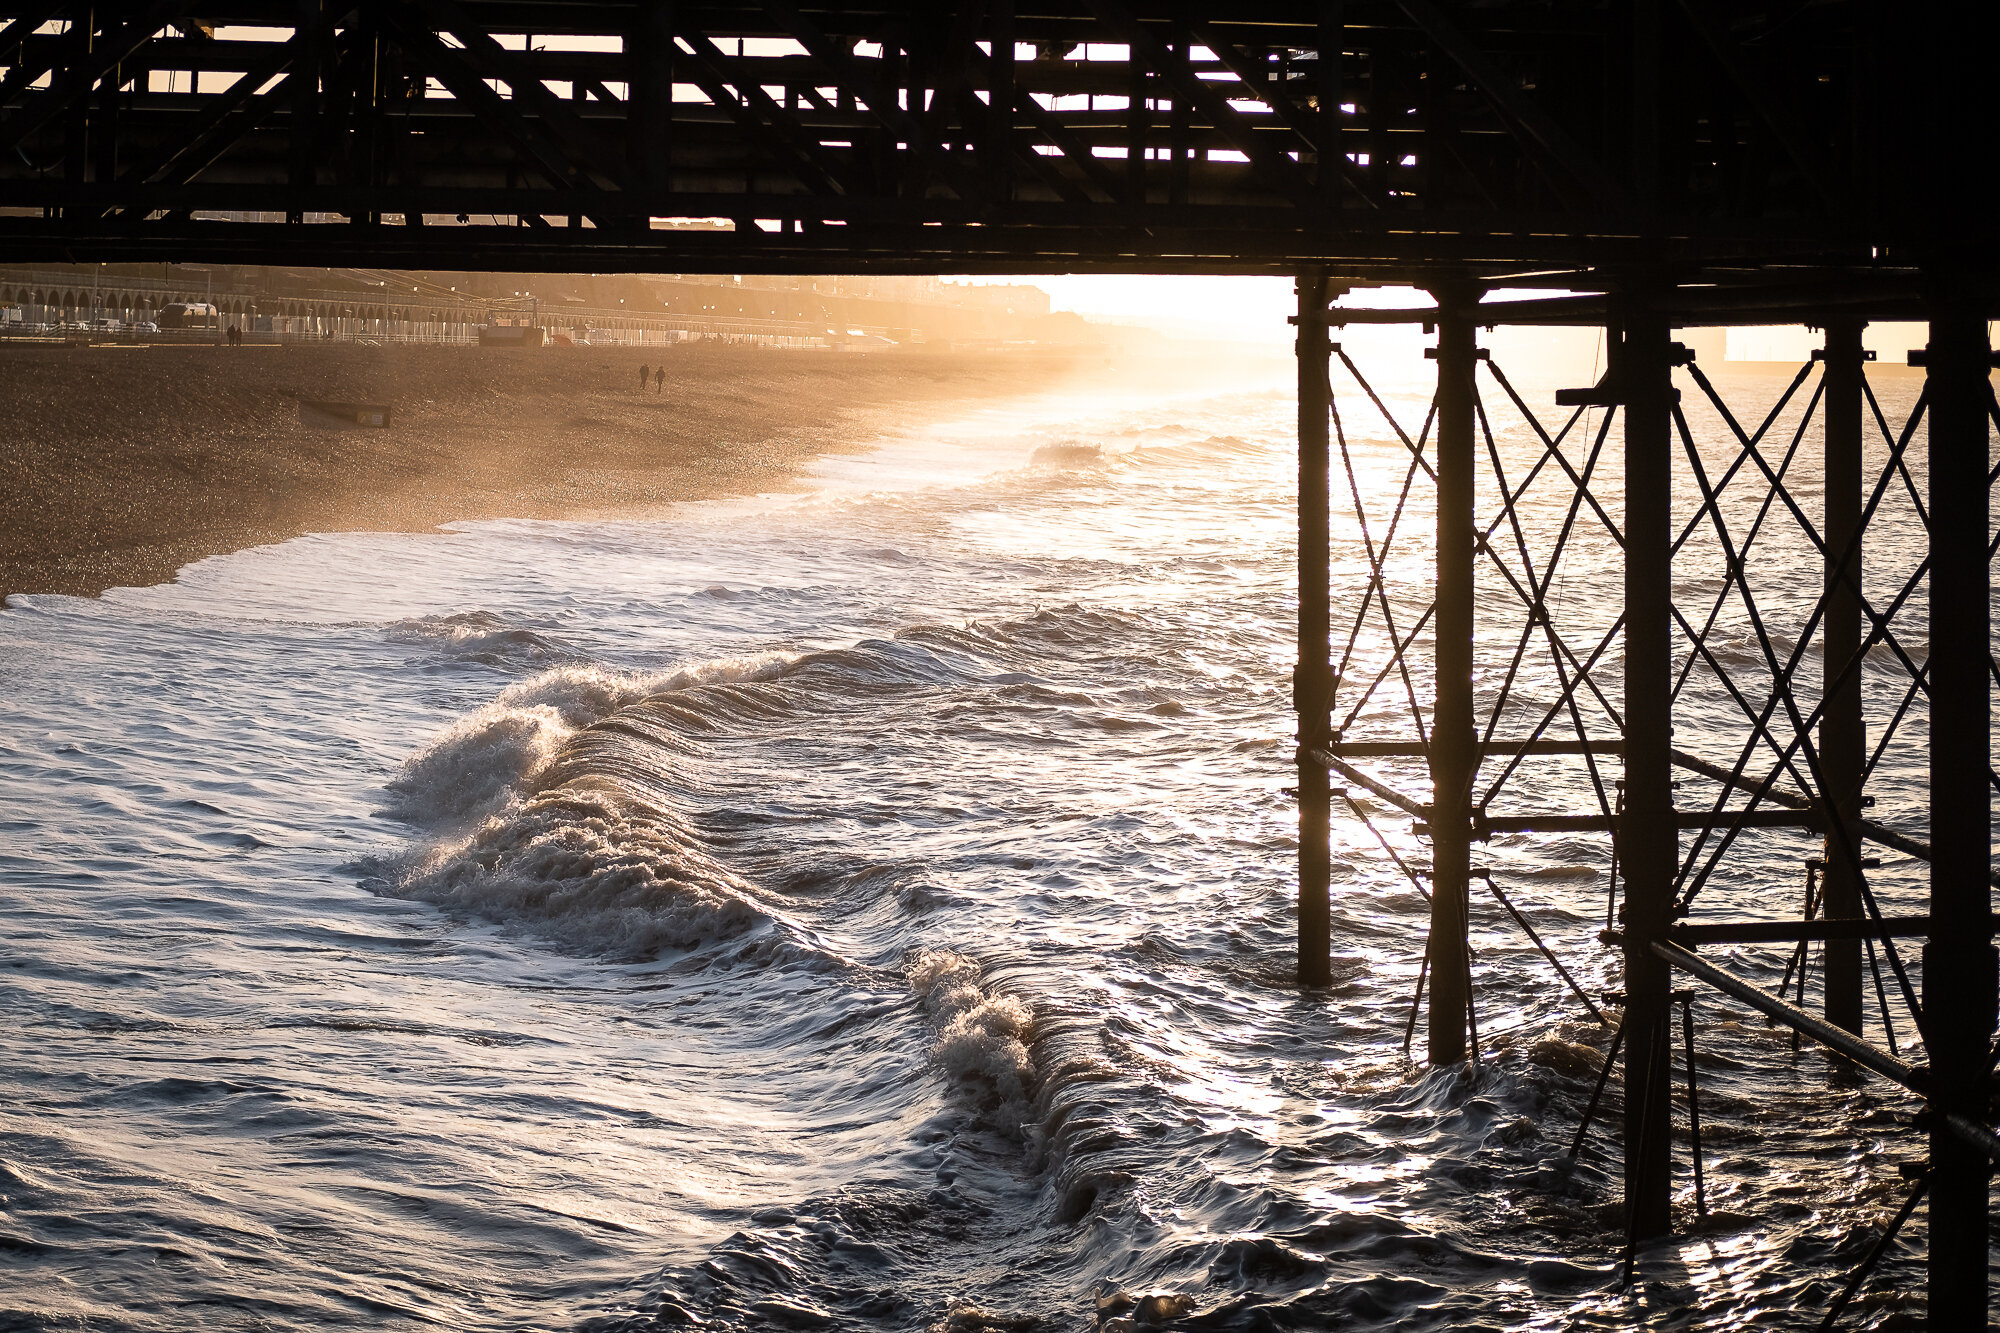
Fujifilm XT2 | XF18-55mm | 28mm | 181 seconds | f/9 | ISO200
The photo above was featured in the twelfth Weekly Photo post found here: 3 MINUTES IN BRIGHTON | WEEKLY PHOTO #12
Thanks to all that supported me in 2019 and I urge you to stick around throughout 2020 by bookmarking my site or by signing up to my newsletter so I can continue to share my work with you in the future. I wish you a happy and prosperous New Year.
I’ll talk to you again next month, next year, next decade!
Trevor

On Location Photographing London With The Fuji XF16mm F2.8
One thing I like to do when I buy new photography gear is to really put it through its paces and to understand everything about it. Having purchased the recently released Fuji XF16mmF2 WR lens, I did just that and took the lens on a rainy walk along the Thames in London at night. Jump in to read how I and the lens got on.
One thing I like to do when I buy new photography gear is to really put it through its paces. To learn how it performs, to understand its characteristics, quirks and drawbacks so when it comes to packing my camera bag, I know what kit is going to help me get the most out of the shoot.
Earlier this year, I brought the pocket-rocket Fujifilm X-T30 and to get to know it well, I used it as my main camera during a recent trip to Ghent, Belgium.
You can read all about this trip in my post here: On-Location | Photographing Ghent
A little more recently I finally got around to purchasing the Fujifilm XF16mm F2.8 WR prime lens. I already had the XF35mm F2 which I really enjoyed using and wanted the same again but wider, so I splashed out the relatively reasonable £350 and bought one.
With the lens now in the bag, it was time to head out and get to know it properly, so a couple of weeks ago I decided to venture out into London after dark to see how it performed while on a walk from Westminster to Tower Bridge.
Just to make a quick note. This is by no means a technical or scientific review of the lens. You will find plenty of reviews that provide technical specifications and deep analysis of how well the lens performs against its rivals but in this post, I will show you the photos I took and talk about how I thought the lens behaved in the pretty tough conditions of a rainy night in London. In addition, this lens is relatively inexpensive compared to the likes of the XF16mm F1.4, the XF8-16mm F2.8 and XF16-55mm F2.8 so this particular review is based on me having realistic expectations of a lens at the particular price point.
To push the limits of the lens and myself as a photographer, I decided to head out to take a mix of street and cityscape photos with just the camera and lens and no tripod whatsoever. I was depending solely on the city to provide enough light to expose the photos enough for most to be taken handheld. I did, however, use the odd wall or ledge to rest the camera enough to enable me to drop the ISO or open the shutter longer on occasion. You can spot these easily by checking the settings I used under each of the photos below.
Photographing London with the XF16mmF2.8 WR
First stop was to capture the London Eye illuminated by these cool colours. As you can see, with no tripod to use, I ended up resting my backpack on the wall, then the camera on top of that which helped me get the angle I wanted. The wider 16mm focal length (equivalent to 83.2 degrees field of view) enabled me to capture the entire scene without having to point the camera too far upwards thus avoiding the distortion this inevitably brings.


Fujifilm X-T30 | XF16mm F2.8 | 16mm | 0.8 Seconds | f/2.8 | ISO160
The image below was about as tough as it got when it came to handheld shots using just the city lights. This area is pretty dark and I needed to up the ISO to 1600 to get close to a sharp image. Just as I had finished adjusting the ISO, this chap crossed the road in front of me and I just managed to capture him as he stepped into the light.

Fujifilm X-T30 | XF16mm F2.8 | 16mm | 1/17th Second | f/2.8 | ISO1600
For this photo walk, I was shooting in aperture priority set to f/2.8 to ensure I captured as much light as possible. One of the minor drawbacks this lens has is that the aperture doesn’t go as low as other lenses in the line up such as the XF35mm F2 WR. I could have done with that extra stop!
I generally set the camera to auto ISO800 but as you can see by the settings below, I had to adjust this for the odd photo. With the camera deciding the optimal shutter speed that left me to play with the exposure compensation dial on the fly which allowed me to manipulate the shutter speed by under or overexposing.
While up on the Golden Jubilee Bridge, I had to use all of the 16mm I had available to fit both the London Eye and sky swings into the image and still have enough room to correct some of the distortion later in post. It’s not a great composition, I know, but it demonstrates the field of view you can get with this lens pretty well.

Fujifilm X-T30 | XF16mm F2.8 | 16mm | 1/18th Second | f/2.8 | ISO800
If I could ask for one thing to improve this lens, it would be to somehow add image stabilisation without adding to the cost, size or weight. Yeah, I don’t ask for much, right? Here’s a couple of photos captured handheld as I walked along from South Bank to Embankment which were both taken at 1/10th of a second. That’s a pretty slow shutter speed and with no image stabilisation available from both camera or lens, I needed a very steady hand indeed.

Fujifilm X-T30 | XF16mm F2.8 | 16mm | 1/10th Second | f/2.8 | ISO800

Fujifilm X-T30 | XF16mm F2.8 | 16mm | 1/10th Second | f/2.8 | ISO800
The WR in the name stands for Weather Resistant. Not to be confused with Water Proof. This lens can withstand the odd rain shower but don’t go dunking it underwater as you may end up with a rather expensive paperweight.
Ideally, I would have had my XT2 camera with me on this photo walk as coupled with this weather-resistant 16mm prime, I would have had a fully weather-sealed set up but on this particular day, I forgot to check the weather and by the time I realised how wet it might get, I was already in London with the X-T30.
It took a few minutes for the right looking people to enter this scene in front of Shakespeare’s Globe Theatre to get the type of photo I was aiming for and although I had to be a bit careful about getting the X-T30 wet, at least I didn’t have to worry too much about the lens. This couple, shielded by their umbrella perfectly told the story about the wet conditions endured on this particular rainy night in London.

Fujifilm X-T30 | XF16mm F2.8 | 16mm | 1/40th Second | f/2.8 | ISO800
While the famous London Bridge is pretty plain and uninspiring during the day, it recently received a new light installation as a part of the Illuminated River Project and now shines bright and colourful at night making it a great subject for night photography. Closing down the aperture to f/10, (it ranges from f/2.8 to f/22) I was able to create these starbursts from the street lamps but the resulting 9-second exposure meant I needed to support the camera. Luckily, there was a nice flat wall right where I stood. What luck!

Fujifilm X-T30 | XF16mm F2.8 | 16mm | 9 Seconds | f/10 | ISO160
I finished up right next to Tower Bridge in the popular More London Estate. This area is pretty well lit and provides a great subject for night photography and allow me to continue testing this lens I was enjoying using so much.
In addition to letting more light through the lens, the wider aperture of F/2.8 allowed me to get a bit creative with the depth of field which you can see in a couple of the images below. The 9 blade aperture results in a nice, smooth bokeh (the blurry, out of focus part of the image).

Fujifilm X-T30 | XF16mm F2.8 | 16mm | 1/15th Second | f/2.8 | ISO800
This lens weighs only 155 grams and with the X-T30 weighing 383 grams including card and battery, I had a fantastic, lightweight set up of 538 grams (that’s about 1.2lbs). With such a light combination, carrying around this camera and lens all evening was absolutely no bother at all.

Fujifilm X-T30 | XF16mm F2.8 | 16mm | 1/25th Second | f/2.8 | ISO800

Fujifilm X-T30 | XF16mm F2.8 | 16mm | 1/20th Second | f/2.8 | ISO800
I know it’s hard to tell from looking at these photos on this web page but I was really pleased with how sharp the shots came out when using this lens wide open. In these low-light, rainy conditions and with the aperture at f/2.8, these shots taken around More London look really good. Like most lenses in this price range, when used wide open like this, you will rarely get corner to corner sharpness and this lens is no different. The images do soften slightly as you get closer to the corners but the softness is very subtle and only really visible when viewed at 100%. All in all, these photos are plenty sharp enough for me and totally useable.

Fujifilm X-T30 | XF16mm F2.8 | 16mm | 1/25th Second | f/2.8 | ISO800

Fujifilm X-T30 | XF16mm F2.8 | 16mm | 1/8th Second | f/2.8 | ISO800

Fujifilm X-T30 | XF16mm F2.8 | 16mm | 1/17th Second | f/2.8 | ISO800

Fujifilm X-T30 | XF16mm F2.8 | 16mm | 1/13th Second | f/2.8 | ISO800
As I mentioned at the beginning of this post, this is far from a formal review of this lens. A quick google will get you to one of those in no time. Instead, these are my real-world experiences of using this cracking little lens on a wet, windy night in London and if all you take away from this post is that this lightweight, inexpensive lens feels solid, performs well and is all around a pleasure to use then that’s good enough for me.
Until next time.
Trevor

Mental Health and Why Photography Matters
Mental wellbeing is getting a lot more attention these days which can only mean good things when it comes to awareness and management of the struggles many people privately endure every single day. In this post, I talk about how having a creative outlet such as photography can contribute to moving one’s mental health in a positive direction.
Many articles on this blog are about portraying the creativity, gear and techniques that I use in my own photography journey. I write about the places I go and photos I take, sharing useful information to other members of this close-nit photographic community in an attempt to give something back for all the help I continue to receive but one thing I don’t talk about as much as I really should is the hidden and personal benefits of having some kind of creative outlet that photography or any other artistic endeavour can provide.
Before I start, I want to clarify that I am by no means an expert. I do understand that mental health is not a light switch where everything is either fine or not. There is black and white and every shade of grey in between when it comes to mental health and everyone is different and facing their own unique challenges. I do, however, recognise how important the subject is and in my personal experience, mental health can be an ever-changeable level of wellbeing. There are the good times where I feel positive and ready to tackle what life has to throw at me and then there are the times of prolonged stress and anxiety which I try to recognise and work to keep on top of the best way I can and for me personally, photography plays a huge part in keeping everything under control.
I found a great source of information which helps to describe both good and bad mental health on the mentalhealth.org.uk website here.
Mental Health Awareness Day - October 10th 2019
This year, in recognition of Mental Health Awareness Day, my employer gave the entire workforce the day off to relax, enjoy the day and do something for themselves. This was by no means a small gesture as the workforce is made up of a few thousand staff. If that’s not getting behind this cause, I don’t know what is.
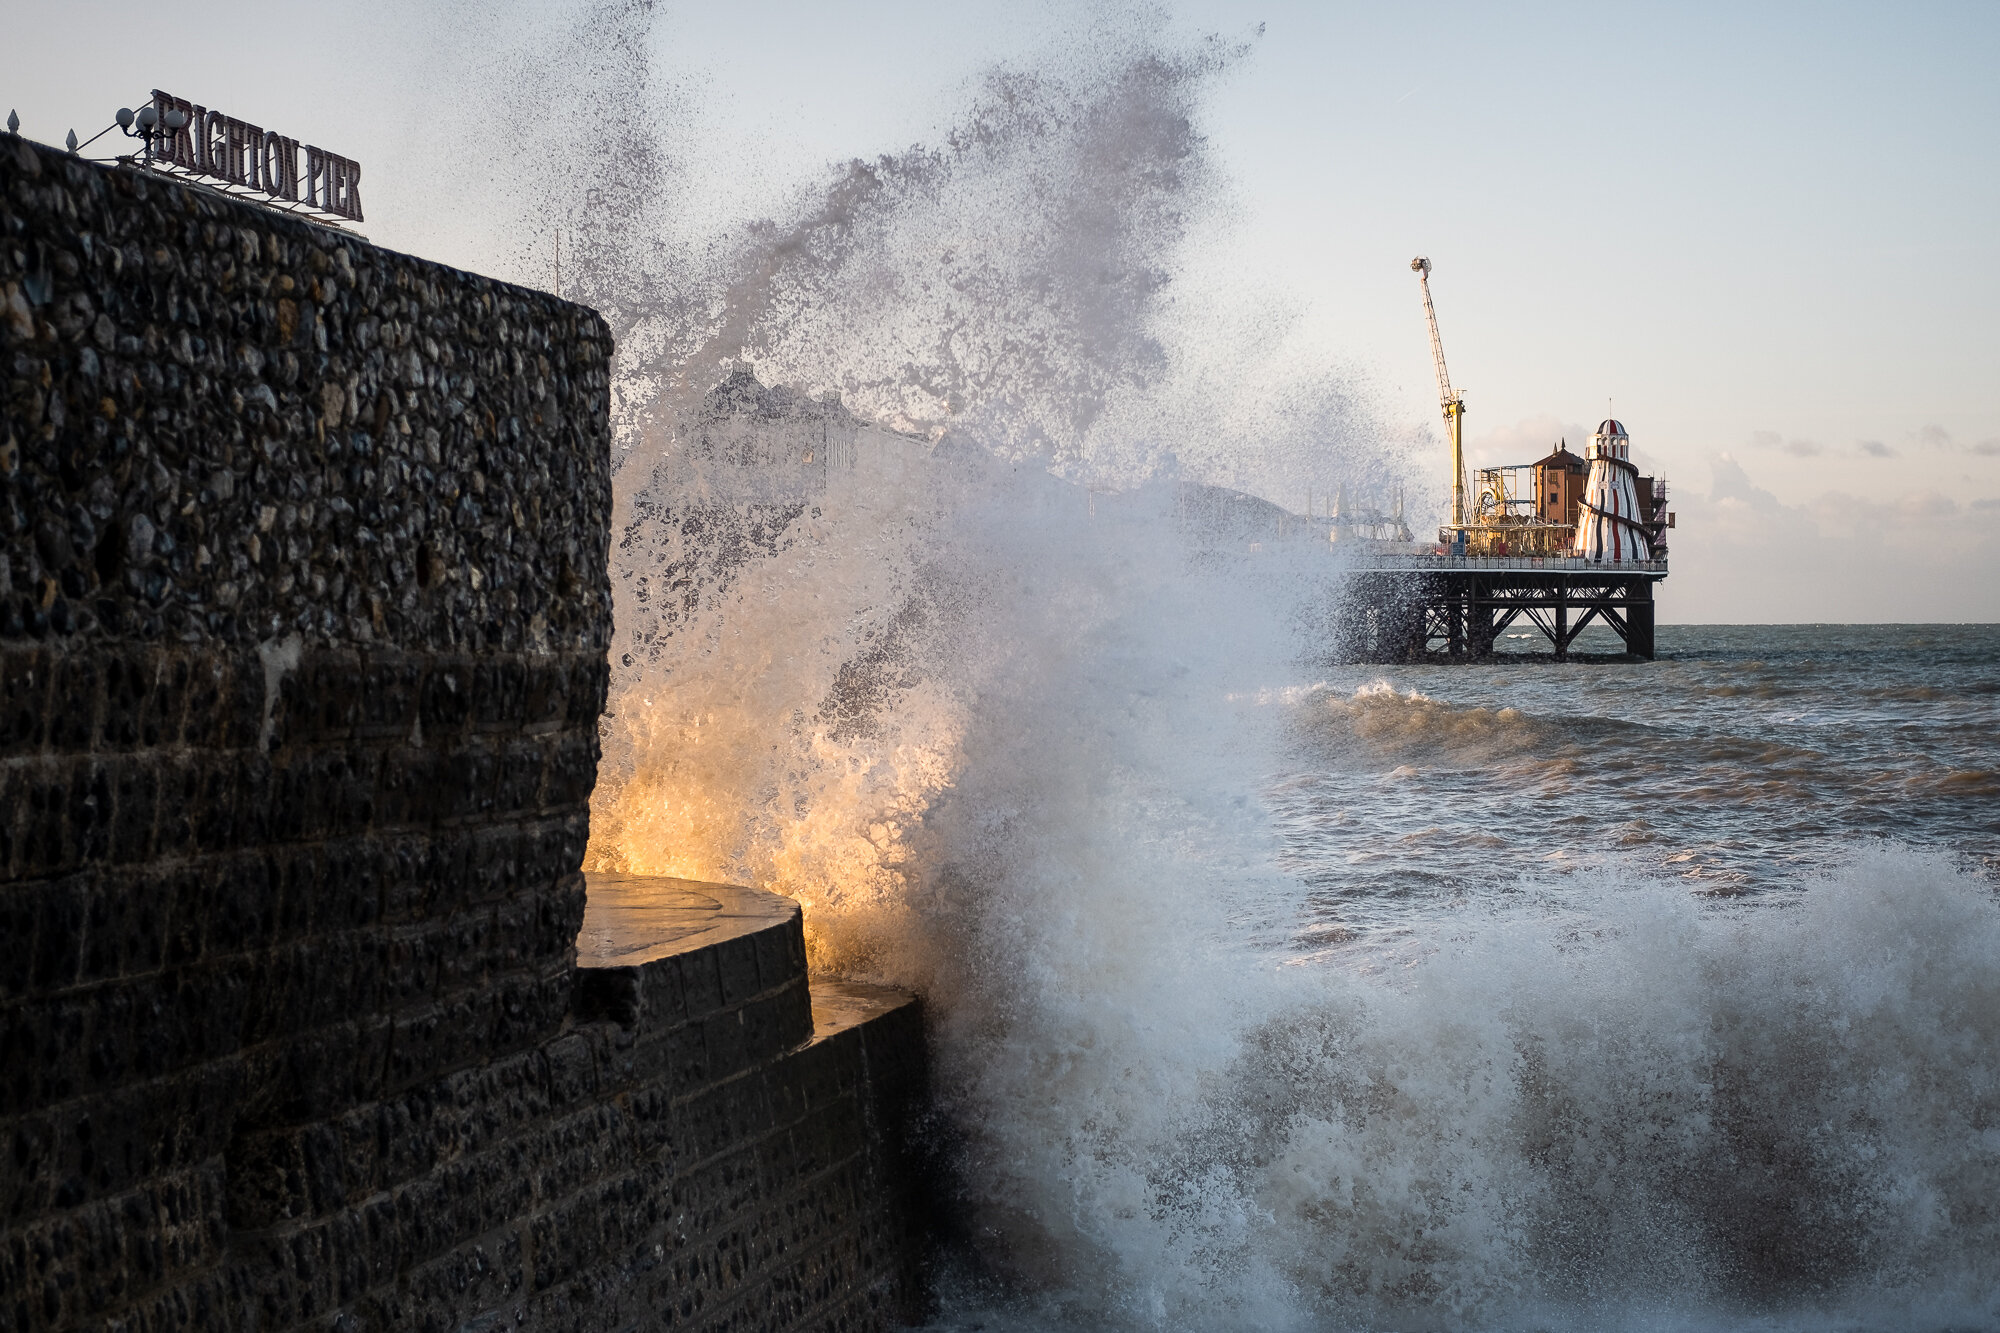
So, with the day to myself, I decided to venture out with my camera to get a bit of me-time, recharge and spend a few hours on my own taking some photos. At this point, I would normally head north into London and go get some cityscape shots but instead, I decided to get out of the Big Smoke and head down to the coast and capture some shots in Brighton.
The main reason I chose Brighton is that if I was going to embrace this opportunity and get some rest and relaxation, what better place to be is on the beachfront, with the waves crashing against the beach at sunrise with nobody else around apart from a few early risers getting their own fix of the peace and quiet on offer. So, I drove down, parked up, put my earphones in and headed out to document the start of a new day.
Why is Photography so Important for Good Mental Wellbeing?
As well as talking about how I spent the morning and showcasing the photos I took, I also wanted to list a few of the benefits that having a creative outlet such as photography provides.

Fujifilm X-T30 | XF35mm F2 | 35mm | 1/1,700 Second | f/2 | ISO160

Fujifilm X-T30 | XF35mm F2 | 35mm | 1/4,400 Second | f/2 | ISO160
Achieving Mindfulness
I believe that achieving mindfulness in pursuit of your creative endeavours can only occur when the act of creation is equal or more important than the product itself.
As a photographer, I am not alone in the photographic community when I say that once you stop worrying about capturing that killer shot each time you venture out with the camera, the pressure really does come off. This leads to less frustration and impatience when out photographing, allowing you to relax and more often than not, create your best work.
Mindfulness is so important in my landscape photography. Taking a breath, being present in the moment and ignoring distractions can help heighten my awareness as a photographer. It also helps me to take some much-needed time out from a hectic work and home life allowing me a bit of time to be alone and process my thoughts. I guess you could say photography is my therapy.

Fujifilm X-T30 | XF35mm F2 | 35mm | 1/1,600 Second | f/2 | ISO160

Fujifilm X-T30 | XF35mm F2 | 35mm | 1/2,000 Second | f/2 | ISO160
Getting Up and Feeling Motivated
I guess this section could also be called “Having a purpose” as that’s essentially the point I want to make. Just the other day, I was talking to my Dad about motivation and drive to get out and he spoke about having to get up super early before a tiring day at work to take his dog for a walk. He said that although it’s a struggle to wake up super early and get out of bed every single day, once he is out with his dog, enjoying the fresh, early morning air he really enjoys that quiet, reflective time. Needing to walk the dog is his purpose and without this, this time he has on his own to relax and process life just wouldn’t exist.
This is also so true for my photography. Having the alarm go off at silly o’clock and getting yourself out can be tough and without that purpose provided by photography, I wouldn't be getting up so early and I would miss out on being out and about at a time of the day that very few people experience.
Physical Fitness
When I head out for a few hours on a photo walk, I usually end up covering quite a distance. and exercise is widely known to be a great way to keep both your body and mind in tip-top condition. Exercise is great at breaking negative cycles such as poor sleep patterns and physical stress on the body causing discomfort and pain which I have first-hand experience with. For some time, I was struggling with tendonitis on my left knee and although seeing a Physio helped, it was never cured. At the beginning of 2019, I decided to up my exercise efforts and focus on my fitness and after only a few weeks the pain in my knee had completely gone. I am now able to walk for hours with my camera without any pain or discomfort whatsoever.
I found a great article on how exercise is so beneficial to your mental wellbeing over at https://www.helpguide.org/. A few of the important benefits the site lists are:
Reduces anxiety
Helps with depression
Helps fight ADHD, PTSD and Trauma
Helps increase overall energy levels
Increases confidence and self-esteem

Fujifilm X-T30 | XF35mm F2 | 35mm | 1/1,400 Second | f/2 | ISO160

Fujifilm X-T30 | XF35mm F2 | 35mm | 1/1,600 Second | f/2 | ISO160
The Power of Creativity
Nothing really beats the feeling you get when you have created something you are proud of and photography is no different as the ultimate goal is still to produce a nice photo, be it artistic or documentary. Although I no longer feel the added pressure to capture a banging shot every time I head out, when I do create something portfolio worthy, it provides such a positive feeling and makes all of the early mornings or cold winter evenings standing around trying to keep warm worthwhile. Occasionally capturing a portfolio worthy image gives me the motivation to keep going, continue to develop my craft and chase that next shot.

Fujifilm X-T30 | XF35mm F2 | 35mm | 1/125 Second | f/14 | ISO400
Fujifilm X-T30 | XF35mm F2 | 35mm | 1/950 Second | f/5 | ISO160

Fujifilm X-T30 | XF35mm F2 | 35mm | 1/170 Second | f/11 | ISO160

Fujifilm X-T30 | XF35mm F2 | 35mm | 1/2,000 Second | f/2 | ISO160

Fujifilm X-T30 | XF35mm F2 | 35mm | 1/1,100 Second | f/2 | ISO160
My goal for this post is not to tell you how to feel or make any assumptions. I wrote this post as I recognise how important mental wellbeing is to every single person and I truly believe that by pursuing any kind of creative endeavour really helps the mind take a break from the many distractions of modern life and allow you time to think or reflect and put things back in perspective once again.
Until next time.
Trevor

On Location Photographing Ghent
In August 2019, I visited Ghent with my family and took my newly purchased Fujifilm X-T30 so this article is part travel blog and part gear review with some photos of the city thrown in for good measure.
Ghent, Gent, Gand, whatever you call this city, one thing is certain, this city is a great place to visit and quite possibly Europe’s best-kept secret. Travellers heading to Belgium for a short break usually head to Brussels (Belgium’s capital city) or Bruges, which is a small and very charming chocolate box city around 45 minutes from Ghent but judging by most of the people I spoke to about my upcoming trip to Ghent, it would normally be followed by the question “Where’s that?”.
Having already visited Bruges in August 2018 and had a great time, my family and I decided to spend another long weekend in Belgium, this time visiting this beautiful medieval city. As we live in the South East of England, Belgium is such a convenient place to visit as it’s only a short drive to the Channel crossing and around 90 minutes’ drive once we had crossed the English Channel. In total, a 4-hour door to door journey. Not too bad at all.
If you missed my “On Location” post covering a previous trip to Bruges I took in 2018, you can find it here: On Location Photographing Bruges.

Fujifilm XT-30 | XF18-55mm | 18mm | 1/640 Second | f/2.8 | ISO160
What photography equipment did I take to Ghent?
This is a photography blog after all. Not long before heading to Ghent, I had retired my Fujifilm X-T10 and purchased the X-T30 as my lightweight alternative to the XT2 workhorse I tend to use on shoots. On this trip, I took both cameras but I only used the XT2 once during a sunrise shoot and used my X-T30 during the day as I thought it would be a good opportunity to really get to know the camera and put it through its paces. Although I didn’t take all of the gear out with me each day, below is the list of kit I took on the trip:
Fujifilm X-T30 Body
Fujifilm XT2 Body
XF10-24mm Lens
XF18-55mm Lens
XF55-200mm Lens

I mentioned above that I had recently retired my X-T10. In fact, I do still have it and one of my daughters decided to use it as her main camera while we were in Ghent. She shot with the 35mm F2 lens on the camera and came away with some fantastic photos of her own.
A little bit about Ghent
Ghent is a port city in the north-west and Flemish region of Belgium situated about an hour’s drive from Brussels and 45 minutes to Bruges. Dating back to around the 7th Century when it’s first two Abbeys were founded, the city flourished to the point that in the 13th Century, it was Europe’s second-largest city north of the Alps, second only to Paris. Now a university city boasting museums, churches and a charming stretch of river, this city has a great mix of historic and modern cultures.

Fujifilm XT-30 | XF18-55mm | 55mm | 1/420 Second | f/4 | ISO160
Instead of documenting our trip chronologically, in this post, I will cover some of the places we visited with some photos and useful information along the way.
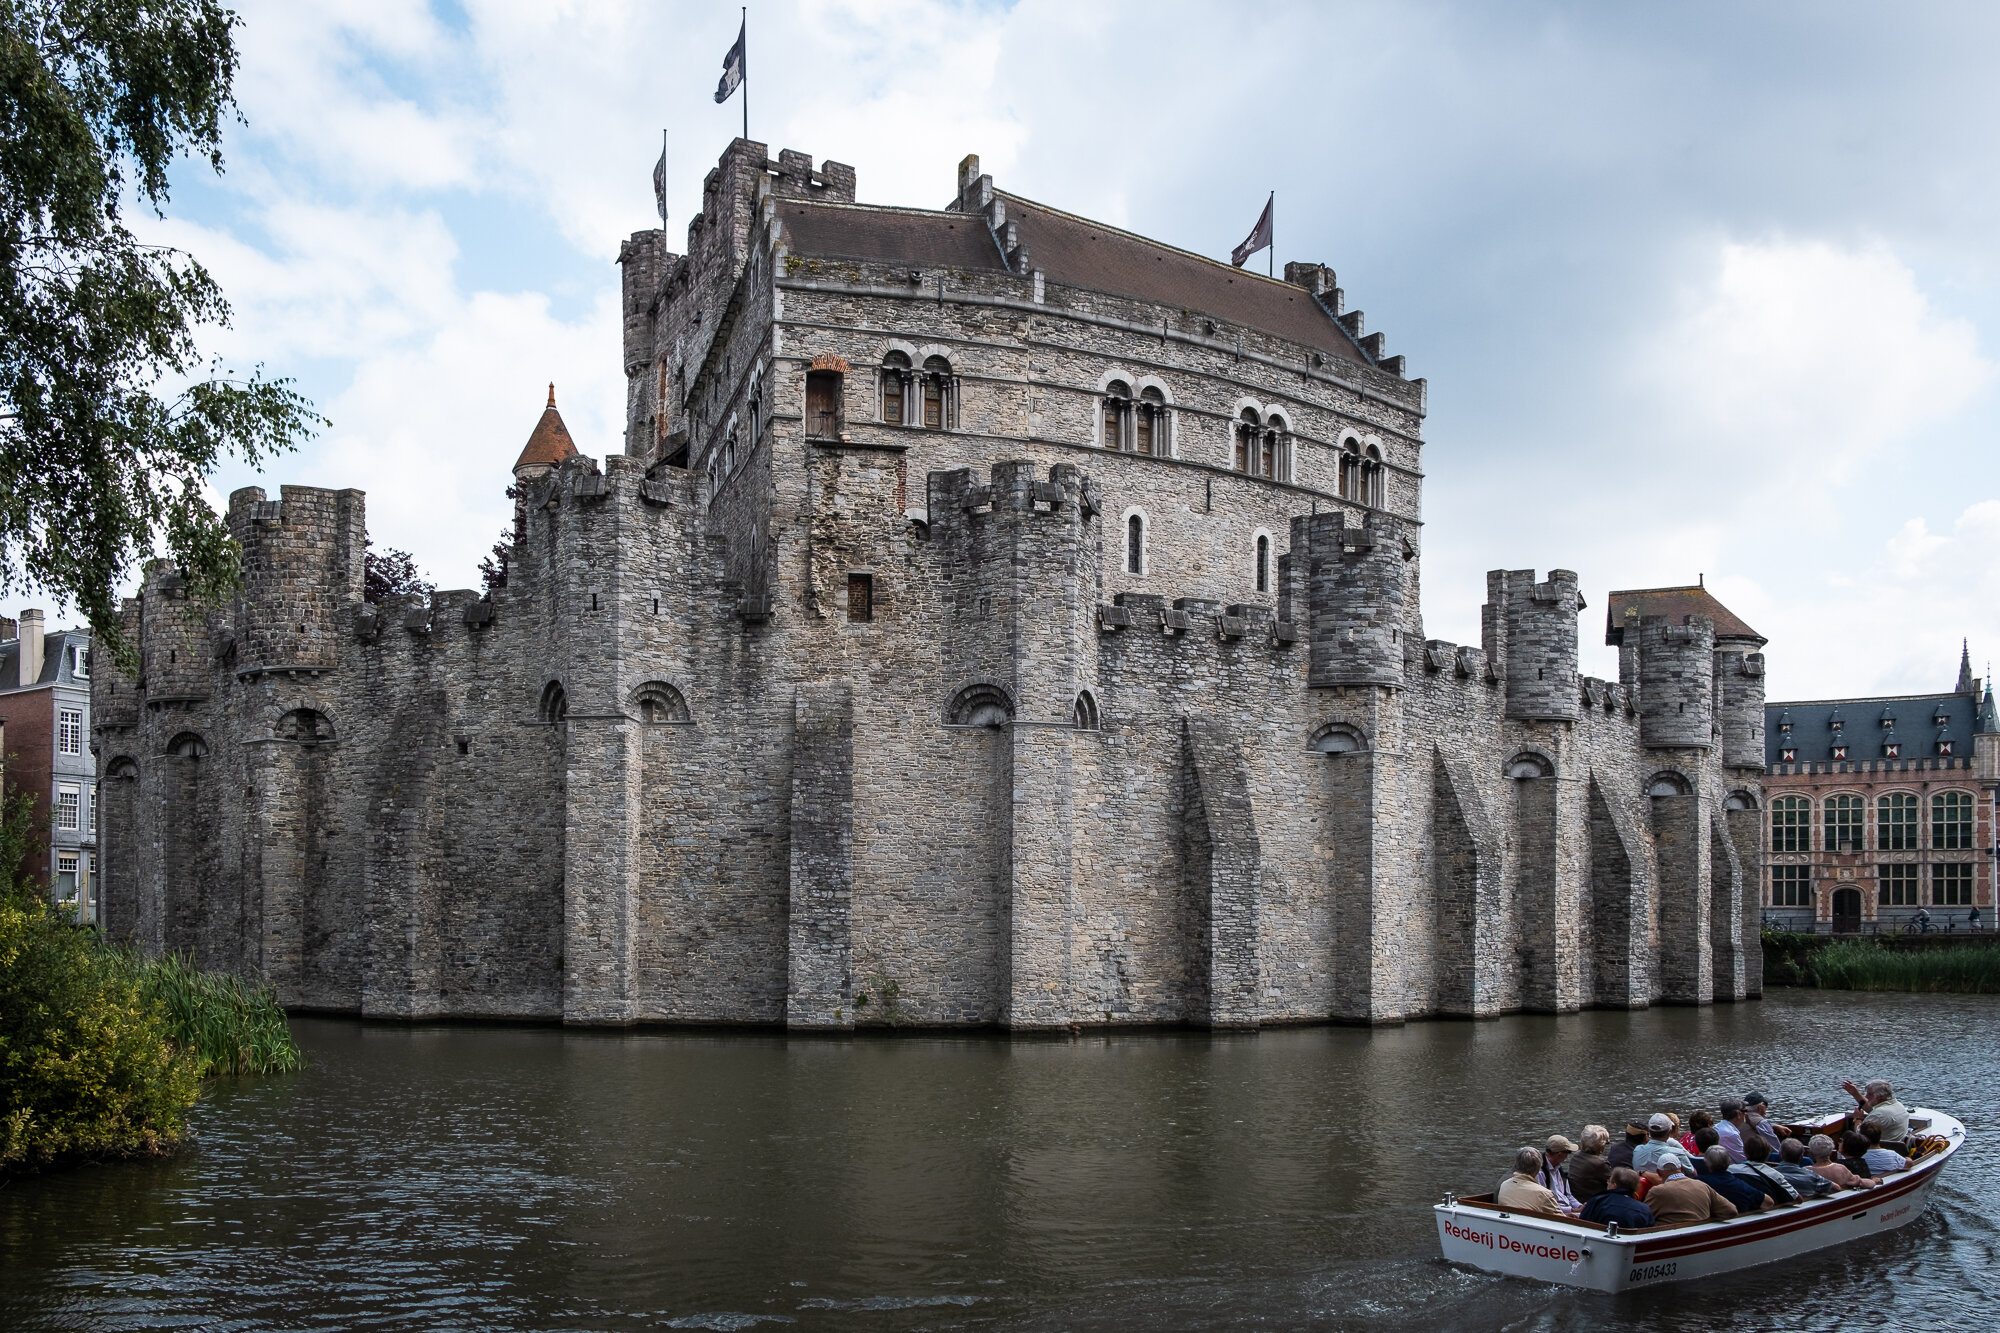
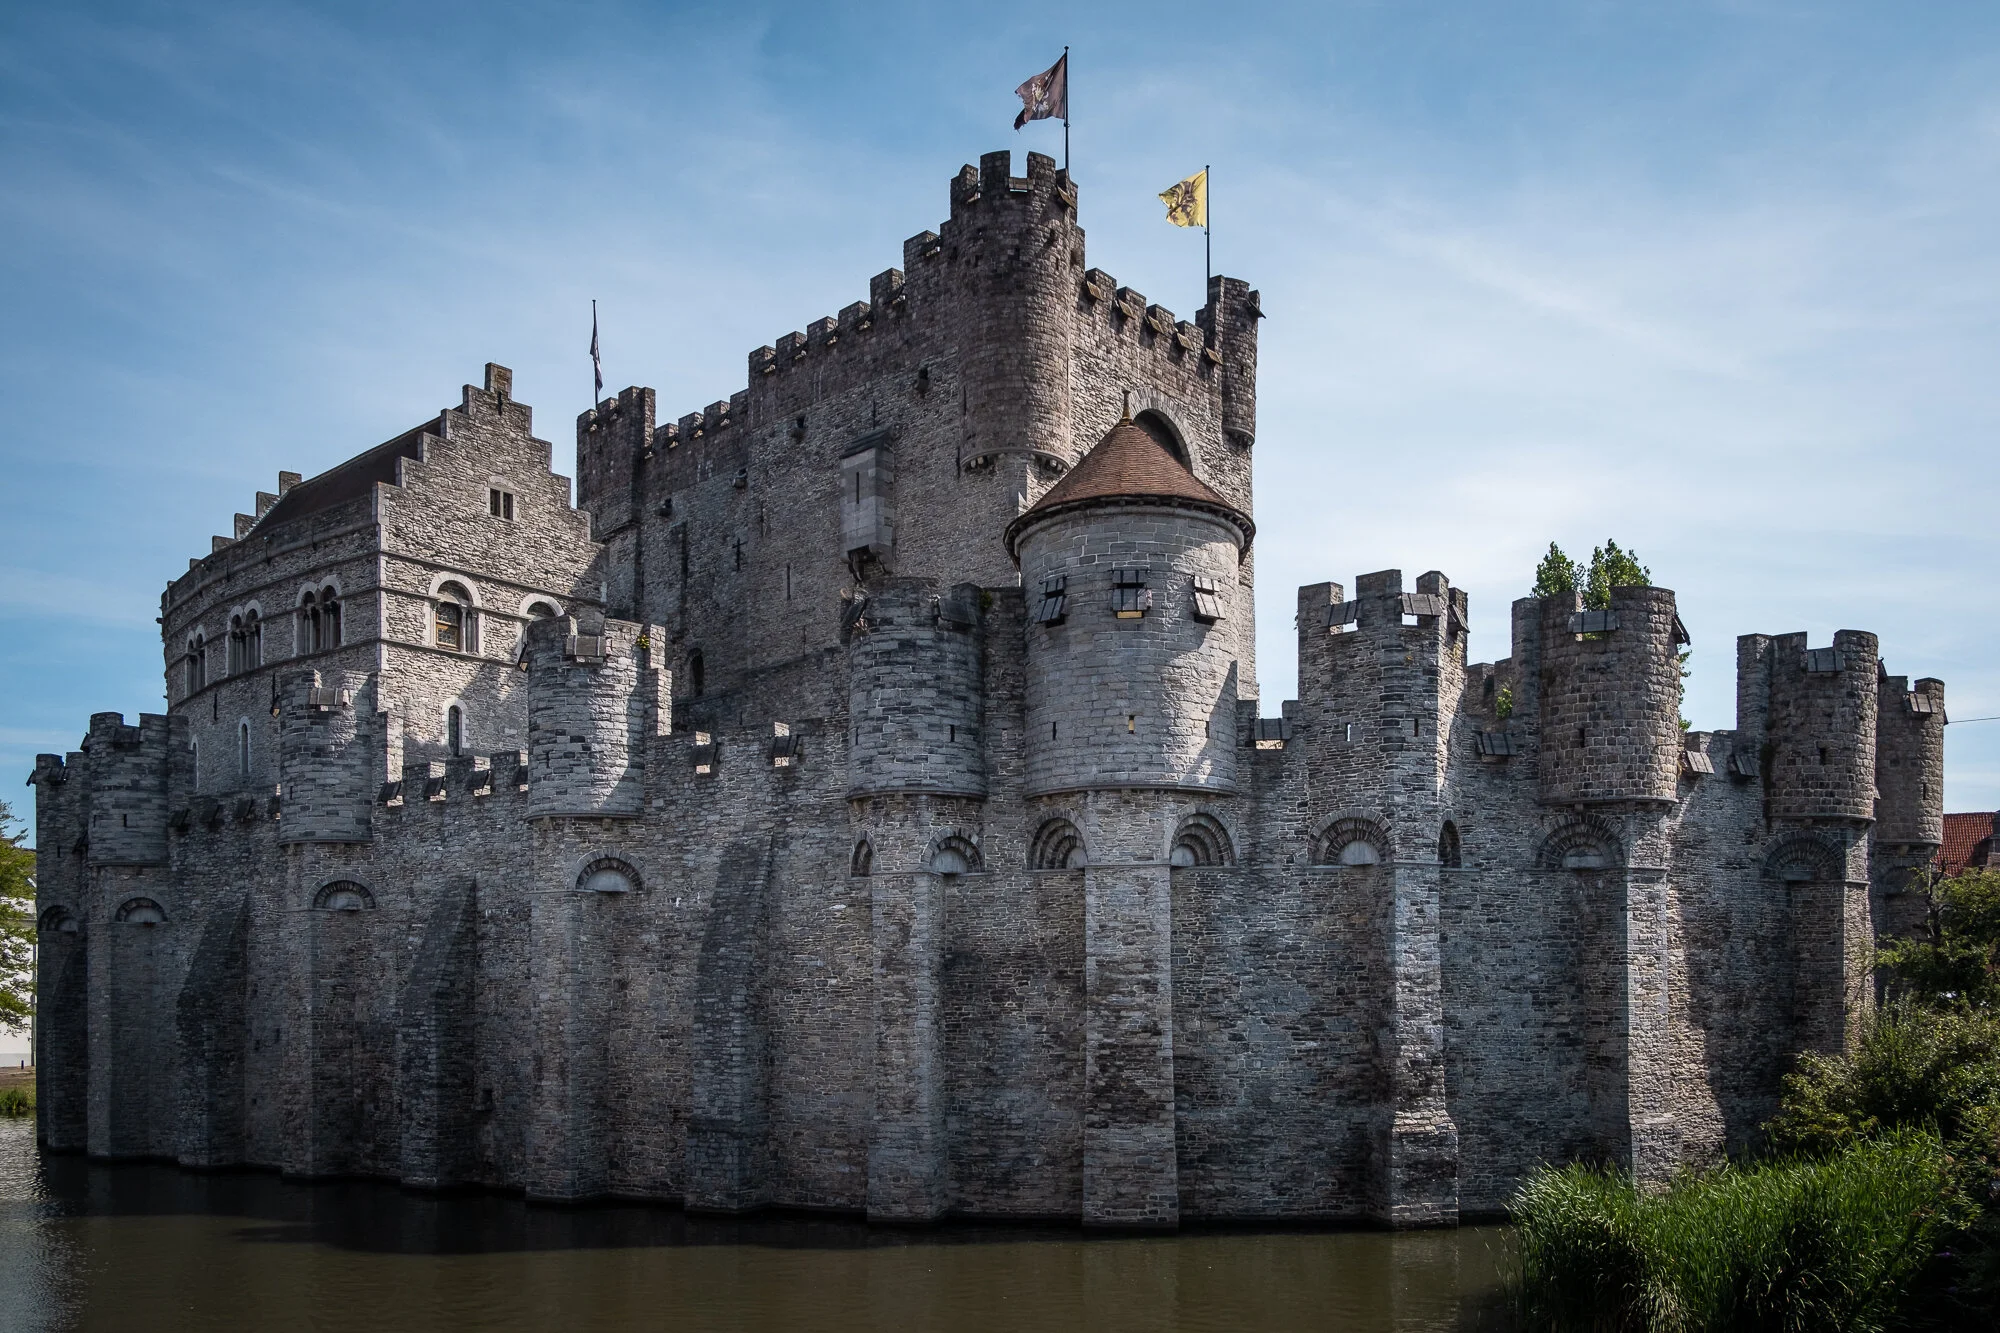
Gravensteen Medieval Castle
First up is this charming but brutal looking Gravensteen Castle located along the River Lieve. Also known as the “Castle of the Count”, this 12th century stone castle has all of the usual medieval features you would expect such as a moat, turrets and arrow slits. Built originally as a fortress, over the years it has been used as a courthouse, prison and strangely, even a cotton factory.

Fujifilm XT-30 | XF18-55mm | 18mm | 1/500 Second | f/6.4 | ISO160


If you decide to venture inside the castle, you will find the inside rather bare so I recommend the audio tour. It’s a bit tongue-in-cheek and a little lengthy so allow extra time as you wander the castle but it is the best way to learn all about its history.
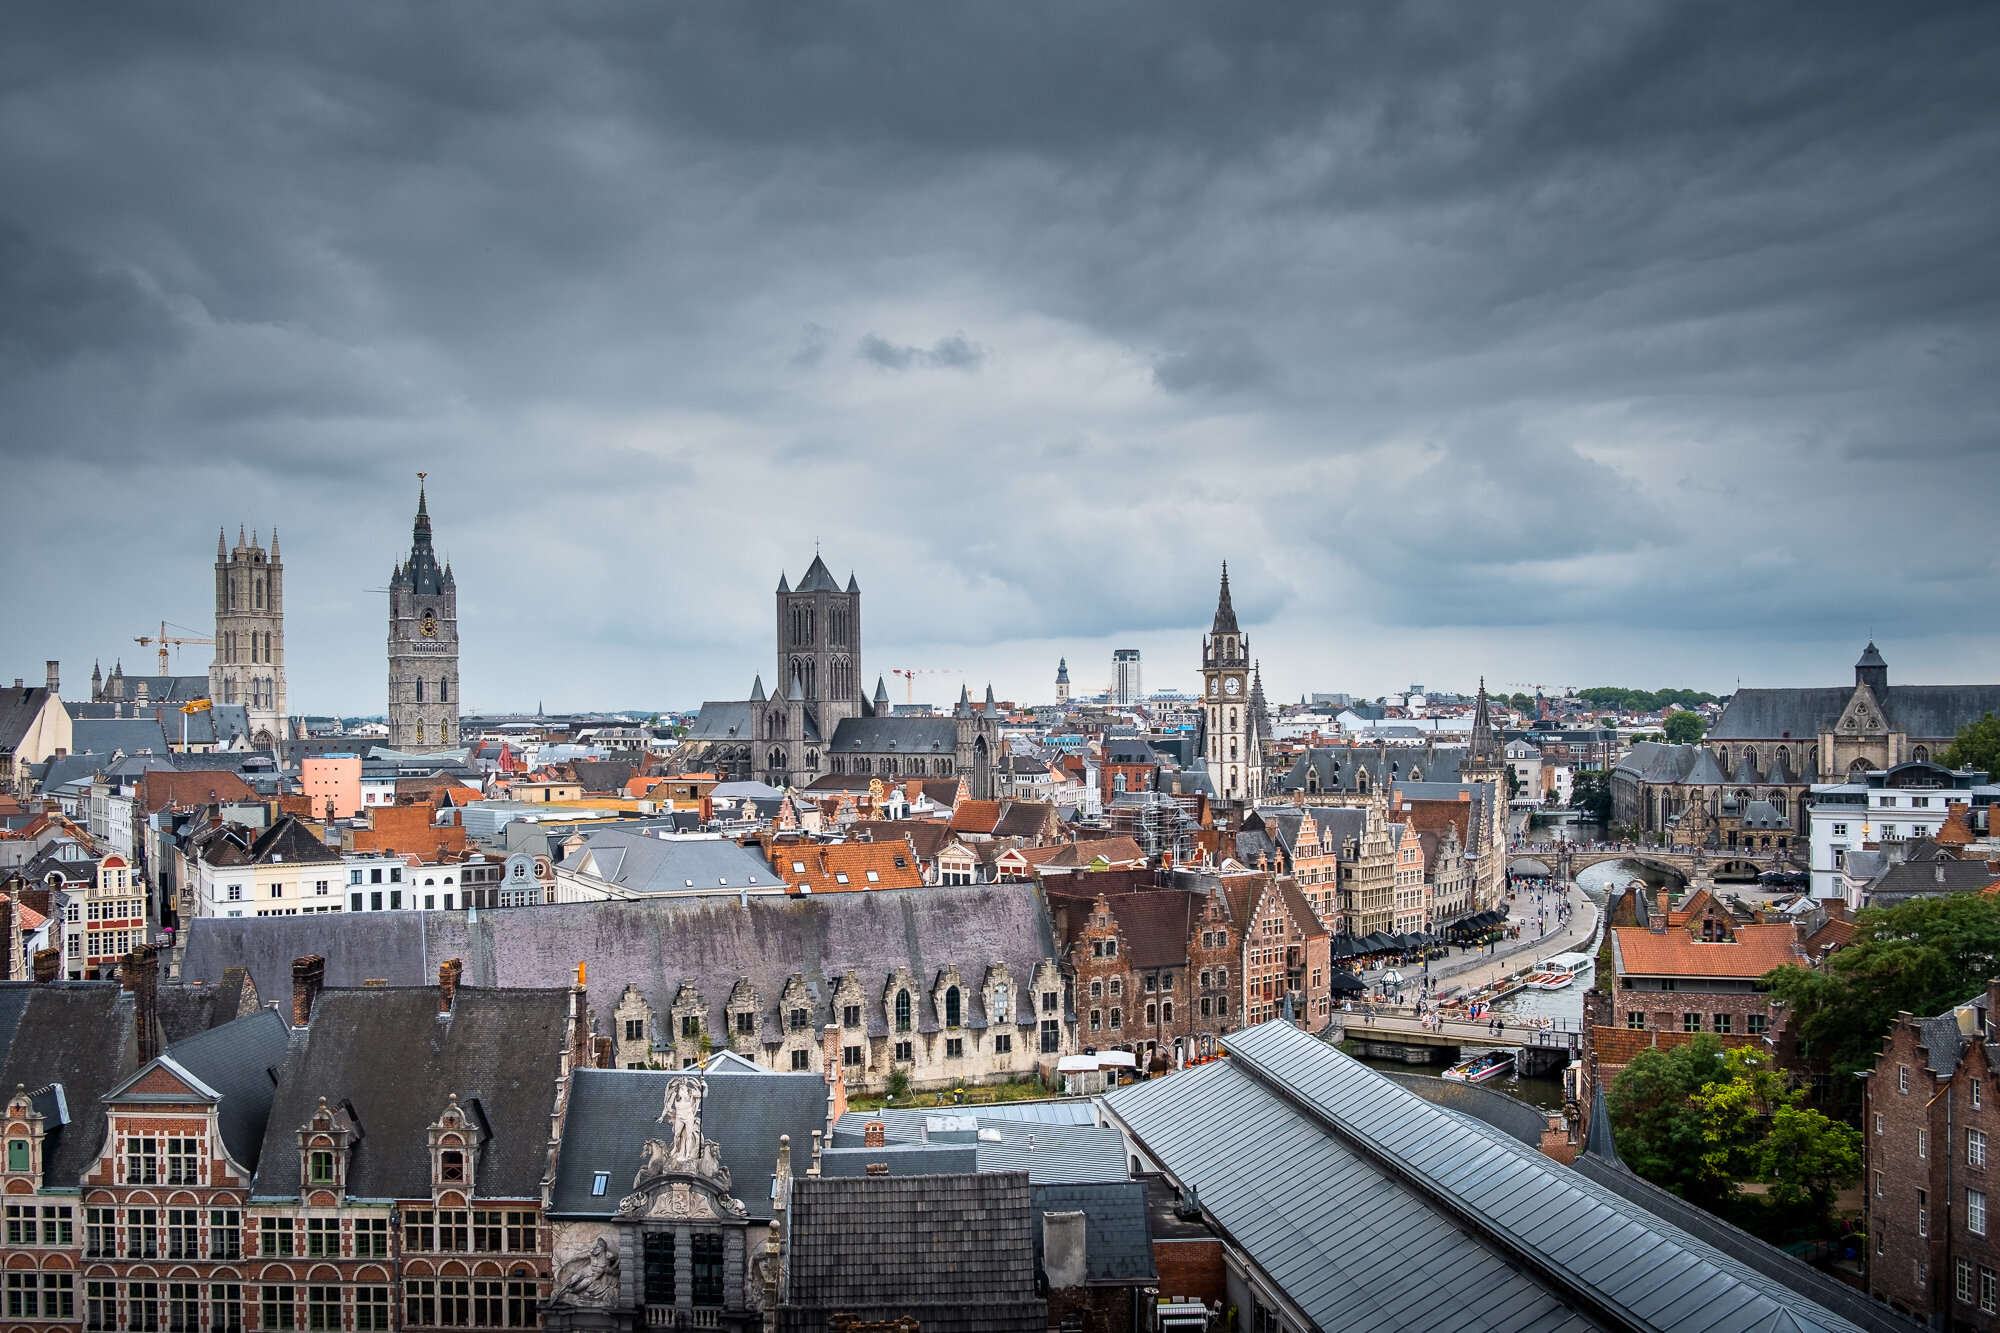
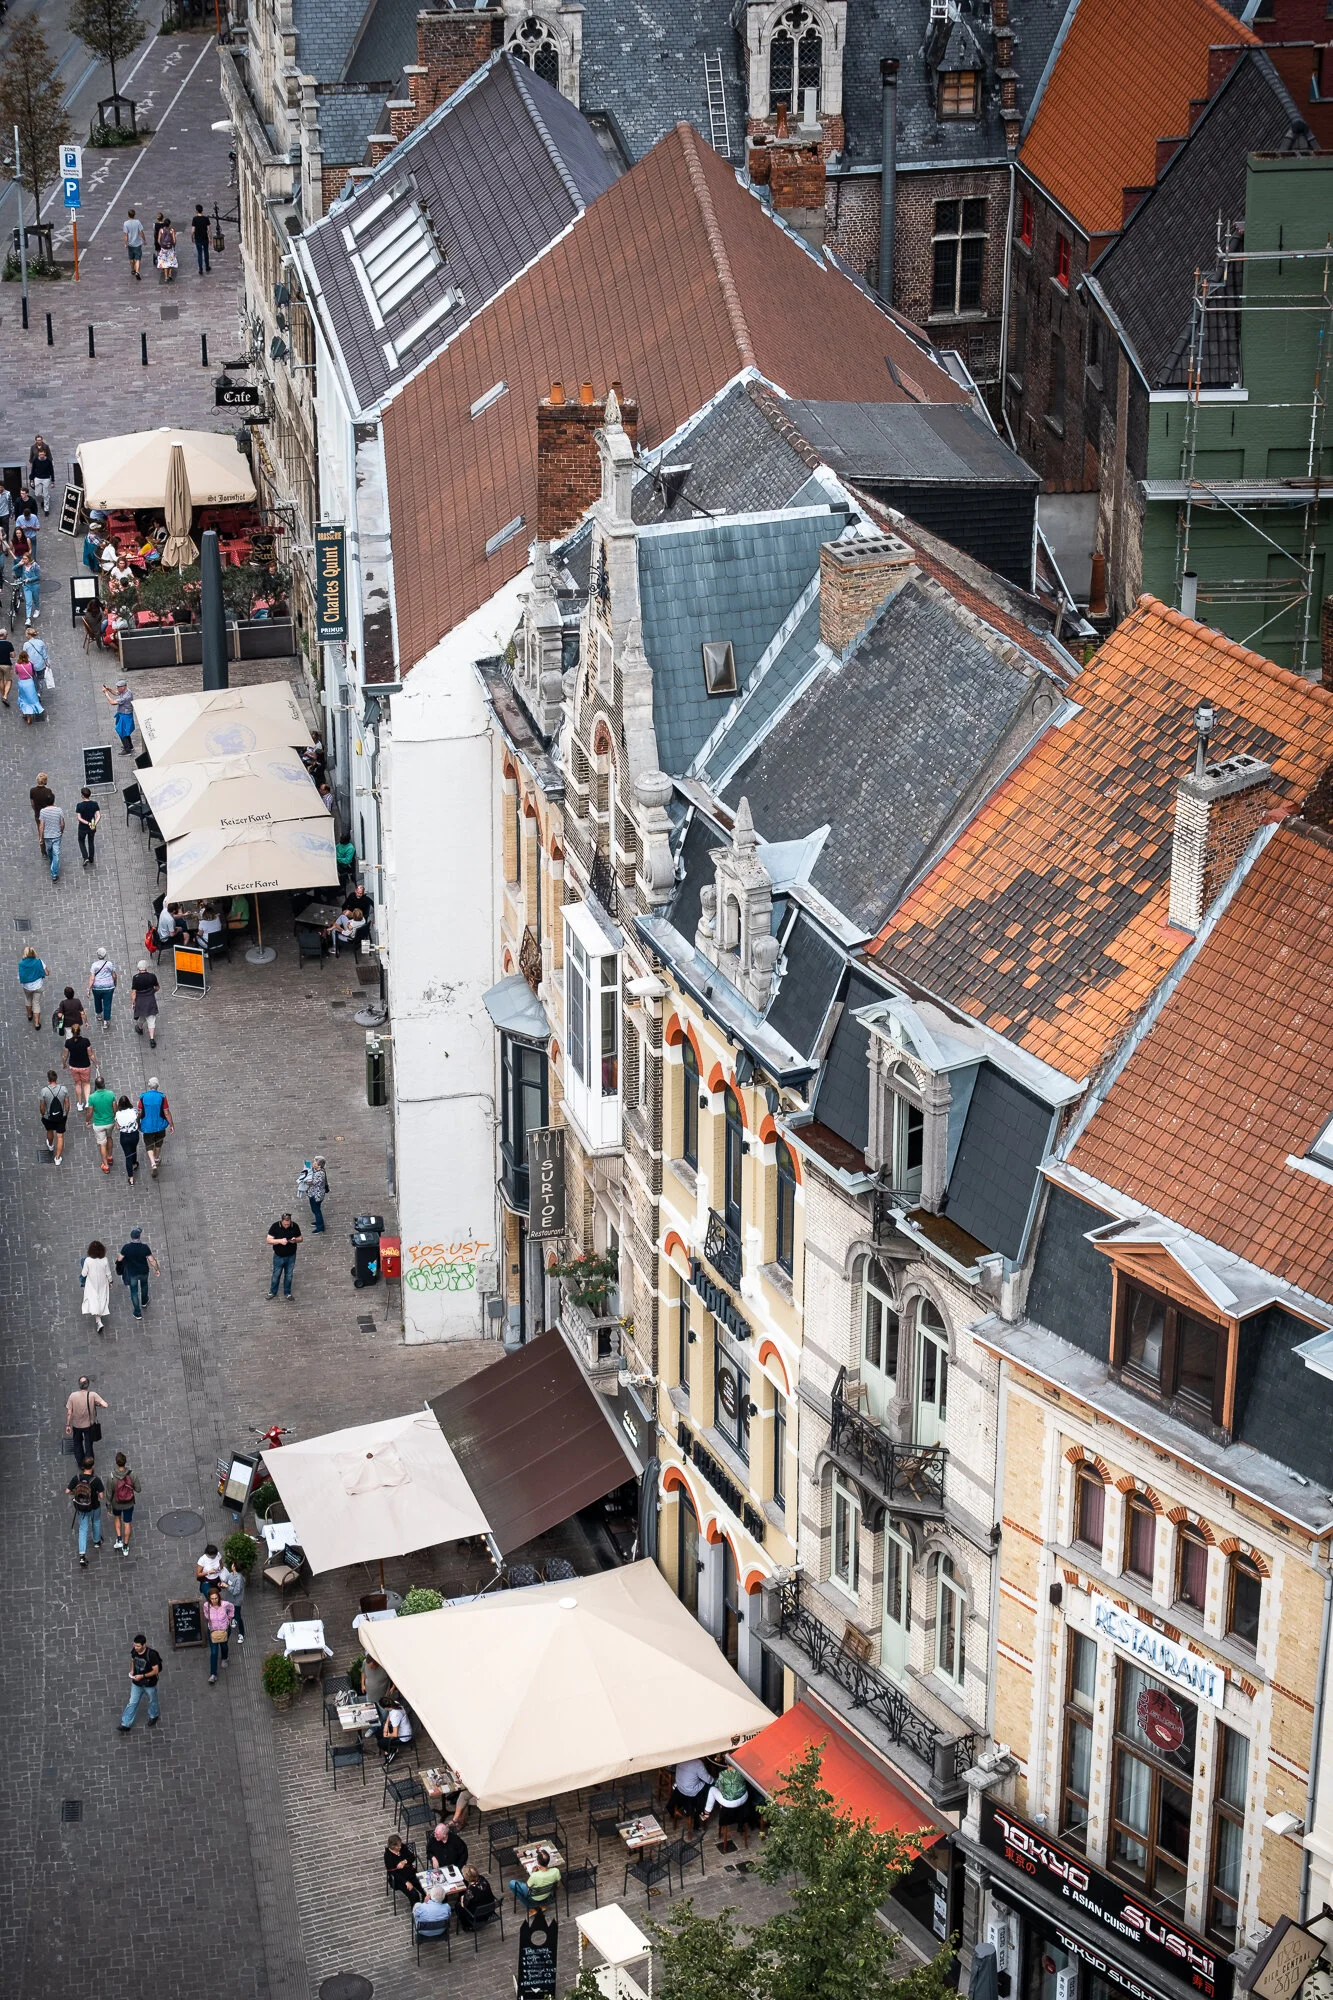
Rooftop views of Ghent from Gravensteen Castle
We visited the roof of the castle which provides some great rooftop views of the city. As you can see below, I used some of the arrow slits to frame some of the city’s other buildings.

Fujifilm XT-30 | XF18-55mm | 18mm | 1/850 Second | f/3.6 | ISO160


Along the River Leie (Lys)
Ghent’s city centre is located along the River Leie and it is such a charming stretch of river and between St Michael’s Bridge and Grasbrug, it is particularly popular with the best of the chocolate box architecture. As we wandered around the city, we really enjoyed walking along both the River Leie and offshoot stretch of water names River Lieve (indeed the names are incredibly similar). Parts of the river had a kind of Amsterdam feel with colourful flower baskets and bikes leaning up against the rails.

Fujifilm XT-30 | XF18-55mm | 22mm | 1/1700 Second | f/4.5 | ISO160
Using the Fujifilm X-T30 as a travel camera
As we wandered around, I was glad I chose the Fuji X-T30 as my “walkabout” camera. This small camera that packs quite a punch was equipped with the standard zoom 18-55mm lens which, when combined, felt nice and light whilst capturing some super sharp images. I also had an incredibly light backpack as I decided to only take one other lens with me from the hotel. Using the X-T30 takes so much friction out of the photography process as the tactile controls and manual dials mean I can compose and adjust settings really quickly. With Fujifilm really upping their focus game with this camera, taking photos while walking about was nice and easy and my family didn’t have to stop too often while I was taking photos.


Fujifilm XT-30 | XF18-55mm | 55mm | 1/1,000 Second | f/4 | ISO160


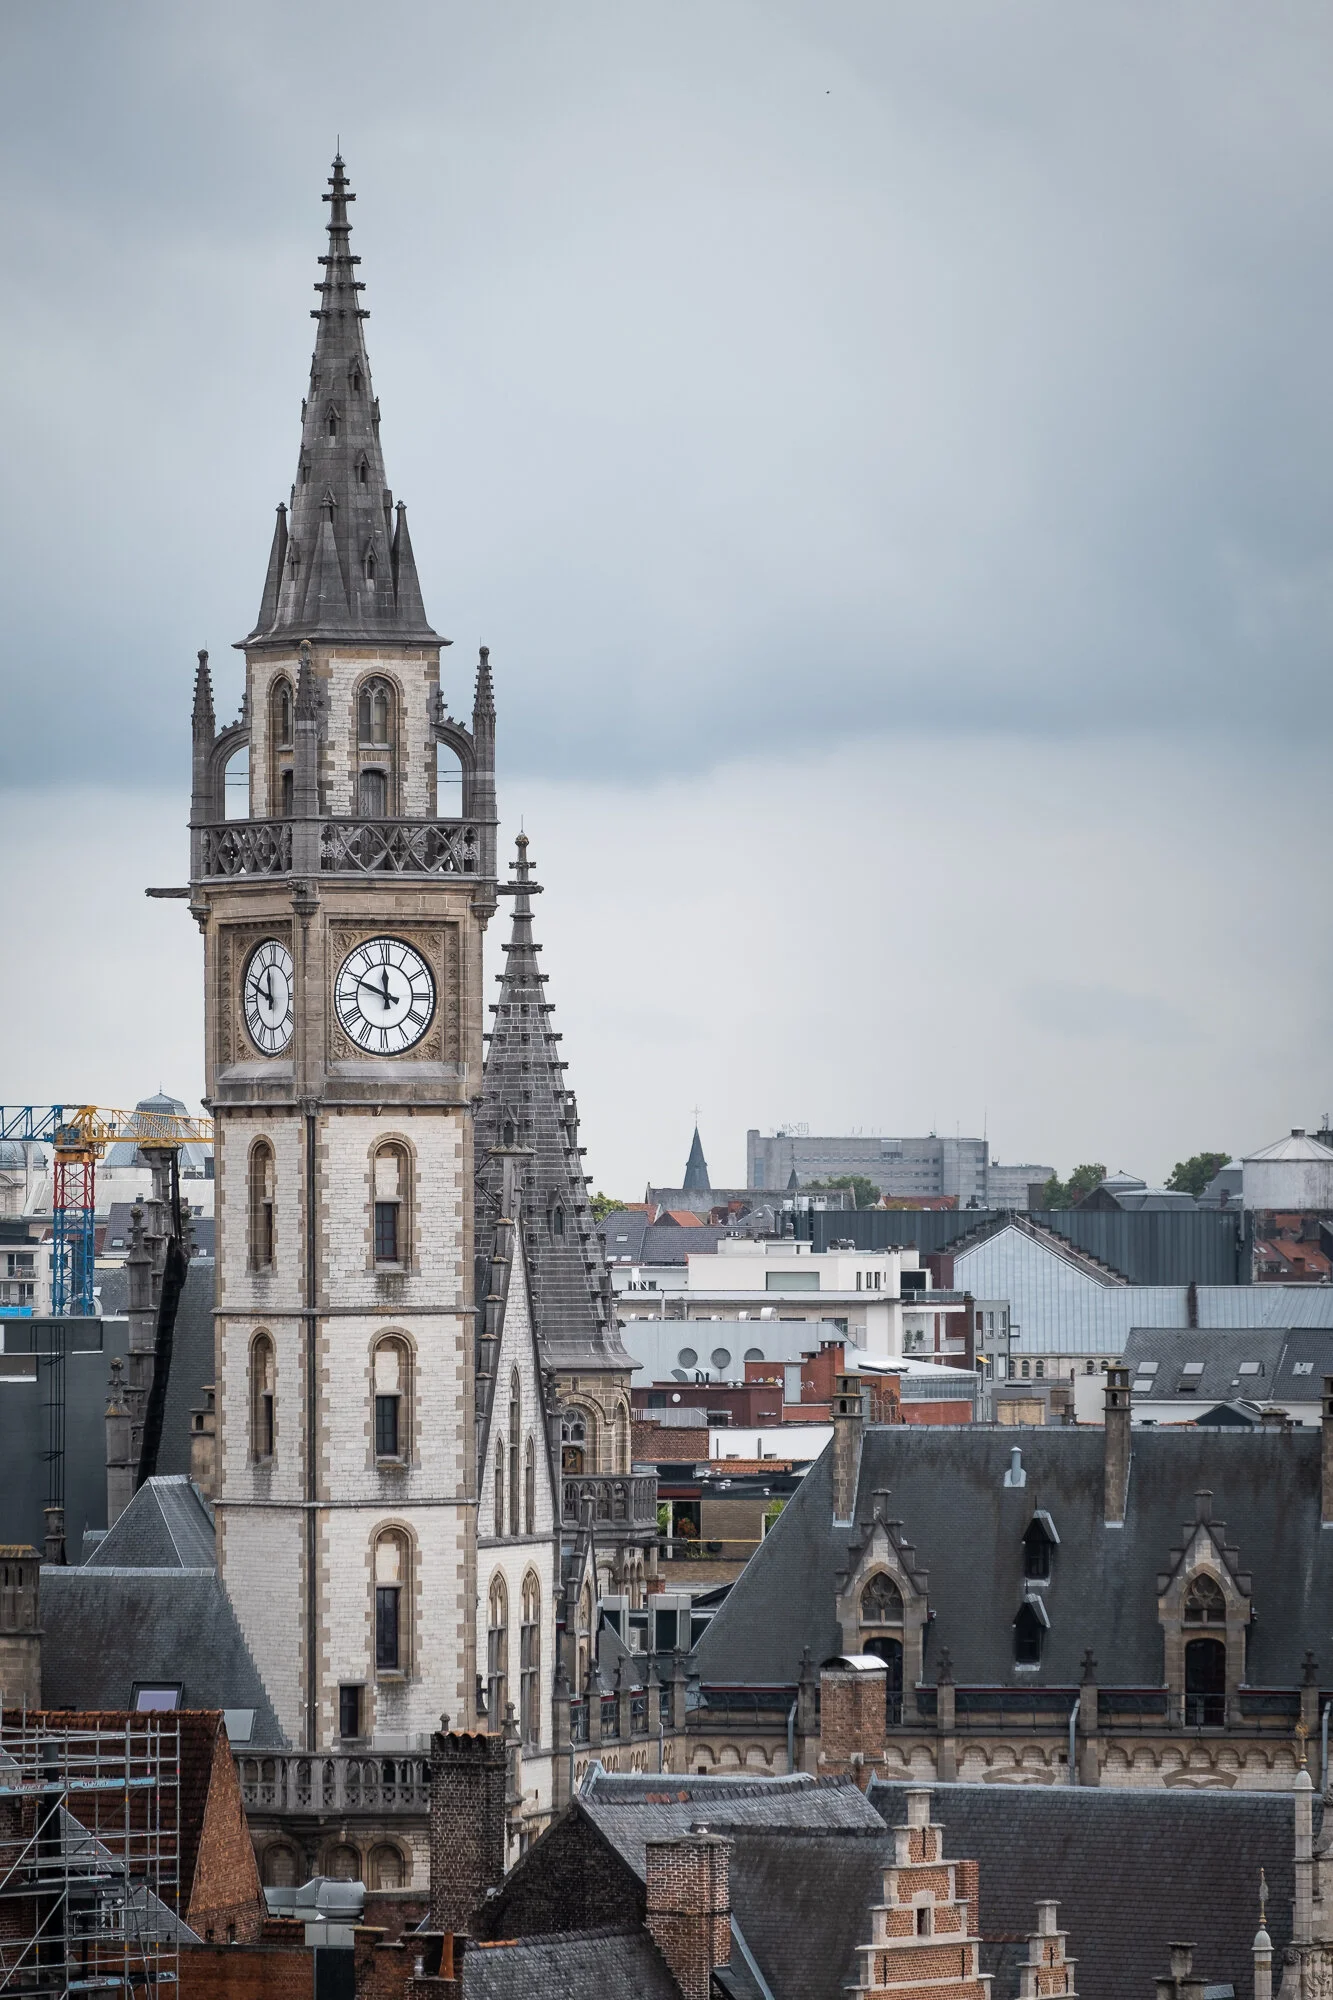
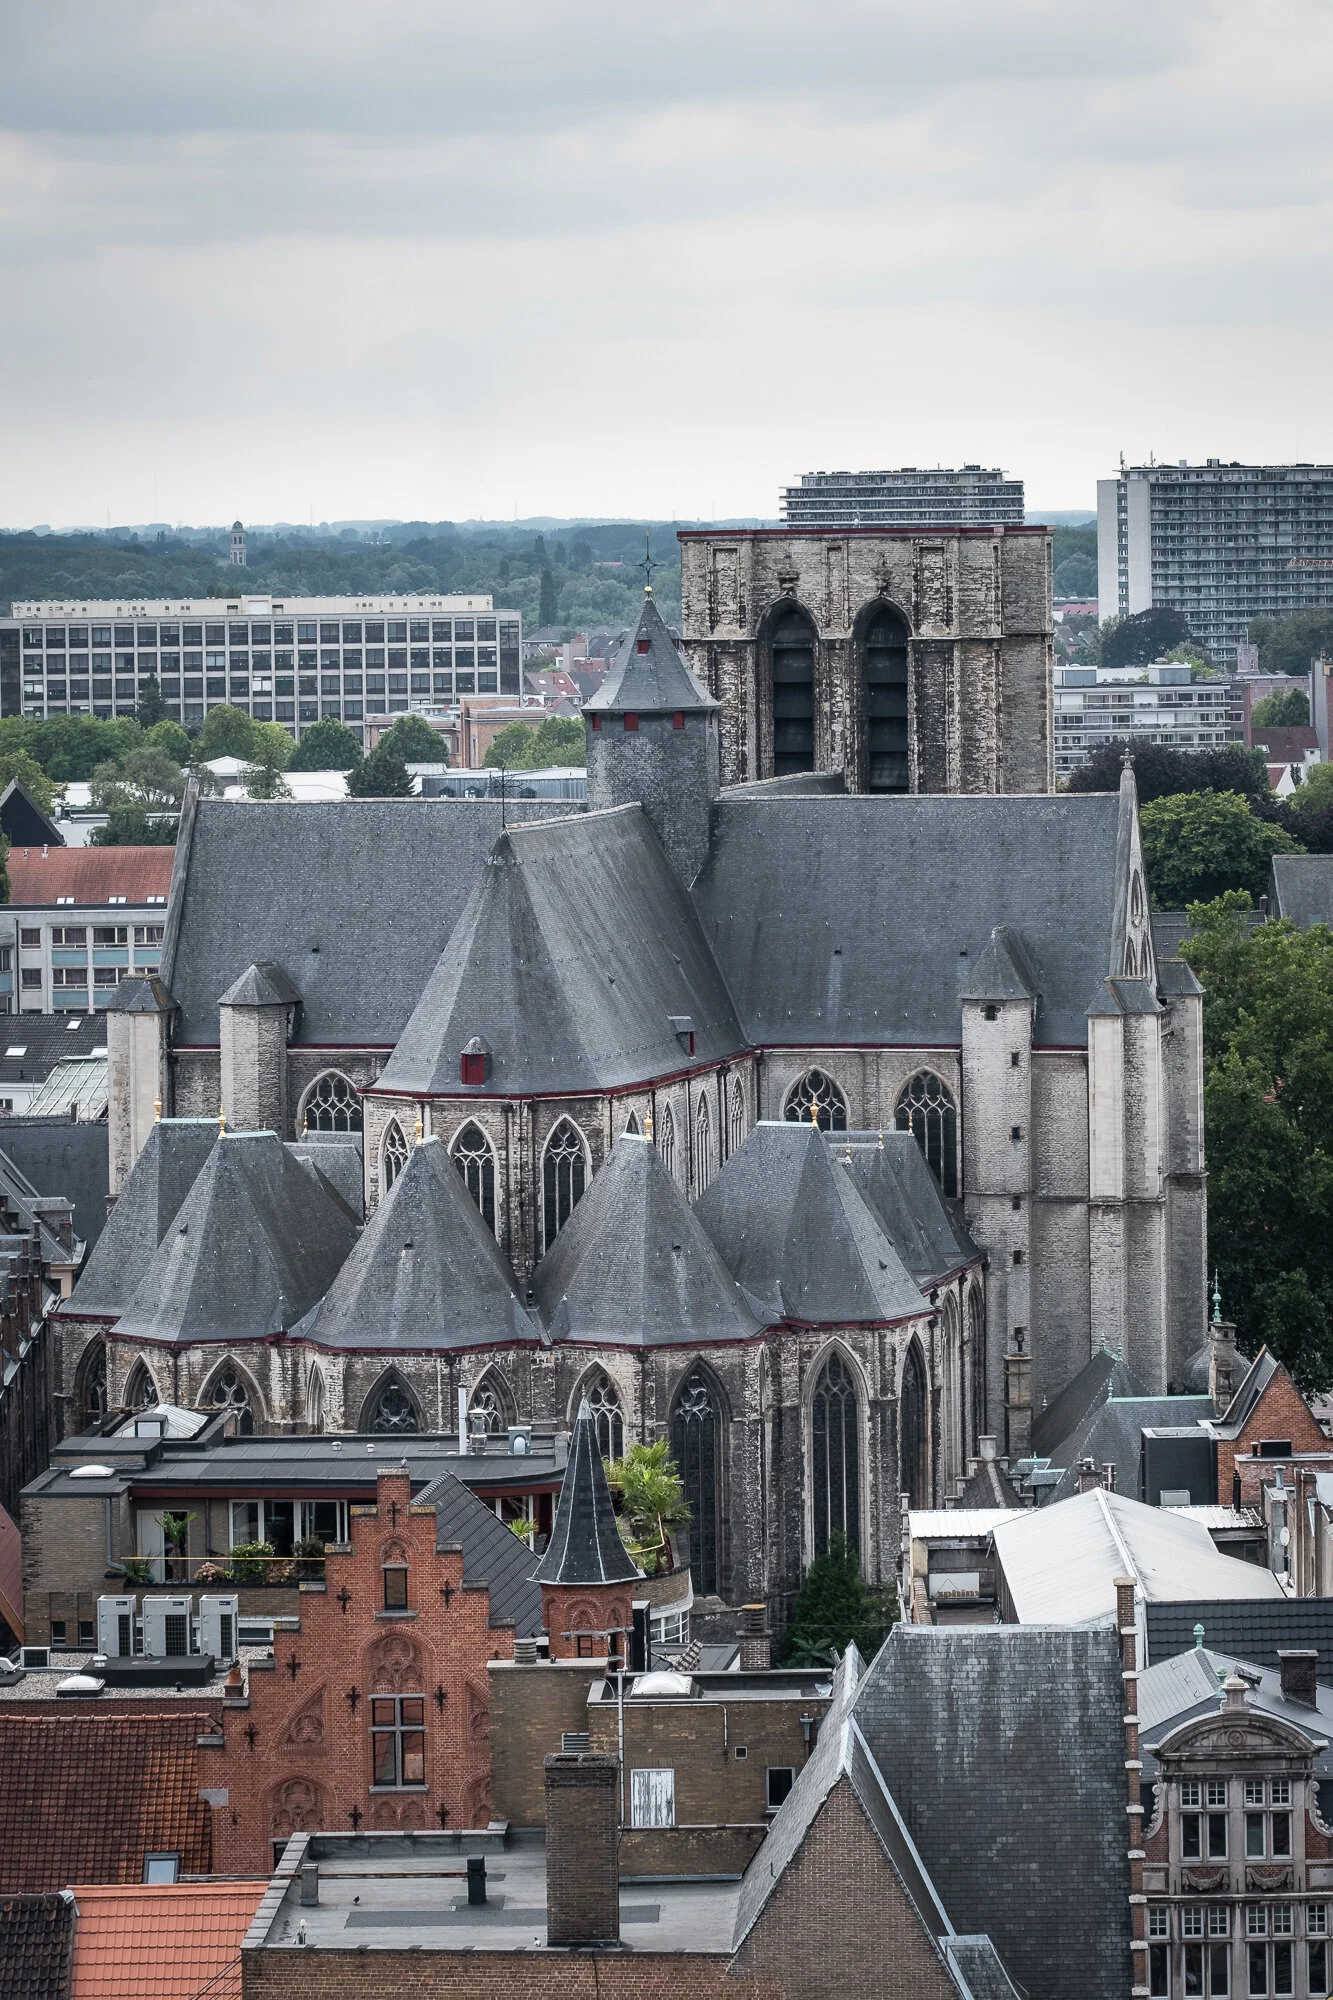
Saint Michael’s Bridge and Saint Michael's Church
The building of St. Michael’s Church started around 1440 and continued into the 16th century whereby 1566 two levels of the tower were completed. Due to religious conflicts, construction stopped until the 17th Century when in 1623 building restarted to repair and complete the tower. Although a design for the tower was proposed, funds dried up and the tower was never built leaving an odd-looking flat roof where the tower should be. I took a photo of the church from atop the Belfry of Ghent which you can see below showing the church and its flat-roofed tower. To me, it doesn’t look right at all as I am used to these types of religious buildings having impressively tall spires and not at all flat roofs.

Fujifilm XT-30 | XF18-55mm | 55mm | 1/5th Second | f/4 | ISO400
Built-in 1910, the neo-gothic St. Michael’s Bridge is probably the most popular bridge in Ghent. Providing great views of this beautiful stretch of river as well as an iconic view of Ghent’s three towers, it’s arguably the best vantage point in the city. I cover the three towers further on in this blog.


Fujifilm XT-30 | XF18-55mm | 18mm | 1/2,200 Second | f/4 | ISO160
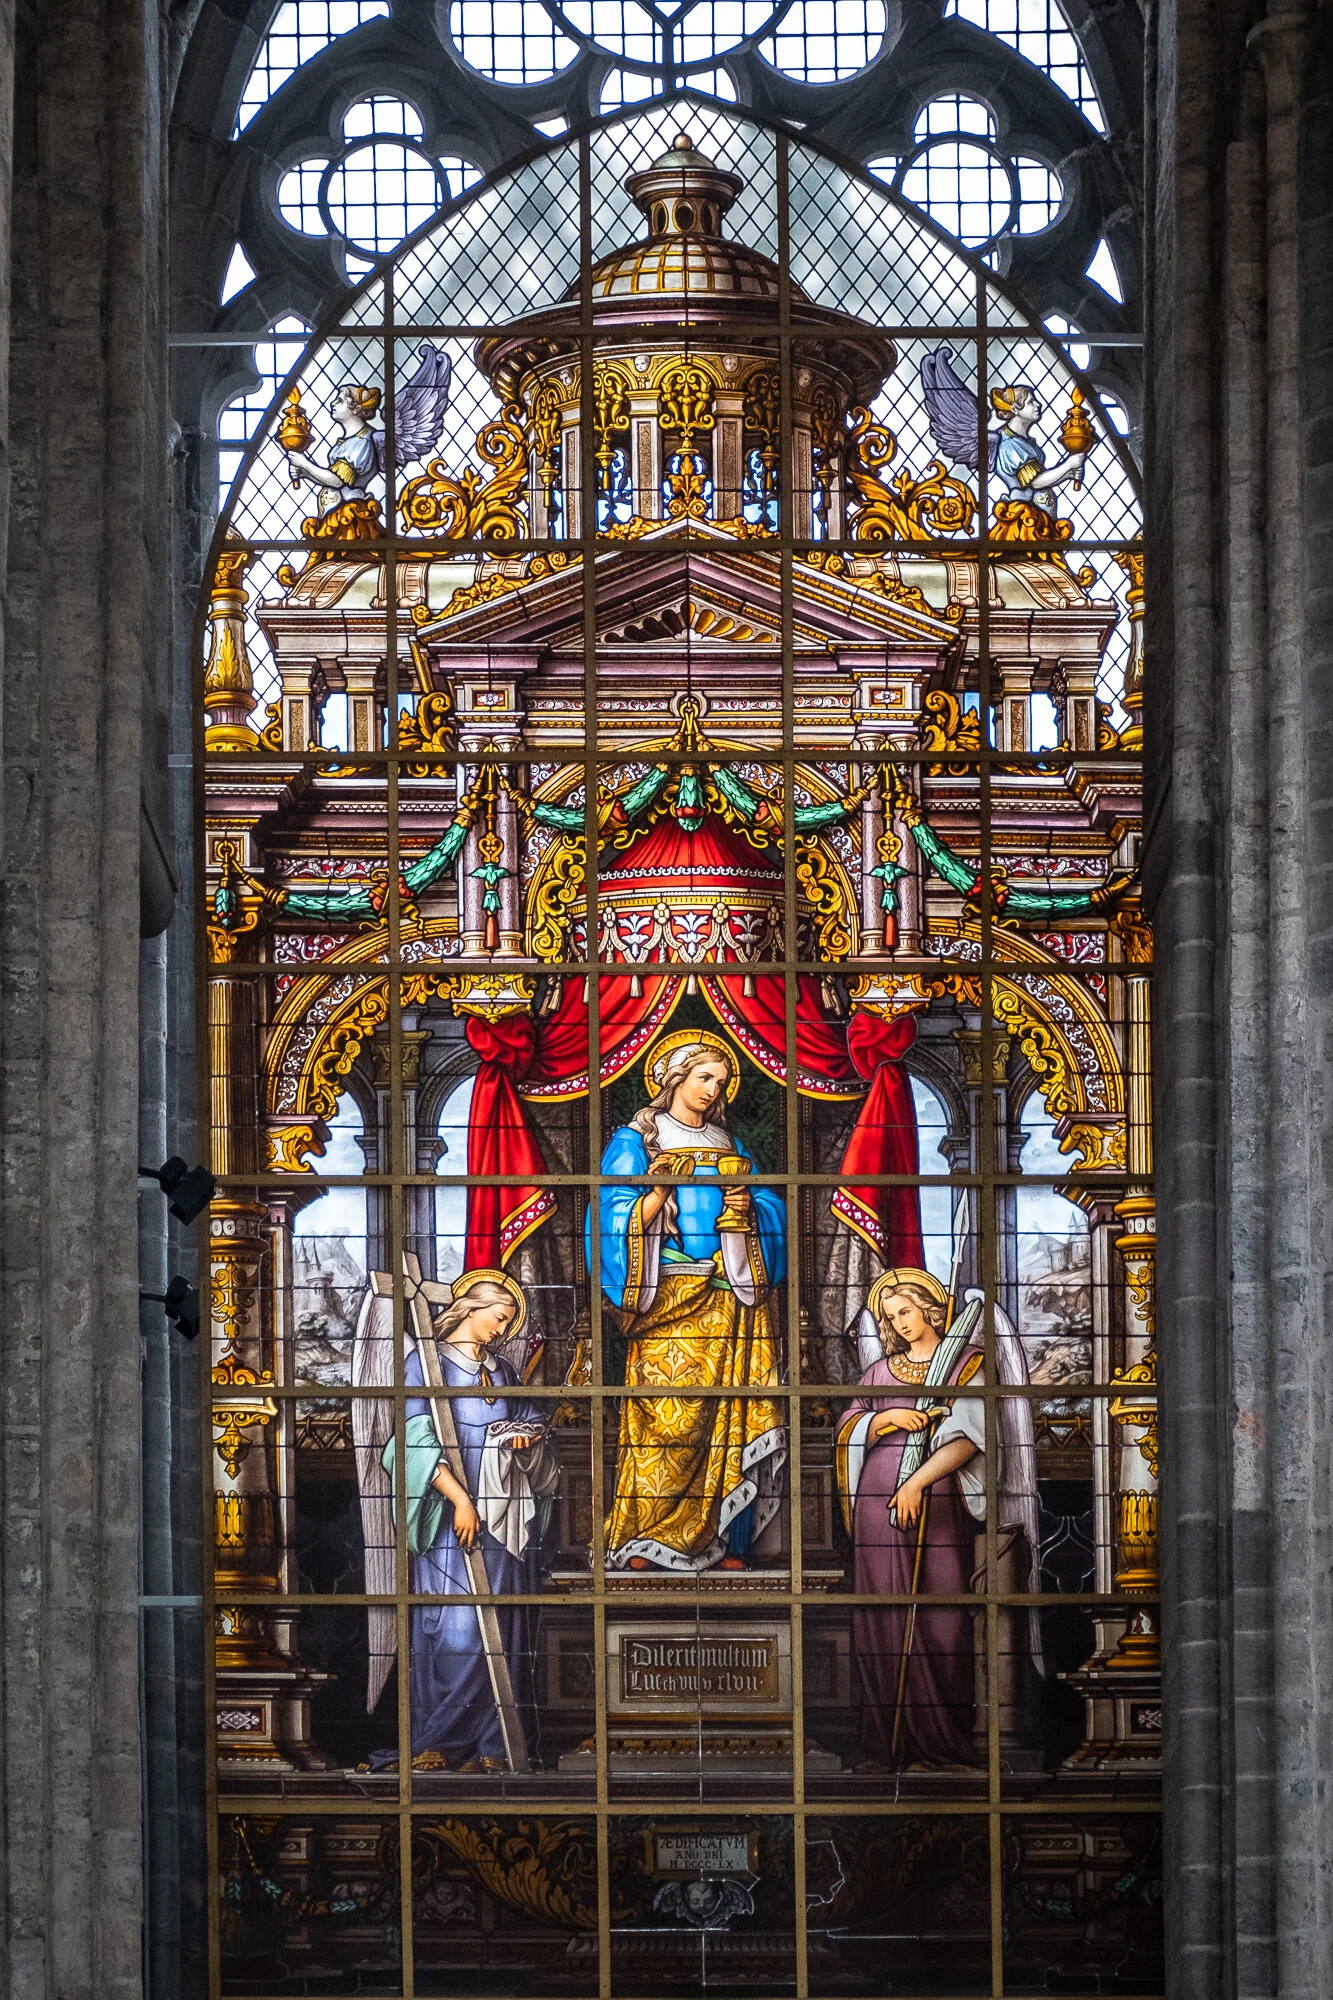
St. Nicholas' Church (Sint-Niklaaskerk)
I mentioned above that Ghent has three towers that dominate the city skyline and St. Nicholas’ Church has one of them. This is the first church we ventured into as when we travel, we like to experience both the external and internal architectural details historic buildings like this have to offer. It was also a good opportunity to put my X-T30 through its low-light paces. More on that below.
In the early 13th century, the building of this gothic church was started and continued throughout the remainder of the century. It also houses an impressive and quite famous organ built by the French organ builder Aristide Cavaillé-Coll. There is a photo of the organ below and although I wasn’t aware at the time of its importance, I certainly remember how striking it was when I saw it at the time.

Fujifilm XT-30 | XF18-55mm | 30mm | 1/950 Second | f/6.4 | ISO160


While wandering inside the church photographing the ornate details and impressive architecture, it gave me an opportunity to test the low-light capabilities of the X-T30 camera. Using both the optical stabilisation in the XF18-55 lens and increasing the ISO, I was able to keep my shutter speed high enough to avoid blur whilst handholding the camera and retaining enough quality in the image. I would regularly up the ISO to 1600 or even 3200 and the photos still had low noise levels and were really quite good.


Belfry of Ghent (Het Belfort van Gent)
The second of the “Three Towers” I will feature in this article is the Belfry of Ghent which is the middle of the three towers in the photo below. It’s a 91-meter tall medieval tower constructed in the 14th century. Over the years, the Belfry was used as a lookout tower and more famously, the city’s bell tower that kept time for the locals for many years.
We climbed the tower, well, I say we climbed but we got the lift when we were about halfway up due to some little legs getting tired. As we climbed there were a few rooms to both rest and learn about the tower’s history. I took a few photos of the bells as we climbed but the real treat was when we arrived at the top of the tower. The views! You can take some great rooftop photos of the city including a nice view of the St. Nicholas' Church from the rear which you can see in one of the photos below.
One word of warning. It is single file around the top of the bell tower so there is not a lot of time to take photos before you feel compelled to move forward to avoid holding other people up. If you want to spend some time up there, you may have to walk around the top a few times to get all the shots you want.

Fujifilm XT-30 | XF18-55mm | 55mm | 1/500 Second | f/4 | ISO160


Saint Bavo Cathedral (Sint Baafskathedraal)
Last but not least of the Three Towers is Saint Bavo’s Cathedral which stands just two metres shorter than the Belfry of Ghent I wrote about in the previous chapter. Although construction began on this gothic church in 1274, subsequent construction projects took place throughout the 14th, 15th and 16th centuries.
Personally, I thought this church has the most impressive interior of those we visited. The ceiling and alter alone are just beautiful. I really enjoyed walking around playing with the tactile knobs and dials on my X-T30 camera locking in the settings needed to take pictures in the low light conditions. Again, I was really happy with how this powerful little camera performed.

Fujifilm XT-30 | XF18-55mm | 18mm | 1/3,000 Second | f/2.8 | ISO160


..and finally, the beer, trams and chocolate!
No visit to Ghent could be complete without visiting the many chocolate shops and drinking the local beer. We had some frequent pit-stops as we wandered around and the local beer went down a treat. If you ever visit Ghent, try the Leffe Blond. It’s my favourite and can also be purchased in the major UK supermarkets in the craft beer aisle.
As far as our kids were concerned, visiting the chocolate shops was probably their favourite part of the trip. They liked to wander into the shop in hope that they would be handing out samples. Of course, once we had tried every type of chocolate on offer, we had to buy some!! It was delicious!
While in the chocolate shops, I opened up the aperture on the camera as far as I could which allowed me to capture sharp images handheld in the low light and provided some nice bokeh too!

Fujifilm XT-30 | XF18-55mm | 33mm | 1/150 Second | f/3.6 | ISO160


Getting around on the trams is super easy and, in my opinion, more comfortable than the buses and taxis. It’s also free to travel on public transport when you purchase a Ghent Citycard making it both convenient and cheap!
I’m really pleased I took my Fujifilm X-T30, as this small, lightweight powerhouse of a camera never missed a beat and took some great quality photos. That coupled with the analogue buttons and dials I find so useful when changing settings on the fly, I was able to focus on taking photos rather than constantly fiddling with the camera’s menu. Battery life seems to improve as mirrorless camera technology moves forward and I was able to last almost all day on a single charge but I had a few spares just in case.
Why you should visit Ghent
Hopefully, you got a good taste of what Ghent has to offer from this article but it’s by no means complete. In the few days, we had to spend in this city, we saw and did enough to feel satisfied we had gotten under the skin of the city and didn’t leave feeling we missed out but there were, however, many other places to visit I didn’t cover such as the art museums and city parks but this time round we didn’t have enough time to get to them all. Maybe that’s a good excuse for another visit in the not too distant future!
On a final note, I mentioned earlier in this article, I had my Fujifilm XT2 with me while in Ghent and used it for an early morning sunrise shoot which I will be sharing soon in a followup post in the next couple of weeks so stay tuned for that. Alternatively, signup to be notified of all website updates here.
Cheers!!

Fujifilm XT-10 | XF35mm F2 | 35mm | 1/640 Second | f/3.6 | ISO200

My Top 10 Photography Spots in London
I showcase what I consider 10 top photography spots in London. I will take you on a trip along the River Thames from Westminster to the Isle of Dogs giving you useful information about each location such as how to find the spot and the best time to photograph it.
I have been taking cityscape photos of London for many years now and with so many famous views available to photograph, I wanted to share some of my favourite spots to capture this great city.
Photographing London’s iconic locations
In this article, I will be taking you on a journey along the River Thames from west to east as we visit 10 of my top spots to capture a cityscape in London including how to get there, when is best to take photos and if the locations are tripod friendly or not.
When you have finished reading this article, why not check out some of my other “Photographing London” posts.
My top 5 free rooftop locations to photograph London
My 10 top tips for photographing London
My Top 5 Long Exposure Locations in London
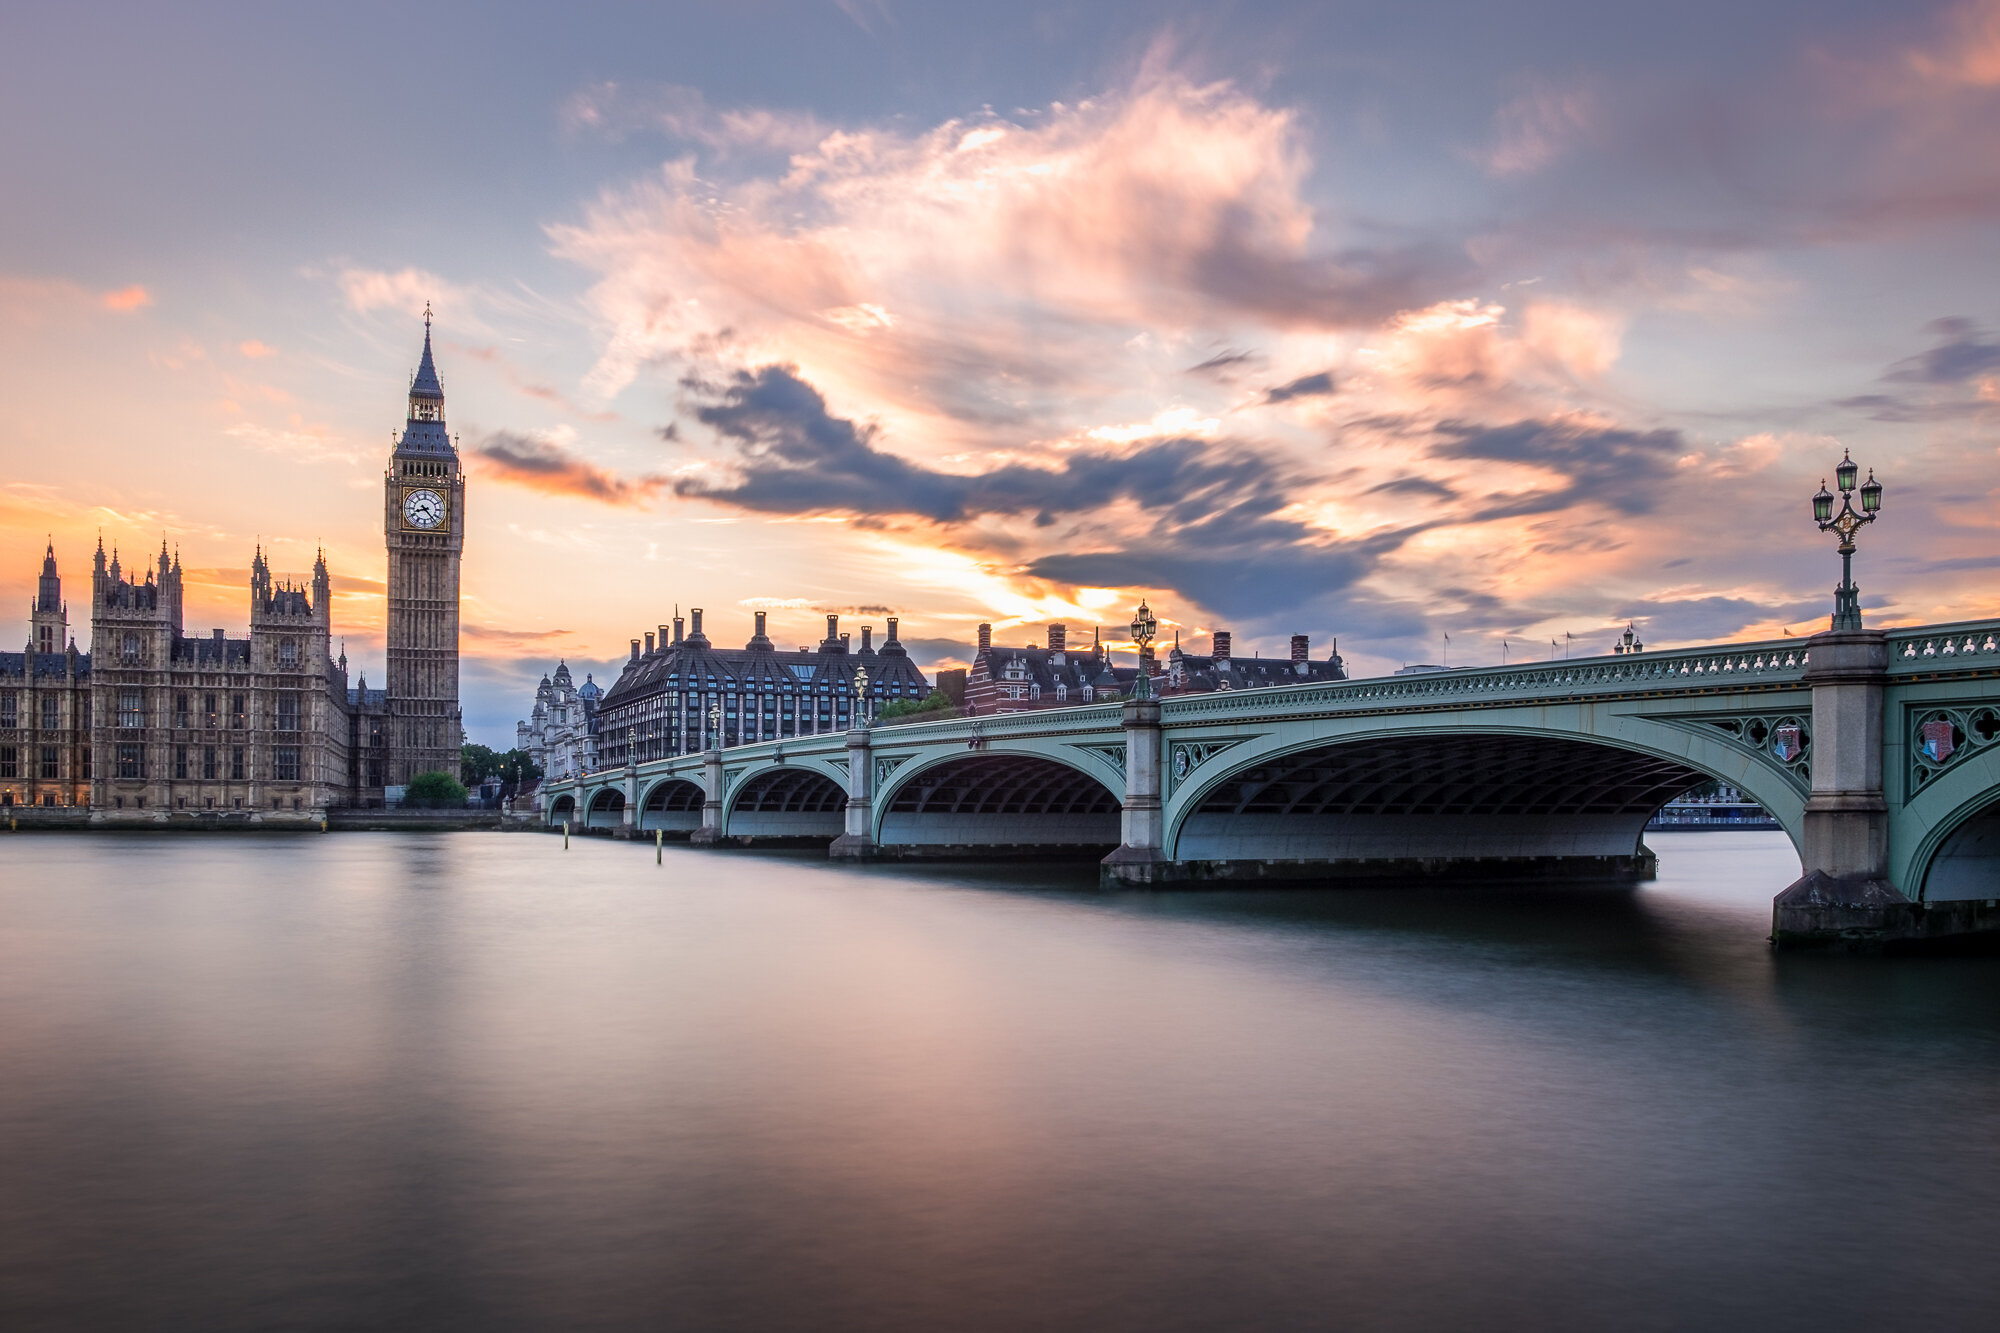
#1 The Elizabeth Tower (Big Ben) from the South Bank
As mentioned above, we are working west to east and the first stop of my top 10 photography spots in London is Westminster and the Houses of Parliament. This is a great location to capture a cool bridge shot leading you across the River Thames to the Elizabeth Tower. The photo shown below was taken in 2017 as, at the time of writing, this view of the tower is obstructed by scaffolding as a 4-year renovation project is undertaken to preserve this iconic London structure which means we will be able to admire and photograph this cityscape for years to come. Roll on 2021 when we hope the work will be complete!
When is the best time to photograph this spot?
If are you after a sunset photo from this location, I advise you to avoid spring and autumn months as the sun will set directly behind the buildings and create a huge amount of dynamic range which most cameras will struggle with. During the summer and winter months, the sun will set either side of the tower reducing the dynamic range just enough to capture the colours of sunset and the architecture on the far side of the river. Capturing this location in the morning is less challenging as the sun will illuminate the Palace of Westminster making it much easier to capture but you may not get such a dramatic sky.
Can I use a tripod?
Yes, you can. There are no rules that prevent the use of tripods but as the location can get busy during the day and into the evenings, you should choose your spot carefully to avoid it being bumped into by other people.
How do you find the location?
The closest underground stations are Westminster (Jubilee Line) and Lambeth North (Bakerloo Line) and from there, head to Westminster Bridge and on the eastern side (South Bank) with the bridge on your right-hand side, this scene should be directly in front of you.

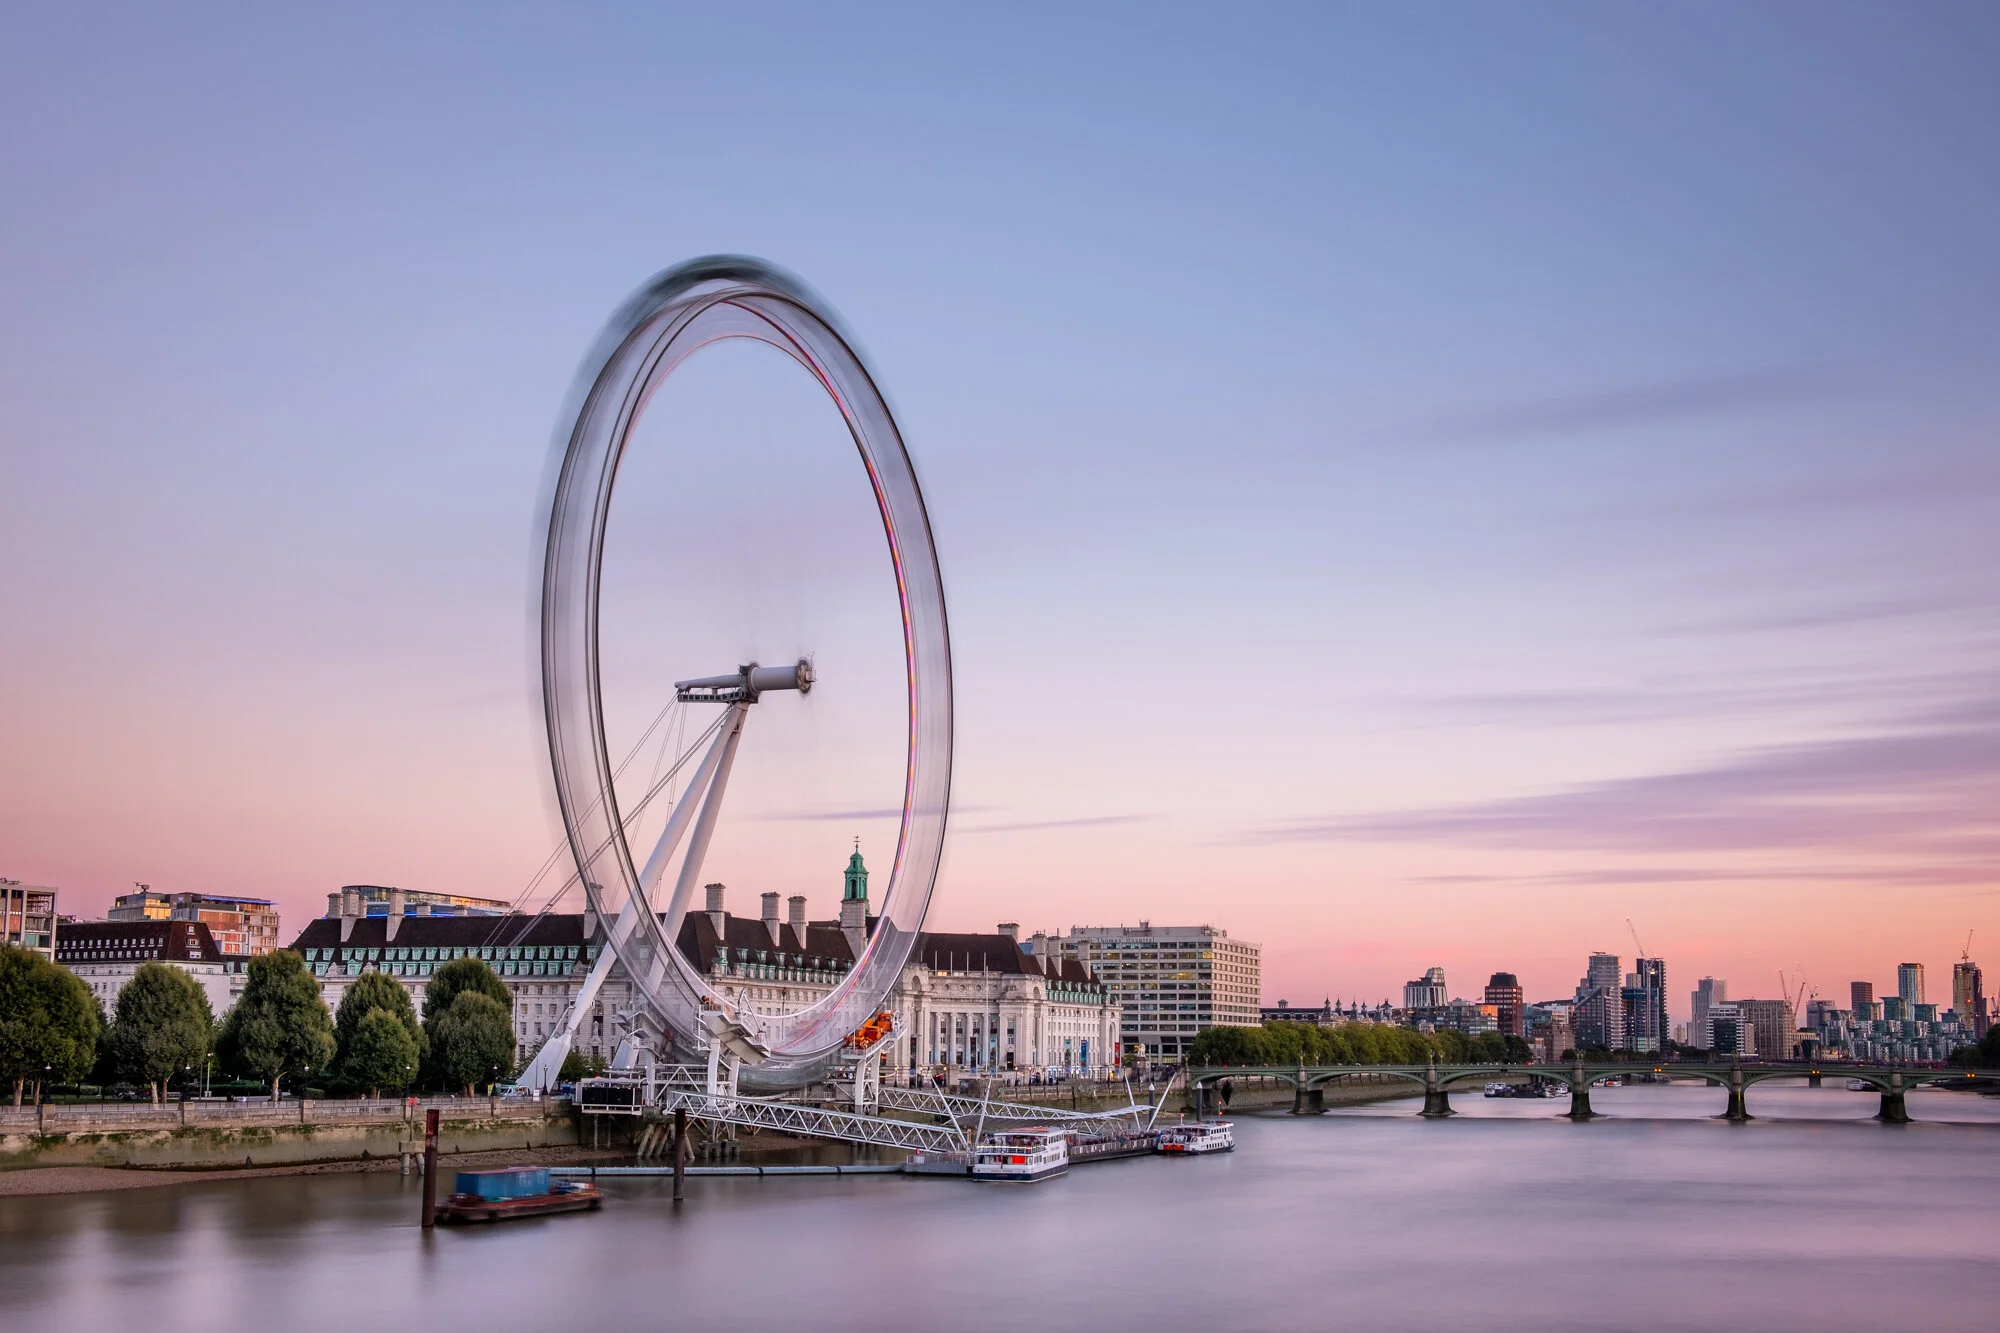
#2 The London Eye from the Golden Jubilee Bridge
I have been photographing this second composition ever since I started photographing London. I love the way the London Eye is dominant in the frame and towers over the smaller buildings that surround it. As you can see from the image here, this is a cracking location to capture the London Eye as a long exposure which I cover in a previous post featuring my top 5 locations to capture long exposure photos in London.
When is the best time to photograph this spot?
The photo above was taken during a late summers evening which is a perfect rime to capture the colours in the sky. Although the River Thames runs east/west, this view actually faces south due to a bend in the river so sunrise is off to the left and sunset is off to the right. Both times of day are great to photograph this scene. If you want to capture the river with less traffic, then the early morning is probably best otherwise you may end up waiting some time for a clear river in the evening which is what I had to do for the shot above.
Can I use a tripod?
Yes, you can. When setting up your tripod, especially when taking a long exposure, try to keep the legs away from the edge of the bridge as it’s a popular spot for people to cross the river and its quite common for people to jump on the rails which could cause the tripod to shake at the wrong time during a capture.
How do you find the location?
There are actually two Golden Jubilee Bridges, each one flanking the Hungerford Bridge. You want to be heading for the bridge on the south side. The nearest tube station is Embankment and this composition is taken from the “north” side of the river.

#3 The London Eye from Waterloo Bridge
It’s always good to find different and unique views of iconic locations and the third location in my top 10 spots to photograph London provides just that. You get a fantastic view looking down the River Thames and being slightly behind the London Eye provides a different perspective. This location is also fantastic for long exposure shots as shown in my blog post My Top 5 Long Exposure Locations in London.

When is the best time to photograph this spot?
Personally, I prefer the golden hour in the summer. The sun sets just off to the right of this view which provides warm, directional light across the image and the sunsets can be beautiful when captured from this spot on Waterloo Bridge.
Can I use a tripod?
Yes, but watch out for pedestrians, especially in rush hour as the path is a little narrow and a lot of commuters cross the bridge to and from work.
How do you find the location?
From the south of the river, head across the Waterloo Bridge on the left-hand side about 1/4 of the way across. Turn to your right and the view seen here should be in front of you.

#4 St Paul’s Cathedral from London’s South Bank
What I like about this 4th spot in my list is how it looks at night with the artificial lighting in the landscape and along the pathway which provides quite a romantic feel to the image. You could imagine a couple walking along the path on a cold winter’s evening and capturing them just as they are under the street lamp (I think I now have a new shot idea for this coming winter so stay tuned!).

When is the best time to photograph this spot?
This is an early morning or late night-spot. If taking a night-scape like the one above, then it will need to be a late one, like after 10pm as this is a very busy walkway and capturing it without people means being there at a quieter time.
Can I use a tripod?
Yes, tripods are fine at this location but like some of the other places in this article, it is important to find a spot away from where people want to walk. When it is quieter, people are happier to walk around you but during busy periods, you are best to be out of the way.
How do you find the location?
This spot is on the south side of the Thames in between Waterloo Bridge and Blackfriars Bridge. The nearest Underground stop is Waterloo Station on the Jubilee Line but what I like to do is walk along the South Bank from Westminster and as long as you stay on the Thames path along the South Bank then you will get to this spot after only a few minutes. Once you can see the dome from St Paul’s Cathedral, Blackfriars Bridge and some of the buildings in the city, you are at the right place.

#5 St Pauls Cathedral from the Tate Modern viewing platform
This is one of my favourite spots to capture St Pauls Cathedral and the first of two rooftop locations on this list. The composition isolates the cathedral somewhat from “modern London” allowing it to stand proud like it once did way back when. I wrote about this image in one of my weekly photo blog posts. With a cafe up on the viewing level, it’s a great location to grab a coffee and admire the view of London.

When is the best time to photograph this spot?
If you want to capture St Paul’s Cathedral at night, then it’s a much more pleasant experience doing so in the warmer months as you are quite exposed to the elements when on the tower and it can be rather cold but with the sun setting later, you should aim to visit on a Friday or Saturday evening, when the museum is open until 21:30. Otherwise, you can catch a nice sunset or night-scape image during the winter months any day of the week, just wear an extra layer or two!
Can I use a tripod?
No, the museum has a strict rule about the use of tripods. To get a sharp image in low light, you can try to use a table top tripod like the Manfrotto PIXI which I carry in my camera bag and balance it on the corner of the railings or on the floor but just be careful as it’s a slightly risky manoeuvre. My advice is to make sure that whatever you do, you keep the camera strap on in case the camera slips.
How do you find the location?
Tate Modern is located along Thames Bankside on the South of the river, opposite St Pauls. Just use the main entrance to the museum and head to the back where you will find the lifts up to the viewing level.

#6 The City of London from the roof of St Pauls Cathedral
Although this is probably one of the oldest viewpoints in London, it’s a recent addition to my top 10 photography spots in London. What I like about this location is the 360-degree views you get around London. You can capture The City, The Shard and around the other side you can capture Tate Modern and the London Eye. There are so many photo opportunities but my favourite has to be the ever-changing city skyline as shown below.
Quick Tip: Although it costs around £17 online (£20 on the door) to visit the Cathedral, UK tax payers can gift-aid the cost of the ticket and receive 12 months free access from the time of your first visit. It’s a fantastic deal if you want to visit again within the year.
When is the best time to photograph this spot?
As the opening times to the cathedral are what they are, most of the year, the Cathedral will be closed during the best of the light but there are two times of year when you can catch some epic light. First of all, during December and January, the Cathedral is open just long enough to capture the golden hour and sunset. In addition, during August, St Pauls Cathedral opens later on a Thursday until 21:30 which presents another opportunity to capture London during the best light of the day.
Can I use a tripod?
No, there is a strict “no tripod” rule within St Pauls Cathedral. Even if this rule didn’t exist, there simply isn’t enough room to set up a tripod in the Golden Gallery, right at the top of the dome.
How do you find the location?
As this is such an iconic landmark, finding the spot isn’t very difficult as the instantly recognisable dome can be seen from around the city and the Cathedral has its own tube station of the same name. More importantly, it’s about getting to the right vantage point which is the Golden Gallery, located at the very top of the Cathedral’s dome and to do so, you need to be fit and able to climb 528 steps. Although it’s not quite as high, if 528 steps are too many, the Stone Gallery offers similar views whilst knocking off around 150 steps from the climb.

#7 Tower Bridge from the Tower of London
Still working towards East London, location number seven is a classic view of Tower bridge. There are so many places to capture this epic landmark but the cobbled street and ornate lamp add a nice finishing touch to this composition. If you like to add people to your photos, then this spot is perfect as you can place someone walking along the path or even sitting on the bench looking out across the river.
When is the best time to photograph this spot?
This location lends itself to a sunrise shot in the colder months during December and January. The sun creeps into the frame on the left adding some nice sidelight to the bridge. In addition, this is the only time of day where you can catch the location free of people. As soon as you get to 8-9am, people flock to the location meaning you cannot take this shot without a bunch of people in the scene.
Lastly, if you want to capture this location at night, a word of warning, it shuts at 9pm every night and if you are set up on a tripod the guards will start to usher you out at around 20:50 so they can lock up on time.
Can I use a tripod?
Surprisingly so, yes. Even though this is private property, it seems the management team at the Tower of London are happy to allow tripods even though it can get very busy during the day which is quite refreshing to say the least.
How do you find the location?
Tower Hill is the nearest tube station located on the other side of the castle. otherwise on the south of the river, London Bridge Station is the closest. Head to the north side of the river, directly in front of the Tower of London and you will see the spot along the river.

#8 More London from Tower of London
This is fast becoming one of the most iconic views in London and is in my top 10 spots to photograph London for that very reason. It encompasses More London, City Hall, The Shard, HMS Belfast and in the background, London Bridge. It’s a rather modern looking view of the city with lots of reflective glass that can vary the look of the buildings depending on where the light comes from and the type of light available.

When is the best time to photograph this spot?
The summer months are best when photographing this location as the sun is further over to the right during the golden hour. During the colder months, the sun will be directly behind The Shard resulting in the buildings being silhouetted which does not make such a good photo.
Can I use a tripod?
Yes, whether you take the photo from Tower Bridge or in front of the Tower of London, tripods are allowed. Just be careful as this area gets very busy and I advise anyone to tuck themselves out of the way as much as possible to avoid the tripod legs tripping someone up or being kicked by a passer-by.
How do you find the location?
This is one of my favourite views in London but compositionally, it can be tricky to capture and whereas a lot of people will try to capture the scene from directly opposite in front of the Tower of London, I prefer to capture this view from the north end of Tower Bridge as I prefer a slightly higher vantage point looking further down the Thames and with the Shard directly the middle, the image looks a little more balanced in my opinion.

#9 Tower Bridge and The Shard from The Girl and the Dolphin Fountain
Number 9 on my list is a great location to capture Tower Bridge with some foreground and background interest. The Girl and the Dolphin fountain creates a great focal point and if you stand in the right place, you can use the statue to frame the iconic bridge. If you are lucky and the clouds are moving towards you then this can make a great long exposure photo as seen below. The smooth lines created by the movement in the clouds can help frame the overall image nicely.
Quick Tip: I recommend taking a wider lens with you if you intend to shoot this location as it allows you to capture the entire fountain along with the bridge.
When is the best time to photograph this spot?
From a light and weather point of view, both morning and evening light can create great images but to make the capture process easier, I recommend a sunrise shoot as this location is very popular with tourists and in the evening, it is really hard to get a clean shot without people wandering into your frame. The location is far less busy first thing in the morning.
Can I use a tripod?
Yes, but be aware and courteous to people around you as the best composition is in the middle of the public footpath. I have shot this location many times and never been bothered by the tripod police.
How do you find the location?
The closest tube station is either London Bridge or Tower Bridge. The location is on the north bank of the Thames. On one side of Tower Bridge, you have the Tower of London. This location is on the other side of the bridge. The fountain is right on the edge of the water so you can’t miss it.

#10 Canary Wharf from the Blackwall Basin
Last but not least in my top 10 photography spots in London is this epic view of Canary Wharf over on the Isle of Dogs. It’s a great spot to capture the high-rise buildings such as One Canada Square and with the still water in the Blackwall Basin, you can capture some really cool reflections which is not normally possible along the River Thames due to its choppy waters.

When is the best time to photograph this spot?
An early morning shoot is a good time to capture this scene as the sun will light the front of the buildings. Alternatively, if capturing a sunset, aim for June or December as the sun will set furthest to each side of the frame minimising the chance of the buildings being silhouetted by the sun.
Can I use a tripod?
You can use tripods from this location.
How do you find the location?
From Canary Wharf Station on the Jubilee line or South Quay on the DLR, head east to find Preston’s Road. Head north from there and just after crossing a bridge there will be a residential area on your left where you will see the scene above

So there you have it, my Top 10 Photography Spots in London! There are so many other great locations to capture the city from down in the streets, along the Thames and up high looking over the rooftops.
As I mentioned at the beginning of this post, do check out some of my other posts to help you take the best photos of London
My top 5 free rooftop locations to photograph London
My 10 top tips for photographing London
My Top 5 Long Exposure Locations in London
Until next time.
Trevor

On Location Photographing Brighton Beach
I live so close to Brighton but I rarely visit just to take photos, so this year I’m trying to put that right. This article covers two recent visits I made to capture the best spots on Brighton Beach at both sunrise and sunset. In the post, I feature photos of the West Pier, Palace Pier and the British Airways I360.
I have been a frequent visitor to Brighton for years. Although I don’t live too close by, I have lived within an hour’s drive of this “city by the sea” for all of my life. Brighton has a cool, positive vibe to it, especially during the summer months when the city is buzzing with locals and tourists enjoying themselves at the seaside. I have a lot of fond memories of the many times I have visited Brighton. I had my stag do in here, it was the first place I drove too after passing my driving test and I now regularly visit with my family to paddle in the sea and eat fish and chips on the beach creating new memories for us all to look back on.
All that being said, for some reason, I rarely visit with the purpose to just take photos. I suspect, living closer to London, the draw to head north from where I live has always been stronger but this year I am determined to head south more often.
I’ve already visited Brighton half a dozen times this year and two of these were specifically to take photos. The first was an early morning in April. I went with the intention of capturing an epic sunrise shot of the West Pier. A classic subject, which I have my own vision as to how I want to capture which depends a lot on the elements all coming together and on this particular morning, I knew as soon as I arrived that this day was not the day I would get that shot.
So, with the intended image no longer an option, I decided to put the tripod away and just wander along the seafront searching out a few compositions as I went.
Armed with my Fuji XT2, I walked between the two piers, using the warm early morning sunlight to help create different compositions of beachfront. Below are 9 of the photos I took on this particular morning, all with the Fujifilm XT2 and XF18-55mm lens except the close up shot of the West Pier which was taken with the XF55-200mm. Select each photo to see the camera settings I used.


Fast forward to July and with a few hours to spare, I drove back south to Brighton to grab a few more photos down at the seafront, but this time during the sunset hours.
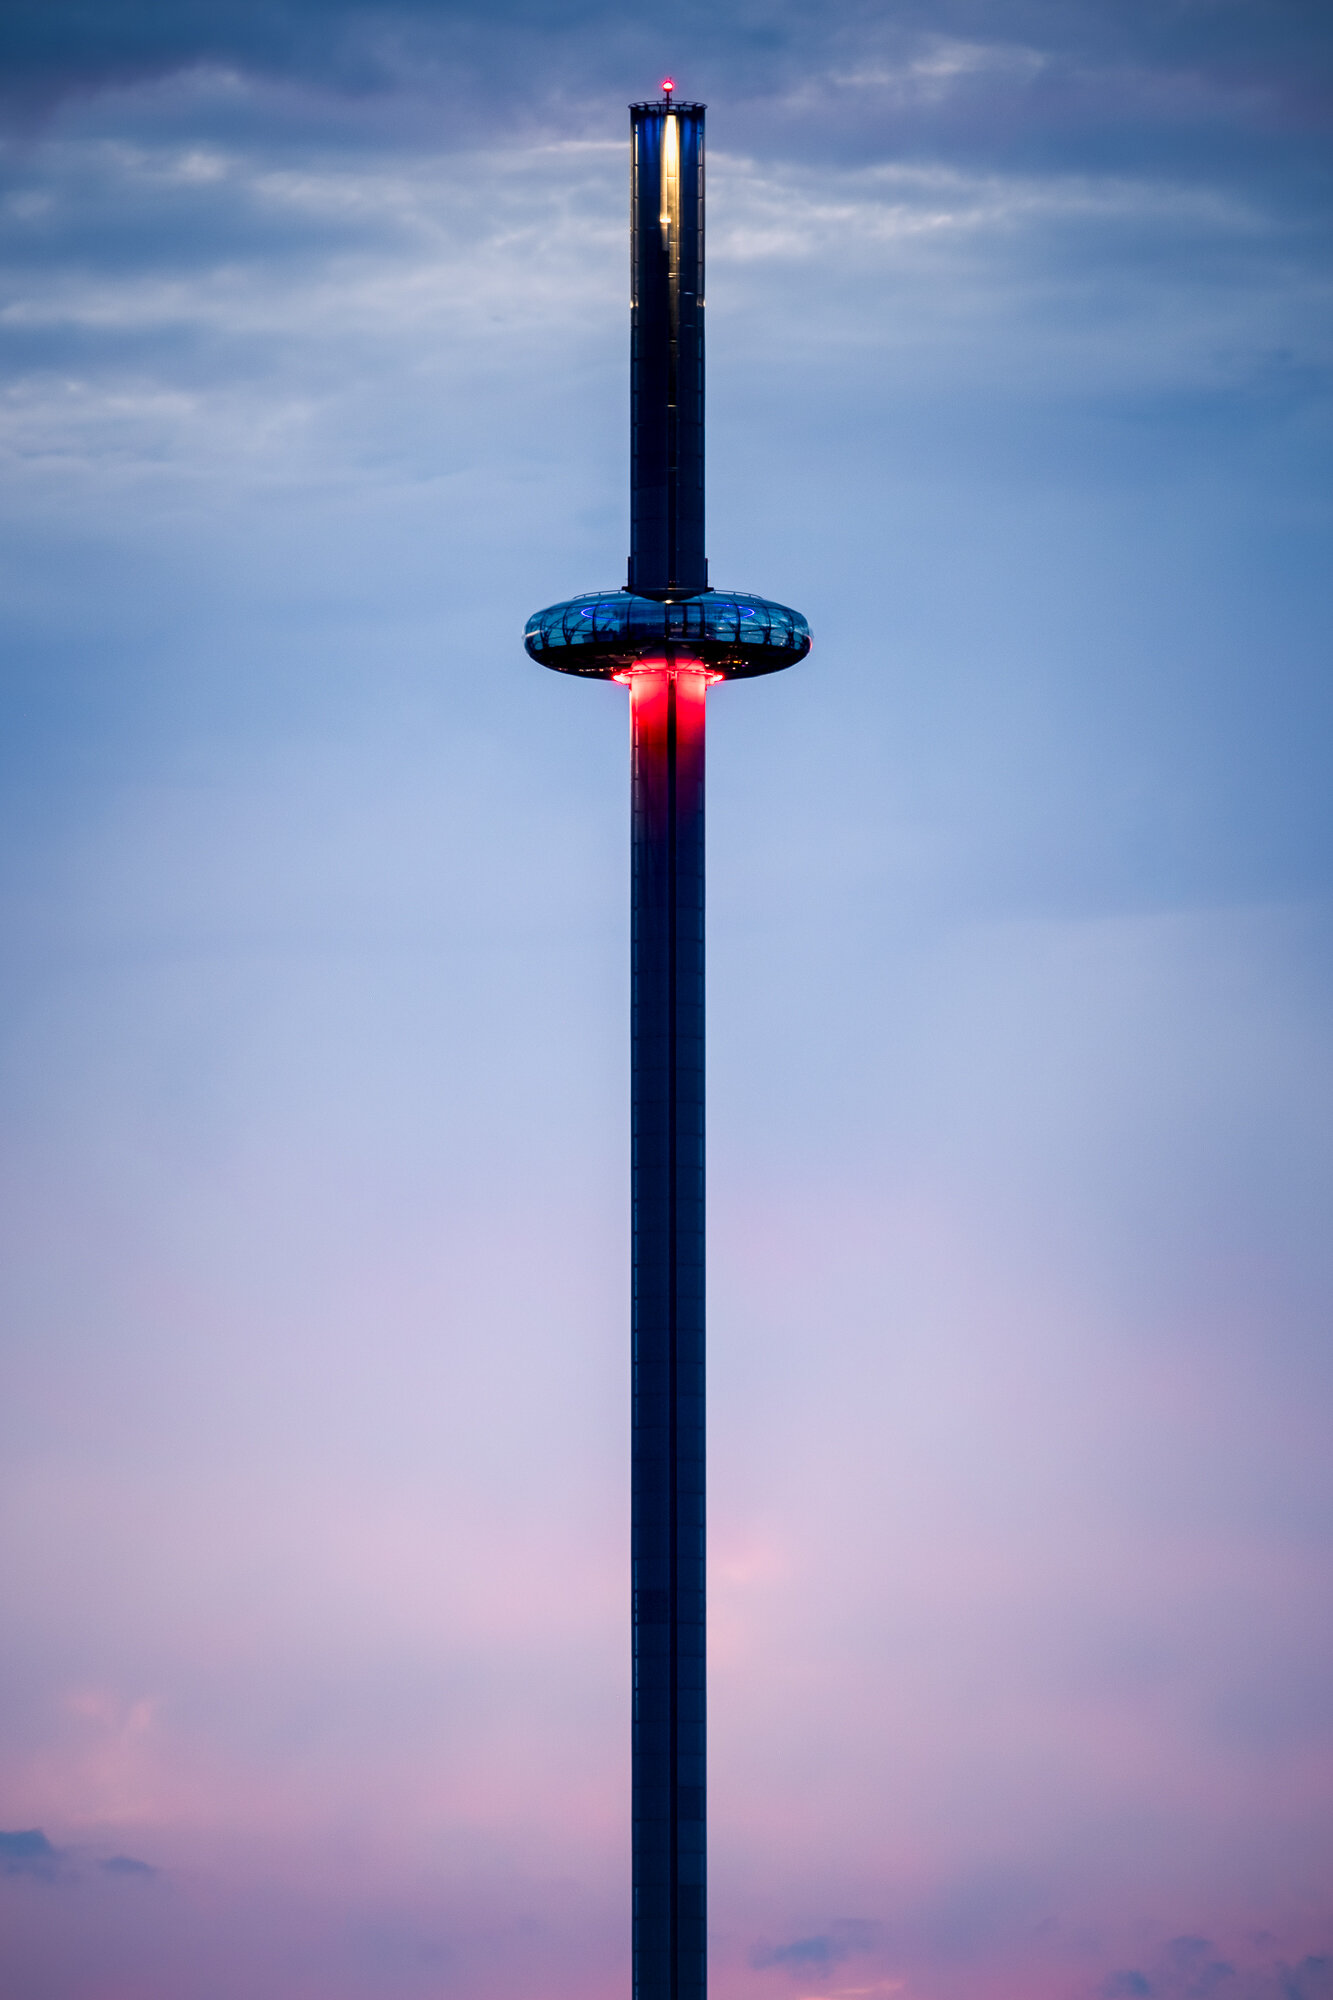
Ever since it was erected in 2016, I hadn’t yet captured any photos of Brighton’s most recent addition to its coastal skyline, the British Airways I360. It’s a unique structure, contrasting against the traditional, ornate Brighton architecture and I for one, really like it. It looks kind of retro-futuristic and what I mean by that is it looks to me like something people in the 1950s would have predicted we would have built today along with the flying cars and gravity suites that is.
For this outing, I once again had my Fujifilm XT2 with my 18-55mm and 55-200mm lenses. I knew that to capture the I360 the way I wanted I would need the extra reach of the 200mm and helped by the optical image stabilisation, I was able to handhold the first shot below and keep it nice and sharp while zoomed right in.

Fujifilm X-T2 | XF55-200mm | 200mm | 1/1,700th second | f/4.8 | ISO200
I have always admired Brighton’s beachfront bandstand. Originally opened in 1884 and restored to its former glory in 2009, I love the ornate Victorian architecture. I have tried to capture this central composition for some time now but every other time I visited, it was either closed or conditions were not good enough to show it off properly. With the sun low and casting a beautiful warm glow across the structure, I grabbed the wide angle XF10-24mm lens and captured the photo below. What was important here was to ensure I had the camera absolutely central and level to make sure the final shot looked symmetrical.

Fujifilm X-T2 | XF10-24mm | 10mm | 1/110th second | f/11 | ISO200
I used the 55-200mm lens to get up close to the I360 in the photo below as I wanted to capture those fantastic reflections in the underside of the pod.
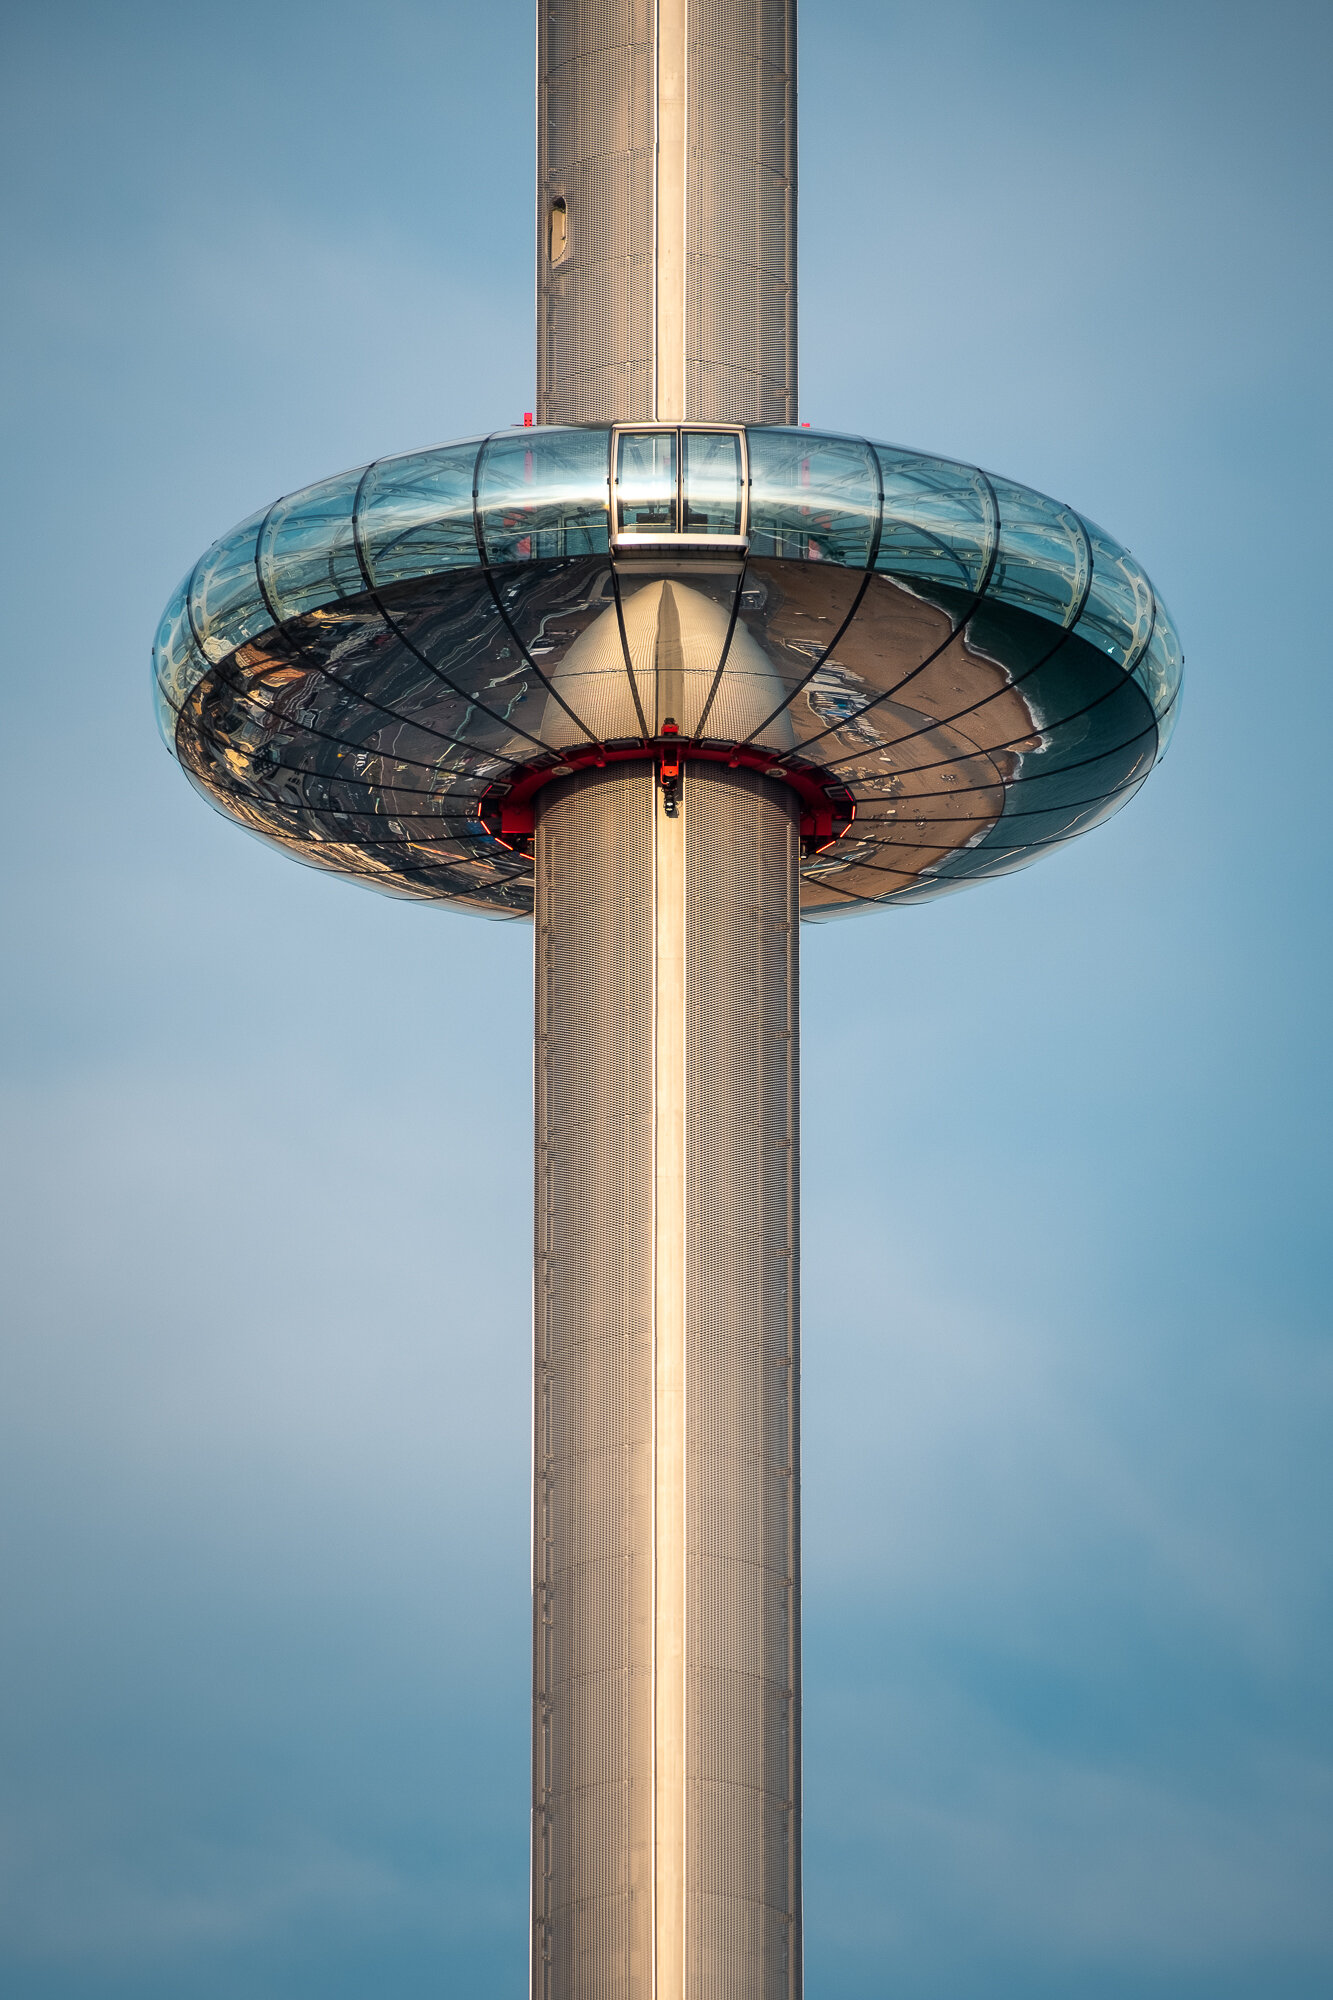
Fujifilm X-T2 | XF55-200mm | 200mm | 1/340th second | f/6.4 | ISO200
I mentioned earlier in this blog that I have a particular photo I want to capture of Brighton’s West Pier and even before I set out, I knew conditions wouldn’t be right for that particular shot but I had another one in mind to capture a long exposure photo of the Palace Pier as the sun was setting. With so much going on architecturally I knew that by capturing the pier as a long exposure photo, all of the details in the sky and water will be rendered smooth and the entire composition would be simplified and less distracting. I used a 10-stop Formatt-Hitech neutral density filter to capture this 3 minute exposure below and if you want to read more about how I take long exposure photos, take a look at this post: How I Take Long Exposure Pictures.
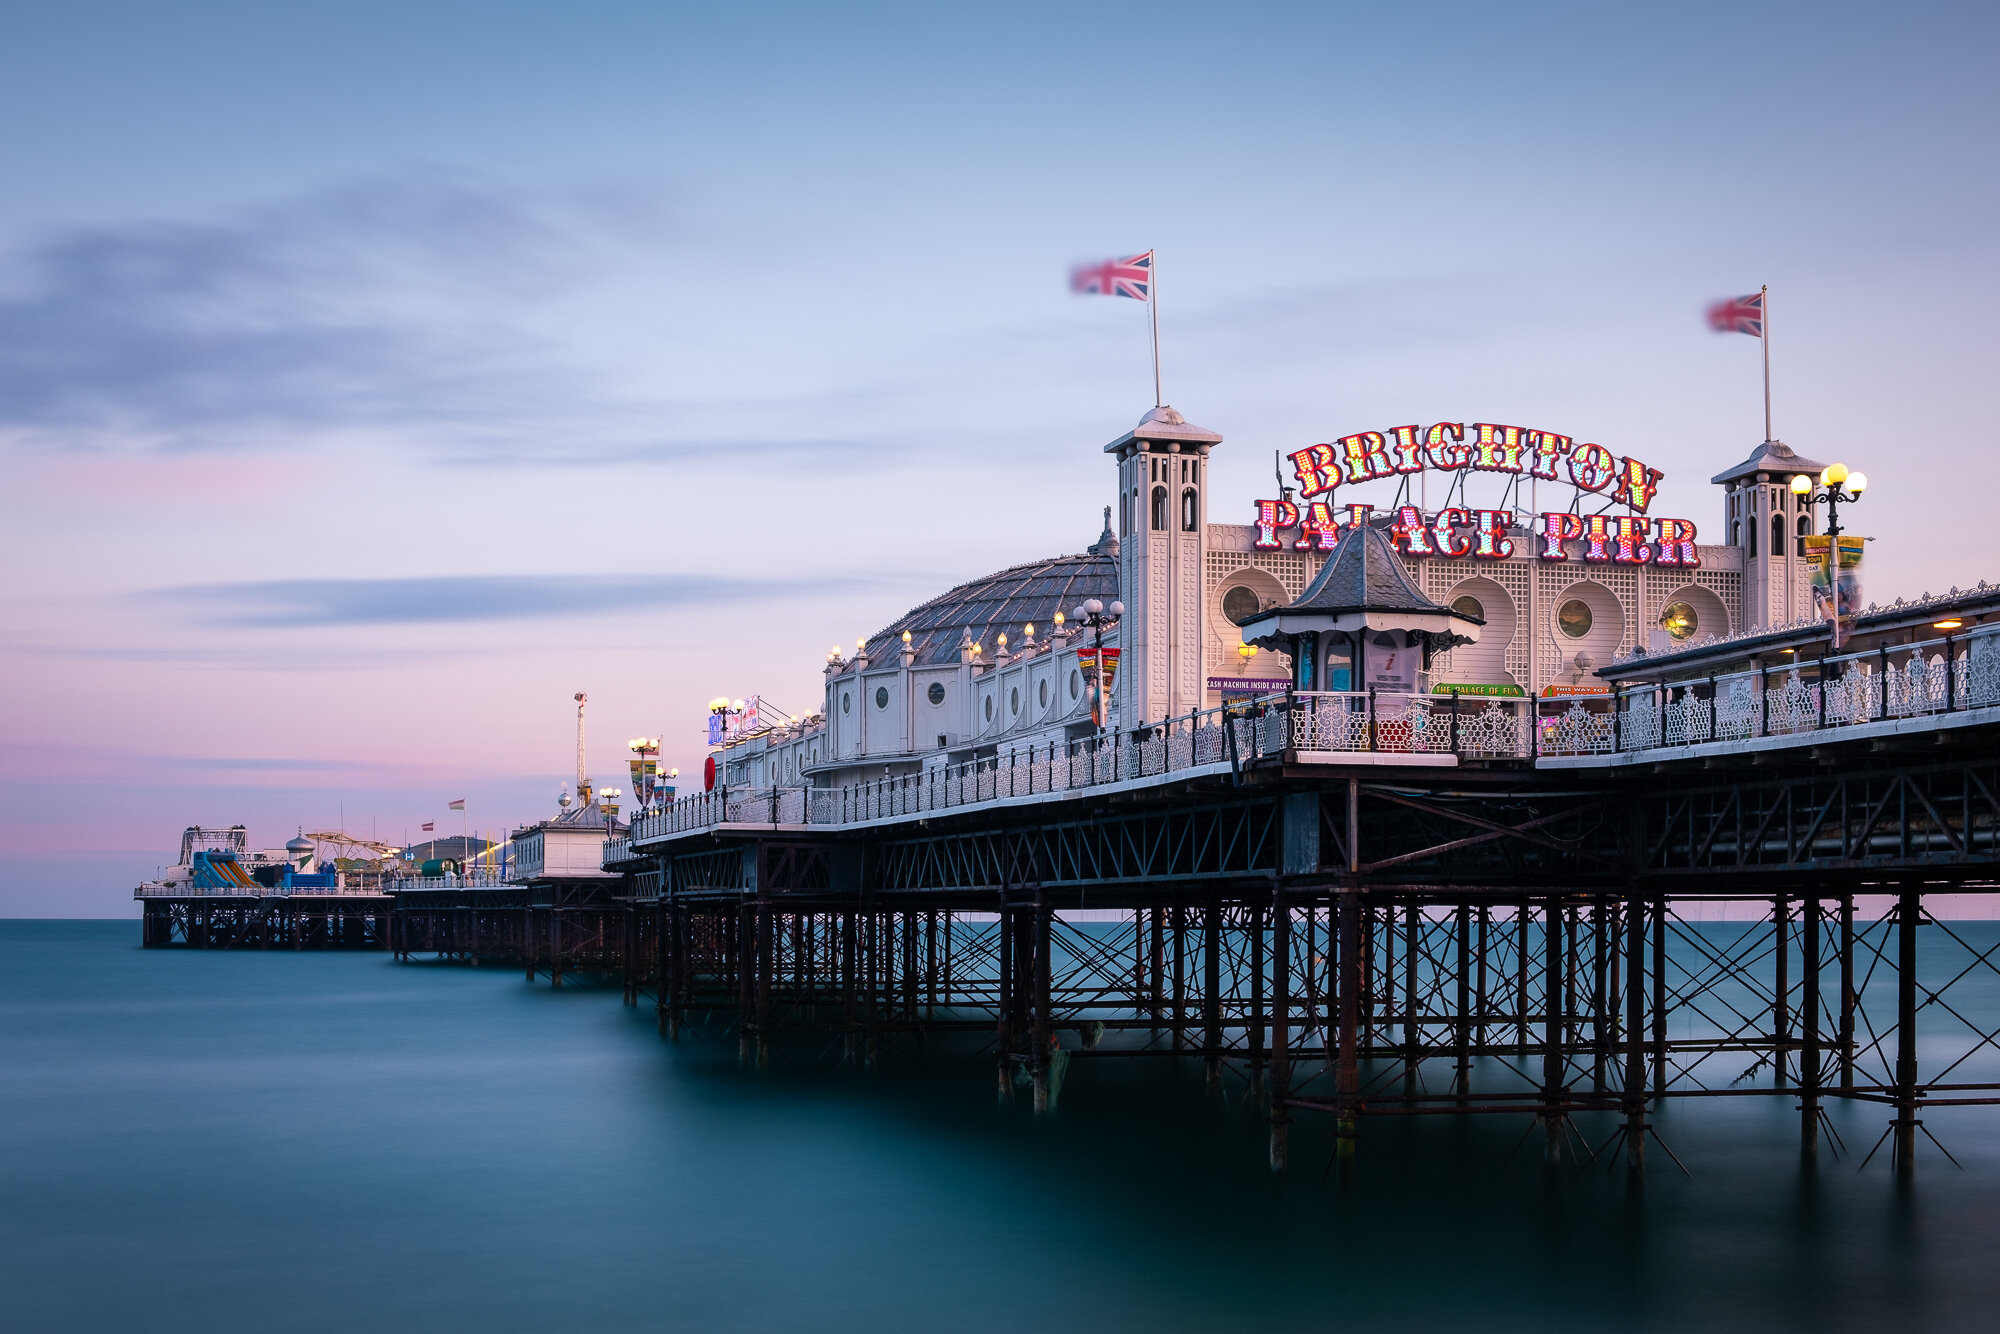
Fujifilm X-T2 | XF18-55mm | 28mm | 181 seconds | f/9 | ISO200
I finished the evening on the Palace Pier to capture the view down the coast towards the I360. With the last of the sun’s light illuminating these fantastic clouds through a thin gap near the horizon, I wanted to use them as the backdrop to both some closeups and wider landscape shots of the view in front of me. The red glow beneath the I360 pod works fantastically with the magenta glow towards the bottom of the frame.
This was a tricky image to capture while keeping as much noise out of the photo as I could by using a low ISO. I was in an exposed spot on the pier and the wind was strong and by using a longer focal length, this combination was just enough to introduce a bit of camera shake. I opened up the aperture to let a little more light in, reducing the exposure time just enough for me to capture the two closeup compositions below.

Fujifilm X-T2 | XF55-200mm | 141mm | 1/9th second | f/4.4 | ISO200
Fujifilm X-T2 | XF55-200mm | 200mm | 1/2 second | f/8 | ISO200

Fujifilm X-T2 | XF18-55mm | 55mm | 10 seconds | f/10 | ISO200
Printing Your Photos
Both the image above of Brighton’s beach as the light was fading and the long exposure of Palace Pier are probably my favourite images of the evening. When I take images I really like, I like to make a print as it brings the photos to life.
Viewing photos on screen is fine but it doesn’t come close to seeing your work printed.
If you are interested in my printing process, take a look at this post here where I walk through printing an image I took of The Shard, London.
With the city lights shining bright and the vibrant blue tones, I decided to use a metallic gloss paper to print this image and I’m glad I did. It gave the final photo a fresh, vibrant finish which suites the subject incredibly well.
So, when you capture an image you really like, do consider printing the image yourself or via a trusted lab. You will not regret it!
As ever, please leave comments below if you have any thoughts or questions relating to this post.
Until next time.


On Location Photographing Paris
During a family trip last summer, we spend 24 hours in Paris wandering around the tourist hotspots amidst a heatwave. Along with documenting my family trip, I managed to grab a few travel photography snaps of the Parisian cityscape and streets as I went. Here are a few photos from Notre-Dame, Louvre and Eiffel Tower.
“A walk about Paris will provide lessons in history, beauty, and in the point of Life.”
I can’t believe how long it has taken me to write a small post about the 24 hours I spent in Paris with the family last year. We tagged a night in the city on to the end of our stay near Paris as my Wife and I wanted to take our two daughters into the city we both love and show them a few of the sights.
At the beginning of our trip, we actually stopped off for a weekend stay in Bruges, Belgium. You can read all about that visit here: On Location Photographing Bruges.
So, with this being a family holiday, photography was not the priority. We were out during the day and eating and drinking in the evening during the best light. At the time of our visit, Europe was in a bit of a heatwave and temperatures were hitting high 30’s (pushing 100 degrees in old money) so there would be no moody, atmospheric skies on this trip, It was mostly white fluffy clouds and blue skies. I took plenty of photos documenting the family trip but even with these bright, sunny, daytime conditions, I also managed to mix in a little bit of my own travel photography as I went along.
For this trip, my camera of choice was the Fujifilm XT2 and I took just two lenses. The XF18-55mm for the standard zoom and XF55-200mm for the extra reach. Both offer a great balance between excellent quality and minimal weight and great for walking around capturing the city.
Once back home, I used some of my existing presets in Adobe’s Lightroom to kick off the editing and provide a base edit. From there I tweaked and adjusted to find the look I wanted. For this set, I was looking for a slightly desaturated look to help tone down the blue sky, sunny day, holiday snap look.
Photographing Notre-Dame de Paris
Early on we took the view that with 24 hours in the city, our options to cover all of the sites was limited. With the hot weather, we didn’t want to be rushing around so we decided to focus on 3 locations. Notre-Dame de Paris, Musée du Louvre and the Eiffel Tower. 3 classic tourist hotspots.
Having checked in and dropped off our bags, we took a brief trip on the Metro to Notre-Dame.
I couldn’t write this post without referencing the horrendous fire that took place at this historic cathedral. At the time of our visit, the fire was many months away and I could never have imagined this beautiful structure going through such an ordeal and still be in a position to be restored. Luckily that is the case and with so many around the world donating to the cause, restoration works are already underway. It will be a few years before we get to see Notre-Dame back to its best so I take some comfort that I was able to capture these images during my visit.
Around 10 years ago, back in 2009, I took a photo from the back of Notre-Dame looking down the river. This was my favourite composition of the cathedral so as we wandered around the area I decided to pop back to the same spot and capture a fresh copy. One day, after the restoration is complete, I will visit specifically to take a sunrise/sunset shot of this composition. Yes, it has been photographed countless times during the golden hour but none of them taken by me, with my style.

Fujifilm XT2 | XF18-55mm | 18mm | 1/1,900 second | f/3.2 | ISO200

Fujifilm XT2 | XF18-55mm | 55mm | 1/2,900 second | f/4 | ISO200

Fujifilm XT2 | XF18-55mm | 55mm | 1/600 second | f/4 | ISO200

Fujifilm XT2 | XF18-55mm | 55mm | 1/350 second | f/4 | ISO200

Fujifilm XT2 | XF18-55mm | 18mm | 1/2,400 second | f/3.2 | ISO200

Fujifilm XT2 | XF18-55mm | 55mm | 1/1,250 second | f/4 | ISO200
Photographing the Eiffel Tower
As we had so little time in the city, we couldn’t spend too much time at each location but we decided that if we were to fully explore one of our three places, it would have to be the Eiffel Tower. When presented a choice to our daughters, going up the Eiffel Tower was the unanimous decision. So, during the late afternoon, into the evening, we had a great time around the area.
We travelled to the second level of the tower and wandered around taking in the views. This is where having my 55-200mm lens came in handy. I was able to capture both the wider Parisian cityscape and also get in close and pick out some of the details around the city.

Fujifilm XT2 | XF18-55mm | 27mm | 1/1,5000 second | f/3.6 | ISO200

Fujifilm XT2 | XF18-55mm | 55mm | 1/1000 second | f/6.4 | ISO200

Fujifilm XT2 | XF55-200mm | 200mm | 1/1,100 second | f/7.1 | ISO200

Fujifilm XT2 | XF18-55mm | 55mm | 1/1,700 second | f/4.5 | ISO200

Fujifilm XT2 | XF18-55mm | 18mm | 1/125 second | f/13 | ISO200

Fujifilm XT2 | XF55-200mm | 122mm | 1/1,700 second | f/4.2 | ISO200

Fujifilm XT2 | XF18-55mm | 18mm | 1/4,400 second | f/4.5 | ISO200
Photographing the musée du Louvre
Before it was time to go and get the car and head home, we were able to spend a few hours around the Musée du Louvre. Even though we didn’t have time to explore inside the museum this time, we had a great time wandering the grounds and hanging about near the fountains getting wet from the spray which on such a hot day, was very welcome indeed.
Photographically, this area provides lots of opportunities to try different techniques such as juxta-positioning contrasting architecture to create interesting compositions or exploring the various walkways and using the deep shadows and bright openings to frame a subject as I did below with the lady walking past the end of the tunnel.

Fujifilm XT2 | XF18-55mm | 34mm | 1/680 second | f/5.6 | ISO200

Fujifilm XT2 | XF55-200mm | 34mm | 1/1,000 second | f/5.6 | ISO200

Fujifilm XT2 | XF55-200mm | 55mm | 1/950 second | f/5.6 | ISO200

Fujifilm XT2 | XF55-200mm | 164mm | 1/2,500 second | f/5 | ISO200

Fujifilm XT2 | XF55-200mm | 200mm | 1/1,500 second | f/5.6 | ISO200

Fujifilm XT2 | XF55-200mm | 200mm | 1/1,250 second | f/4.8 | ISO200

Fujifilm XT2 | XF55-200mm | 55mm | 1/1,400 second | f/4 | ISO200
We had such a fantastic 24 hours in Paris. The weather was great, the kids had a blast and I was able to capture a few snaps along the way.
It’s off to Ghent, Belgium next but I am sure we will be booking a longer stay in Paris together soon enough and you never know, I might even get that golden hour shot of Notre-Dame I want so badly.


On Location Photographing the Golden Hour in London
I recently took a walk along the River Thames, London with my Fujifilm XT2 and XF18-55mm lens starting at the London Eye to the Tate Modern and across the river, finishing at St Paul’s Cathedral. Along the way, trying to embrace the strong sunlight and deep shadows while capturing a mix of street and architecture photos.
“Light makes photography. Embrace light. Admire it. Love it. But above all, know light. Know it for all you are worth, and you will know the key to photography.”
This well-known quote increasingly resonates with me and I will be the first to admit, that I have a long way to go before I have mastered the art of seeing light…but I’m getting there. Not so long ago, it would have been rare to catch me without a tripod as I took photos in London. My eye was fixed on the city’s skyline or architecture which to a large degree still is but I when capturing a cityscape, the wide vistas rely heavily on an interesting sky with great light and with all of the planning in the world, once set up ready to take the shot, I have to wait for the light to find me. Sometimes it all comes together but more often than not, I am left without an image.
Back in 2018, I started a project called London Chrome. This project continues today and was started to help me develop my photographic craft by wandering the streets, unchained from a tripod helping me to develop my eye for shapes, composition and light with a degree of success.
These days, as I wander the city, camera in hand looking for compositions, I am now using light as a part of the composition much more effectively, embracing dark shadows while attempting to balance the composition with both the subject and light.
A few weeks ago, during a bright sunny morning, I took a walk along the River in London with my Fujifilm XT2 and XF18-55mm lens starting at the London Eye, crossing the river at the Tate Modern and finishing at St Paul’s Cathedral. Along the way I tried to take advantage of the strong sunlight and deep shadows while capturing a mix of street and architecture photos. In terms of mastering the light, I think I still have a long way to go but I’m comfortable with that. Mastering photography is a journey, probably a life long one and once that reality hits, the pressure to capture a winner every time is lifted. I’m really enjoying this phase of my photographic journey, embracing new challenges and seeing where it takes me.
If you ever feel wanting for some creative inspiration, maybe down in a photographic rut, then I urge you to change things up, take on a challenge or start a new personal project and just see what happens. Exploring the unknown can be quite liberating.
I will leave you with a few of my photos from my photo-walk along the River Thames.

Fujifilm XT2 | XF18-55mm | 18mm | 1/110th second | f/8 | ISO200

Fujifilm XT2 | XF18-55mm | 18mm | 1/150th second | f/9 | ISO200

Fujifilm XT2 | XF18-55mm | 55mm | 1/220th second | f/9 | ISO200

Fujifilm XT2 | XF18-55mm | 18mm | 1/400th second | f/9 | ISO200

Fujifilm XT2 | XF18-55mm | 18mm | 1/350th second | f/7.1 | ISO200

Fujifilm XT2 | XF18-55mm | 18mm | 1/1250th second | f/8 | ISO200

Fujifilm XT2 | XF18-55mm | 55mm | 1/1800th second | f/4 | ISO200

Fujifilm XT2 | XF18-55mm | 55mm | 1/340th second | f/4 | ISO200

Fujifilm XT2 | XF10-24mm | 10mm | 1/125th second | f/8 | ISO200

Fujifilm XT2 | XF10-24mm | 14mm | 1/250th second | f/8 | ISO200

Fujifilm XT2 | XF10-24mm | 14mm | 1/420th second | f/8 | ISO200

My Top 5 Long Exposure Locations in London
I’m going to show you what I think are 5 of London’s top spots along the River Thames to take long-exposure cityscape photos of some of the city’s most iconic views.
I’m a big fan of long exposure photography. I love the way long exposure photography blends all of the elements, such as light and colour together in a single image. Colours tend to be softer, distractions removed and overall, I have a cleaner, less cluttered composition. This is especially true when applying the technique to my London cityscape photography. If capturing wide vistas of London’s skyline from the River Thames, it can end up a rather cluttered image. The fast-flowing river, the many, many people that walk along the banks and some of the less attractive or ill-fitting architecture can all add a sense of chaos and noise to the final image. By rendering the river silky smooth, removing all of the people and softening the sky, I find long exposure photography adds balance and focus to the final image.
“What makes photography a strange invention is that its primary raw materials are light and time.”
I previously wrote a more detailed article about why I take Long Exposures and what it brings to both the colour and composition of my images. You can find the post here: SLOWING TIME: WHY THE LONG EXPOSURE?
In this post, I’m going to show you 5 of my top spots along the River Thames that are ideal locations to capture long exposure photos of London’s iconic views. I will attempt to cover some of the more practical information such as how to get there and when to visit. It’s probably worth noting at this point that the list below is far from exhaustive. There are many other great locations along the river or elsewhere in the city to take long exposure photos but as mentioned, these are some of my top locations which I want to share with you.
In this post, I won’t talk too much about the technique or equipment I use but if you are interested in this, take a look at a previous article I wrote which covers my 10 step approach to taking long exposure photos: HOW I TAKE LONG EXPOSURE PICTURES.
One last thing to add before we jump in to the 5 locations is that all 5 are tripod friendly. Tripods are a key component when taking long exposure photos as the camera has to be absolutely still and like most cities, there are many privately owned areas with strict rules around tripod use but for all of these locations, you should have no problem with tripod police spoiling your fun.
The London Eye from The Golden Jubilee Bridge

Fujifilm XT2 | XF18-55mm | 24mm | 121 seconds | f/10 | ISO200
Travelling West to East along the River Thames, we will start at the London Eye. The London Eye itself is probably the best landmark in London to capture with Long Exposure photography as the spinning wheel adds a great sense of motion and interest in the sky, especially when the sky is clear as in the photo here. There are a handful of great locations to capture the London eye such as from Westminster Bridge in the distance, directly from the front or behind the wheel but for long exposure compositions, this is my favourite.
Top tip: Opening times for the London Eye vary throughout the year so if you want to get the movement like that shown in the photo below you should ensure you plan the shoot while the London Eye is open.
Getting Here:
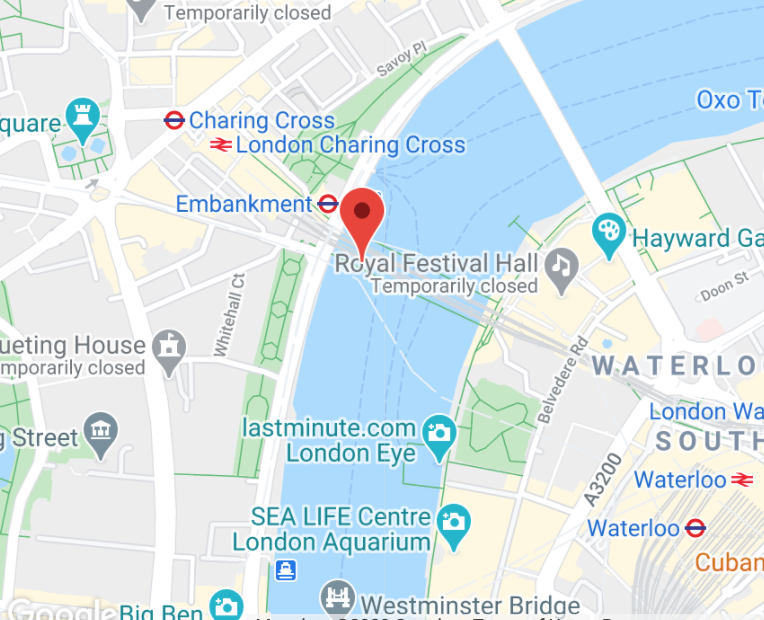
The nearest tube station is Embankment which is along the Circle and District lines. When existing the station, head towards the riverside and under Hungerford Bridge and up the stairs onto the southern Golden Jubilee Bridge.
Click here to open location on Google Maps
When To Visit:
The London Eye itself faces west so straight at the setting sun. This means during the golden hour and sunset, you can get some great light. You can still get some great shots of the London Eye at sunrise but I find it best to avoid the months Between September and March as the sun rises behind the London Eye which can cause issues getting a correctly exposed image. Oh, and you have to get up super early!
Westminster from Waterloo Bridge

Fujifilm X-T10 | XF18-55mm | 23mm | 58 seconds | f/11 | ISO200
Over the years, I have walked across Waterloo Bridge many times and love this view towards the west, but before I started taking long exposure photos, I never really captured a photo of it I particularly like. How does it go again? “A good view does not necessarily make a good photo?”
Usually, there’s a lot going on in this composition. With the rough waters, London Eye, people walking across the Golden Jubilee Bridge and along the Southbank, it’s hard to pick out the main focus points in the composition. By capturing the scene as a long exposure, some of these elements are removed from the composition leaving the rest of the image some room to breathe.
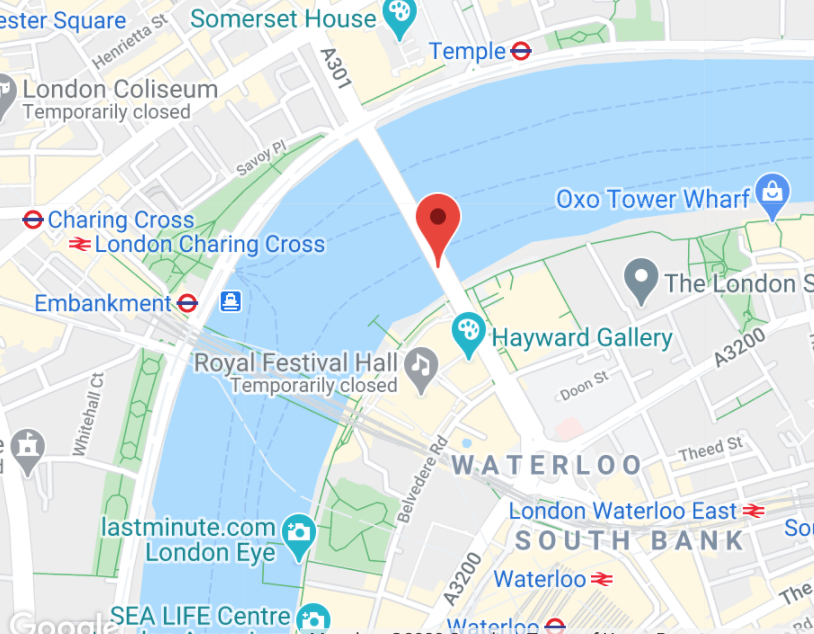
Getting Here:
There is a choice of tube stations for this location. Waterloo which is on the Jubilee Line or you have both Embankment or Temple to choose from on the Circle and District Lines.
Click here to open location on Google Maps
When To Visit:
To capture a good sunrise, the winter months are a great time to do so as the sun will light the scene from the left but I find the summer months the best time for capturing the evening light as the sun sets to the right of the scene, later in the evening meaning less river traffic to avoid in your photo and importantly, less people crossing the bridge as the path is a bit tight for space, leaving little room to set up the tripod safely.
If you’re interested as to how I edited the photo above, I wrote a post about the steps I took which you can find here: EDITING SUNSET AT THE SOUTH BANK
St Paul’s Cathedral and the Millennium Bridge

Fujifilm X-T2 | XF18-55mm | 25mm | 161 seconds | f/11 | ISO200
Continuing east along the river, the composition here is an incredibly popular one for good reason. The Millennium Bridge creates fantastic lead-in lines towards the world-famous St Paul’s Cathedral. The Millennium Bridge can be very busy at times and taking this photo with a standard exposure will capture all of those people compromising the strong, simple lines as you can see here but by using the long exposure technique, all of those people are rendered invisible in the final image simplifying the overall image.
Here you can see exactly the same photo taken with a 1/40s exposure showing people crossing the Millennium Bridge.

Getting Here:
This location is really easy to find. When I took this photo, I was situated right outside the front doors of the Tate Modern Museum on the south bank of the River Thames. Getting here is also super easy as there are many local stations such as London Bridge for National Rail, Jubilee and Northern Lines which are all located south of the river or on the north side you have Mansion House for the Circle or District Lines. You also have St Paul’s on the Circle Line. Head towards Tate Modern and you will find the spot right by the river.
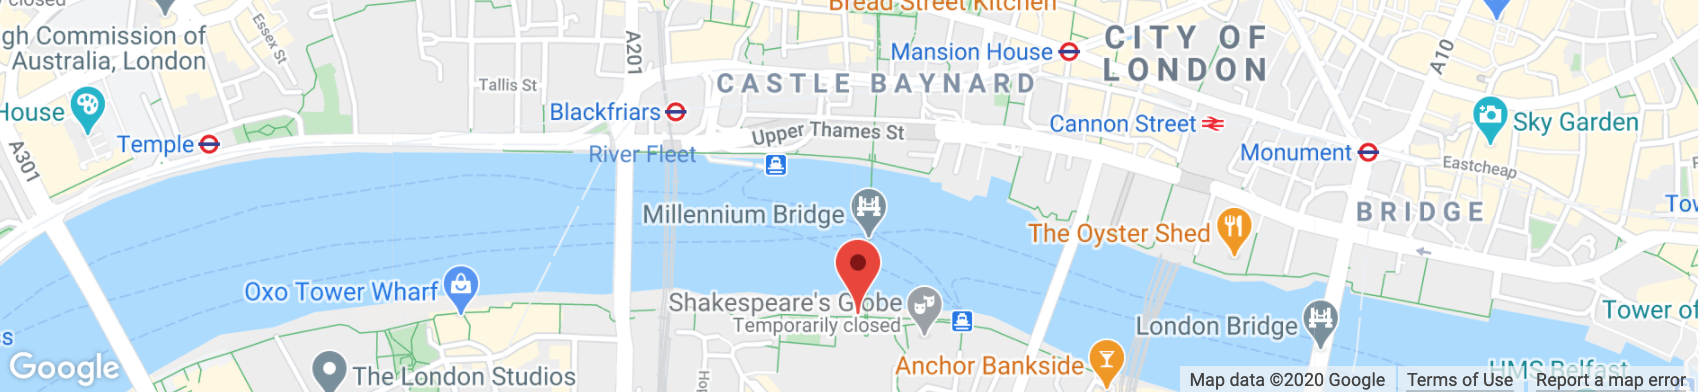
Click here to open location on Google Maps
When To Visit:
Catching a good sunset or sunrise requires a bit of a late night or early morning as the summer months are best. During May to July, the sun rises in the north-east and sets in the north west. Facing north to take the photo, the sun is close by when the best light hits the cathedral. If you want to visit the area and have it all to yourself, then a summer sunrise, although incredibly early is the best option.
City Hall and the Shard from Tower Bridge

Fujifilm X-T2 | XF18-55mm | 18mm | 150 seconds | f/8 | ISO200
Looking west from Tower Bridge provides some great views of The Shard along with the striking architecture of More London and City Hall. Although they belong to different estates, the modern architecture of More London and The Shard complement each other nicely.
This view is another example of how using long exposure removes some of the distractions in an ordinarily busy scene to add calm and focus on the main subject. With the smooth water and softer clouds, the hard-chiselled lines such as those belonging to the Shard are enhanced leaving no doubt as to the main focal point in the composition.

Getting Here:
By far the easiest way to get to Tower Bridge is to take the short walk from either London Bridge (Jubilee Line, Northern Line or National Rail) or Tower Hill (Circle and District Lines). During the day and late into the evening, Tower bridge can be incredibly busy with tourists and commuters so, although tripods are allowed, there is a high risk of it being knocked or bumped. My advice is to keep the tripod retracted and take advantage of the deep walls around the towers to rest the tripod away from the foot traffic. Just be careful the camera is not knocked into the river!
Click here to open location on Google Maps
When To Visit:
As with Waterloo Bridge, if you want to capture a cracking sunset with a little less people around, I think the summer months are best. The sun sets just off to the right lights up the architecture beautifully and the later sunset means a little less foot traffic. As for sunrise, the winter months provide the best chance of great light in the clouds above the buildings as in December and January, the sun rises just off to the right of the scene.
Tower Bridge from the Girl and the Dolphin Fountain

Fujifilm X-T2 | XF10-24mm | 16mm | 150 seconds | f/11 | ISO200
The last stop on this trip down the Thames is Tower Bridge. Tower Bridge is arguably one of the most instantly recognisable structures in the world. The twin towers are a fantastic subject for a long exposure photo and I think this location, with the fountain adding foreground interest, provides one of the best compositions of this iconic bridge.
Getting Here:
As with the location above, the easiest way to get to Tower Bridge is to arrive from either London Bridge (Jubilee Line, Northern Line or National Rail) or the now closer Tower Hill Station (Circle and District Lines). Once at Tower Bridge, the fountain is on the north side of the river right by to the stairs that lead to the bridge’s road level. You can’t miss it.

When To Visit:
You may have gathered from what you have read so far, I find the best light for a long exposure at sunrise or sunset and I find this location great for a sunset photo during the summer months. I’m not keen of having the sun set directly in the scene when taking long exposure photos as it creates too much contrast and can render the subject a silhouette. Having the light come in from the side or front of the subject creates a more balanced exposure and when an epic sunset takes place just outside the frame the best of the light is captured without fighting the dynamic range.
You may require a little patience when capturing this shot as this is the only location listed where people can literally walk in front of your camera. This is a popular spot for tourists capturing a look at Tower Bridge, usually standing for long enough to be rendered visible in your image, regardless of how long the exposure time is. If you want to avoid waiting for a suitable gap or even happy to risk not getting a clean shot at all, then a winter sunrise, all being well with the weather can provide a great shot with a lot less people around.
To capture a great long exposure sunset/sunrise photo of London, you are at the mercy of the weather to get that great light but one other important element that needs to be considered is the clouds. With a long exposure photo, the density and direction the clouds are moving can make or break the final photo. In terms of composition, if the clouds are moving directly away or towards the camera, they can create fantastic lead in lines. Even if the light doesn’t turn out great, if the clouds play their part, you can still walk away with a great long exposure image.
So, there you have it, 5 of my favourite spots to take long exposure photos along the River Thames in London. As I mentioned at the beginning of the post, there are many more spots around the city that are also great to capture but I personally feel that by incorporating the river adds great balance against the movement captured in the sky.
Feel free to leave a comment with your own suggestions for long exposure locations in London and further afield.
Until next time.

On Location Photographing Covent Garden
If you want to capture what are normally very busy tourist hotspots in London without all of the crowds of people, an early morning shoot is the best option and in this post I did just that and ventured out around Covent Garden with my wide-angle lens to capture this incredibly popular location.
I have often said that wandering any city early in the morning is hands-down the absolute best time to do so and London is no different. On this particular morning, I started at Trafalgar Square, on to Covent Garden then via Seven Dials, I finished my shoot in the trendy and colourful Neal’s Yard.
I set out with just my Fujifilm XT2 and XF10-24mm wide angle lens. Heading out with a single camera and lens combo is something I like to do often. Even if I have other lenses with me, I tend to stick with just one. Not because I’m lazy (which I can’t fully deny) but because after just a short time working with different compositions through the camera’s viewfinder, I find I start “seeing” the scene in that particular focal length allowing me to pick out subjects and compositions easier.
Trafalgar Square
I started the walk around a rather cold and cloudy Trafalgar Square. I wanted to capture some architecture but I then spotted some people walking in front of the National Portrait Gallery looking tiny compared to the museum building adding a fantastic sense of scale to the composition, I stood dead central on the stairs and waited for people to walk past. I reeled off about 5 different images and the shot below is probably my favourite.
It’s probably worth noting that adding people into my photographs is quite new to me and where previously, my approach would often involve a camera atop a tripod and using filters to remove people from my images, undertaking my London Chrome project has encouraged me to change and adapt and use new techniques such as this, which has almost certainly improved my photography.
For the second image below, I simply turned 180°, looking out across Trafalgar Square with Nelson’s Column perfectly central, splitting the image in two. As you can see, there is a hint of blue sky which gave me some renewed hope that I may get some good light a bit later.

Fujifilm XT2 | XF10-24mm | 10mm | 1/105th Sec | f/6.4 | ISO200

Fujifilm XT2 | XF10-24mm | 10mm | 1/140th Sec | f/6.4 | ISO200
Covent Garden
After finishing up at Trafalgar Square, I headed over to Covent Garden. If you have ever visited Covent Garden you will know how busy it gets there during the day. Being one of the most popular tourist attractions in London, capturing the area without the usual swarms of people can prove difficult but if you get there early enough and you have a much higher chance of doing so. The photos below were all taken before 8am on a Monday morning.
As I arrived at Covent Garden, the light started to improve so I wandered around the Market building seeking out different compositions.

Fujifilm XT2 | XF10-24mm | 10mm | 1/125th Sec | f/8 | ISO800

Fujifilm XT2 | XF10-24mm | 10mm | 1/125th Sec | f/8 | ISO400
As I wander around, photographing London, I often look back at the photos and wonder about their history such as how they were built or why they even exist and the Covent Garden Market building was no different. After a quick google search, I came across this article which talks about the history of the market and why this iconic London landmark was built.

Fujifilm XT2 | XF10-24mm | 16mm | 1/75th Sec | f/8 | ISO1600
I looked for different compositions such as the plants on a wooden cart below creating some foreground interest or as above with the symmetrical composition created by the walkway through the Market Building.

Fujifilm XT2 | XF10-24mm | 10mm | 1/125th Sec | f/8 | ISO640

Fujifilm XT2 | XF10-24mm | 24mm | 1/90th Sec | f/8 | ISO1600

Fujifilm XT2 | XF10-24mm | 10mm | 1/105th Sec | f/8 | ISO1600

Fujifilm XT2 | XF10-24mm | 24mm | 1/125th Sec | f/8 | ISO1250
Seven Dials and Neal’s Yard
As I wandered away from Covent Garden, the sky had cleared and the morning sun began to light up the surrounding buildings I found myself in the area of London called “Seven Dials”. This area, designed and built in the 1600’s is a road junction where 7 streets converge to a point. Interestingly, there is a column in the centre with only 6 sundials as the column was built before the seventh road was added to the plans at a later stage of construction.
I grabbed a quick photo of the Seven Dials junction before heading into Neal’s Yard.
Located between two of the roads that converge at Seven Dials, Neal’s Yard is accessed through a small alleyway between Short’s Gardens and Monmouth Street and is a colourful street with trendy wine bars and coffee shops.
Armed with the wide-angle lens and with the light now illuminating some of the architecture providing me some more contrast and colour, I snapped a few images of this vibrant little street.

Fujifilm XT2 | XF10-24mm | 22mm | 1/125th Sec | f/8 | ISO320

Fujifilm XT2 | XF10-24mm | 10mm | 1/125th Sec | f/8 | ISO500

Fujifilm XT2 | XF10-24mm | 10mm | 1/125th Sec | f/8 | ISO400
By the time I was finished, London was awake and I no longer felt I had this vast space to myself. With summer just around the corner, I am confident there will be many more sunny mornings to wander the streets capturing some of the colour that adorns this incredible city.
Until next time.

So Long Fujifilm X-T10 and Thanks For All The Photos
It seems a bit strange that I am writing a blog post about a camera, even more so about a camera I no longer plan on using but this little camera came along just at the right time and helped re-ignite my photography spark. Having now upgraded to a more recent model, I have decided to share a selection of photos I took with this cracking little Fujifilm camera.
In April 2016, I was a Nikon shooter. I had a Nikon D90 DSLR since 2011 and a D50 before that and for a long time, very happy. Yes, the camera was heavy and so were the lenses but at the time, I didn’t know any different. When I first got the D90, mirrorless cameras were in their infancy and lacked somewhat in image quality and performance. Back then, if you wanted a camera that was more capable than a point and shoot, then most chose a DSLR.
Fast forward to late 2015 and things weren’t going so well. I was in a bit of a photographic rut, feeling uninspired and a bit tired of lugging the long in the tooth D90 around. None of this was helping with my creativity and I was not enjoying my photography very much at all.
I needed a change.
Around the same time, the mirrorless market had been steadily growing. The cameras had come on leaps and bounds. They may not have been quite matching the performance and quality of the top end DSLRs but for the serious photography enthusiast, they were really, rather good.
Feeling frustrated photographically, open to change, I came across Fujifilm and their mirrorless camera line up. I have to admit, I knew almost nothing about Fujifilm cameras as at the time the market was still all about Nikon and Canon DSLRs and Sony Mirrorless but not being one to follow the crowd, the form factor and manual dials of the Fujifilm line-up turned my head and I started to look at these cameras more closely.
Introducing the Fujifilm X-T10
After researching the options, weighing up the pros and cons of each model in early 2016 I eventually settled on the X-T10 and XF18-55mm lens. I had heard nothing but good things about this combination and the X-T10 had all of the quality of the flagship XT1 but with only a few functional compromises and a lack of weather resistance, the smaller and lighter option won the day for me and full of excitement and anticipation, off I went to the store to pick up my new camera.

From my very first trip out with the X-T10, everything changed. I loved everything about this camera. It felt great to be able to adjust the shutter speed by twisting a dial or changing the aperture by twisting a mechanical ring on the lens.
With the mechanical knobs and dials, it felt like I was actually making a photo just like they did back in the film days. On top of that, the image quality was great, the camera bag was light and my creative spark was re-ignited!

Fujifilm X-T10 | XF18-55mm | 26mm | 14 Secs | f/18 | ISO200
The photo above was from my very first trip out with the camera along London’s Southbank in March 2016.
For the last 3 years, my enthusiasm to get out and take photos with this camera has not waned one bit. Being incredibly happy with the Fujifilm X system, in 2017 I decided to invest in the extremely capable XT2 which is a fantastic workhorse delivering fantastic pictures in any weather but throughout this entire time, the X-T10 has remained my favourite camera to take photos with. The camera would remain with me as I wandered the streets capturing London’s architecture or armed with a prime lens, out with the family documenting my children as they grow up.
Now fast forward to 2019, the camera has been released for 4 years which is a long time in the fast-moving camera market and the X-T10 was showing its age compared to the newer cameras being released and I knew the time would soon come for me to think about life after the X-T10. Don’t get me wrong, this camera is as good as the day it was released and a new camera model doesn’t render an older one bad. If money was a limiting factor, I would have no problems continuing to use the X-T10 for the foreseeable future as it still took great images but I was now open to something new.
But what camera could replace the X-T10? I didn’t want to change camera brands as I am heavily invested into Fujifilm and quite happy to remain in the family. The obvious choice was the X-T20 but as soon as I started to be open to investing in a new body, Fujifilm announced the X-T30. After looking at the improvements in image quality, resolution and focus speeds, I made up my mind and it was pre-ordered.
I’ve now had the X-T30 a few weeks and over the moon with my new camera but what about the X-T10? Well, that’s not going anywhere just yet. It’s not worth a great deal to sell and quite frankly I don’t want to part with it anyway. Feeling a tad sentimental about this small camera, I plan on keeping this camera for my daughters to use and with any luck, this camera may ignite a creative spark for a second time!
I had a rummage through my collection to leave you with a selection of photos taken with the X-T10 over the last few years.
So, as the title says, so long X-T10 and thanks for all of the photos.

Fujifilm X-T10 | XF18-55mm | 23mm | 58 Secs | f/11 | ISO200

Fujifilm X-T10 | XF10-24mm | 10mm | 0.9 Secs | f/13 | ISO200
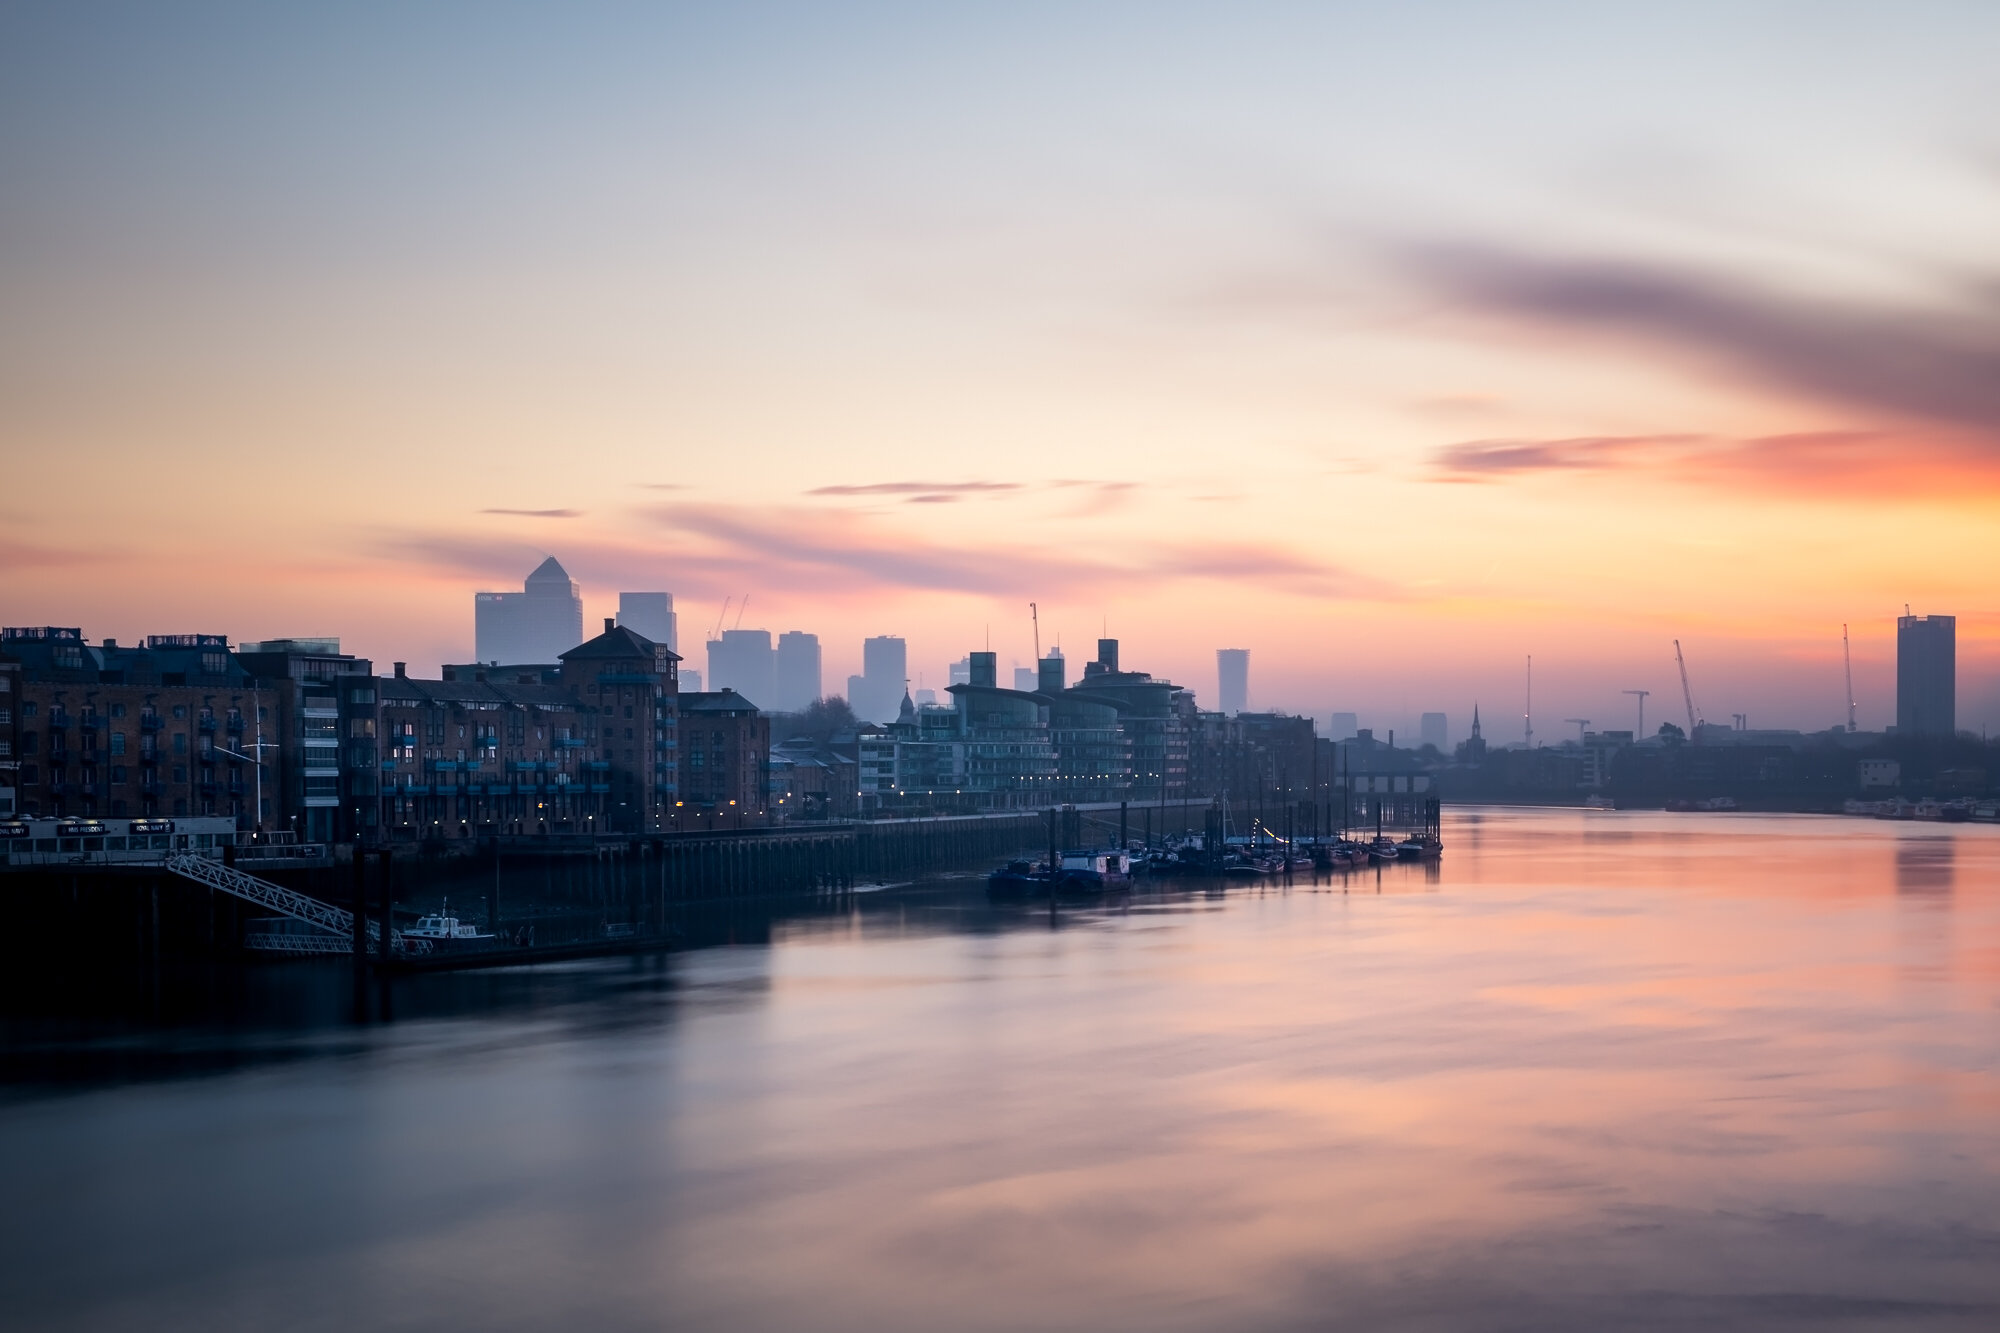
Fujifilm X-T10 | XF18-55mm | 39mm | 58 Secs | f/13 | ISO200

Fujifilm X-T10 | XF18-55mm | 18mm | 140 Secs | f/9 | ISO200

Fujifilm X-T10 | XF18-55mm | 18mm | 90 Secs | f/16 | ISO200

Fujifilm X-T10 | XF18-55mm | 18mm | 4 Secs | f/9 | ISO200

Fujifilm X-T10 | XF18-55mm | 55mm | 1/250th Sec | f/5 | ISO200

Fujifilm X-T10 | XF18-55mm | 21mm | 1/125th Sec | f/7.1 | ISO1250

Fujifilm X-T10 | XF35mm F2 | 35mm | 1/180th Sec | f/5 | ISO200

Fujifilm X-T10 | XF35mm F2 | 35mm | 1/20,000 Secs | f/2 | ISO200

Fujifilm X-T10 | XF35mm F2 | 35mm | 1/50th Secs | f/5.6 | ISO1600

Fujifilm X-T10 | XF35mm F2 | 35mm | 1/125th Sec | f/14 | ISO200

Fujifilm X-T10 | XF18-55mm | 33mm | 1/300th Sec | f/4 | ISO200

Fujifilm X-T10 | XF10-24mm | 15mm | 30 Secs | f/16 | ISO200

Fujifilm X-T10 | XF18-55mm | 18mm | 3.2 Secs | f/10 | ISO200

Fujifilm X-T10 | XF18-55mm | 44mm | 1/350th Sec | f/8 | ISO200

Fujifilm X-T10 | XF18-55mm | 18mm | 1/60th Sec | f/22 | ISO320

Fujifilm X-T10 | XF18-55mm | 18mm | 480 Secs | f/8 | ISO200
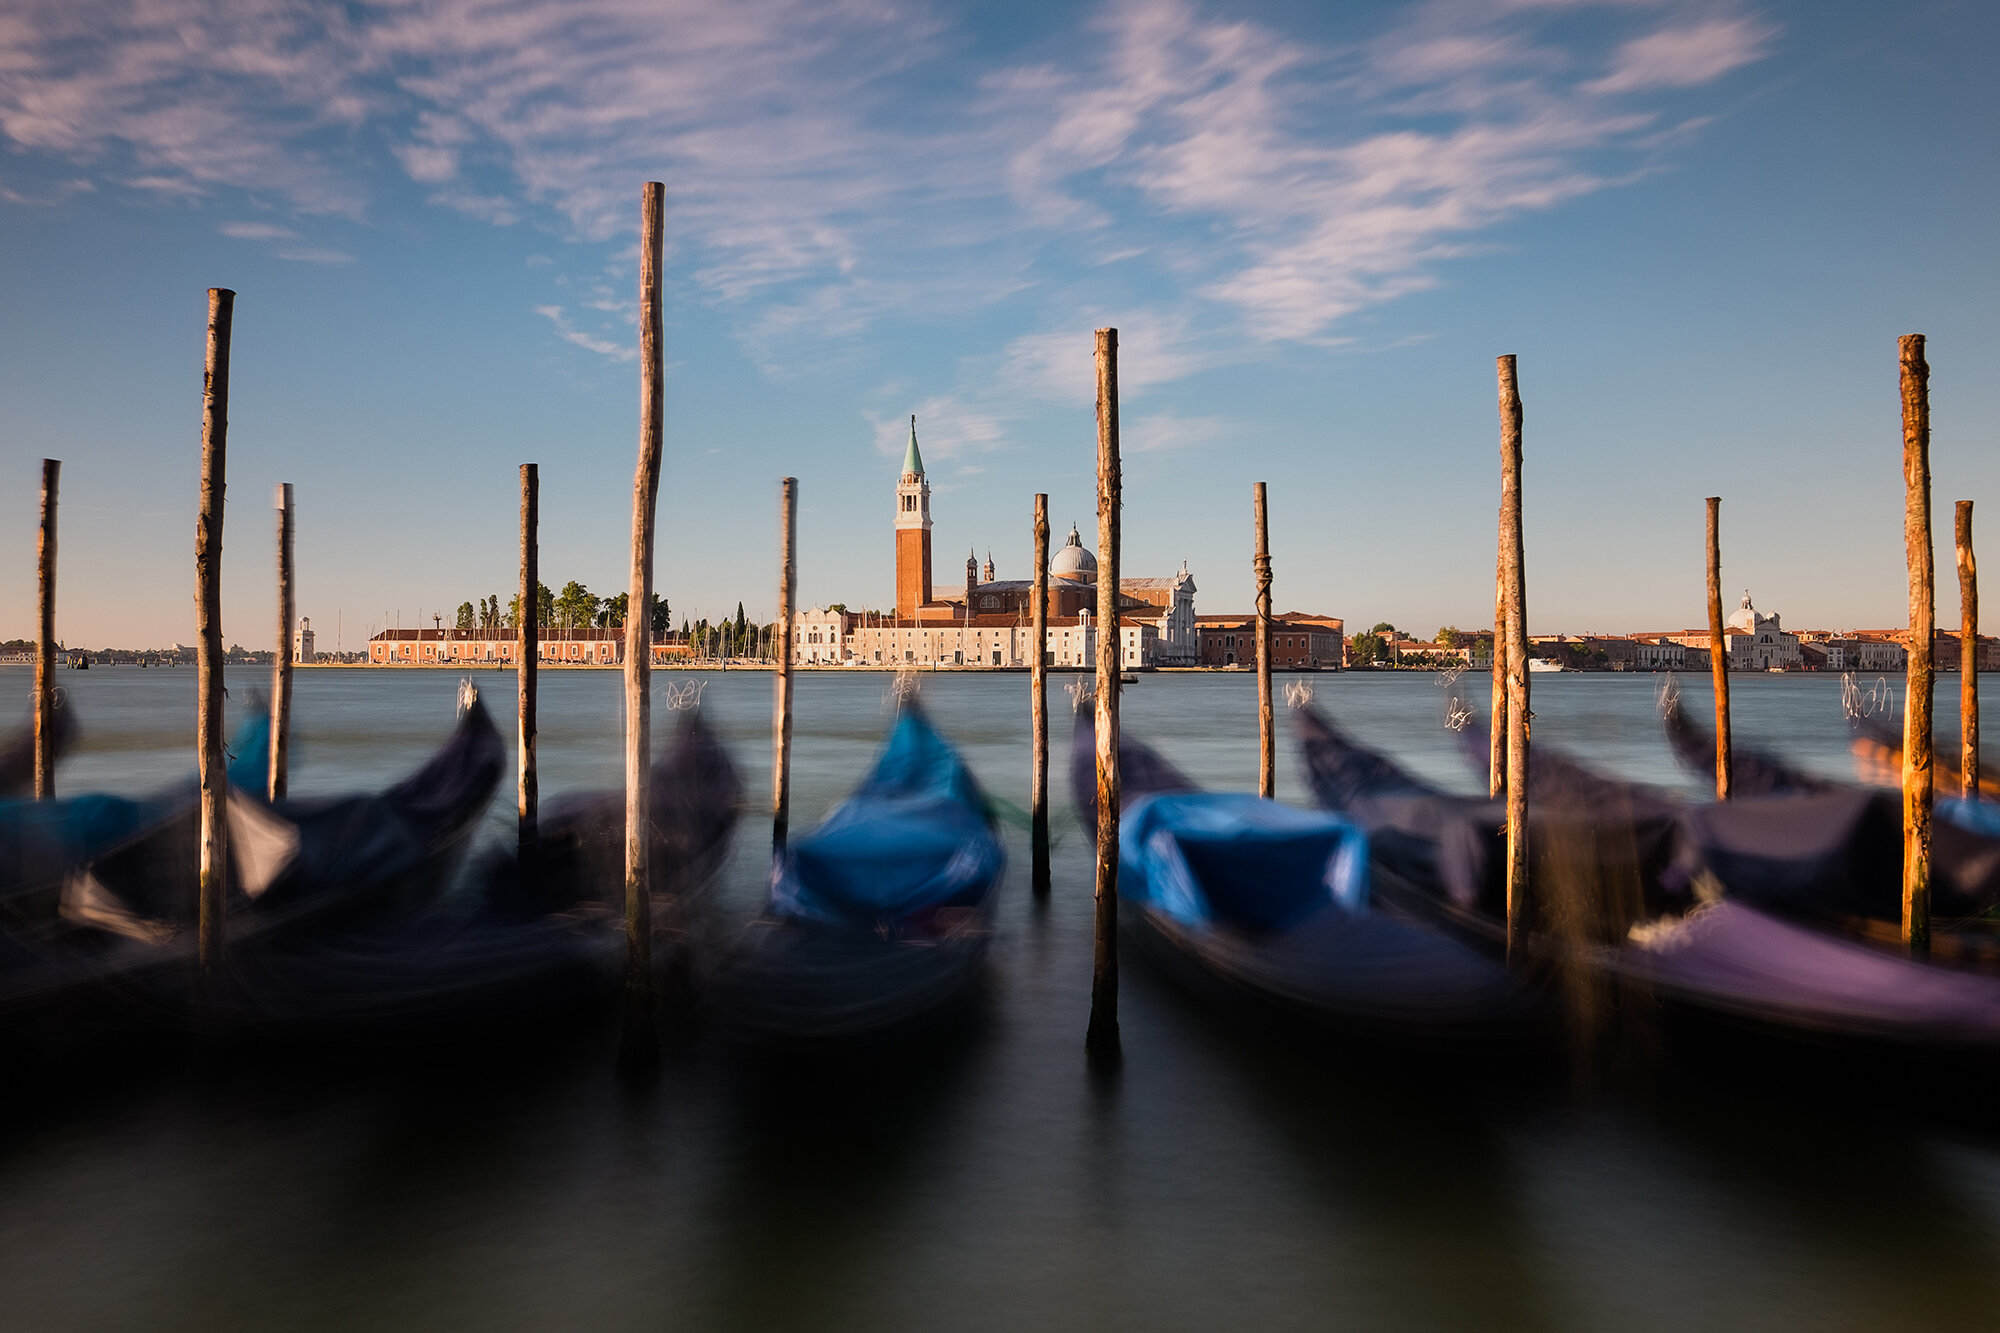
Fujifilm X-T10 | XF10-24mm | 17mm | 14 Secs | f/7.1 | ISO200

Fujifilm X-T10 | XF55-200mm | 61mm | 8 Secs | f/8 | ISO200

Fujifilm X-T10 | XF18-55mm | 34mm | 6 Secs | f/8 | ISO200
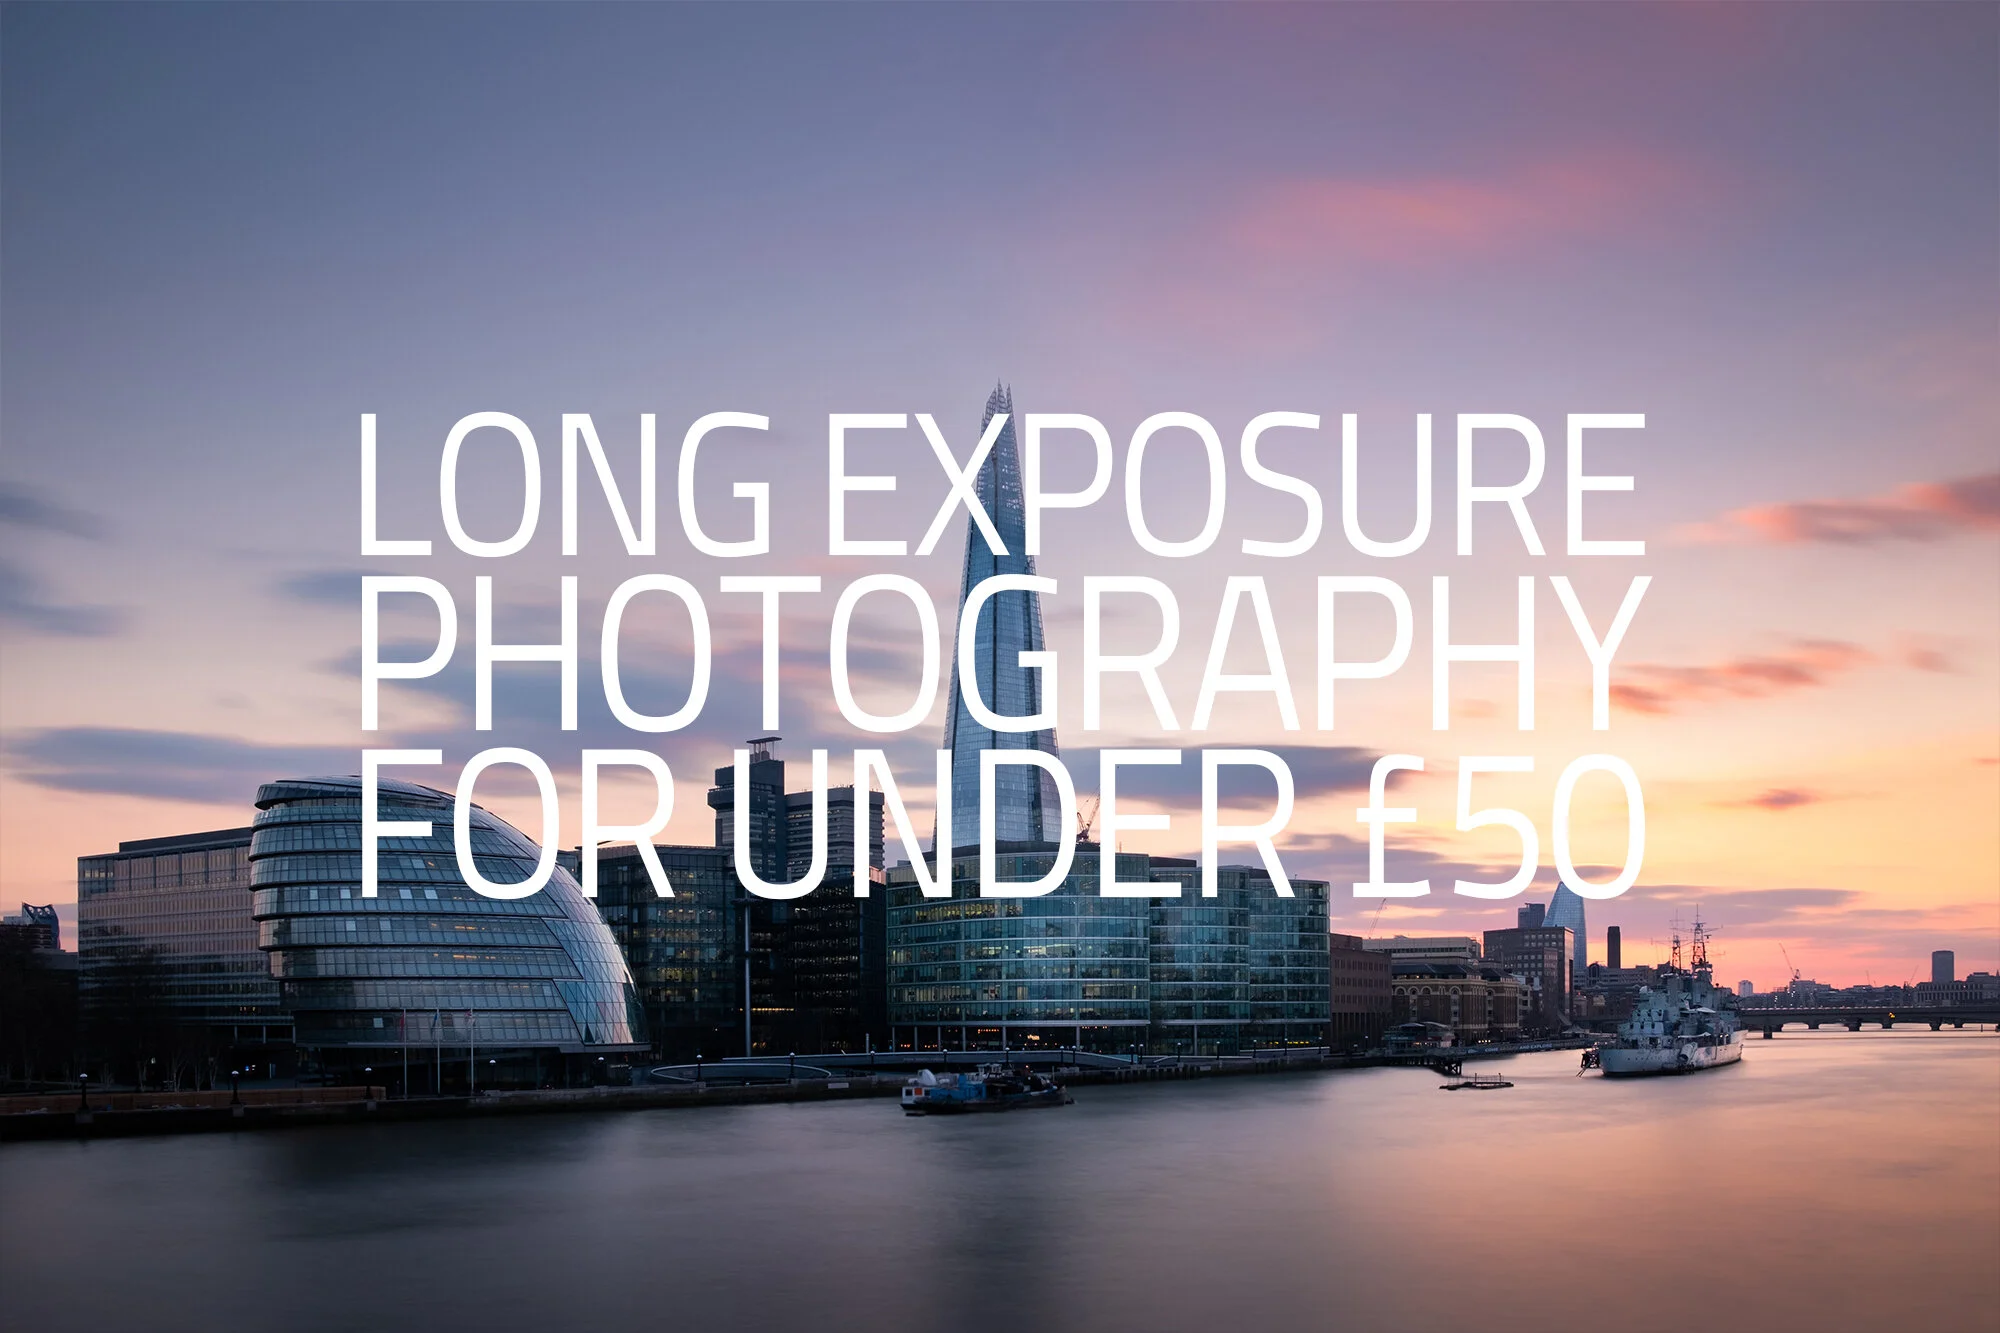
How I took this long exposure photo for under £50
Who says long exposure photography needs to be expensive? If you’re looking to give this fantastic technique a try but not looking to invest too much money (just yet) then take a look at this post to see how I took this photo with under £50 of accessories.
Is long exposure Photography an expensive undertaking? Well it certainly can be. Over the years I have spent hundreds of pounds on filters, tripods and accessories in my pursuit of capturing long exposure photos of London’s cityscape.
Now, I accept that the title of this post is a tad misleading. It’s certainly correct that I captured the image below with under £50 worth of accessories but with one significant pre-requisite. The camera. This, you will need to have already, in particular, a camera that has full manual options.
This article won’t go too deep into how to take long exposure photos. If you want to read a 10 step guide to taking long exposure photos, see the following article on my blog: HOW I TAKE LONG EXPOSURE PHOTOS.
On a recent outing in London, I found myself in East London just before sunset. I was actually out testing my newly acquired Fujifilm X-T30 camera that at the time of writing has just been released and just as I crossed Tower Bridge I decided I would put the camera through its paces and capture a long exposure looking west towards The Shard.
Here is the photo I ended up taking. The long exposure gives the image a silky-smooth look and blends the colours of the sky nicely.

Fujifilm X-T30 | XF18-55mm | 18mm | 25 Secs | f/10 | ISO160
What equipment did I use to take this photo?
Apart from the camera itself, I used only two accessories to capture this image. A small table top tripod to keep the camera perfectly still and a 10-stop screw in neutral density filter to slow down the exposure.
Just a note. The equipment I use here is certainly not top of the range and you may well find even cheaper alternatives from places like China but I have been using both items listed below for some time and for the price, it is, in my opinion well worth the extra few pounds over cheaper unknown brands.
Read more about the kit I have in my bag here: WHAT'S IN MY CAMERA BAG? (2019 EDITION)

HOYA PROND1000 10 STOP ND Filter - £29.99
To slow down the light reaching the cameras sensor, and to essentially trick the camera into thinking the ambient light is lower than it really is, you need a Neutral Density Filter. This Hoya PROND1000 is a 10 stop filter meaning it reduces the light entering the lens by 10 stops. Filter kits from the likes of Lee or Formatt-Hitech can be hundreds of pounds whereas I brought this great little filter with a 58mm thread size for under £30.
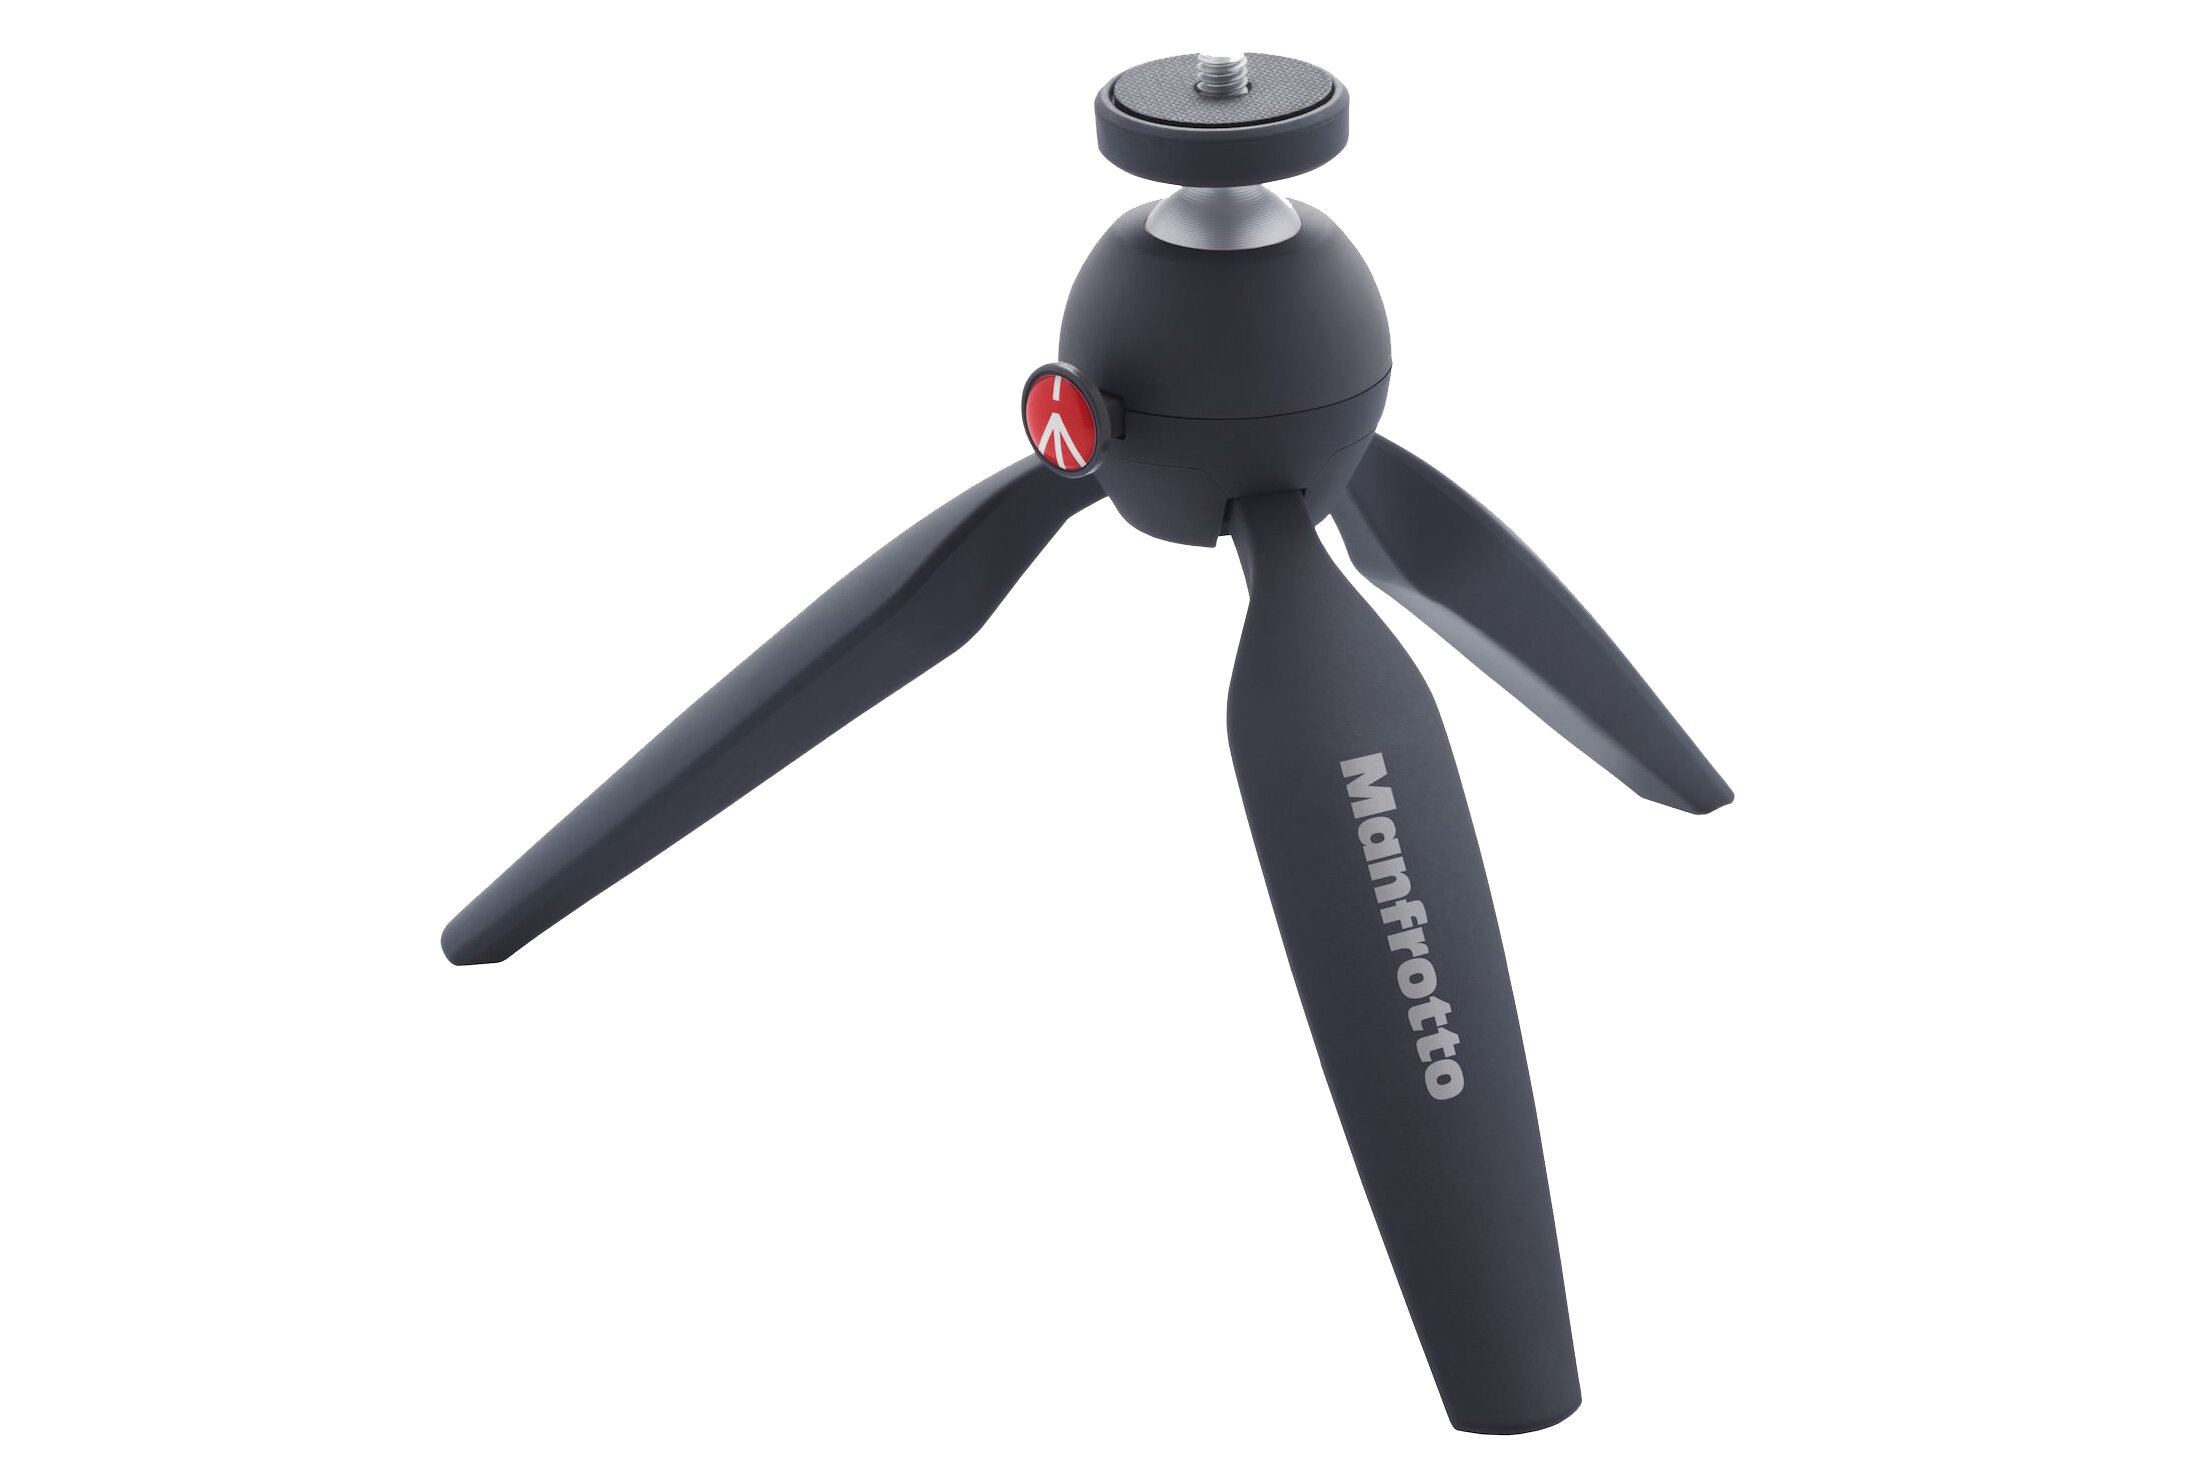
Manfrotto Pixi Tripod - £16.99
Now, I accept that in some ways, this is not the most versatile tripod. It’s size certainly has some limitations but this great little tripod is perfect to slip in any bag and as long as there is a ledge to perch on, this is strong and stable enough to support my Fujifilm X-T30 and attached lens.
Total Cost £46.98
So, looking west from Tower Bridge and with the camera perched nicely on the thick walls that flank each side of the bridge, I composed the image. I manually focused the camera, set my desired aperture and shutter speed and captured what I already think is one of my top photos of 2019.
There you have it. If you’re looking to give this fantastic technique a try but not looking to invest too much money (just yet), now you know how it can be achieved for under £50.

On Location Photographing the Garden at 120 in London
The Garden at 120 is a new rooftop terrace 15 stories up that opened in early 2019 offering new photographic opportunities of London’s skyline. I popped along one evening, just as the sun started to set and captured a few images for myself.
I recently wrote an article about a taking photos up at the Sky garden and how I wanted to get up high in London during 2019 and capture new views of the city so I was thrilled to hear of a new rooftop terrace opening up in the city and I had to pop by to take a look.
You can read the previous post I wrote about the Sky Garden here: PHOTOGRAPHING LONDON'S ROOFTOPS
Located on the 15th floor, just up the road from the Sky Garden is The Garden At 120 (Fenchurch Street). It was only open a couple of weeks at the time these photos were taken and although steadily growing in popularity there is still no need to book yet and you can just turn up at your leisure but his may well change so do check their website here.
I don’t always carry my larger camera (Fujifilm XT2) and lenses with me and on this particular day I had my ultra-light walk about kit which is my Fujifilm X-T10 and 35mm f2 lens so all of the photos below are taken with this set. See more about the gear I use in my post WHAT'S IN MY CAMERA BAG? (2019 EDITION). Although having only the 35mm lens limited me to one focal length, the wider f2 aperture was perfect to shoot through the glass as my focus was on the landscape beyond the glass and anything close to the lens was rendered invisible including any marks or dirt on the glass resulting in a cleaner image.
Enjoying the best light of the day and with the winter sun quickly setting, I wandered around taking in the 360° views and ended up capturing 3 or 4 compositions of the cityscape below. There are many more photos to take but I will have to pop back soon with my wide-angle and zoom lenses to get the best out of these.

Fujifilm X-T10 | XF35mm F2 | 35mm | 1/680th Sec | f/2 | ISO200

Fujifilm X-T10 | XF35mm F2 | 35mm | 1/1,500th Sec | f/2 | ISO200

Fujifilm X-T10 | XF35mm F2 | 35mm | 1/420th Sec | f/2 | ISO200

Fujifilm X-T10 | XF35mm F2 | 35mm | 1/1,000th Sec | f/2 | ISO200

Fujifilm X-T10 | XF35mm F2 | 35mm | 1/350th Sec | f/2 | ISO200

Fujifilm X-T10 | XF35mm F2 | 35mm | 1/450th Sec | f/2 | ISO200

Fujifilm X-T10 | XF35mm F2 | 35mm | 1/600th Sec | f/2 | ISO200

Fujifilm X-T10 | XF35mm F2 | 35mm | 1/120th Sec | f/2 | ISO200

Fujifilm X-T10 | XF35mm F2 | 35mm | 1/60th Sec | f/2 | ISO200

Fujifilm X-T10 | XF35mm F2 | 35mm | 1/100th Sec | f/2 | ISO200
One thing to note before I wrap this post up is that at the time I visited, tripods were allowed up on the roof terrace. Not just the little ones but standard sized tripods. This is quite rare and for a photographer incredible refreshing. I spoke to the security guards there and their policy is that as long as they are kept off the glass, not too high near the top of the glass and not in the way of other people, they were happy to allow tripods…. for now. This policy may change and I suspect it probably will when popularity increases.
Until next time.

What's In My Camera Bag? (2019 Edition)
“What’s the best camera to get?” “That’s a great photo, what camera did you use to take that?” These are just a couple of the questions I regularly receive when people see my photos, so, for those interested, here is my own What’s in my camera bag? 2019 edition.
“What’s the best camera to get?” “That’s a great photo, what camera did you use to take that?” These are just a couple of the questions I regularly receive when people see my photos, so, for those interested, here is my own What’s in my camera bag? 2019 edition.
Before I start, it is worth noting that I firmly believe it’s the photographer that has the vision, chooses the subject and creates the image. There are many photographers that successfully shoot with a single body and lens, a compact camera or even just their camera phone and still produce quite stunning work so don’t get fixated on the photography gear, always fixate on the craft and seeking to create your own artistic style.
“The single most important component of a camera is the twelve inches behind it.” - Ansel Adams.
That being said, if you are shooting with intent and have particular style of image you want to capture, then the right equipment can remove all of the friction in the process and allow the photographer to focus on the creative instead of working overly hard to get the shot and maybe even taking some of the fun out of the process.
Lastly, this is not going to be an overly technical post. It won’t be about the features and specifications, just what gear I am currently using and why.
Cameras

Fujifilm XT2
Those that have followed me for some time know I am a Fujifilm shooter and this XT2 is my primary camera. Unless I am travelling super light (more on that below) I take this amazing camera. It may no longer be the latest model but it is still super-fast, very capable and not going anywhere yet!

Fujifilm X-T10
When I moved over from Nikon to Fujifilm in 2016, this is the camera I brought and I instantly fell in love with it. I loved and still love the tactile dials and buttons, it literally changed my photographic life. Yes, this camera is a little long in the tooth and at time of writing, I am waiting for the X-T30 to be delivered after I pre-ordered it but this little gem is going no-where and is what I carry with me when I am travelling super light or need a second camera in my bag.
Camera Lenses

Fujifilm XF 10-24mm lens F4 OIS
A great and versatile wide-angle lens. Great for architecture and cityscapes, this lens will often come on a shoot with me. Not the fastest lens at f4 but the OIS certainly helps when shooting handheld in low light situations.

Fujifilm XF 18-55mm f2.8-4 R LM OIS
This was the first Fujifilm lens I brought as it came with the X-T10 and is regarded as it’s kit lens. This may be true but normally kit lenses are considered entry level and not able to match the quality of more expensive lenses. The XF18-55mm breaks that mould as it has excellent image quality and a fantastic standard zoom. This lens ca be found on my camera more often than any other.

Fujifilm XF 55-200mm lens f/3.5-4.8 lens OIS
For the weight and size, this is a fantastically compact zoom lens with great image quality to go with it. When I first purchased this lens, I was concerned as I had previously brought similar lenses for similar money when I shot Nikon and image quality was quite poor. This lens is different, it’s IQ is great and the optical image stabilisation is a godsend, especially at those longer focal lengths.

Fujifilm XF 35mm F2 R WR
This 35mm F2 is one of Fujifilm’s “f2” range and it truly is a great lens. It may not be as fast as the f1.4 35mm Fujifilm also make but this compact little lens packs a punch and coupled with my X-T10 means I have a very lightweight system to wander around with and when used with my XT2 I have a full weather resistant system. I plan to add the 16mm f2.8 which Fujifilm has just announced later in the year.
Tripods

MeFoto Roadtrip
I don’t own any big, bulky tripods. This is as heavy as it gets for me which is all I need to capture my long exposure and low light photography. This will be in my bag if I know my photo shoot will include some extensive tripod use. The ball-head is strong enough to hold the weight of my heaviest combination which is the XT2 and 55-200mm lens.

Manfrotto Compact Light
I brought this tripod just before I took my first trip to Venice. I knew that tripods would be difficult in such a crowded place so a lightweight tripod seemed an ideal compromise between weight and frequency of use. Since then I now carry it as a part of my lightweight kit (see the differing kits below).

Manfrotto Pixi
This little table top tripod is excellent. It is super strong and super light and perfect to carry around for those just in case moments you need a little stability while out shooting.
Filters

Formatt-Hitech 85mm Filters
A great set for landscape and long exposure photography. The 85mm filters are perfect for the Fuji mirrorless system and more than big enough for all of the lenses with one small exception. The 10-24mm, which at its widest has a little vignetting at 10mm when the filters are attached. Currently, I have a 10 stop ND filter and a set of three ND graduated filters for those landscape photos where the dynamic range is too high.
Camera Bags
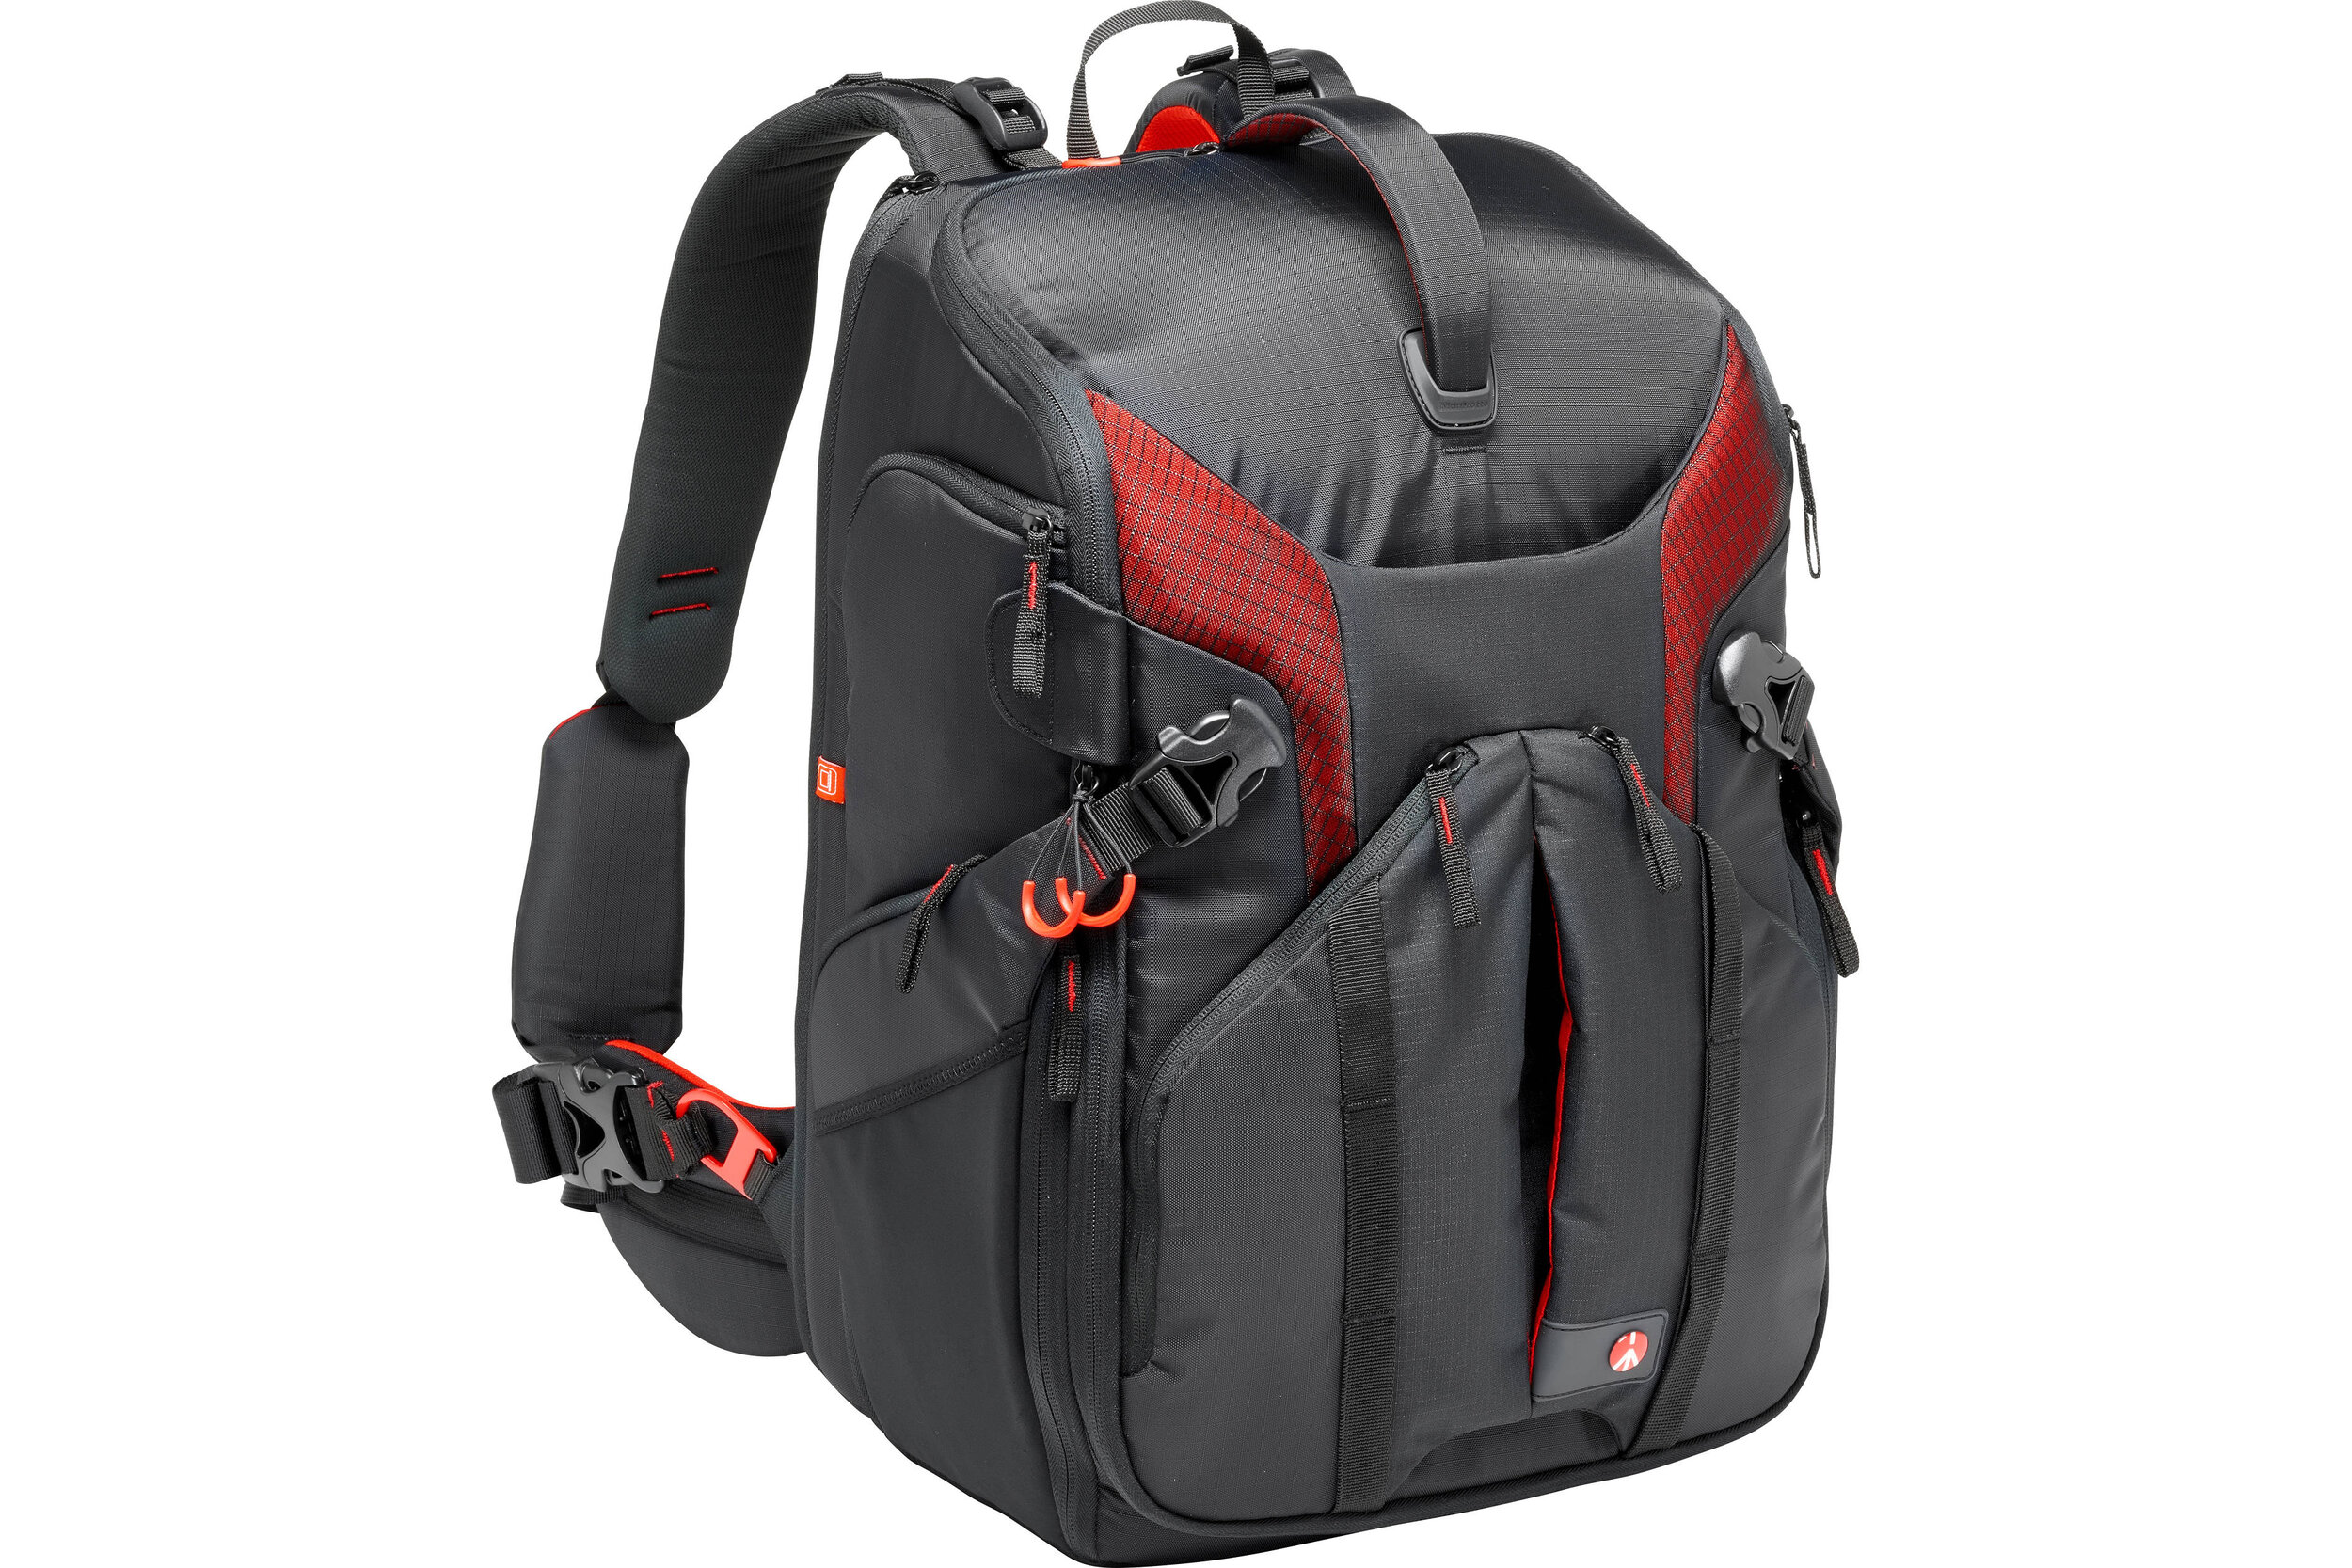
Manfrotto Pro Light Backpack
Having a mirrorless system means the size and weight of my kit is kept a little lower and that means I don’t need a huge bag to carry it all. I chose this bag as it both carries all of the kit I would take on a shoot with its multiple configuration options and it also allows me to carry my biggest tripod centrally to keep the bag balanced and takes the pressure off my back.

Manfrotto Street Backpack
I use this bag when I need to travel light or I need to carry other bits as well as some camera equipment. This easily fits a camera and a couple of lenses leaving enough room in the top compartment for clothes and laptop etc.

Camera Bag Insert
I use one of these camera bag inserts to combine a little camera gear with my standard backpack. I like to always have a camera with me just in case an opportunity presents itself so this insert fits a camera and a lens which is perfect when I need to travel ultra-light.
Accessories

3 Legged Thing L-Bracket
Perfect to quickly switching between landscape and portrait while using the tripod.

3 Legged Thing Toolz
Quite a critical tool as the 3 Legged Thing L-Bracket covers the battery compartment on my XT2 so when the battery needs changing, out comes this tool to quickly remove the L-bracket.

Ultimate Lens Hood
Perfect to help cut out those reflections when shooting through glass. I used the ULH when I was on this sunrise shoot in London.

Remote cable Shutter Release
Critical to ensure no camera shake happens when pressing the shutter or keeping the shutter open during long exposure shoots.

Peak Design Slide
This is a great camera strap, it’s comfortable and the quick release anchors mean it can be removed with minimal fuss.

Sandisk Memory Cards
I use Sandisks memory cards because so far, during all of the years I have been photographing, I have not had one failure. I do retire cards when they start showing any sign of wear which I am sure helps avoid failures.

Fujifilm NP-W126s Battery
On a long shoot, I will go through many batteries. One downside of mirrorless is still the battery life. It is improving but still nowhere near what it was when I shot with a DSLR.

BC-W126s Charger
The charger comes with me on longer photography trips when I know my batteries might not last the entire time.

Puridea S2 10,000mAh
This neat little battery pack can charge my phone 4 times or using my other USB charger, can charge 6 or 7 camera batteries. An incredibly useful gadget.
So, how do I pack all of this gear in my bag?
Although I have a healthy collection of camera gear, I certainly wouldn’t bring it all with me to each shoot. Below are 3 of the most common ways I pack my bag, depending on the type of photography I intend to do.
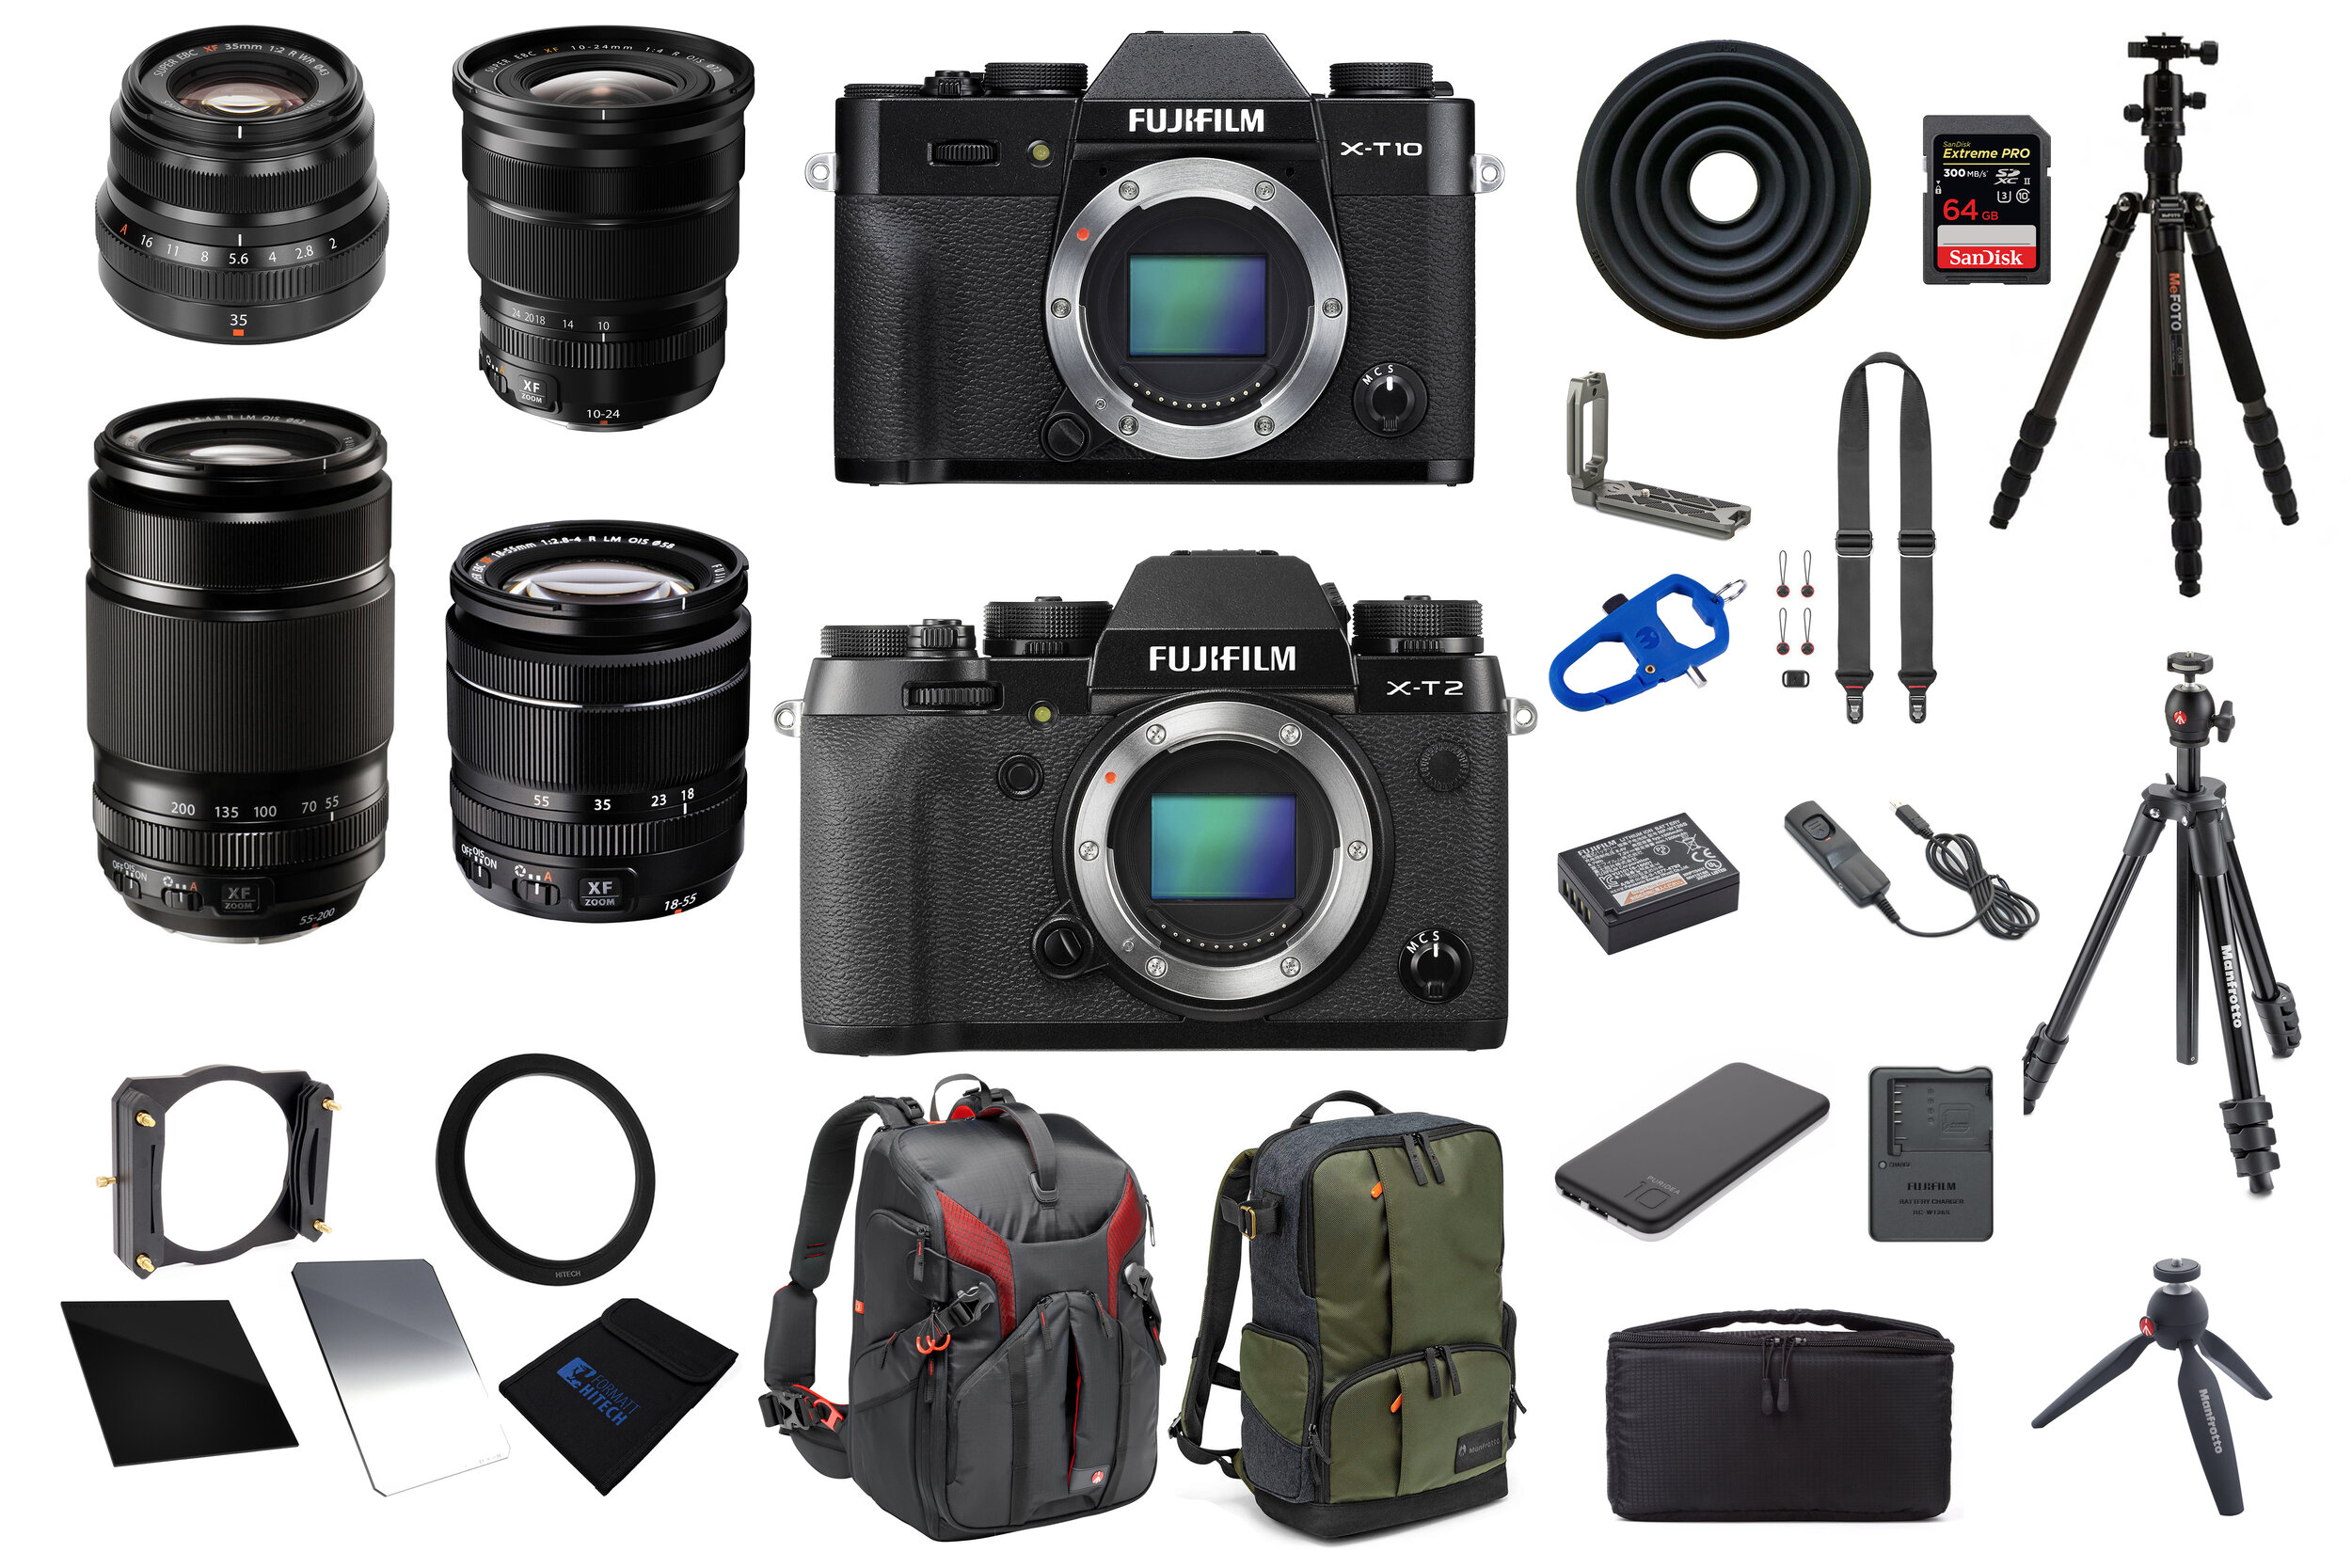
Full Landscape/ Cityscape
When I am on a long shoot, capturing long exposure images, high level cityscapes or grabbing the odd time-lapse, this is the kit I will usually pack. There is not a lot of room left in the bag and it’s my heaviest configuration but at least I am prepared for anything.

Lightweight City/Travel
Much more suitable for a long day walking around the city or while traveling where there will be a mix of intimate and sweeping landscapes to photograph. The shoulder strap for walking about and the very lightweight Manfrotto tripod to take photos in low light. Depending where I go and what I intend to shoot will depend on the combination of lenses I take.

Ultra Light-weight Walkabout/Street
I tend to have this kit with me when my primary focus for the day isn’t photography but I may sneak in an hour or two. I use a standard backpack with the camera insert which will fit the camera and lens ensuring it is protected while I go about my day.

So, there you have it, all of the gear I take with me as of March 2019. I mentioned previously, I will be making some changes very soon. I have already ordered the brand-new Fujifilm X-T30 to replace my X-T10 as my secondary/walk about camera and I am both excited to get this small but incredibly capable camera but sad that my favourite camera will be retired to the side-lines. I am also planning to buy the new Fujifilm 16mm f2.8 which is a member of the same family as my existing 35mm f2. Lastly, I plan to add the DJI OSMO Pocket. It looks like a fantastic little video camera and will compliment my kit nicely.
As my equipment evolves, I will try to refresh this post each year.
Until next time.

On Location Photographing Venice in Black and White
With a second visit to Venice on the horizon, I decided to try something new (well, for me anyhow). I set out to capture a set of black and white photos of this beautiful city. Jump into the post to read about how I got on.
In October 2018, I made my second trip to Venice. When I’d first visited back in July 2017, the weather was good and it was nice and warm the entire time I was there. When the sun is out the city is full colour and vibrancy and being someone who prefers to shoot in colour, I didn’t consider doing anything else.
You can read about my previous visits to Venice in my two-part article here:
Fast forward to October 2018 and the weather forecast was quite different. Throughout the time we would be in the city, the weather would start to deteriorate. We would have some sunny weather to start but by the last day there was heavy rain predicted so I knew right away that I would need to adjust my plans to capture some photos I would be happy with.
Photographing Venice with the Fujifilm XT2
On this trip, I would have with me my Fujifilm XT2. It’s the big brother to my X-T10 and although the X-T10 is a lighter camera, I decided to take the heavier XT2 as not only does it have the great image quality and tactile controls I love using so much, but it also has a weather-sealed body so it was less of a concern if I was out shooting in damp weather.
With the XT2, I took the following lenses, all of which you will see photos taken with below:
XF10-24mm
XF18-55mm
XF35mm f2 (weather-sealed)
XF55-200mm
Although I had all of these lenses with me, I would typically head out with just one on the camera and one in the bag. I like to travel light when on a city break and the Fuji X system helps me do that without compromising on the quality one bit.
Photographing Venice in Black and White
As mentioned above, I usually take colour photos and black and white would tend to be a bit of an afterthought. I might choose to convert to black and white if the photo is not working in colour and it would always be during the editing stage and rarely when capturing the photo.
For this trip to Venice, I decided to change things up a bit. I chose one of Fujifilm’s cracking black and white film simulations so I could visualise the image in black and white as I was taking it, removing the wait to see how it looks in Lightroom. This method worked incredibly well for me and I ended up with lots of images I really liked.
Although I used the film simulations to capture the photos, I did still record the raw files too as I wanted to process the photos myself when I returned from the trip using the JPGs as a reference. This way I retained all the creative control and if I saw an image that looked better in colour, I still had all of that data to play with.
San Marco Basin and San Giorgio Maggiore

Fujifilm XT2 | XF35mm F2 | 35mm | 1/125th Sec | f/2 | ISO640
The first set of photos were taken from various angles looking across San Marco Basin towards the Church of San Giorgio Maggiore. San Marco Basin is located towards the south of the island at the mouth of the Grand Canal and there are so many angles and compositions to shoot here.
I really like the contrast that black and white processing provides as it helps the tourists and their umbrellas stand out as silhouettes against the brighter background as they cross the bridge in the image above. It really helps tell the story of the conditions that day and I love the feeling I get from this photo.
I have found that black and white photography allows you to push the highlights and crush the blacks much more than you would dare in a colour photo and the high contrast images you are left with can have lots of impact and work well for photos such as these.

Fujifilm XT2 | XF18-55mm | 18mm | 1/9,000th Sec | f/4.5 | ISO1250

Fujifilm XT2 | XF55-200mm | 86mm | 1/3,200th Sec | f/4.5 | ISO200

Fujifilm XT2 | XF35mm F2 | 35mm | 1/1,100th Sec | f/2 | ISO200
The Gondolier
During both of my trips to Venice, I couldn’t stop taking photos of the iconic gondolas as they would float peacefully along the twists and turns of the seemingly never-ending canals. These instantly recognisable boats are fun to shoot, especially when they catch the occasional light hitting the water creeping through the gaps between the buildings and with those tall Venetian structures flanking the canals they make perfect compositional frames which look fantastic in a black and white image.

Fujifilm XT2 | XF18-55mm | 46mm | 1/25th Sec | f/4 | ISO200
When converted to black and white, the photo can have a somewhat timeless look to it and in Venice, even more so as without any modern distractions in a lot of the scenes, these photos look like they could have been taken any time in the last 50 years. I guess it’s a bit of a throwback to the past when there was no colour photography and black and white film is all there was to use.

Fujifilm XT2 | XF10-24mm | 10mm | 1/1,400th Sec | f/4.5 | ISO200
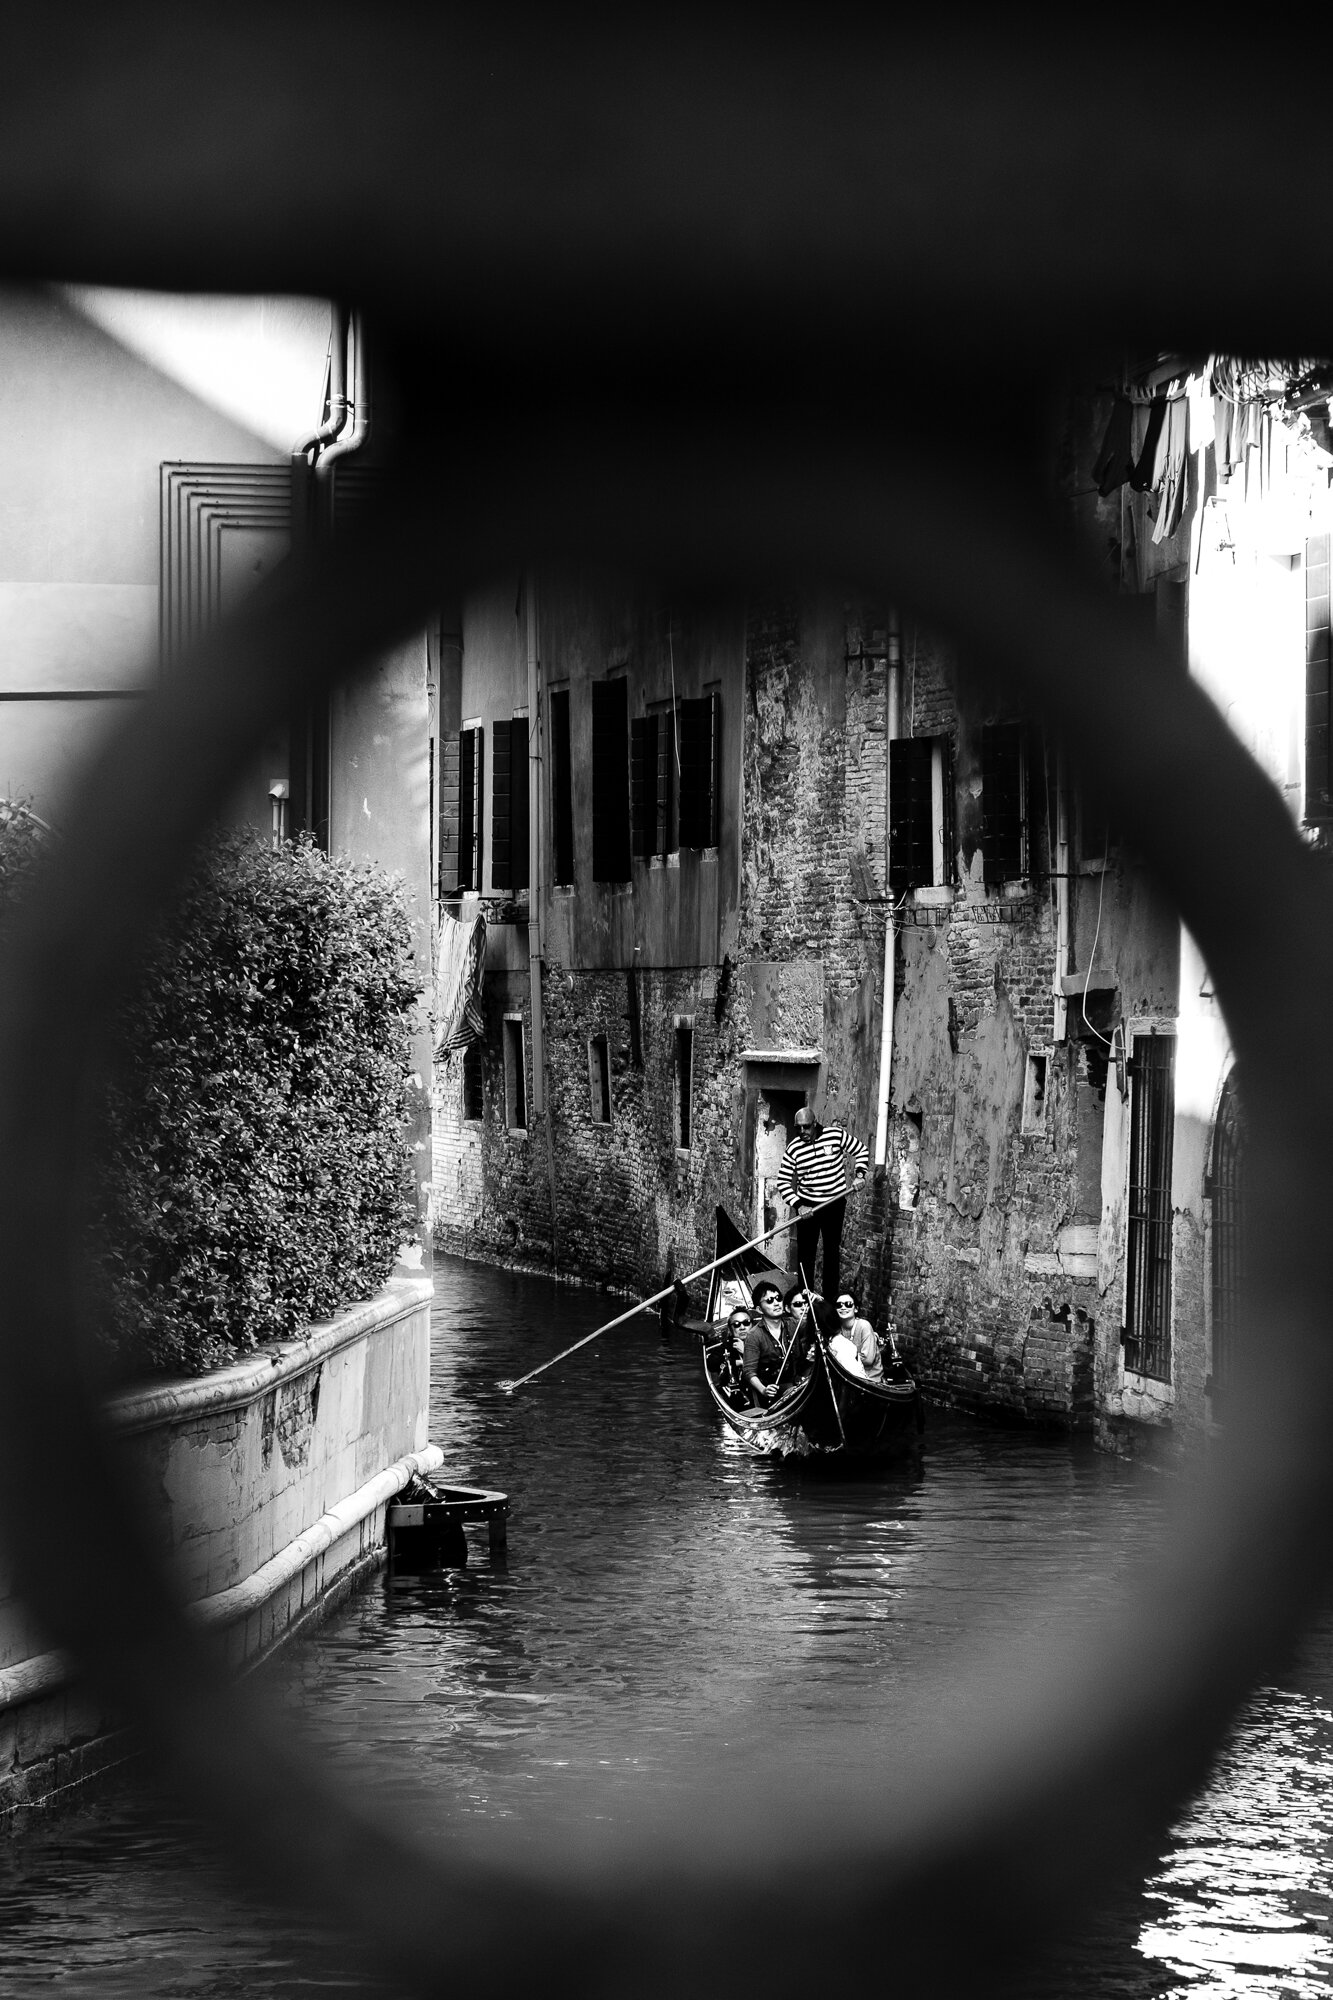
Fujifilm XT2 | XF18-55mm | 55mm | 1/80th Sec | f/4 | ISO400
Venice at Night
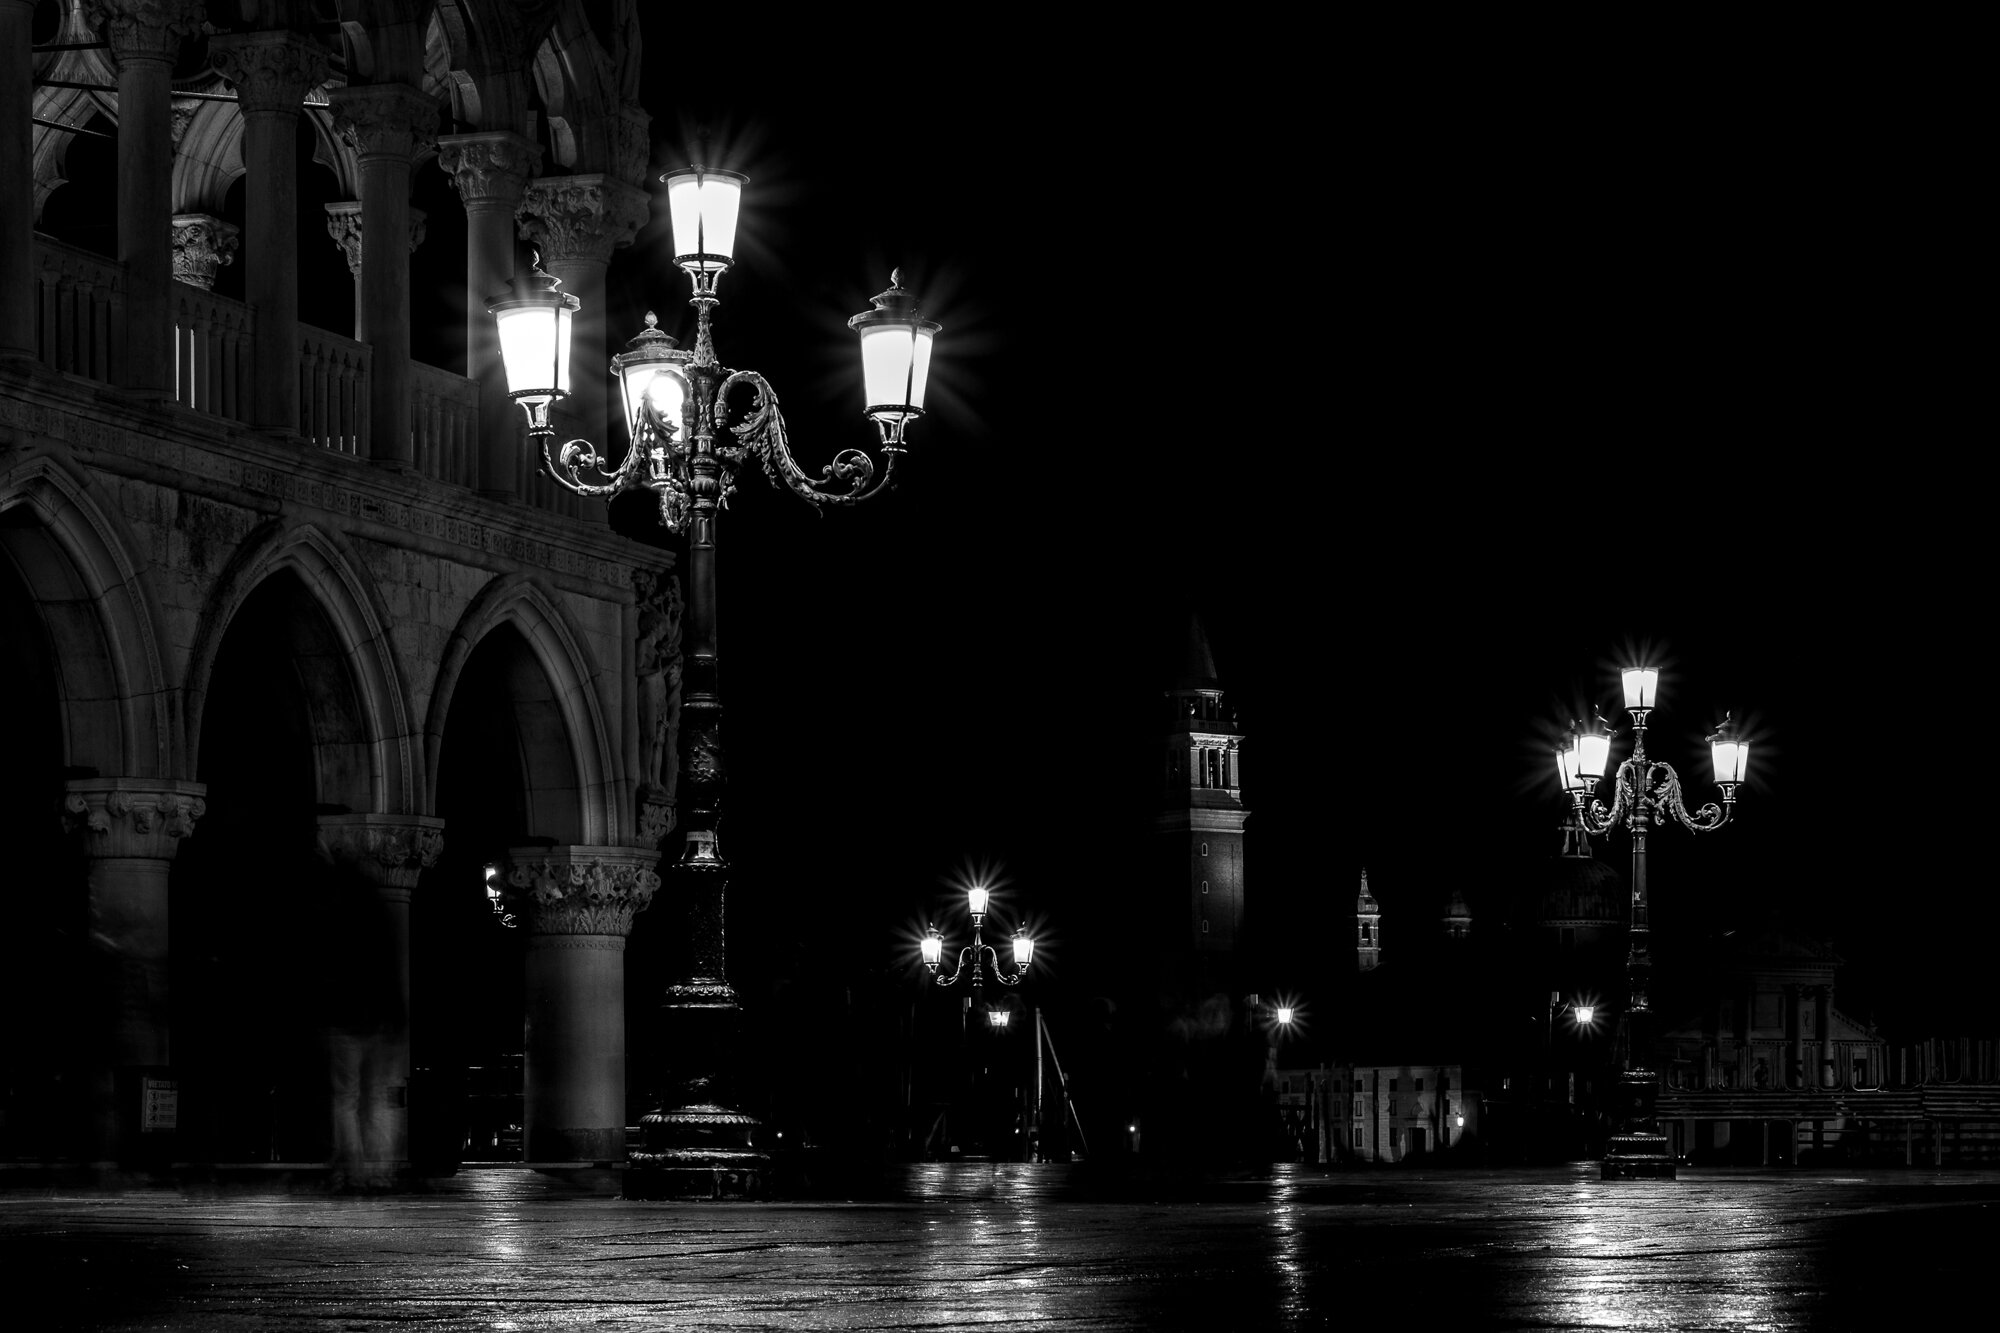
Fujifilm XT2 | XF18-55mm | 50mm | 15 Secs | f/16 | ISO200
Black and white photography is particular good when taking low key images as those shown here. I really like the mood in the image above, in particular the tower of the Church of San Giorgio Maggiore partially illuminated across the water and the light from street lamps illuminating their ornate shapes and features. This style created the mood I was looking for perfectly

Fujifilm XT2 | XF18-55mm | 18mm | 1/125th Sec | f/2.8 | ISO1600

Fujifilm XT2 | XF18-55mm | 18mm | 30 Secs | f/14 | ISO200
Piazza San Marco
You can’t possibly visit Venice and not capture a few photos of the striking architecture at Piazza San Marco. I had to get up extra early to capture the images of the square being empty of people but with all of the people removed, these photos portray well how a black and white image can emphasise the lines, shapes and patterns such as the paving slabs on the ground or the buildings that flank the square shown in the images below.

Fujifilm XT2 | XF10-24mm | 17mm | 1/6th Sec | f/8 | ISO200
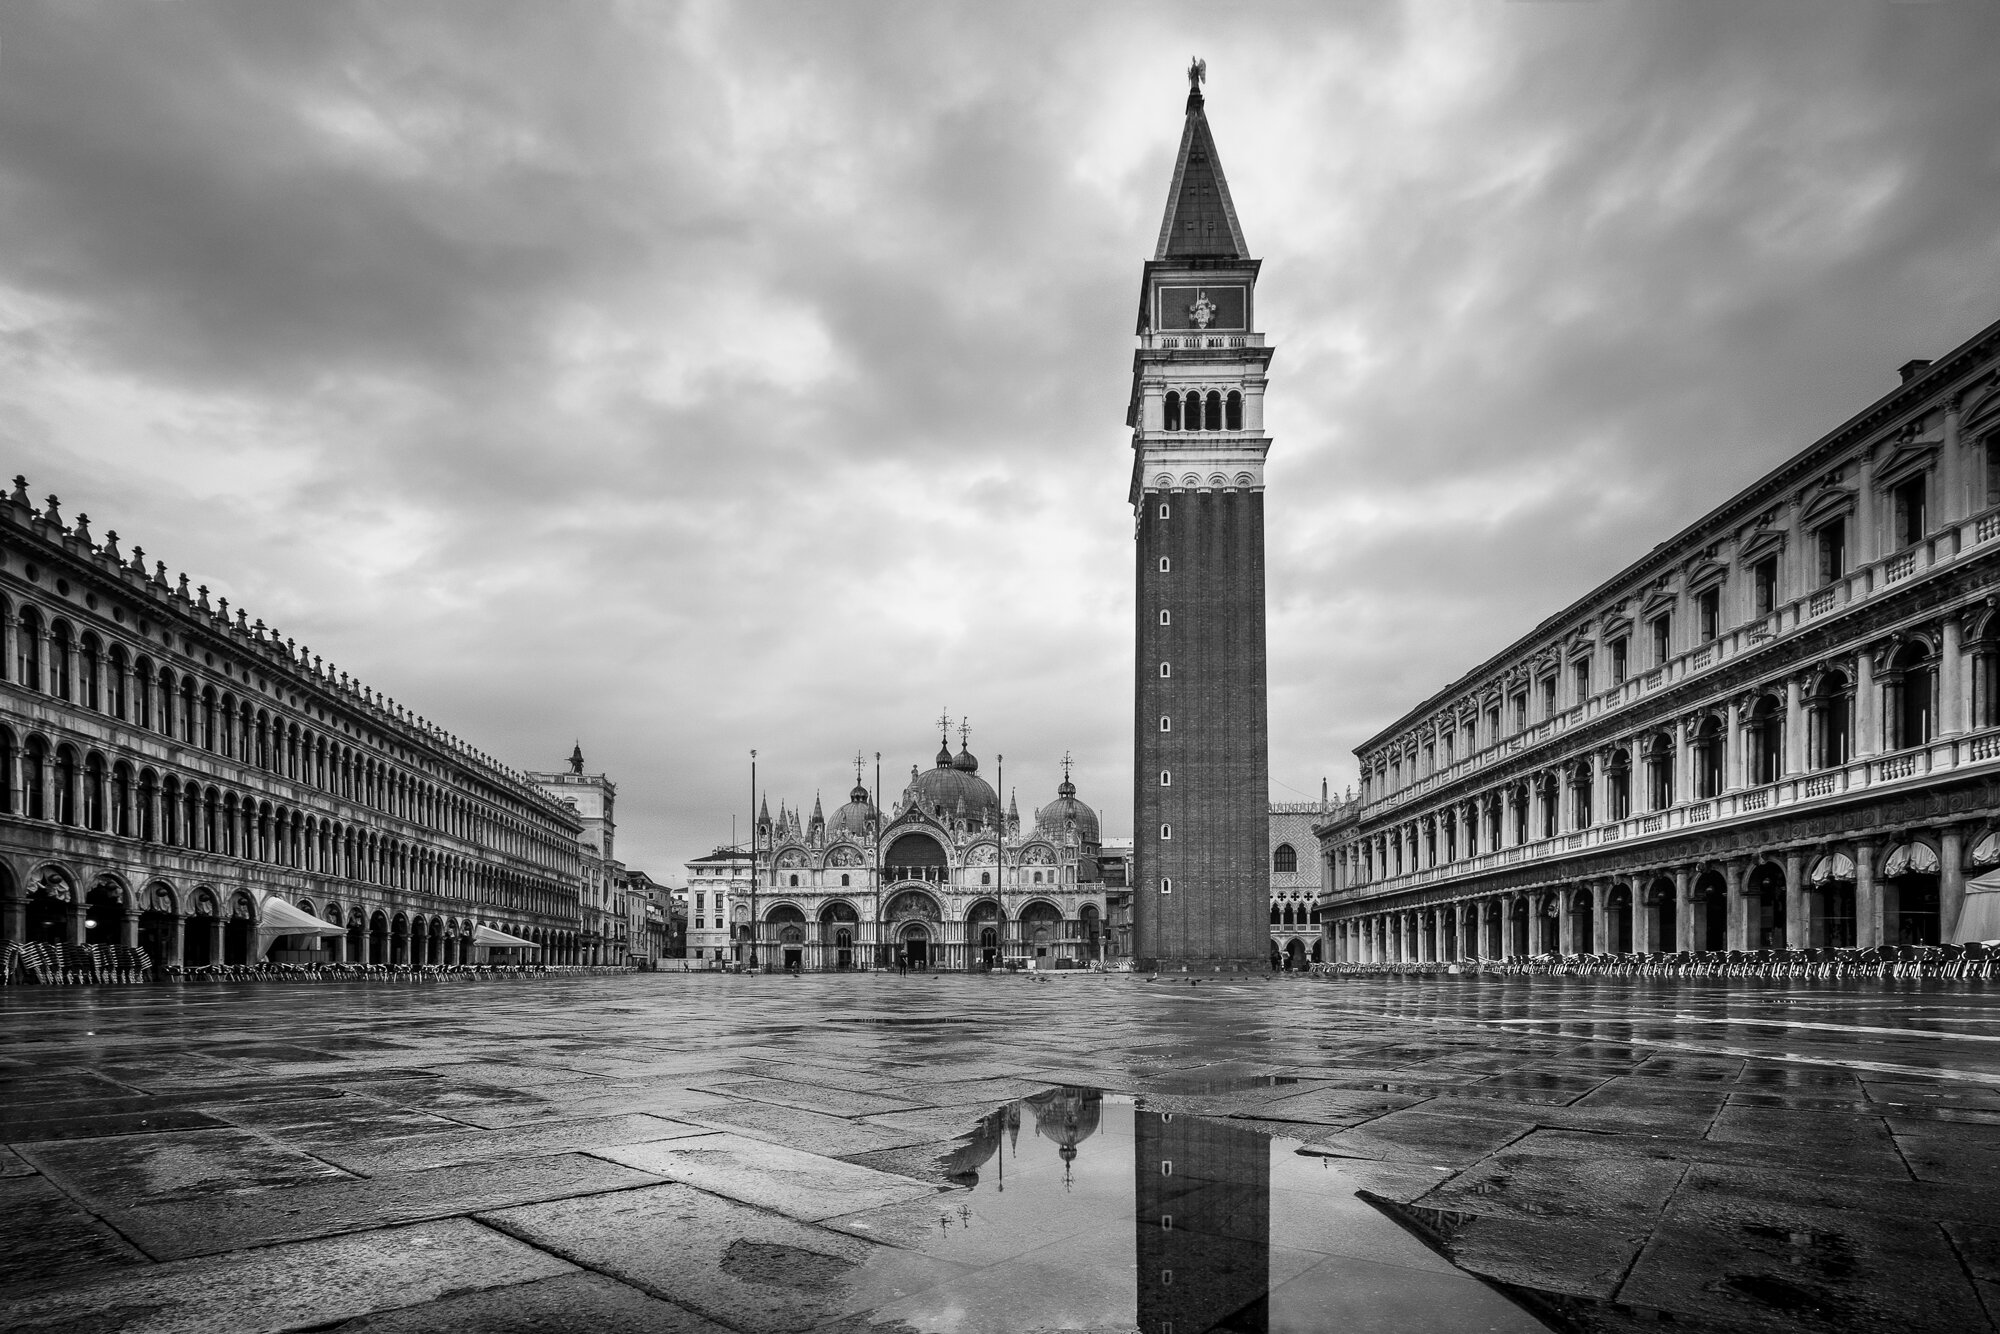
Fujifilm XT2 | XF10-24mm | 10mm | 1/10th Sec | f/16 | ISO200
This was my first attempt at some deliberate black and white photography and I couldn’t have picked a better camera or a more beautiful setting to give it a try. Who knows, I may even attempt a similar approach on one of my regular walks around London. I wrote in my last post how we all should step out of our comfort zone now and then to see what we are really capable of and while in Venice I feel I did this and as I am happy with the photos I took, it was well worth it.
Until next time.

Photographing London's Rooftops
In this post, I share the photos from a sunrise shoot from 35 stories up at the Sky Garden in London. I plan to get up high to capture London a few more times during 2019 so watch out for more posts like this in the future.
London’s skyline is seeing an unprecedented rate of change, particularly in the Square Mile which is experiencing some kind of race to the clouds. New, taller buildings are being erected right now and even taller buildings than that are undergoing planning permission. One of the many strict conditions developers are having to comply with when obtaining permission to build is that in the taller buildings, publicly accessible observation levels need to be incorporated.
Policy 7.7 of the London Plan states that tall and large buildings should 'incorporate publicly accessible areas on the upper floors, where appropriate.
This may not be good news for potential developers but it is great news for us photographers looking to capture new angles and compositions of London’s cityscape.
One of my 2019 photography related objectives is to capture at least 3 high-rise keepers. That’s 3 images taken from London’s canopy during 2019 which I would consider including in my personal portfolio.
The Sky Garden - 20 Fenchurch Street, AKA “The Walkie-Talkie’.
So, my first attempt in 2019 started at the Sky Garden (see map). This location is perfect to start honing those high-rise photography skills for one great reason, its free!. That’s quite a rarity when getting up high in London as most of the viewing levels up this high cost money to enter and although the Sky Garden isn’t as high as The Shard, it is absolutely high enough to get fantastic views of London.
Another good reason to start photographing up high at the Sky Garden is that you can book your visit in advance at a time that suites you (assuming there is availability). That means you can book golden hour, sunrise and sunset time slots so you can be primed and ready to capture the city with the best light available if that’s what you prefer. Follow the link here to book: https://skygarden.london/booking.
On this particular occasion I booked to arrive at 7:15am and on this January morning, that meant I would be there around 30 mins before sunrise so timing was just about perfect.
Here are the photos I took during my visit.
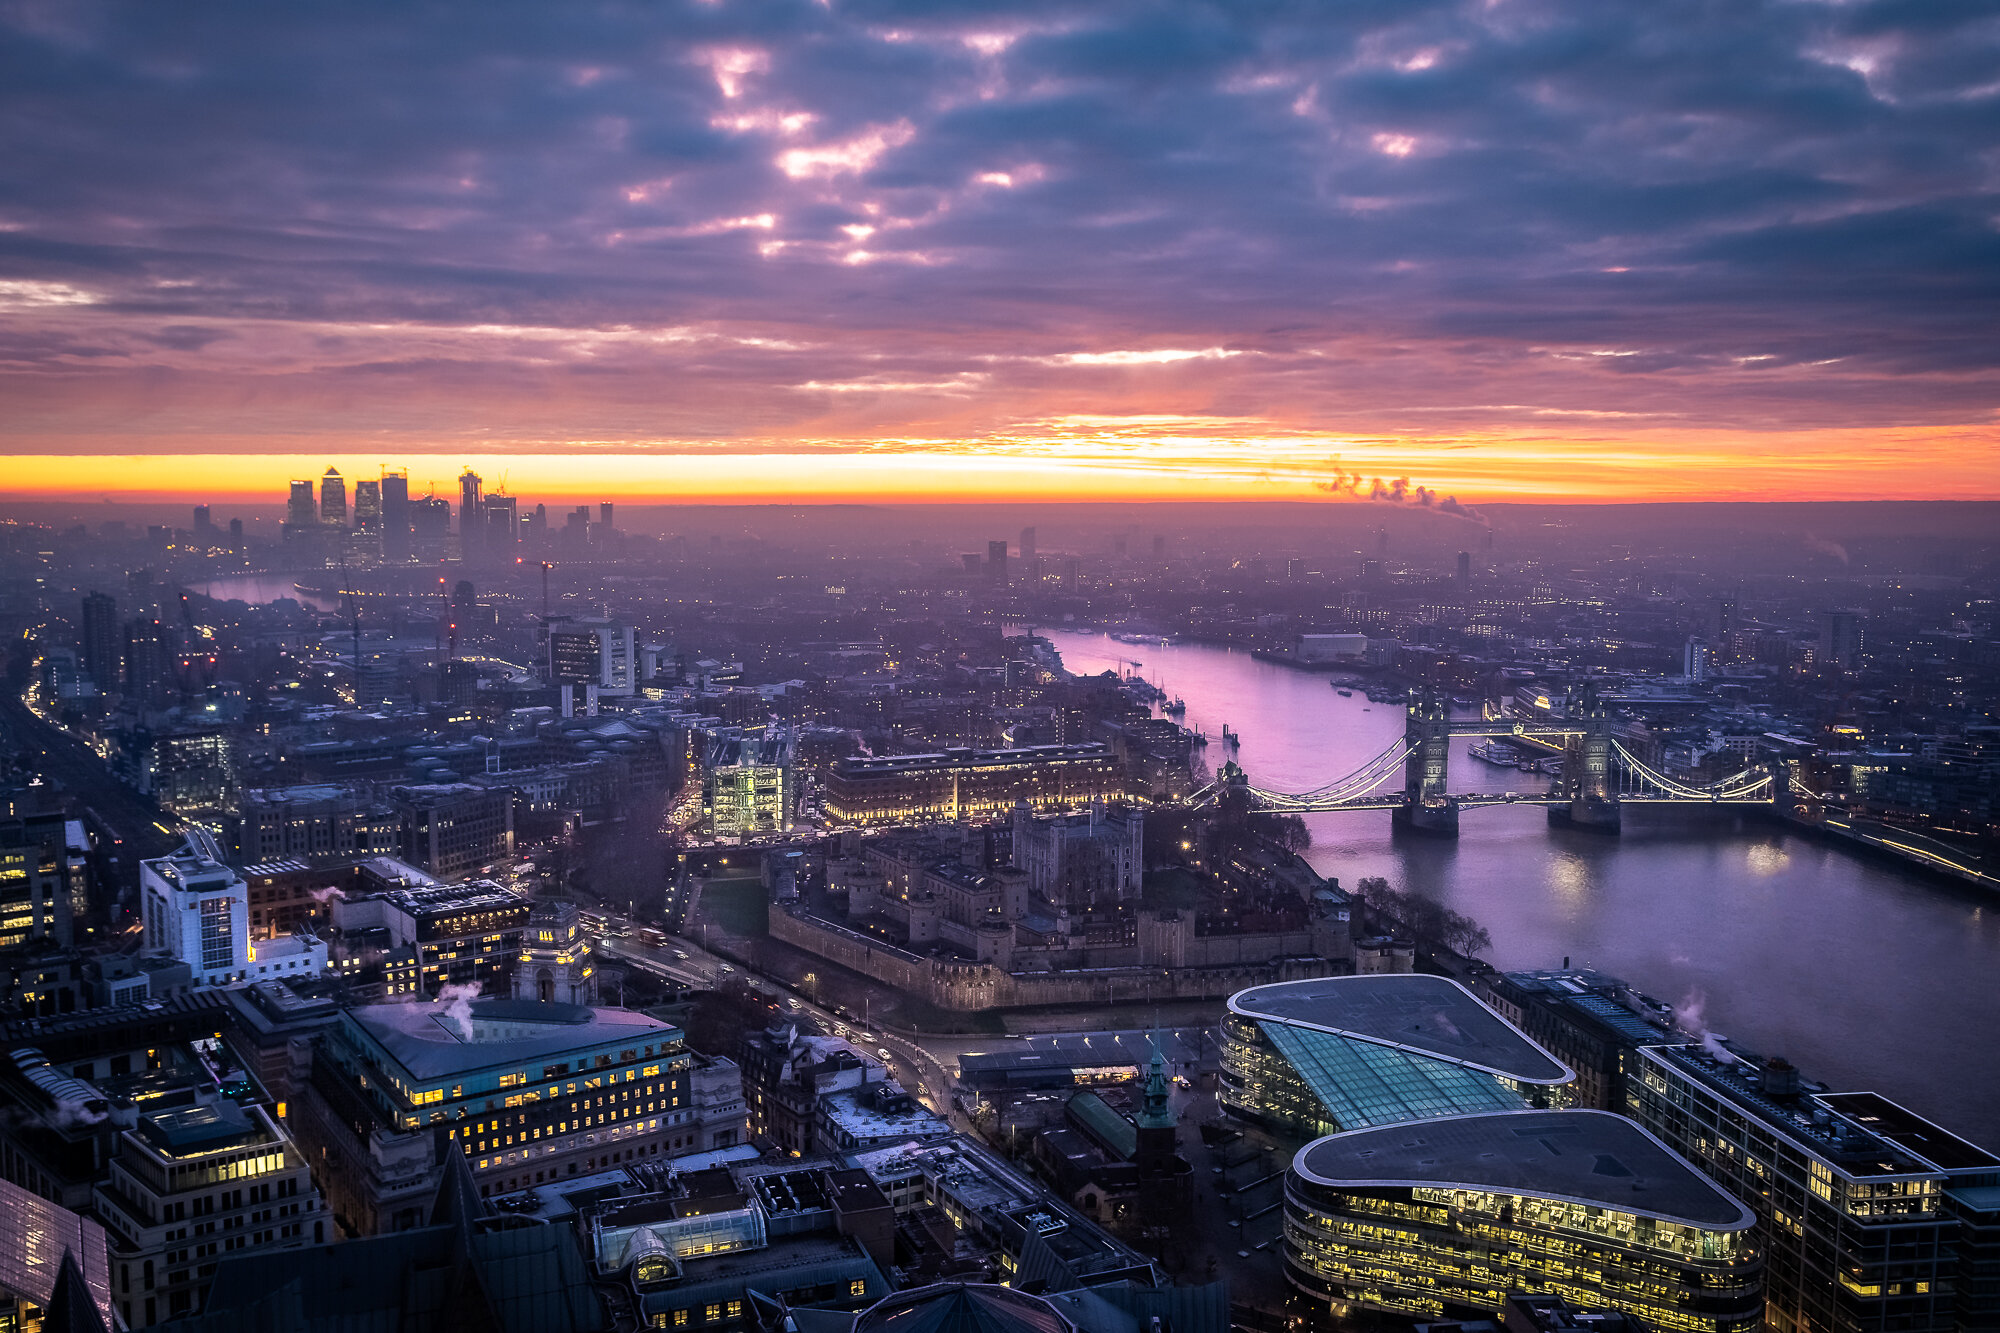
Fujifilm XT2 | XF10-24mm | 17mm | 1/60th Sec | f/4.5 | ISO800

Fujifilm XT2 | XF55-200mm | 55mm | 1/5th Sec | f/6.4 | ISO800

Fujifilm XT2 | XF18-55mm | 48mm | 1/105th Sec | f/4 | ISO200

Fujifilm XT2 | XF18-55mm | 18mm | 1/70th Sec | f/3.2 | ISO200

Fujifilm XT2 | XF55-200mm | 58mm | 1/2 Sec | f/7.1 | ISO200
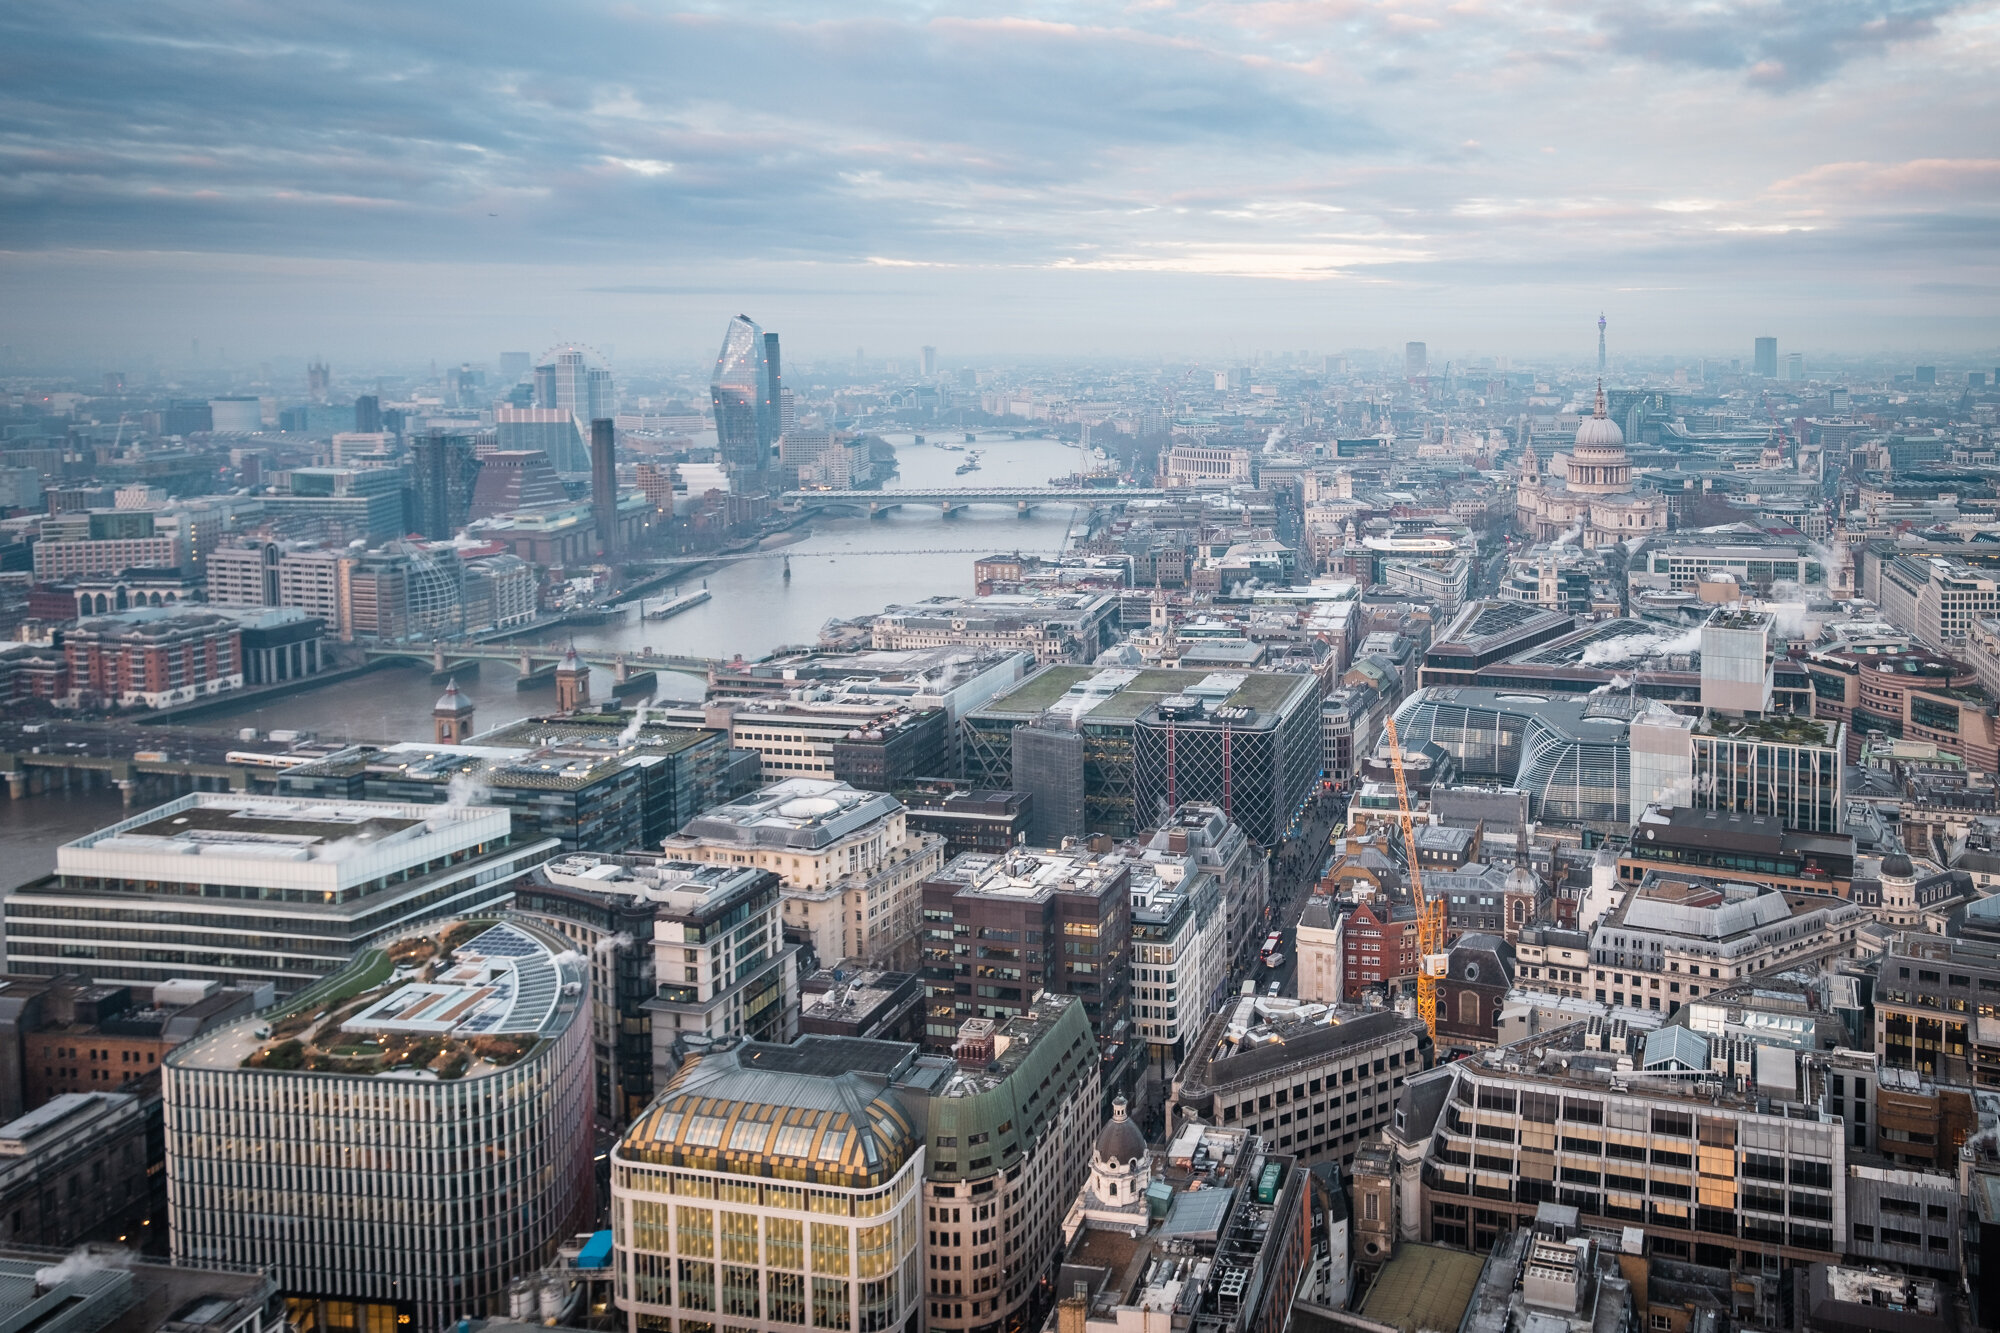
Fujifilm XT2 | XF10-24mm | 17mm | 1/25th Sec | f/4.5 | ISO200

Fujifilm XT2 | XF10-24mm | 10mm | 1/125th Sec | f/4 | ISO400

Fujifilm XT2 | XF10-24mm | 10mm | 1/200th Sec | f/4 | ISO400
I’m pretty happy with this set. The sun made a brief appearance as it rose above the horizon meaning I could capture East London with a fantastic warm glow cast across it. Once the sun went behind the clouds, the light was a lot flatter and less interesting but once processed using my city chrome LightRoom presets, I’m still happy with the results.
What’s next? I plan to revisit the Sky Garden soon and then look for the next building to photograph from after that. If all goes to plan and I take some share-worthy images, I will post them here on my site sometime soon.
Until next time.

Photographing London on a Cloudy Day
I have so much fun taking photos in great light. When the sun is low, the light is warm and the scene is full of contrast making good photos is so much easier. So what do you do when the light is flat and weather pretty miserable? Well, you go out and work harder for those images by finding strong compositions. In this post, I did just that during a day out photographing London’s Square Mile and beyond.
It’s been a bit of a struggle to fit as much photography in as I would like in the last couple of months. It was a busy time at work as the year drew to a close and having a family at Christmas means lots of festive related activities and unfortunately photographing landscapes and cityscapes needs to take a back seat every now and again when work and family commitments come calling. It’s important to get the balance right in these congested situations.
Having said that, I did manage to get out over the Christmas period and spend a day in The City of London’s Square Mile on what turned out to be a cloudy, quite miserable day in December. I already knew I wouldn’t be getting much in the way of sunlight as I checked the weather the night before but I decided to head out regardless to see what I could capture.
I find myself drawn more and more to getting out and about when the weather is bad as I am continually trying to challenge myself and capturing a good photo while the light is poor is certainly a challenge for me. It forces me to focus on stronger compositions and subjects to ensure the photo is still visually pleasing even without the good light. On top of this, it also helps me develop my post processing to better represent the mood of the photo.
THE TOWER OF LONDON
I started the day around a place I know well. I arrived at the Tower of London around sunrise, although you would never have known as the thick, dark rain clouds prevented any chance of some nice light. I wandered about looking for texture and a composition so I got my camera low to the ground to make the wet, reflective, cobbled street a little more of a feature and that coupled with the lines created by the street lamps and benches, I snapped my first image of the day.
Here is a post featuring more images taken around this area of London.

Fujifilm XT2 | XF35mm F2 | 35mm | 1/80th Sec | f/2 | ISO800
IN THE CITY OF LONDON
Heading into the city, I passed one of my favourite spots in London. A pretty little street, surrounded by modern skyscrapers, Leadenhall Market has an ornate look and feel to it with lots of history and is a great subject to photograph. I chose to once again get low to the ground to emphasise the wet cobbled street and as I was crouched in the middle of the street, slightly wary of being in in the way of other people I spotted this lady with her umbrella which along with the wet street, continued to tell a great story about the conditions I was photographing that day.

Fujifilm XT2 | XF35mm F2 | 35mm | 1/125th Sec | f/2 | ISO1250
Heading further into the city, I captured the photo below of the 30 St Mary Axe building, aka “The Gherkin”. I was drawn to the strong compositional shapes and layers created by the various structures in this photo giving the image a nice sense of depth.

Fujifilm XT2 | XF35mm F2 | 35mm | 1/125th Sec | f/4 | ISO400
I chose a central composition of this Christmas Tree at the end of St Helens Place which is another small but charming road tucked away amongst the city’s towers. I kind of regret not having my wider lens with me for this outing but even though it was taken at a slightly longer focal length than what I would have preferred, the central composition works well enough.

Fujifilm XT2 | XF18-55mm | 30mm | 1/125th Sec | f/3.6 | ISO400
Now heading back towards the river, I passed The Gherkin and had to capture the photo below showing the building’s entrance. The strong lines and shapes create an impactful composition but when you are presented with a subject like this, it is important to ensure the camera is both central and completely level otherwise the image will look unbalanced and compositionally weak.

Fujifilm XT2 | XF18-55mm | 18mm | 1/125th Sec | f/2.8 | ISO500
UP THE MONUMENT
On my journey back to towards the river, I walked down Lovat Lane. I seem to have taken a few photographs of cobbled streets already and here is another. So down I went again to get a low angle of the road and the towering Shard from across the Thames.
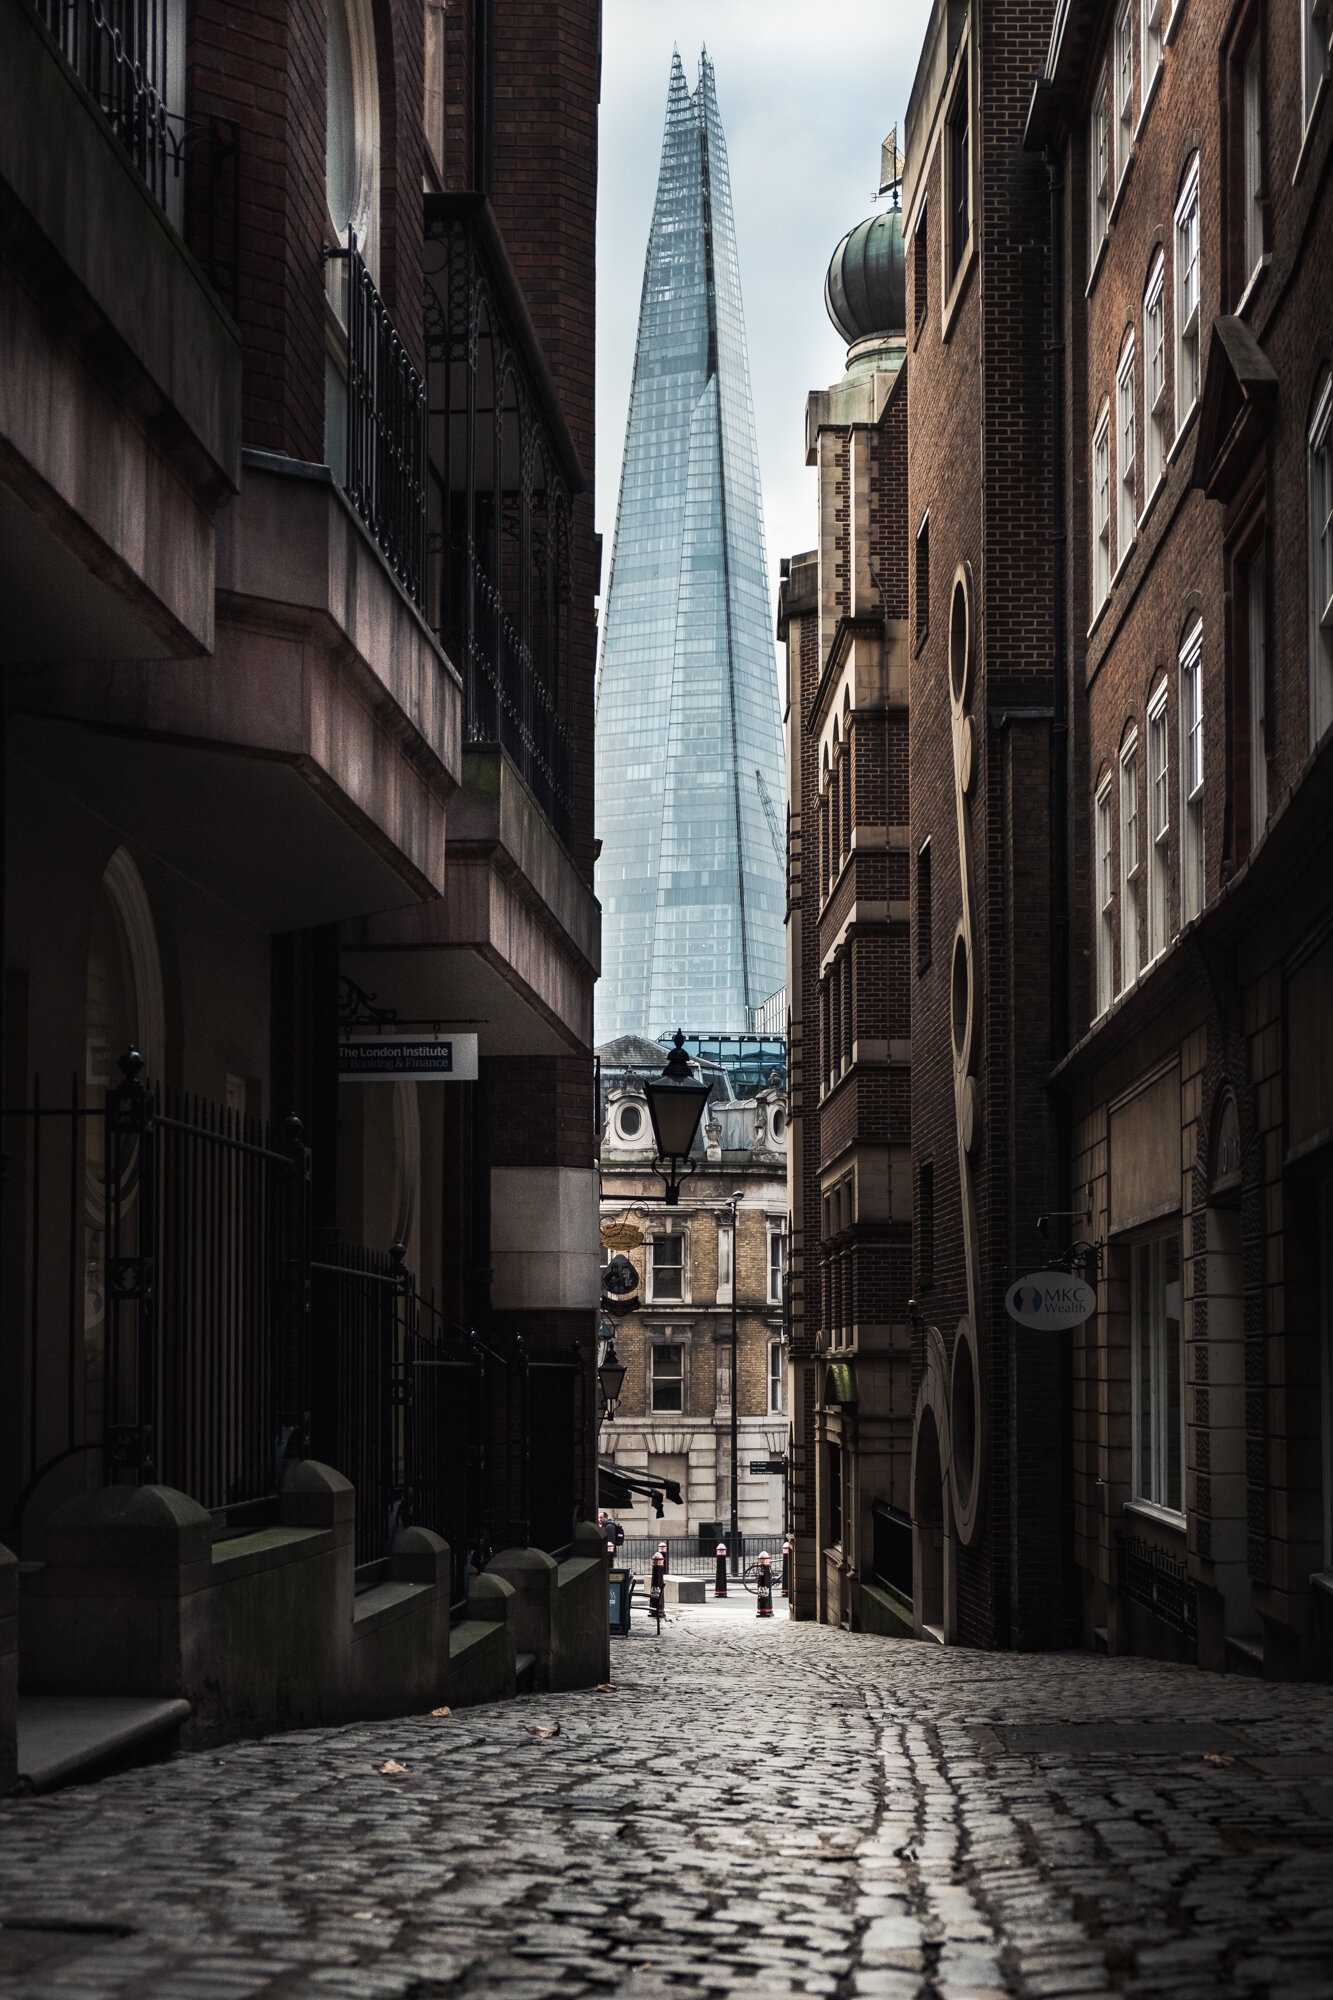
Fujifilm XT2 | XF18-55mm | 32mm | 1/1600th Sec | f/3.6 | ISO200
I have been meaning to visit the Monument for a while now. In fact, the last time I went up to the top, I was shooting with Nikon DSLR which had lenses far too wide to shoot through the fencing at the top of the tower so with the smaller lenses on my Fujifilm mirrorless camera, I could just about shoot through the holes without the images being obstructed.

Fujifilm XT2 | XF35mm F2| 35mm | 1/125th Sec | f/2 | ISO320
Up on top of the Monument, I looked around and really, there was only one good photo I could take of this classic photo of the Thames and Tower Bridge. There was just a small amount of light just appearing in the breaks of the clouds but still not enough to change the scene dramatically. I do like this composition as the streets in the foreground provide some interest and lines leading the eye up the image towards the bridge.

Fujifilm XT2 | XF18-55mm | 29mm | 1/150th Sec | f/6.4 | ISO200
ALONG THE THAMES
I spotted the shot below as I walked along the north bank of the River Thames and across Waterloo Bridge. The dominant London Eye is almost silhouetted against the subtle bursts of light piercing the clouds creating an image which almost monochrome.

Fujifilm XT2 | XF55-200mm | 110mm | 1/1000th Sec | f/4.2 | ISO200
The two photos below were taken along the Thames South Bank. The first is probably my favourite shot of the day. From the end of Waterloo Bridge, I captured the National Theatre in all of its brutalist glory but there was something missing. The architectural lines looked great but I knew I needed someone to walk into the area in the bottom right-hand corner of the image. I had to wait around 10 minutes before this lady in red walked across the frame and I knew that was the shot in the bag.
I love the way the lady’s vibrant red coat contrasted against the desaturated building and being so small in the frame, she adds a sense of scale to the Theatre. At the exact moment I took the shot, a bird decided to fly into my photo and although I would usually think nothing about cloning it out, I decided to keep it in the shot. I don’t know, I just like it there.
The second image along the South Bank is of the Oxo Building. It’s another shot where there is a bold, dominant colour and strong architectural lines create a pleasing composition. I particularly like the way the Oxo Building and wooden pier frame the buildings in the city which continues to be the theme of this post. To think that only a few hours earlier, I was walking amongst those very structures.
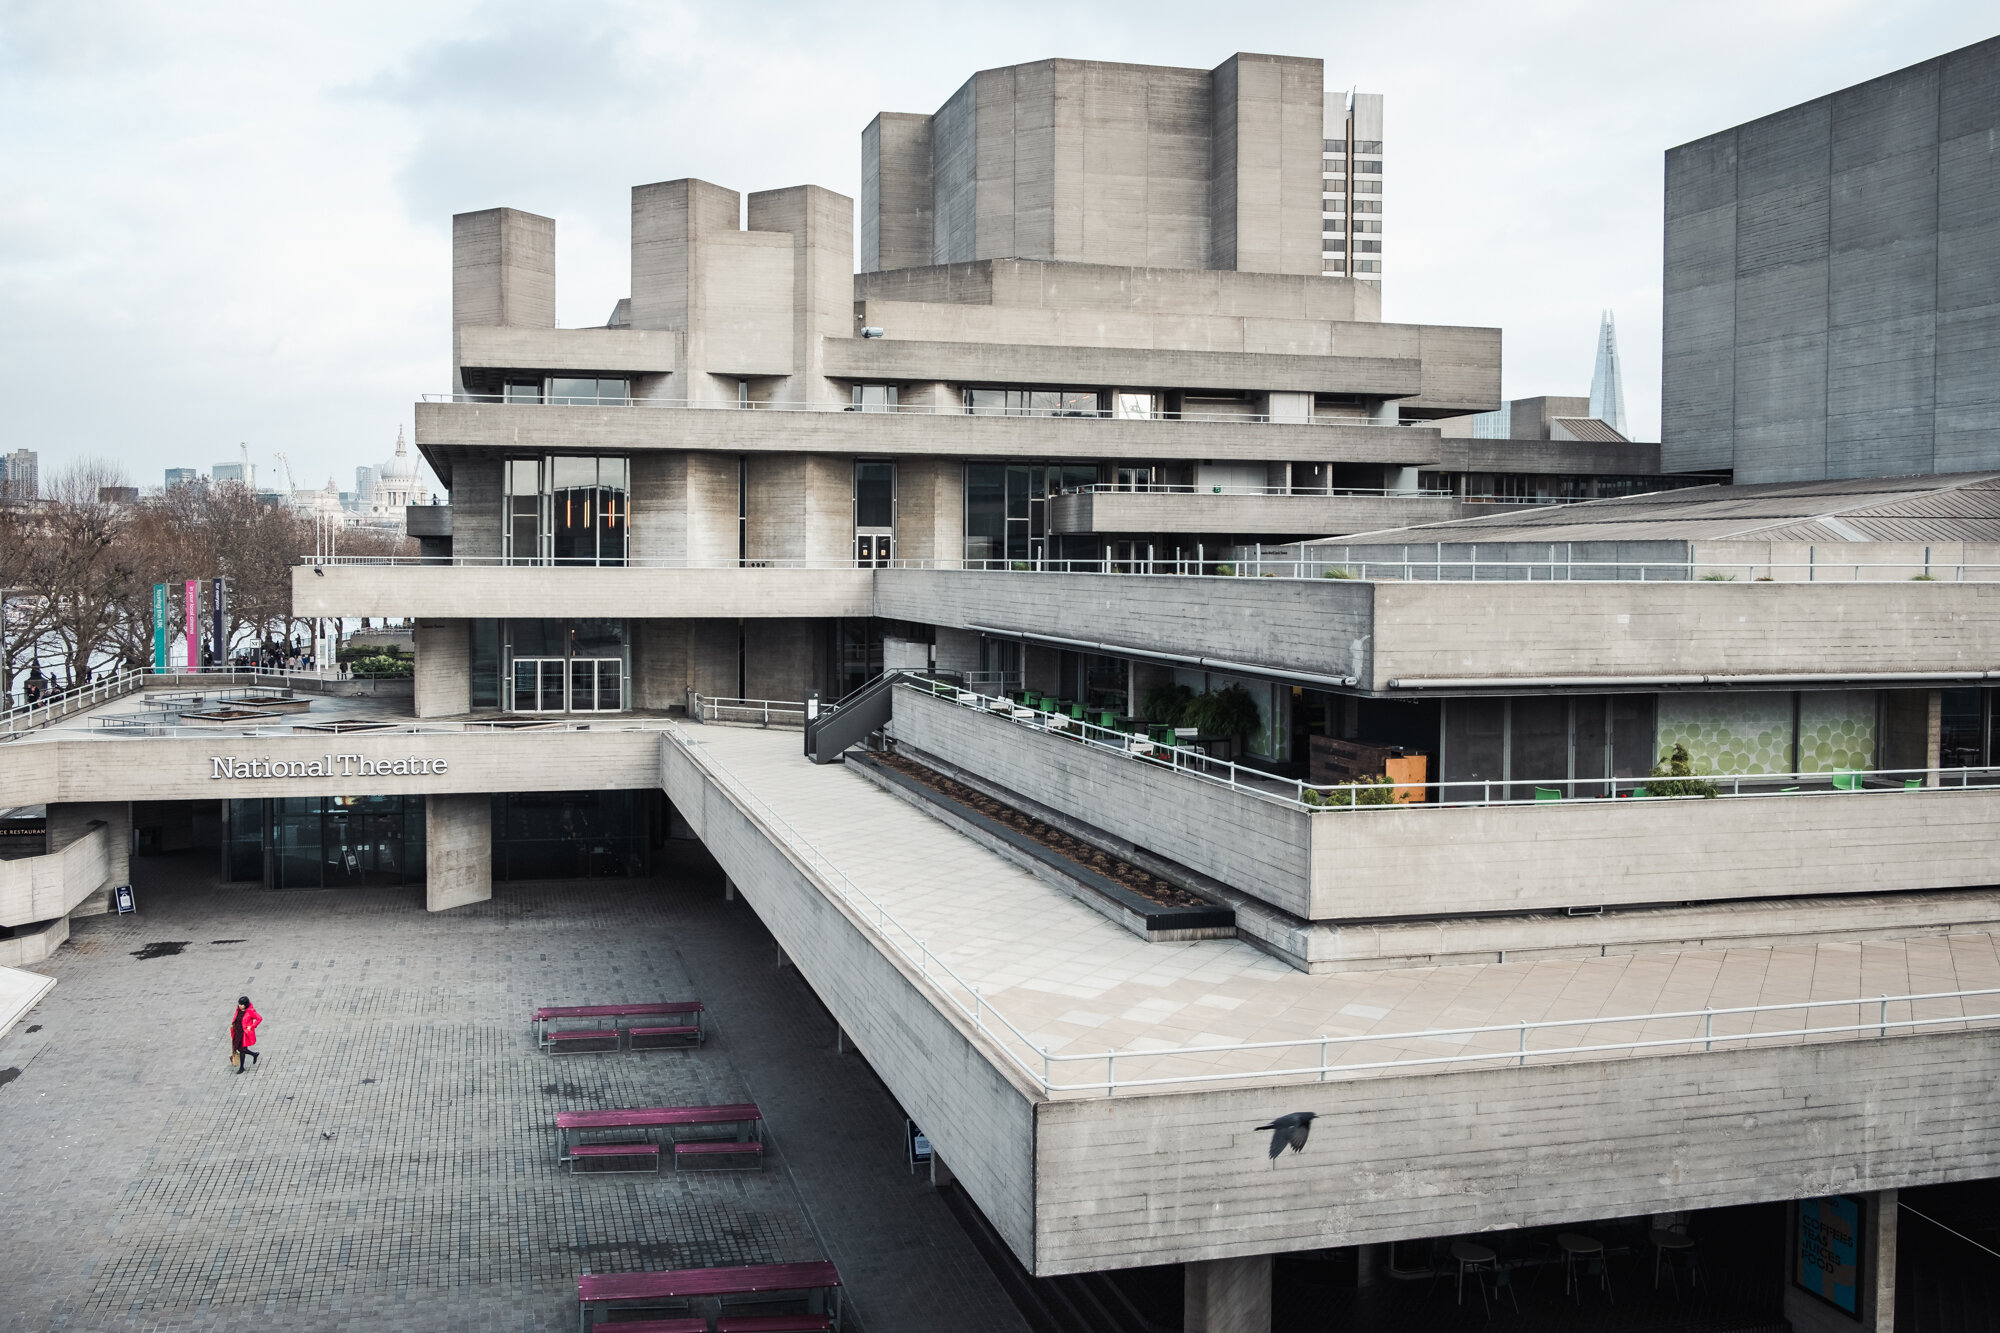
Fujifilm XT2 | XF18-55mm | 18mm | 1/350th Sec | f/3.6 | ISO200

Fujifilm XT2 | XF18-55mm | 34mm | 1/600th Sec | f/3.6 | ISO200
AROUND TATE MODERN
To finish up my day I visited the Tate Modern’s viewing level at the top of the Blavatnik Building behind the main turbine room. The viewing level is 10 floors up and provides some pretty cool views of St Paul’s Cathedral and the high-rise buildings in the city. If you try to take a photo of the scene across the river while up on the viewing level, it will be hard to avoid the iconic chimney so as I have done in the photo below, it’s best to purposely make it a part of the composition.

Fujifilm XT2 | XF18-55mm | 18mm | 1/105th Sec | f/14 | ISO1600
Although there was a brief break in the clouds, there was no epic sunset but, in the image below, I used all 55mm of my lens mounted on the camera and captured the last light of the day hitting the buildings over in the city. I particularly like the gold/grey/blue colour palette in this image.

Fujifilm XT2 | XF18-55mm | 46mm | 1/125th Sec | f/14 | ISO1000
I don’t really like to use the word “resolution” but I have made a small agreement with myself that I will try to get out and about more often in 2019 and those times I look at the weather, see a cloudy, miserable day ahead and decide to stay in bed, those are the missed opportunities I need to take in 2019 to ensure I do spend time with the family, I am able to put a shift in at work and I do spend enough time out and about with my camera doing what I so enjoy doing. Let’s see how that goes.
Until next time.

My Favourite Photos of 2018
Another year has passed and it only seems like the other day that I wrote about my favourite images of 2017 and now, a year later I sit down to reflect a little on 2018 and think about where I want my photography to head in 2019.
Another year has passed and it only seems like the other day that I wrote about my favourite images of 2017 and now, a year later I sit down to reflect a little on 2018 and think about where I want my photography to head in 2019.
When reviewing my photos taken in 2018, I didn’t just choose those that had the most wow factor, I want to choose those that ignited some kind of feeling, a memory or some significance related to my photographic journey during the past 12 months. Photography has a far deeper meaning to me than just capturing the view in front of my lens. It allows me to take time out of a busy life, to recharge and reflect and most importantly it gives me a sense of personal achievement when I capture a portfolio shot or undertake and complete a personal project and there will be moments throughout this entire process that leave an imprint on me in some way from the place I was at to what I had to go through to capture the final shot.
The first few images I chose are of course going to be my first photographic love which is capturing London, particularly during a sunrise or sunset. These tend to be the photos I work the hardest to get and as a result give me the most satisfaction when all the elements come together. If I had to put a number on it, I would say that even with all the planning, checking weather apps etc, only 1 in 10 attempts to capture some great light at sunrise or sunset result in exactly that and that’s before I have all of the other elements going my way such as the cloud direction, the subject being clear of distractions etc. So not only do these London cityscape photos stand out as my favourites of 2018, they represent all of those early mornings and late nights I arrive back home in Surrey empty-handed because the light was flat or the sky was grey and featureless.
The image below is one I remember specifically as it reminded me about the role I play as a photographer in London and the patience needed while trying to capture a photo. This is such a busy spot and it was such a nice evening so there were many visitors trying to grab a look at Tower Bridge. Normally when taking long exposures, if the exposure is long enough, someone walking into my shot won’t register in the final image but if they stop, even for a short while, I will get a blurry figure in the scene. On this evening, there were so many people stopping to look out over the water, as much as I tried, I could not get a clean image. Every time I thought the coast was clear, I fired off a new shot only for another person to walk into the scene and stand there long enough to be visible in the final image. I could have asked for the other people to move away while I took the shot but I remember thinking at the time that me being there photographing this location gives me no greater right of passage and everyone is entitled to stand where they like and take in this epic view even if it means me missing the shot altogether. So I waited patiently for a gap in the foot traffic and I was eventually rewarded with a 150-second window without someone stopping for too long enabling me to capture this photo below.

Fujifilm XT2 | XF10-24mm | 16mm | 150 Secs | f/11 | ISO200

Fujifilm XT2 | XF18-55mm | 24mm | 121 Secs | f/10 | ISO200

Fujifilm XT2 | XF18-55mm | 20mm | 1.4 Secs | f/14 | ISO200
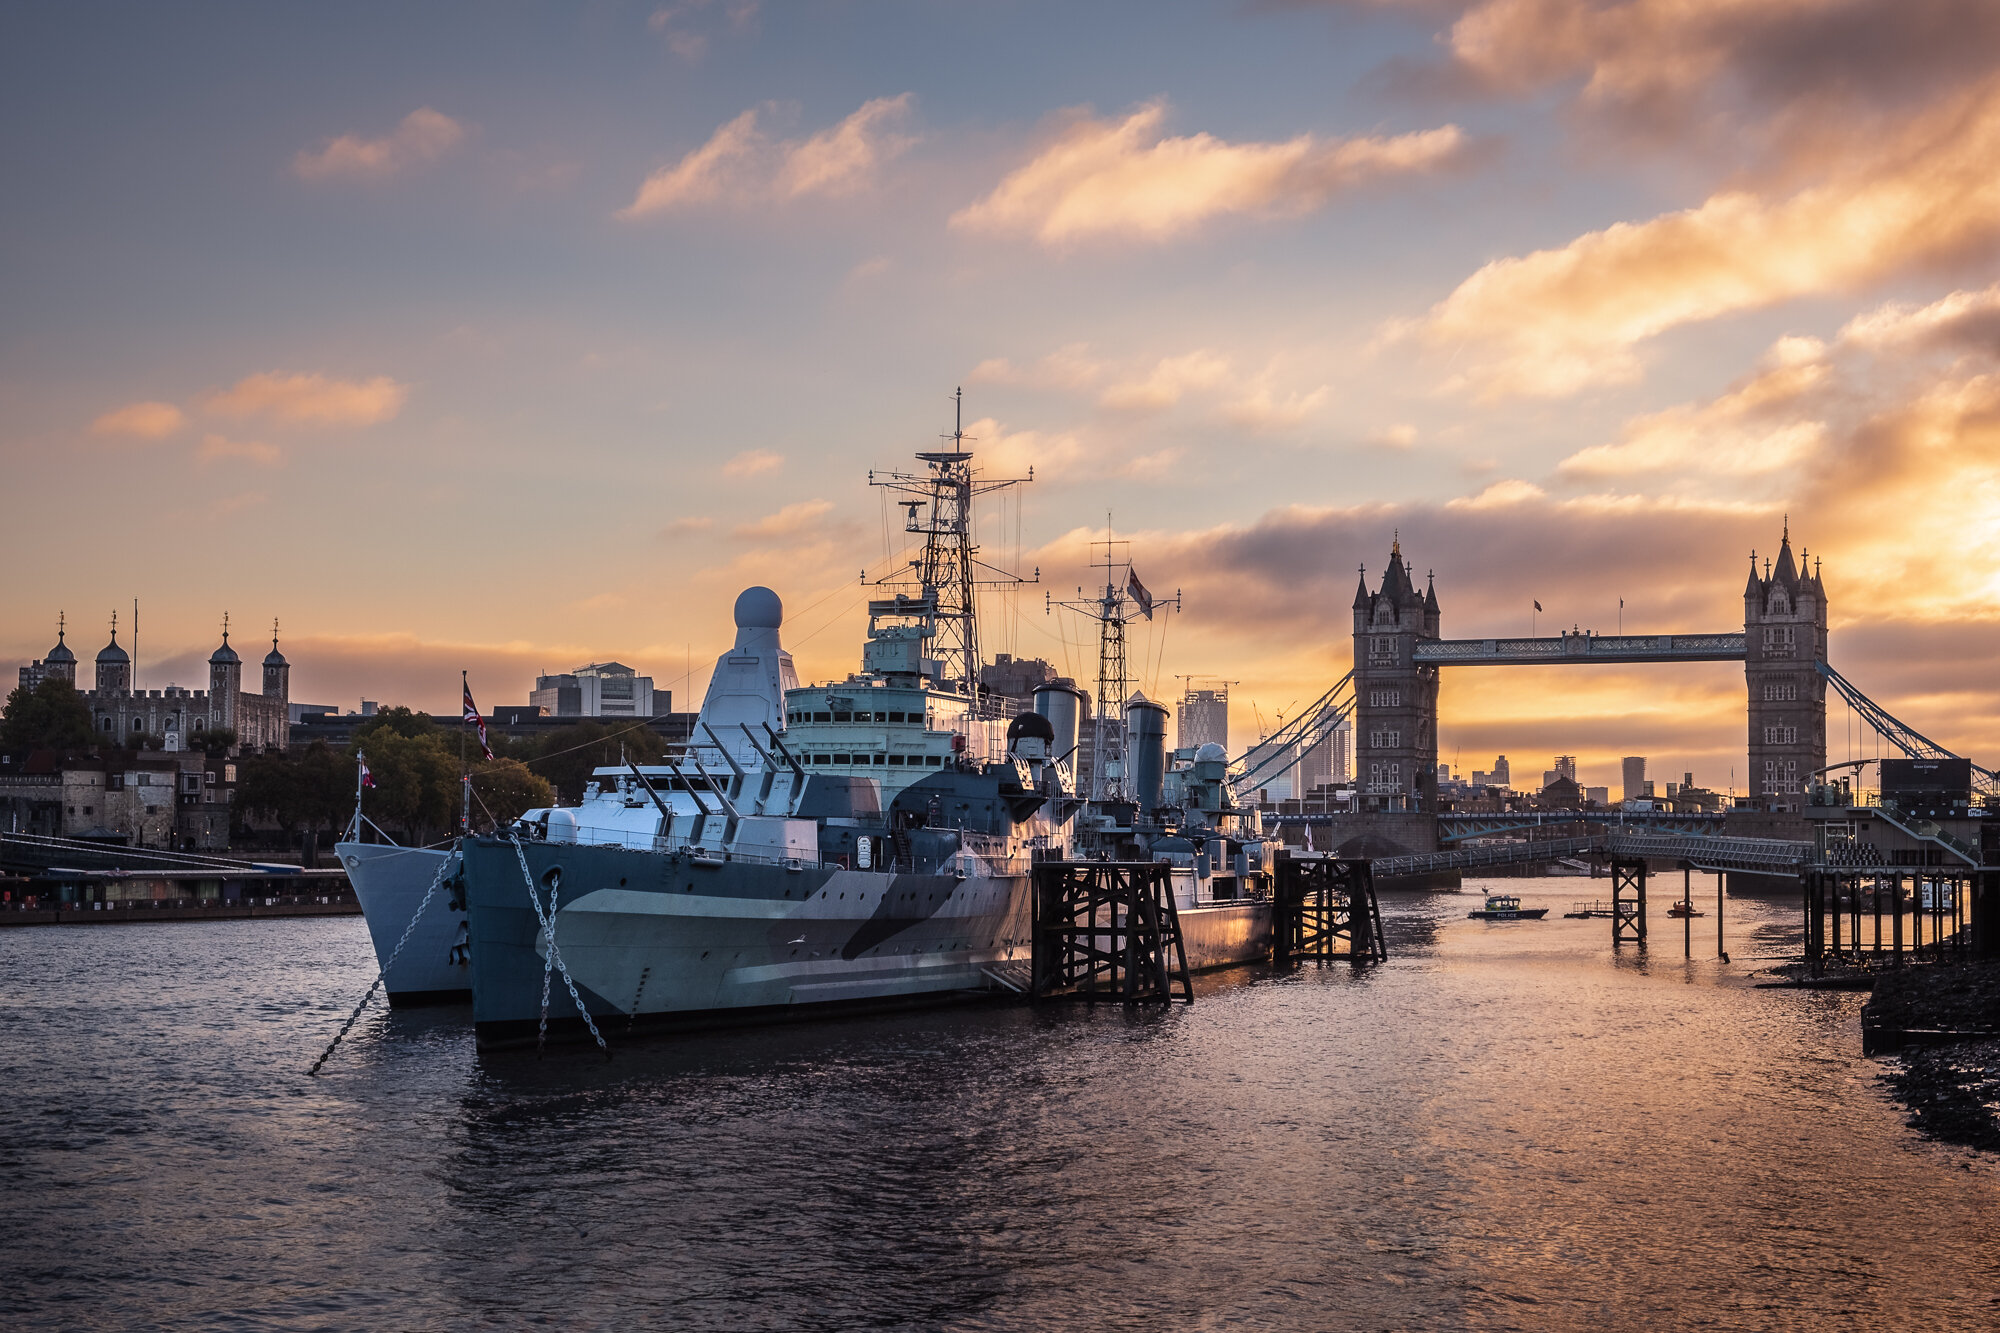
Fujifilm XT2 | XF18-55mm | 34mm | 1/500th Sec | f/8 | ISO200
The next couple of images were taken in Bruges and Venice. The reason these are in my list besides the fact that I really like the final images are that they spark fond memories of my travels in 2018. It was my first trip to Bruges and I absolutely loved it there You can read about my trip in this post. On Location Photographing Bruges.
I took the photo of the Dijver Canal at sunrise and thats why it is extra special. Whenever I visit a new place such as this I wake up early and venture out before sunrise (as I did in Venice). Not only does this present some fantastic photo opportunities, there is just nothing that compares to experiencing a normally busy place while it is calm and tranquil. I really think it shows though in the images and they spark this feeling in me every time I look back on the photos.

Fujifilm XT2 | XF10-24mm | 10mm | 1/4 Sec | f/11 | ISO200

Fujifilm XT2 | XF18-55mm | 18mm | 1/40th Sec | f/9 | ISO200
The reason I chose these images is that they represent my first significant project to help me both progress and diversify my photography somewhat. These images also spark a feeling of liberation because one of the objectives for this project is to capture London without a tripod and allow me to move more freely as I wander about the city capturing it with a little more spontaneity.

Fujifilm X-T10 | XF10-24mm | 24mm | 1/100th Sec | f/4 | ISO200

Fujifilm X-T10 | XF10-24mm | 24mm | 1/1,600th Sec | f/4.5 | ISO200

Fujifilm X-T10 | XF55-200mm | 70mm | 1/200th Sec | f/4 | ISO200
This last photo of Colley Hill in Surrey brings me both joy and a little regret. Although I really like this image of a place close by many years ago and all the memories it brings, the small amount of regret is that in 2018 I didn’t venture out locally enough. I have focused on London as my main photographic subject and this photo has reminded me to make sure I make time to venture out into the beautiful Surrey Hills to photograph it more.

Fujifilm XT2 | XF18-55mm | 18mm | 1/45th Sec | f/22 | ISO200
So there you have it, my favourite images of 2018. As well as reflect on the past 12 months, I have been making a list of what I want to achieve in 2019 which I will no doubt share in time as these plans evolve.
I wish you all a happy and successful 2019.
Until next time.