
BLOG ARCHIVE

Why I chose the Fujifilm X-T50 as a second camera
Thinking about buying the Fujifilm X-T50? Read about why I decided to buy this camera to use alongside my XT5.
Those who have read some of my “What’s in my camera bag” posts over the years will know that I shoot with Fujifilm’s X-series cameras and since owning the XT2 back in 2017, I’ve always had a second, “backup” camera. This was particularly useful when towards the end of 2022, my XT2 decided to die while out taking photos in my local woodland. It had taken a few knocks and had a fall when my tripod tipped over shortly before, so I wasn’t shocked it happened. But with the XT5 about to be released, I decided against having it repaired and used my X-T30 camera for a month or two while waiting for the XT5 to be delivered.
The good news is that accidents and camera malfunctions are pretty rare, but having a backup camera for those just-in-case moments can mean that most of the time, it’s sat on a shelf, unused and depreciating.
So, how can I ensure I have a second camera, both as an adequate backup, and at the same time ensuring it gets used regularly? I could simply buy the same model again and rotate the cameras, knowing that they are both used half the time, reducing the normal wear and tear they typically get. That would work just fine, but can I take it a little further?
For all five generations of Fujifilm’s XT series cameras, they have had a philosophy to have a bigger, more robust flagship model (the XT1-5 range) and a smaller, less feature-rich range being the X-T10 to the newly released X-T50.

My lightweight camera gear from early 2023 featuring my backup Fujifilm X-T30
The key differences between the two are size, weight, construction (weather resistance), memory card slots and tweaks to the control/buttons. But what I particularly like about the smaller, lighter X-TXX range is that they use exactly the same sensor and image processor as their bigger brother.
My primary camera for landscape photography is a Fujifilm XT5
In late 2022, shortly after my XT2 failed, I ordered the newly announced Fujifilm XT5 to use as my primary landscape photography workhorse and after around 6 months of regular use, I wrote a review from the point of view of a landscape photographer. So, if you want to know more about that camera, click the thumbnail below.

Why I chose the Fujifilm X-T50 as a second camera
I chose to use the phrase “second camera” on purpose as I don’t like the idea of just having a backup camera (as I mentioned already). I wanted a second camera that has its own unique role to play, to contribute positively to the work I create while at the same time being a backup to the XT5. This is where the X-TXX range and more specifically the X-T50 comes in.

I wrote this article to not only explain why I decided to own both the XT5 and X-T50, but to also provide help to anyone considering buying one of them but needs help deciding which. I also acknowledge that this is not a scientific gear review, and everyone will have their own reasons and opinions for the gear they buy, and these are mine. If I make an error with any of the technical features and specifications, then feel free to correct me but if you don’t agree with some or all the points I make, well,… then,… that’s ok. We can agree to disagree there.
The Fujifilm X-T50 is smaller and lighter than the XT5

The Fujifilm X-T50 and XT5 side by side
I spend a lot of my time walking the streets of London and even more so while I create work for my Timeless City project and when carrying a camera in your hand or around your neck for a few hours at a time, keeping the weight down is important. When I’m not lugging so much weight around with me (like I might on a landscape or woodland photography shoot), it feels more freeing, and I can manoeuvre faster to find those more interesting compositions by crouching low or climbing to get a higher vantage point.
Same sensor, same image processor, same quality
When selecting a camera from other brands, you often have to choose between the latest sensor in their flagship models or previous generation sensors with their lower-end models. In essence, the more you spend, the higher quality imaging capabilities. This seems pretty fair, but Fujifilm does it a little differently. For both their flagship XTX and less expensive X-TXX models, they have always used their latest sensor and image processor.
With the same 40.2MP sensor in each, I never have to compromise on image quality or resolution when deciding what camera to use for a given situation. This also applies to when I might have to use the X-T50 as a backup camera both exclusively or alongside the XT5. In truth, if they didn’t have the same sensor, I might have just bought another XT5 and rotated between them. So, this was a key point in my final decision.
The X-T50 uses the same X-mount lenses as the Fujifilm XT5
The advantage of a second camera being the same brand as my primary camera is that they use the same X-mount lens system. This means I can use any lens I own with both cameras and equally as important, I only have to invest in one set of lenses for all of my photography endeavours.

My current collection of Fujifilm x-mount lenses
The X-T50 now has in-body stabilisation
As I mentioned, the smaller and lighter body helps when using the camera in hand-held situations such as when photographing in the city, travelling and photographing my family. On top of the form factor, Fujifilm have now found a way to add up to 7-stops of in-body stabilisation (IBIS) which means sharper hand-held photos in low light situations.
Familiar Menus, design and button layout

A back of the camera shot of the Fujifilm X-T50’s menu system and buttons
I know I’m not alone when I say that I do not like replacing my cameras and will only do so if there is an obvious advantage to doing so, as even the slightest of changes between camera generations means there is some level of adapting to new button layouts or features. What Fujifilm do well is keep their camera designs and menus incredibly consistent and although there is always some level of adapting when picking up a new Fujifilm camera, it is kept to a minimum.
So, when I pick up either my XT5 or X-T50, I know I won’t have to spend any time relearning how to dial in my settings for any given shooting situation.
The X-T50 is a fun camera to use
I’m not sure if it’s psychological or not but with it being bigger, heavier and more robust, I see my XT5 as the workhorse in my kit. It’s my serious camera, one I use for my slower, more considered landscape photography work. On the other hand, I see the X-T50 (and previous generations I’ve owned) as the fun, everyday camera. It’s a strange thing to say on one hand, as the X-T50 is just as capable in terms of image quality as its bigger brother but whatever the reason, I just find it more fun to use.
The downsides of choosing the X-T50
It’s not all a bed of roses as from a landscape photography point of view, the Fujifilm XT5 is still a superior camera compared to the X-T50. So, what features and capabilities am I giving up? To clarify, these are not criticisms of the X-T50 as I researched the features in detail before I bought it and knew what I would be giving up. This is more to help those undecided and looking for a comparison between the Fujifilm XT5 and X-T50.
The X-T50 is not weather-resistant
Having a weather-sealed camera is a must for any serious landscape photographer as some of the best photos can be taken during inclement weather and I certainly considered the X-T50’s lack of weather resistance when making my decision to buy this camera. The weather-sealed XT5 is still my go-to camera for my landscape photography outings, so for those times I’m standing there in the rain taking photos, I will have that camera with me. If the XT5 is temporarily out of action and I need to rely on the X-T50 for landscape photography, for the odd time it might be raining, I will have both my ThinkTank rain cover and an umbrella with me just in case.
The Fujifilm X-T50 uses the smaller NP-W126S batteries

The NP-126S battery used in the Fujifilm X-T50
This means I have to buy and maintain 2 different sets of batteries. That’s not such a big issue for me as I already had a couple from when I owned the X-T30 but to some, it might be something to consider. Also, the battery is smaller and has less capacity than the NP-W235 used in the XT5. Sure, that might mean fewer images per charge but there is no way the camera would be as small if it was designed to use a bigger battery. So, I think Fujifilm made the right call there.
The X-T50 only has one memory card slot
The Fujifilm XT5 has dual memory card slots and I’ve configured the camera to write new images to both cards, meaning if one were to fail before I get around to backing them up, I still have all the images safe and sound on the other card. With only one memory card slot in the X-T50, I need to be mindful of how a card failure could result in the loss of images and if I were taking photos for a paid job or at a location I know I can’t return too, then I would be using my XT5 anyway. For the typical situations where I use the X-T50 and in the unlikely event my memory card was to fail before backing up the images, it would certainly be frustrating but not the end of the world.

Hopefully, you found that comparison and some of my rationale for buying the X-T50 useful. As I mentioned, this kind of article is quite subjective, with no right or wrong reasons for deciding what camera gear one decides to buy. The most important thing in my opinion is that we all make the most informed decisions we can as the investment we make in camera gear can be significant and the least we can do is help each other to make the right decision.
Until next time.
Trevor

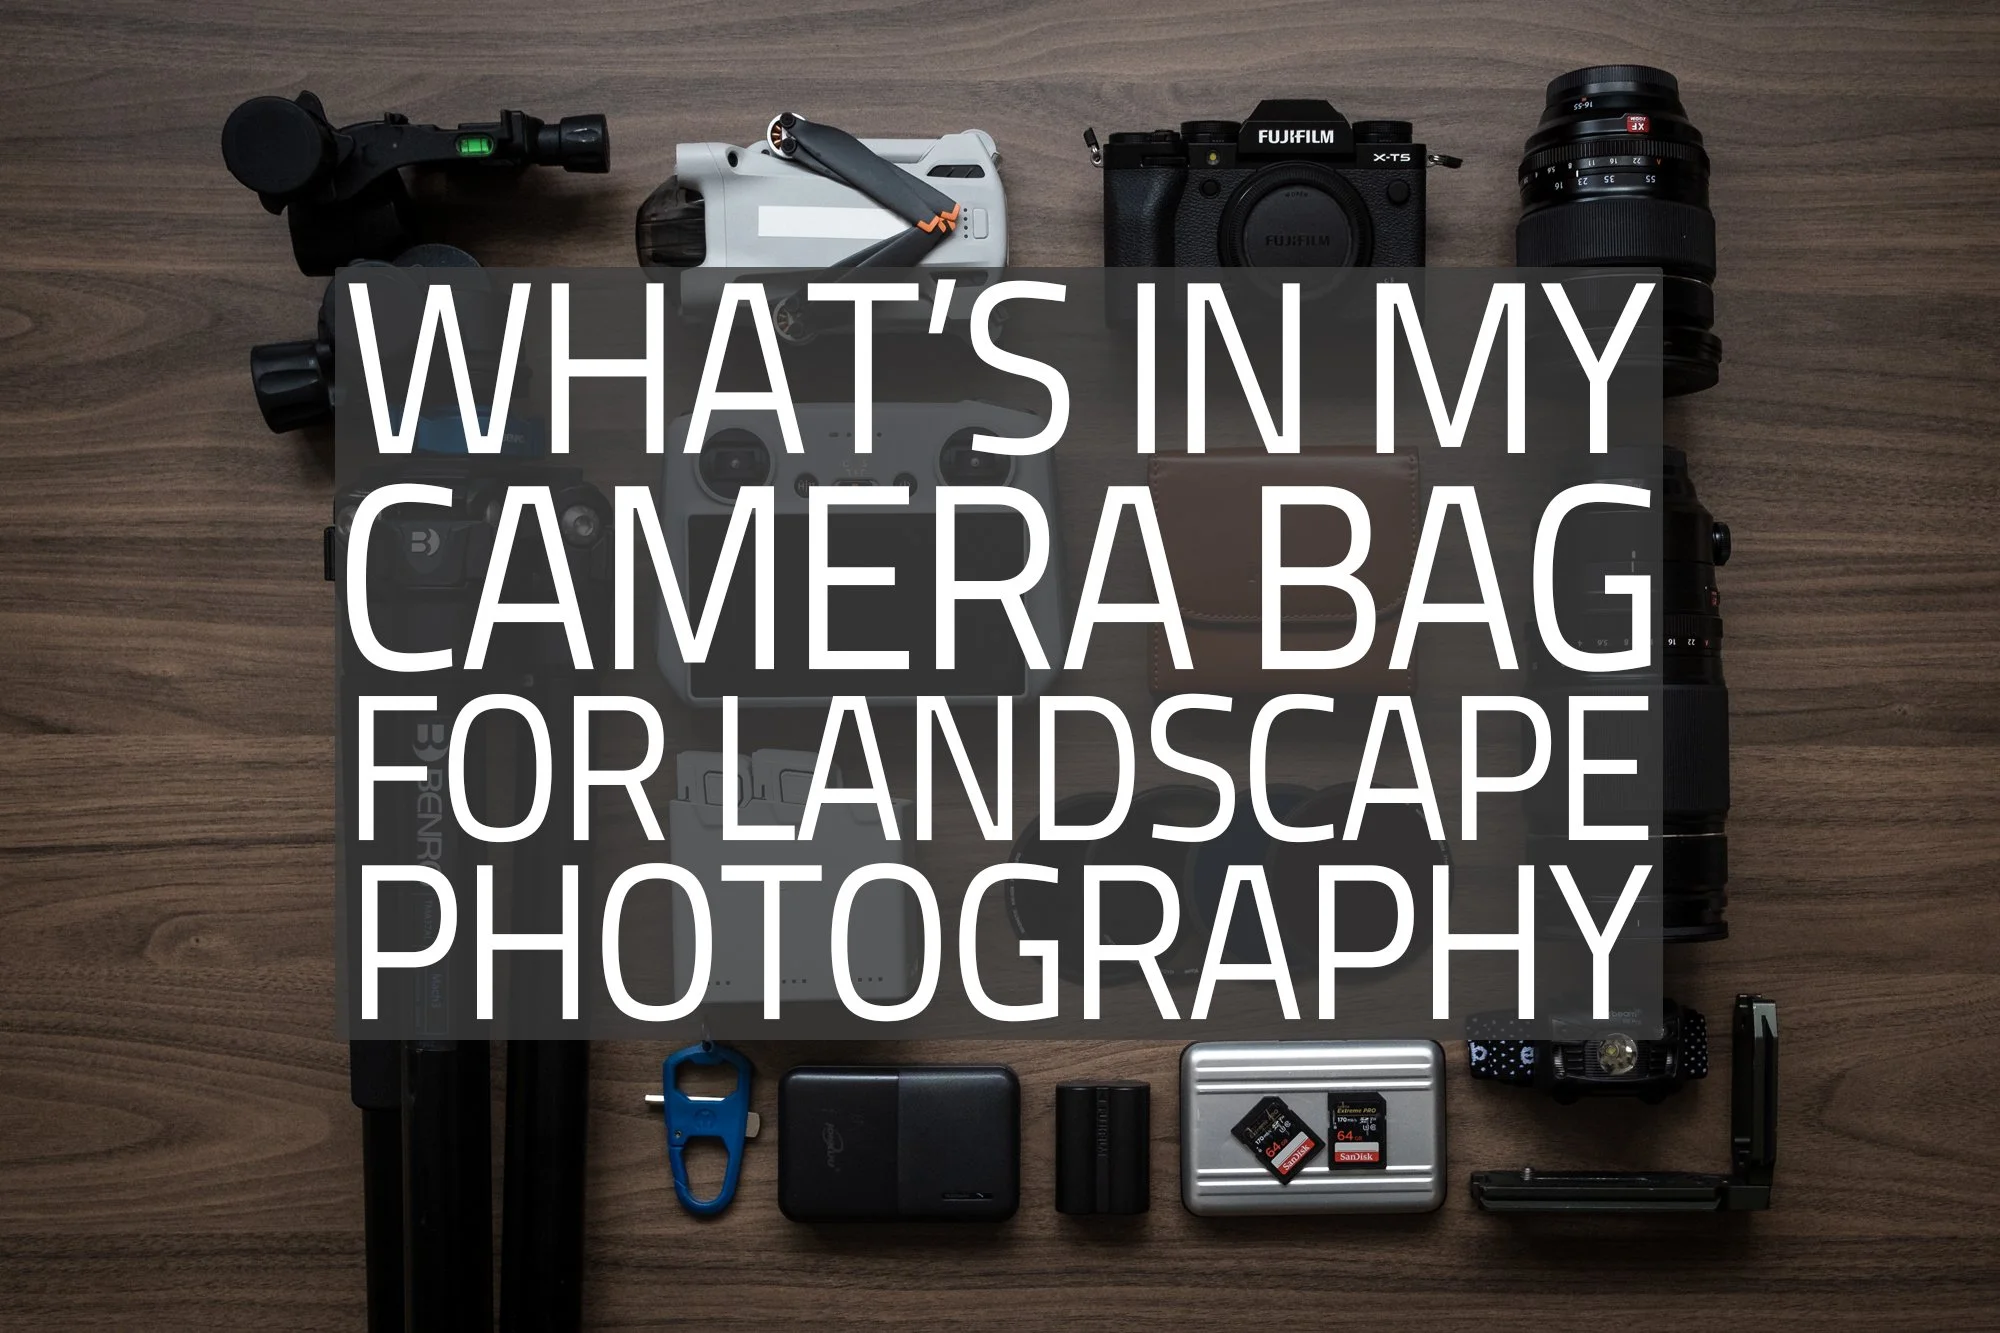
My Camera Gear for Landscape Photography in 2024
This post provides a look inside my camera bag and lists the gear I use for landscape photography in 2024.
Does camera gear really matter when taking landscape photos? Well, this may seem somewhat controversial to some, but yeah, I actually think it does. Sure, it’s not the be-all and end-all when it comes to taking photos, as most modern cameras are pretty decent at that, but I believe a camera and lens system is a subjective choice based on the photographer’s specific needs and priorities. Being happy with the size, weight, ergonomics, functionality, menu system, lens choices and features is, in my opinion, very important as it can remove much of the friction from the picture-taking process, leaving the photographer to focus on the creative side of photography.
I’ve been using Fujifilm’s X series for around 8 years now and am still very happy with the choice I made way back in 2016. Having used the system for so long, I know the camera inside out and love the fact that while out in the field, I can manage all my settings without going near a menu. That and the balance between size, weight and features means that this system still works best for me.
Here’s a rundown of the photography gear I use when out taking landscape photos in 2024.
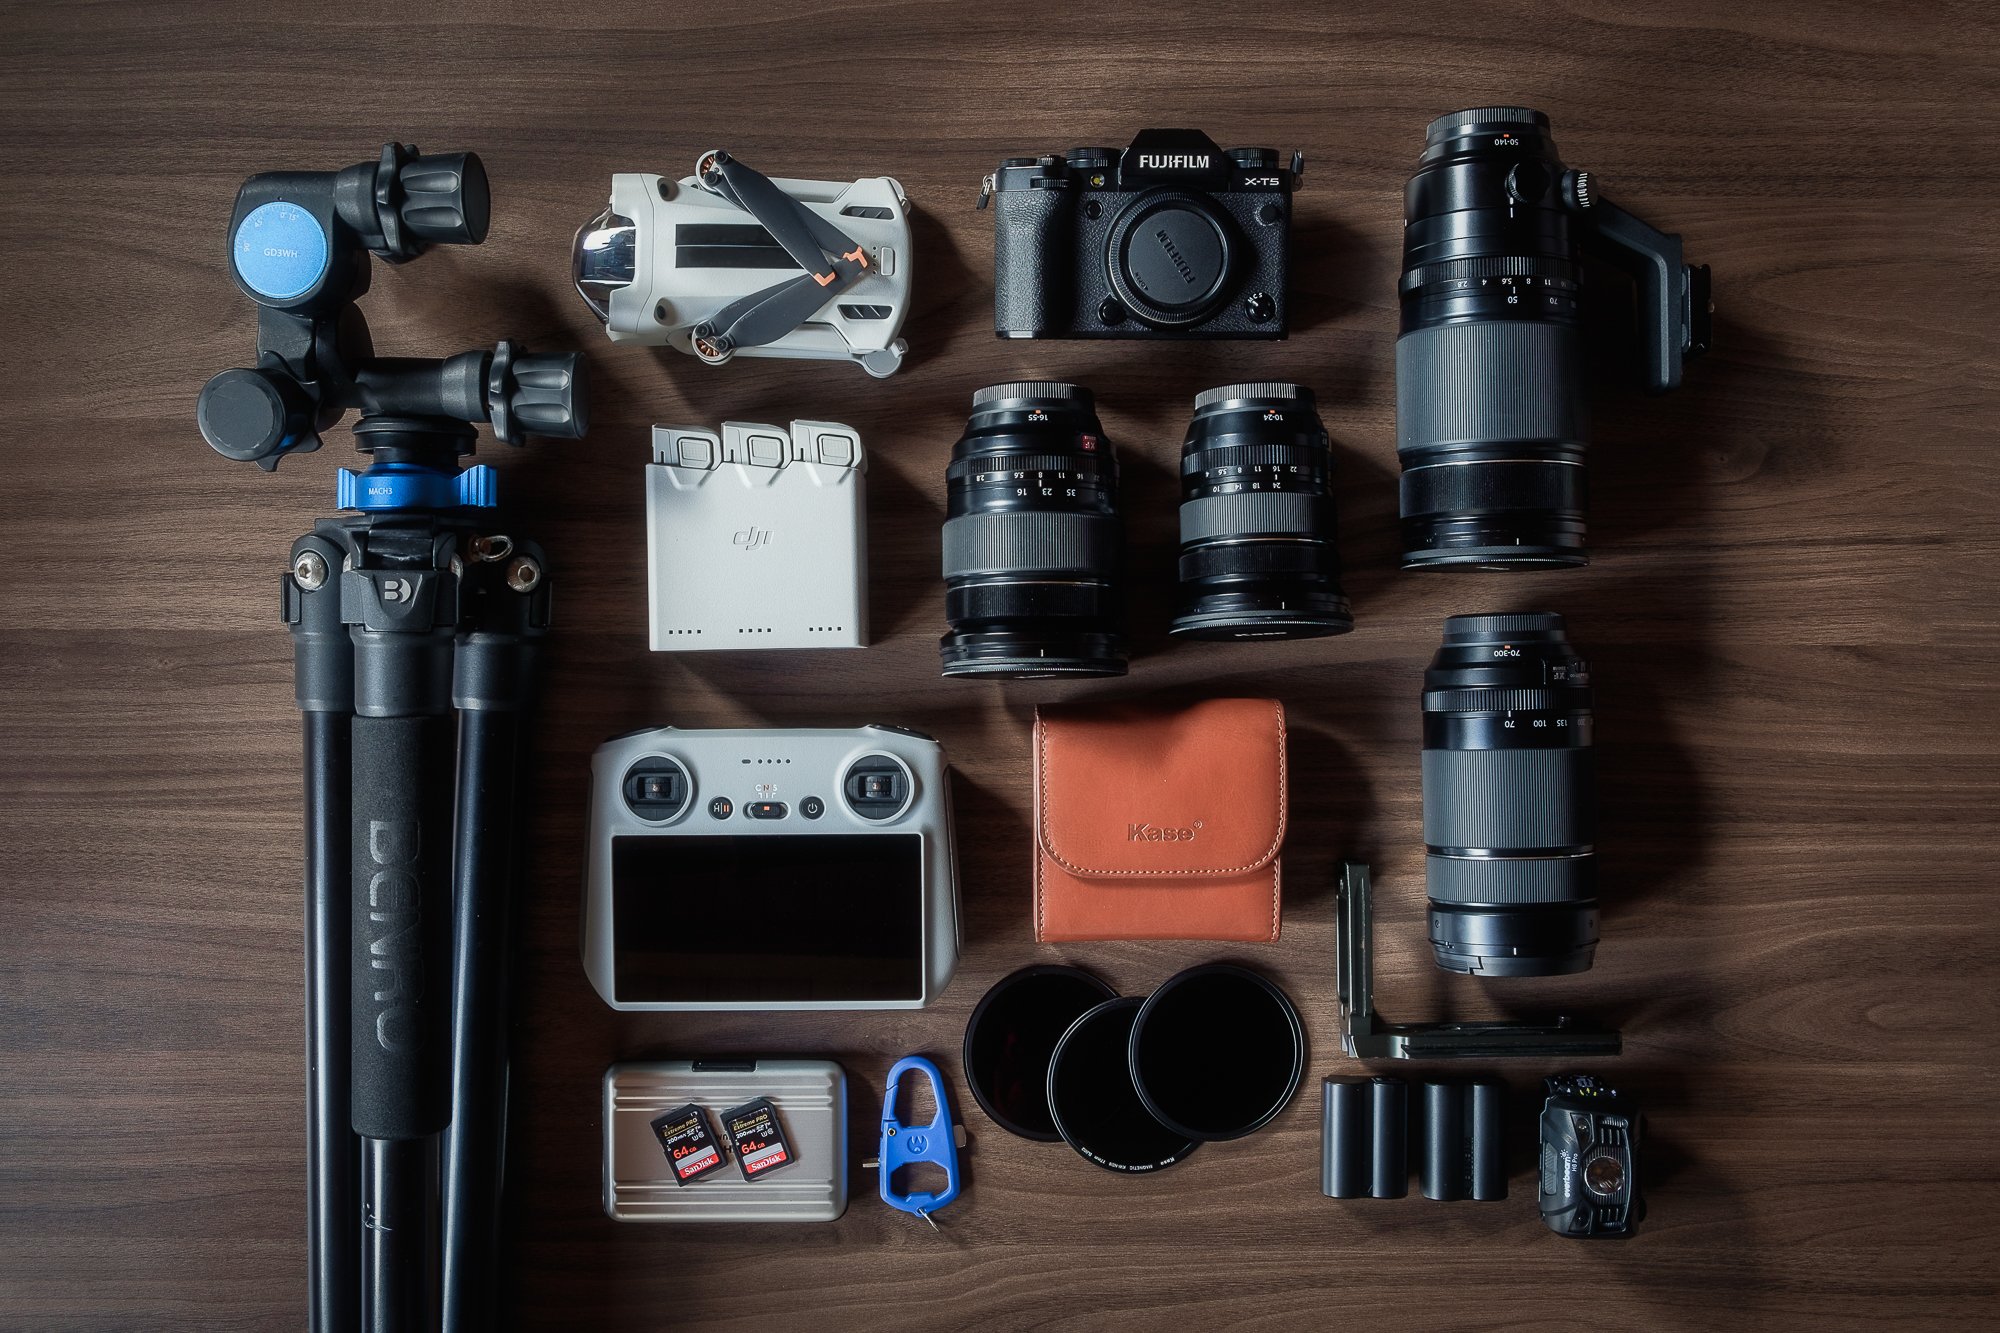
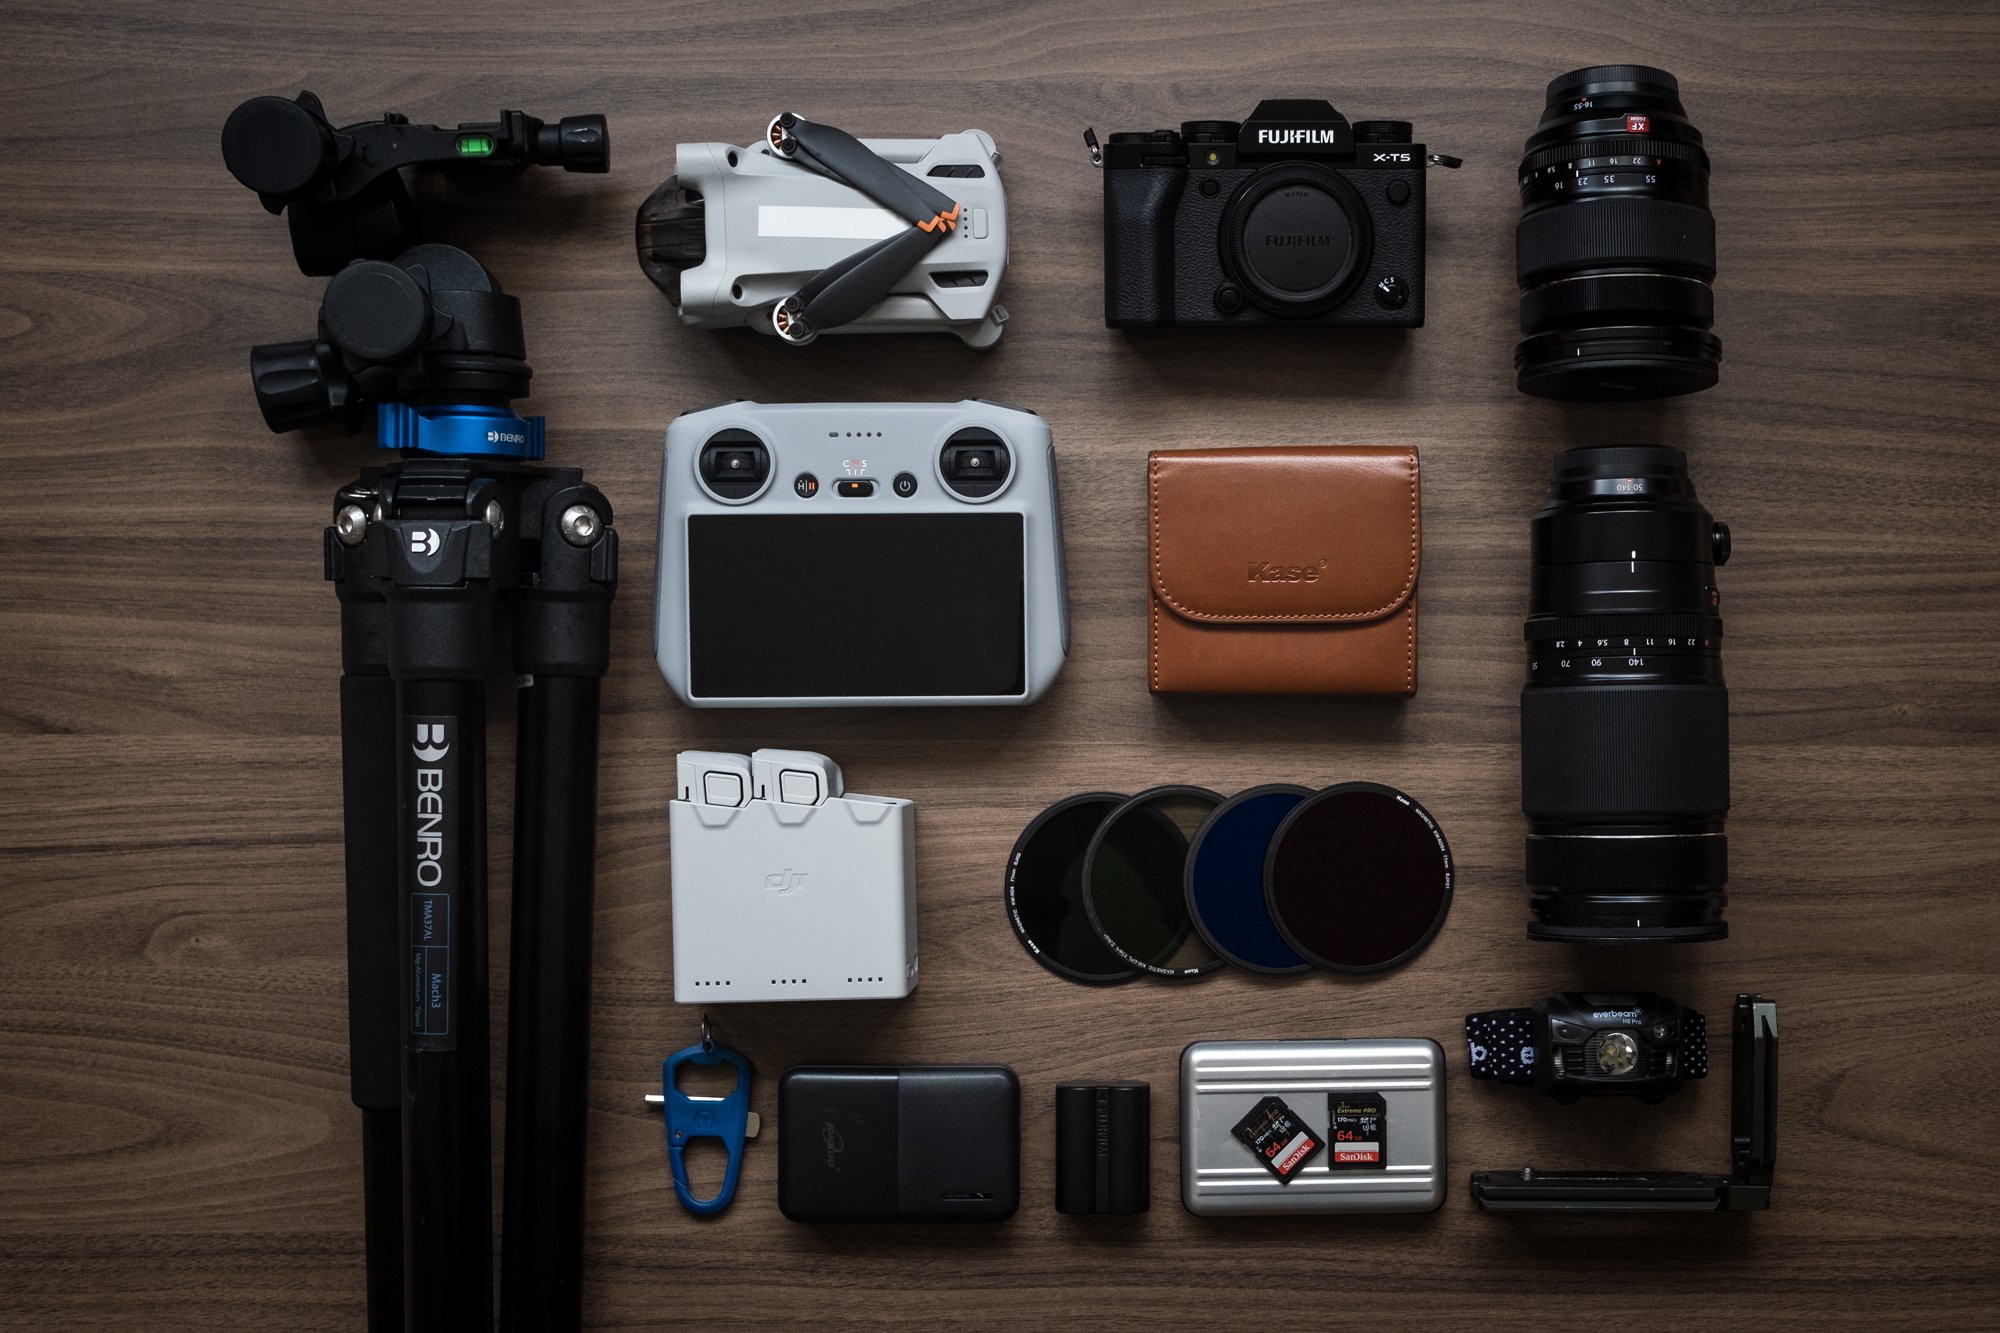
My landscape photography gear
Fujifilm Camera and Lenses
XT5 camera: With a weather-resistant shell, dual card slots, 40 megapixels and tons of other useful features, this is a great camera for landscape photography. If you want to read more about how well the camera performs from a landscape photographer’s perspective, you can read my review of it here.
XF16-55 F2.8 standard zoom lens: Although I still have the very capable XF18-55mm, in 2022, I decided to upgrade to the XF16-55 F2.8 as I wanted all my main landscape gear to be weather sealed. The improved optics is a nice bonus, but the extra weight most certainly isn’t.
XF50-140mm F2.8 telephoto lens: For the same reasons I upgraded my standard zoom, I also traded in my XF55-200mm lens for the even heavier but weather-sealed XF50-140 F2.8.
XF10-24mm IOS WR wide-angle lens: New to 2024 is this wide-angle lens. I used to own the original non-weather-sealed version but decided to sell it as I wasn’t using it often enough, but in 2023, I felt not having the ability to go as wide as 10mm limiting in certain situations and with the release of the newer, weather-sealed version of the 10-24mm lens, I decided to buy it once again.
XF70-300mm IOS WR telephoto lens: Like with the wide-angle lens, I felt at times when out in the landscape, the 50-140mm lens lacked the extra reach I needed. So, instead of buying a teleconverter as I had originally planned, I opted for the 70-300mm instead. I’ve not had this lens too long, so the jury is still out but after using it just a few times, so far so good.
DJI Mini 3 Pro drone
In 2022, after what seemed like an eternity of indecision, I finally took the plunge and purchased my first drone. For a few reasons, I opted for the DJI Mini 3 Pro. Having owned it for a while now, and given most of the blogs and YouTube videos out there talk about the video side of things, I wrote a few blog posts about using the DJI Mini 3 Pro specifically for landscape photography.

DJI Mini 3 Pro | A Landscape Photographer’s Review

DJI Mini 3 Pro Camera Settings for Landscape Photography

How I Process My Landscape Photos Taken with the DJI Mini 3 Pro
Filters and accessories
Kase Wolverine magnetic filters: I used to carry larger, square slide-in filters and would spend time fiddling with step-up rings for the different lenses and the holder before being able to slide in the filter I intended to use. That all changed when I got the Kase Wolverine filters. No more fuss! Snap the filter onto the lens and get shooting. In the pouch, I have a CPL, a 3-stop, 6-stop and 10-stop filter. I wrote more about my experiences with these filters in a previous blog post here: Kase Magnetic Filters | A Landscape Photographers Review.
Benro Mach3 TMA37AL tripod: After using my previous tripod for several years, I was after something a little sturdier and a little taller without relying on a less stable centre column. After much research and getting a few recommendations, I eventually opted for the Benro Mach3TMA37AL.
Benro Gd3Wh geared tripod head: For years I’d been happy to use a ball head on my tripod but when I started taking woodland photos, the lack of precision and having to compensate for further movement while making small adjustments with the tripod head began to frustrate me a lot. I invested in this Benro geared head and although it has a bit more bulk, it has solved this problem for me completely.
Spare batteries: The Fujifilm NP-W235 used in the XT4 and XT5 is so much better than the last generation of batteries and I can shoot for much longer on a single charge.
Memory cards: You can’t have too many memory cards. I still prefer to use Sandisk as they have been bulletproof for me so far, but I know there are other brands, just as capable out there.
3 Legged Thing L-bracket: Used to quickly switch from landscape to portrait orientation when using my tripod.
3 Legged Thing Toolz: A handy tool to tighten tripod legs, remove L-brackets, etc.
Headtorch: Not much to say about this one, other than it is bright, light, waterproof and rechargeable. It cost about £15 and lights my path on those dark treks before or after a shoot.
Camera Bag
If you don’t own a load of camera bags, can you even call yourself a landscape photographer? Jokes aside, I’m still using the Vanguard VEO Active 46 as my primary means to carry my landscape photography gear around. For the features I wanted, the size, weight and price, it ticks all the boxes for me.


Going forward, I have half an eye on what Fujifilm plan for the X-T30 II replacement in 2024 as I may decide to buy a backup camera. I’m also contemplating the XF16-80mm F4 lens to complement the XF70-300mm and use them both for trips where I need to keep my camera bag weight down.
As with all my blog posts, if you have any comments or questions, feel free to drop a comment below.
Until next time.
Trevor

Sunrise in the City
Photos from a short walk around the London Bridge area with my camera at sunrise.
Continuing my mission to upload more of the photos I take to this website without feeling pressure to write long-form, location-based stories or update my portfolio after every trip, here is another on-location jaunt where I took a stroll with my camera along the Thames at sunrise.
Arriving in the nick of time off the train, I started off just a little west of Tower Bridge on the south side of the river. A composition I’d not yet photographed at this time of day and with the blue hour making way for the pre-sunrise glow, I wasted no time getting the camera out to take the photo. It took a minute or two to fine-tune the composition, making sure Tower Bridge was nicely centred between the lights above and the wall below. With the composition looking as balanced as it could be, I took the photo.
With the help of my ND filter (I forget which one), I opted for a 15-second exposure. This was because there were one or two early morning runners on the walkway and by opening the shutter for 15 seconds, it rendered them invisible in the frame. This is a great tip for when photographing places with people and you want them to magically disappear from the photo.

Fujifilm XT5 | XF16-55mm | 16mm | 15 Seconds | f/9 | ISO125
Talking of quick tips, here’s another for anyone looking to photograph the city with a tripod, particularly in this area between London Bridge and Tower Bridge. Get it done fast! It doesn’t matter if you are the only one out there, the tripod police are always on the hunt, ready to pounce the minute they hear the telltale sound of a tripod leg being extended. That’s exactly what happened as I was taking the photo above. Luckily for me, I know it to be a hot spot for being told off for using a tripod, so I composed the photos, locked in a few settings and only then did I extend the tripod, mount the camera and click the shutter. I had around 3 or 4 minutes of photo-taking joy before the inevitable chap in a reflective jacket headed my way.
To be fair, whether you agree or not (obviously I do not), it’s private property and those are the rules. If the security guards come and ask me to put the tripod away, I know they are just doing their job and are usually polite enough. Deep down, they probably don’t see what the big deal is either, but I don’t cause a fuss and just pack up and move on. I can always return another time.

Fujifilm XT5 | XF16-55mm | 16mm | 2.5 Seconds | f/13 | ISO125
Moving on and with a little pre-sunrise magenta still lingering in the sky, I stopped by a spot I’ve photographed many times featuring this view of HMS Belfast with Tower Bridge and the Tower of London visible in the background.
The photo above is probably my favourite I’ve taken at this location. I love a blue-hour cityscape, but the pink light hitting the clouds and reflecting on the water added something extra to this image.
After taking in the last of that pre-sunrise colour, some thicker cloud passed through taking all the nice light and colour with it. I decided to hang around for a while and wait for the cloud to move, with the hope that some golden morning light might still make it through. As you can see by the photos below, that’s exactly what happened.

Fujifilm XT5 | XF10-24mm | 14mm | 1/80th Second | f/10 | ISO125

Fujifilm XT5 | XF10-24mm | 10mm | 1.3 Seconds | f/10 | ISO125

Fujifilm XT5 | XF16-55mm | 16mm | 1/1000th Second | f/6.4 | ISO125
The photo above of HMS Belfast using the railings and roof to create a framed composition is one I haven’t personally seen before and although it’s probably been taken a thousand times before, it was new to me. Finding previously unseen compositions of London’s cityscape is always difficult and on the rare occasions it does happen, it always gives me a buzz.
With the light getting increasingly stronger and more contrast appearing in the scene, I started to take photos to process them for my Timeless City project. While editing these as black-and-white photos back in post-production, I couldn’t ignore how good they looked in all that glorious golden light, so I also decided to process them in colour.

Fujifilm XT5 | XF16-55mm | 16mm | 1/1000th Second | f/6.4 | ISO125
Walking across London Bridge, I took a few photos looking east along the Thames, directly towards Tower Bridge and the rising sun. The dynamic range in the scene was through the roof, and I had to let go of some of the cloud details in the brightest areas around the sun to preserve some of the shadow details in the scene.
Even though this is a well-photographed view, taking the photos in these conditions, in this light and processing them my way makes them unique to me.

Fujifilm XT5 | XF10-24mm | 10mm | 1/40th Second | f/11 | ISO125
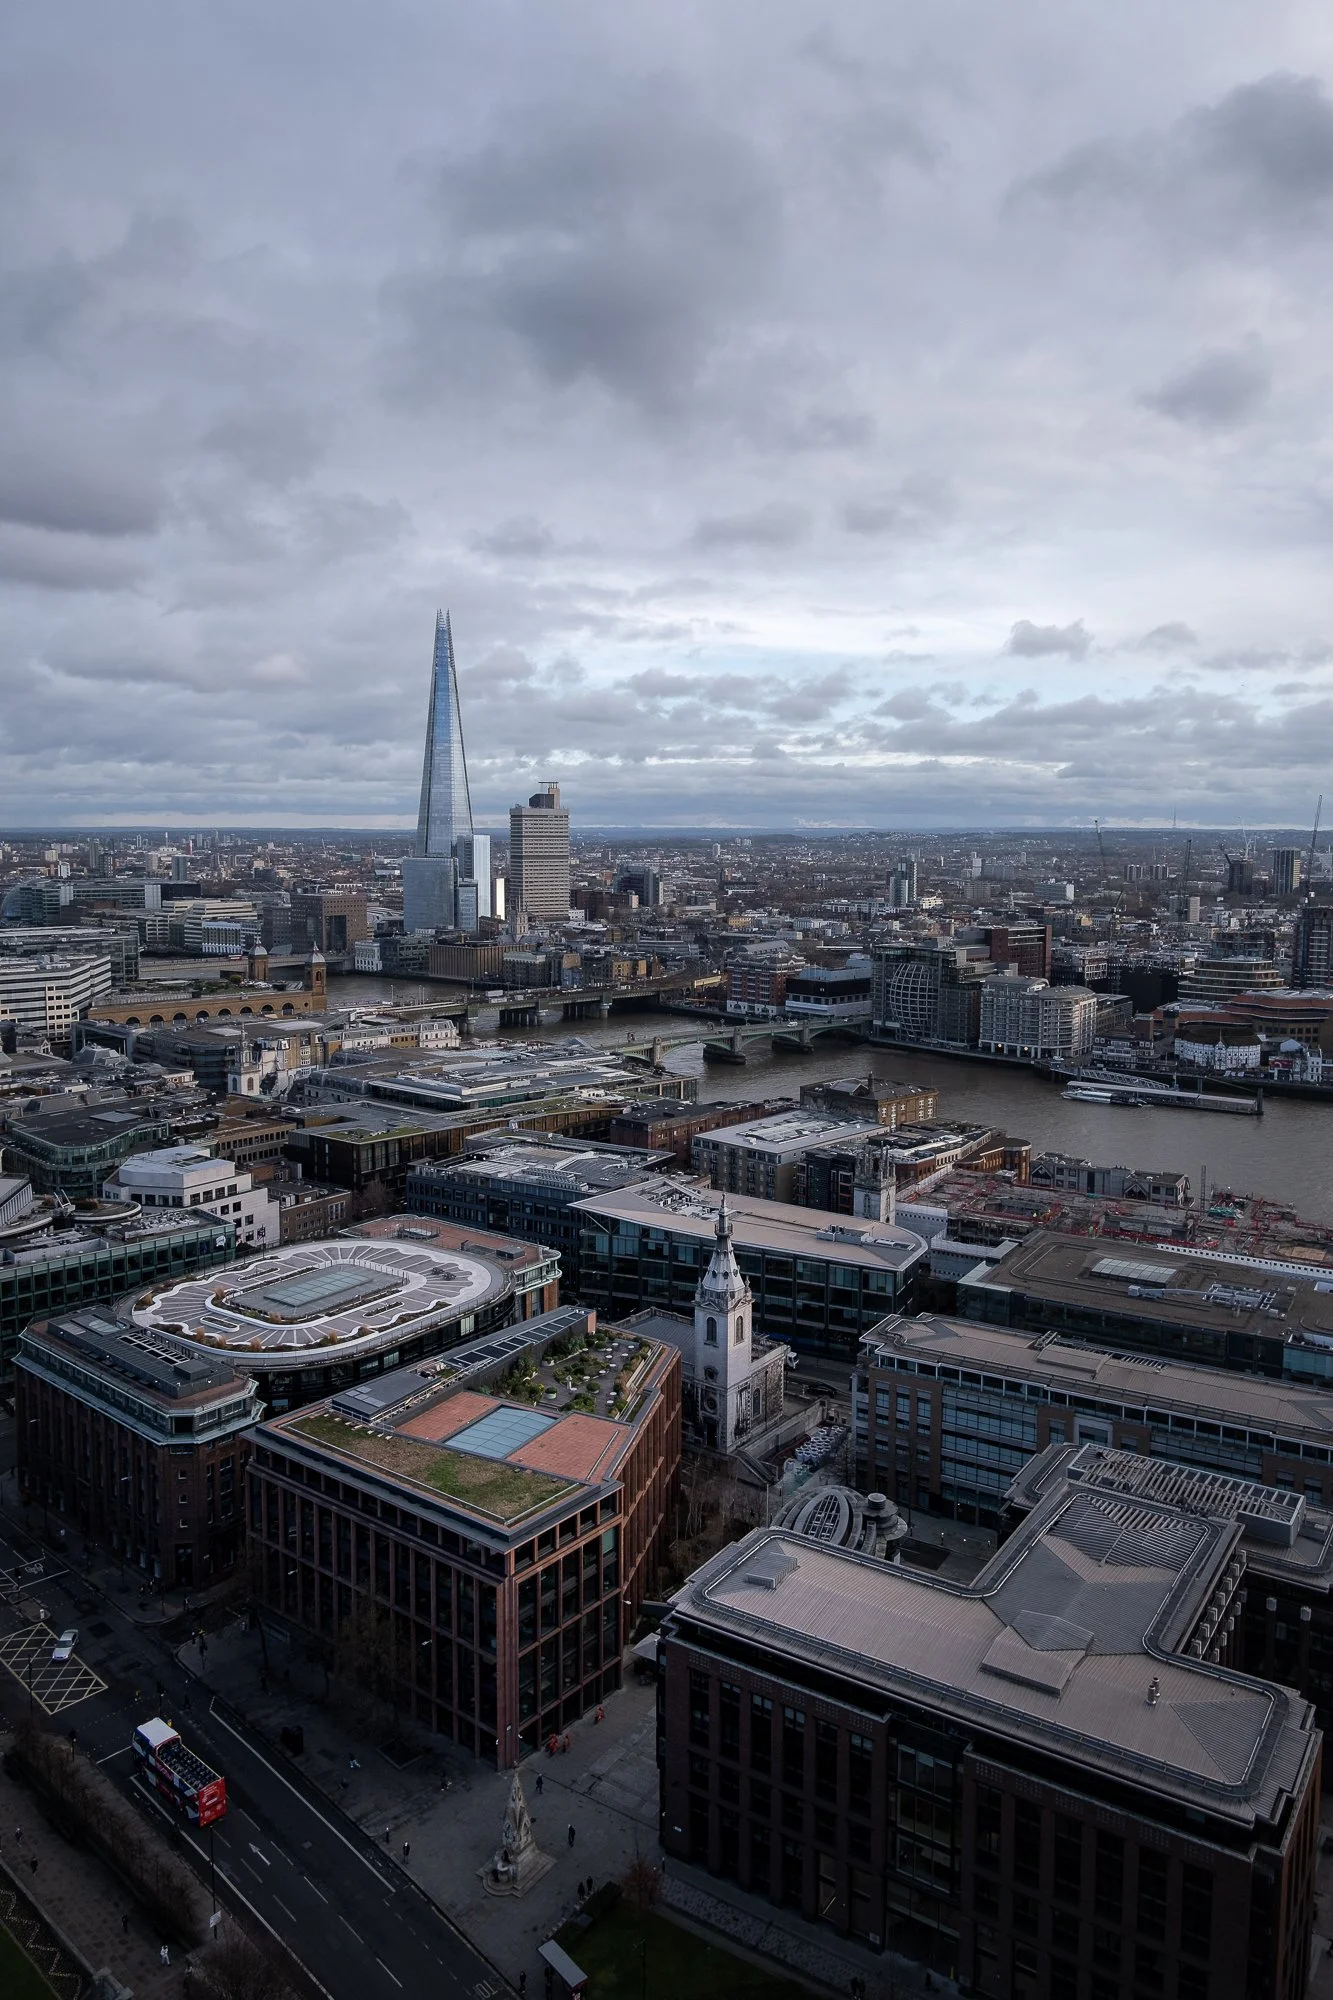
While the sun rose higher into the sky, I made my way to the opposite side of the river to get a view of The Shard across the water and take my final photo of the morning.

Back of the camera shot with an iPhone
This composition from between two buildings and The Shard in the centre has captured my attention lately and I have visited it a few times to photograph it in different conditions. I have, in my mind’s eye two particular images which I know are possible in the right conditions, so being the person I am, I have returned time and again to take them before I feel I can move on with my life. It’s becoming an obsession!
It may well be the increased use of the square format, but I’ve fallen for the central composition recently, and with lines around the edge of this frame, leading into the centre, towards The Shard, this composition works for me. In this picture, I like the soft light illuminating the city across the river and the natural vignette created by the shadows in the alley.
That’s it for this on-location post. What do you think of these bite-sized blogs? Do you like them and want to see more?
As I mentioned, I like to write them as they enable me to share a few more of my photos without depending on the social media algorithm, and I can display and talk about them in a way that suits me.
If you have any feedback, please do leave a comment or get in touch here.
Until next time.
Trevor
Photographing autumn colour with the Fujifilm XF50-140mm lens
I took a walk into the woodland with just my Fujifilm XF 50-140MM telephoto lens to photograph the last of the autumn colours.
Late last year, toward the end of November (2023), I popped out to the forest to photograph what was left of the autumn colours. Only having a couple of hours to spare that morning and deciding to travel light….(ish). I took just my Fujifilm XT5 camera, the XF 50-140mm f2.8 lens and my tripod. Everything else was left in the car. Don’t worry, this blog isn’t a lens review, but more of an acknowledgement of the single camera and lens combo I used for all the photos during this little photography jaunt.
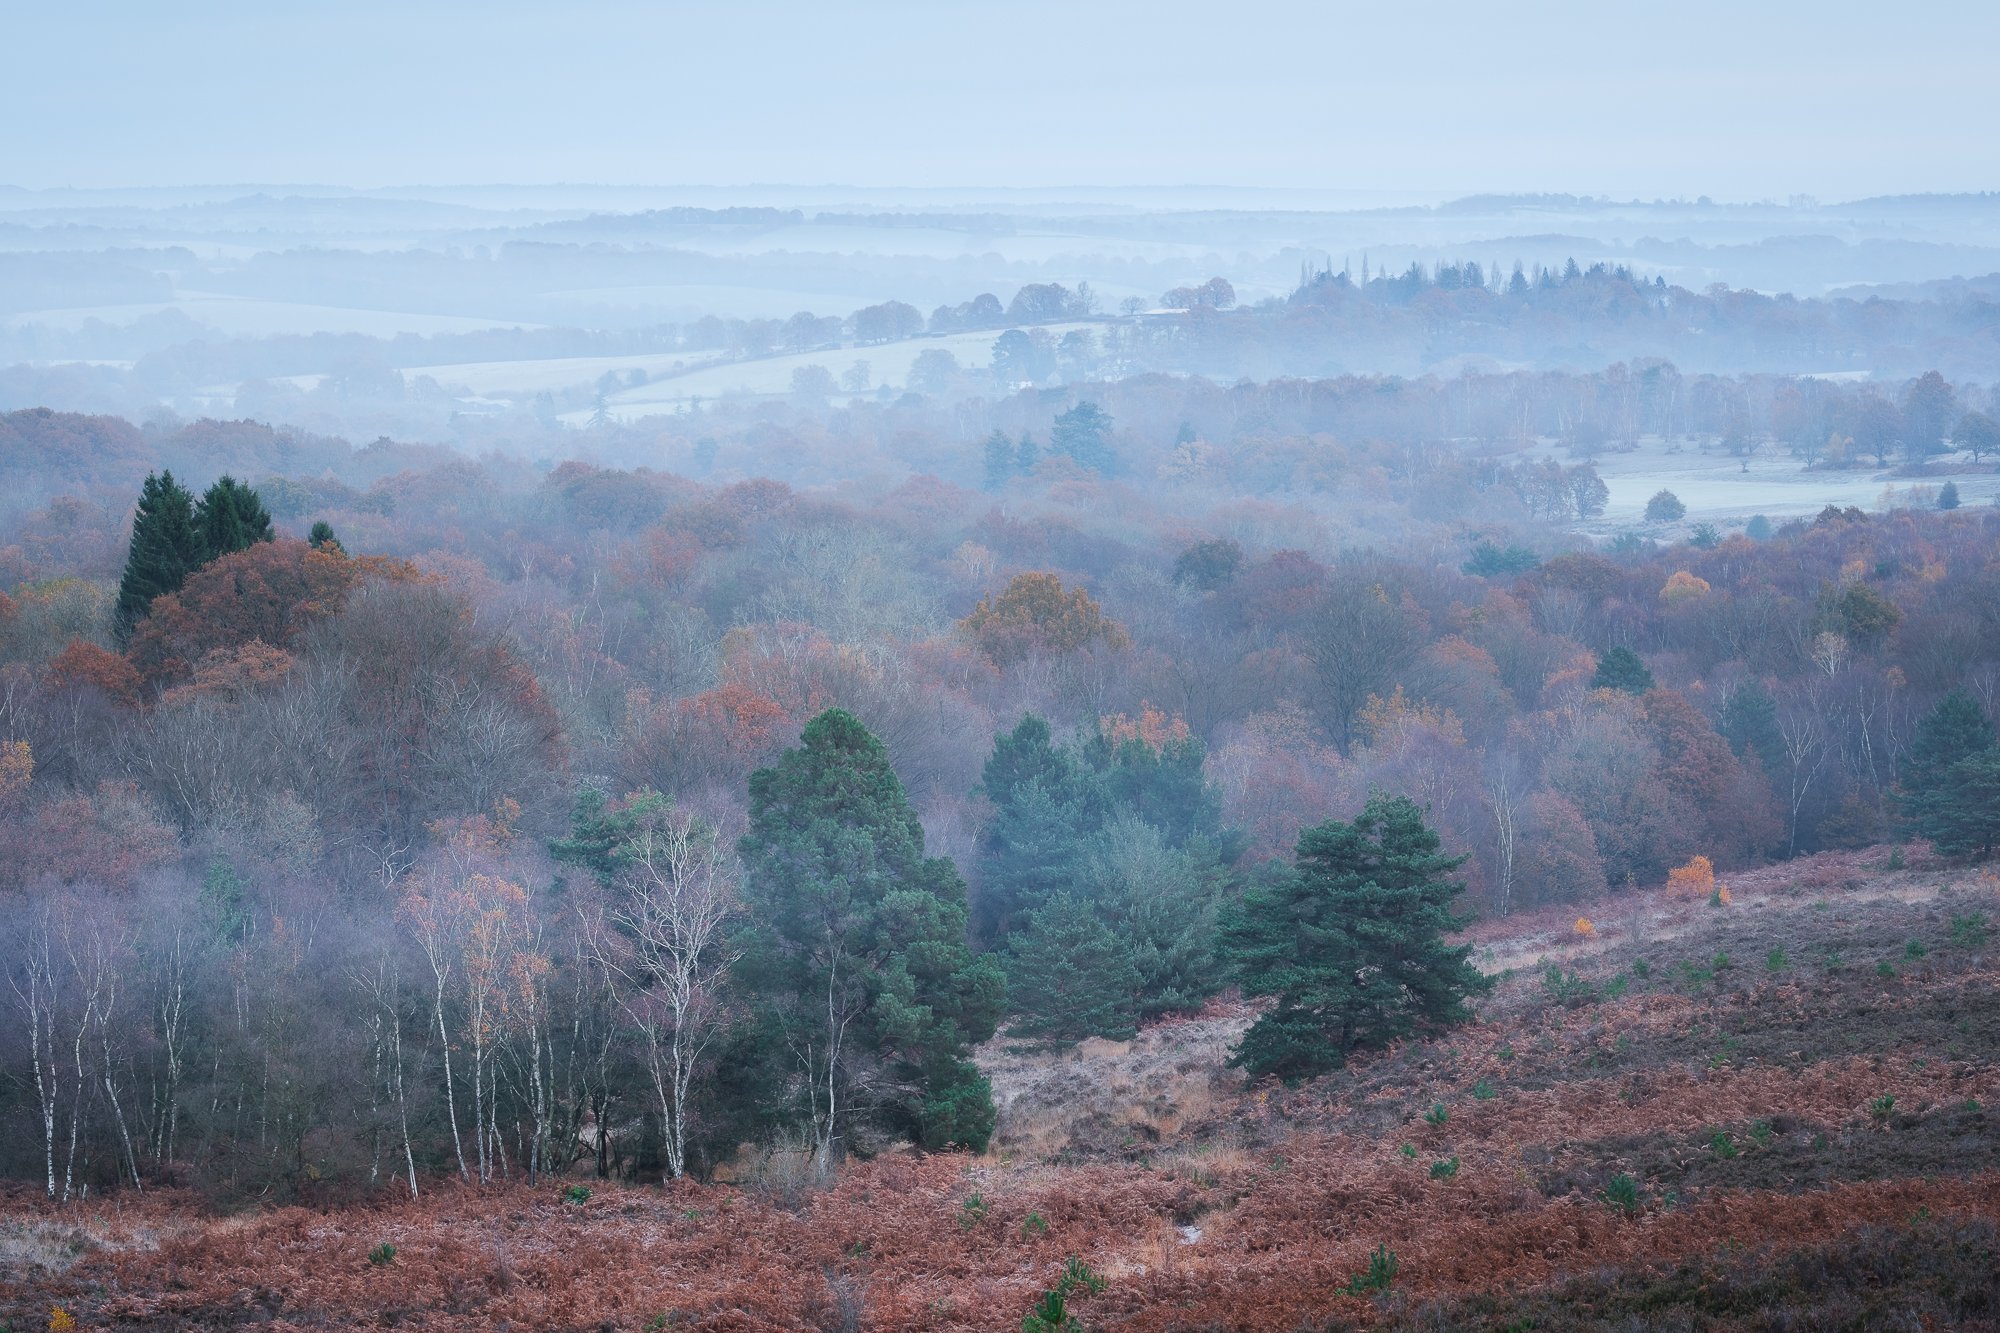
I arrived before sunrise and whenever I start from this area of the forest, I’ll typically head to my favourite viewpoint with a coffee to watch the sunrise and witness the landscape appear in front of me. It was a cloudy day, but for a short period before sunrise, there was a thin mist in the air, providing a touch of atmosphere across the landscape. So, taking advantage of the cooler, pre-sunrise tones, I took this photo of the undulating landscape below.
Fujifilm XT5 | XF50-140mm | 59mm | 1.3 Seconds | f/10 | ISO125
As the light levels increased and the mist withdrew into the distance, I photographed the same scene, but this time with the colours in the foreground looking warmer and more autumnal. Wanting to take in the wider landscape and being restricted to a minimum focal length of 50mm, I decided to take a stitched panoramic image. The advantage of doing it this way is that I can switch to a portrait orientation and zoom in further to bring the foreground even closer, making it appear larger in the picture. If I tried the same with a single shot on a wider lens, then I would have a huge foreground, tons of sky and a small slither of trees in the middle.

Fujifilm XT5 | XF50-140mm | 77mm | 0.6 Seconds | f/10 | ISO125
The other benefit of taking a stitched panoramic with 7 or 8 40-megapixel images is that you end up with a super-high resolution file. The panorama above is a whopping 157 megapixels and with so much resolution to play with, I was able to create another version of the image by just cropping it down to a 3:2 aspect ratio. The cropped photo below is still over 70 megapixels. Thats nearly double the resolution of my camera!

Fujifilm XT5 | XF50-140mm | 77mm | 0.6 Seconds | f/10 | ISO125
Before heading off into the woods and being drawn to how the brighter birch trees looked against the darker trees along the woodland’s edge, I took advantage of having the telephoto lens and zoomed right into 140mm and took some close-up photos of the woodland’s edge.

Fujifilm XT5 | XF50-140mm | 140mm | 2 Seconds | f/10 | ISO125

Fujifilm XT5 | XF50-140mm | 140mm | 0.5 Seconds | f/10 | ISO125
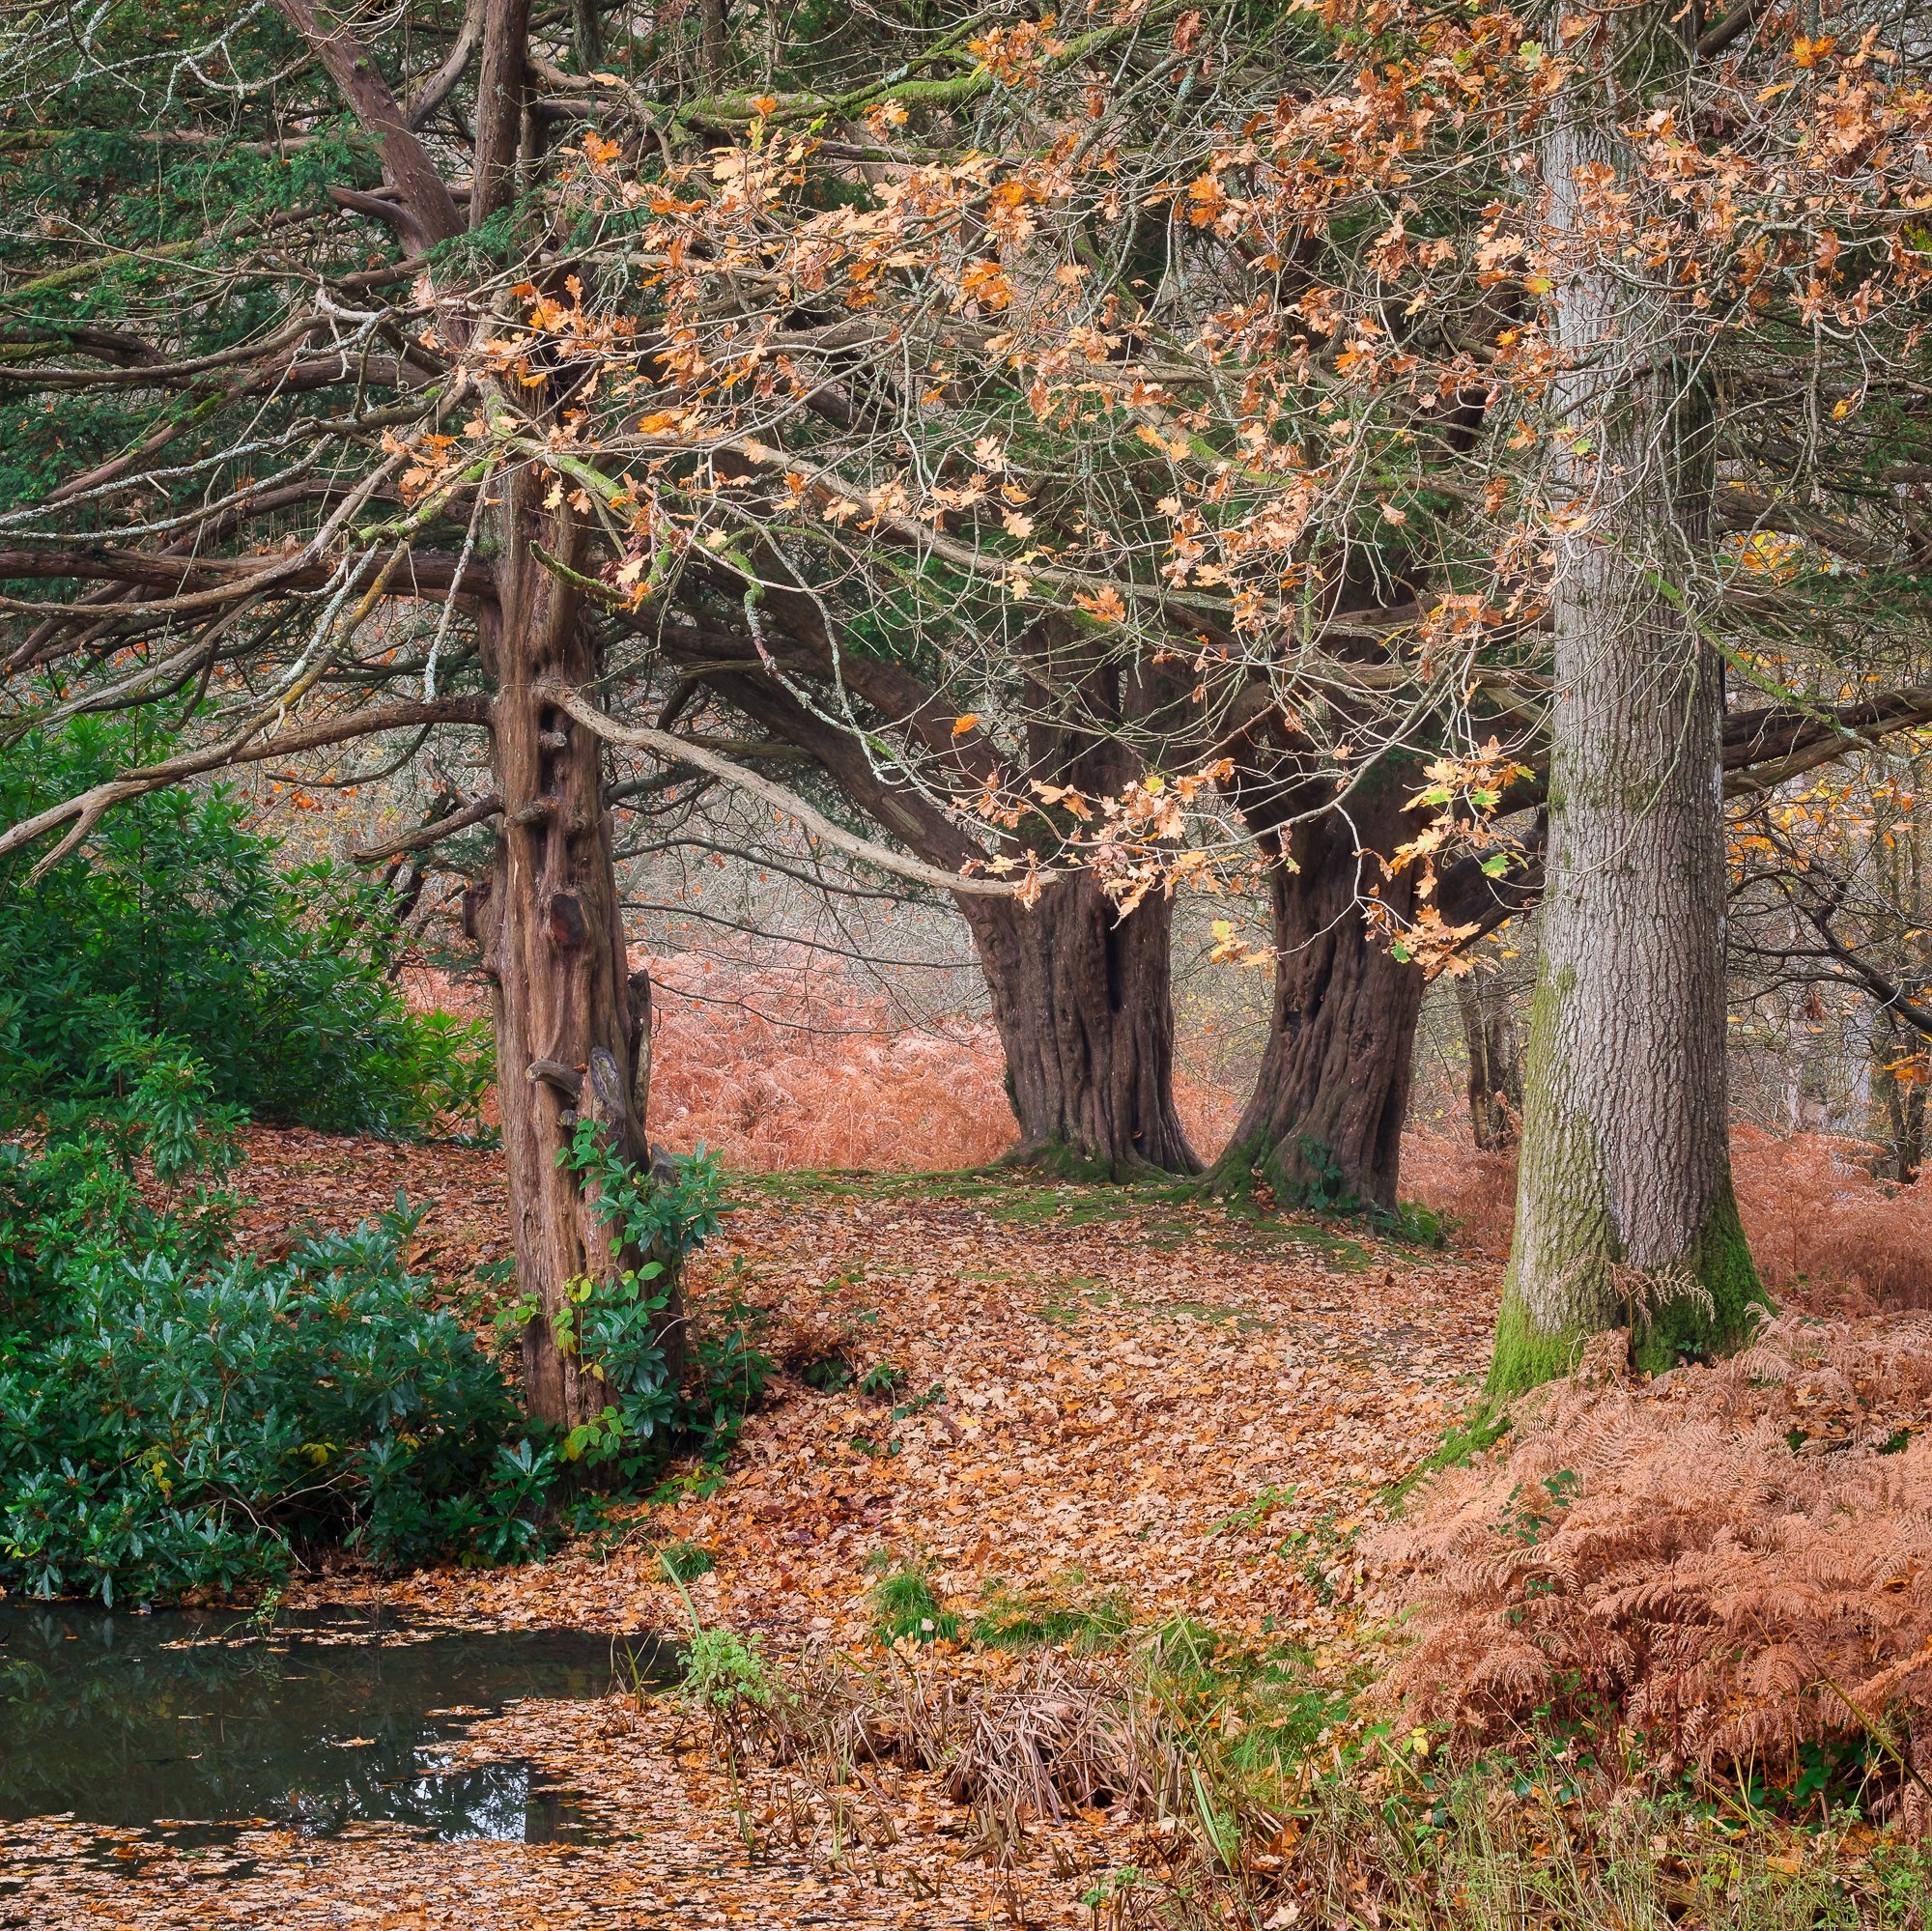
By this time, I had probably been in the same spot for around an hour, so, I decided to stretch my legs and head into the forest to have a little explore. Having just the 50-140mm lens with me, I focused on taking pictures of more intimate scenes, including just parts of the trees and cutting out any sky from the frame.

Fujifilm XT5 | XF50-140mm | 111mm | 0.6 Seconds | f/10 | ISO125
Fujifilm XT5 | XF50-140mm | 52mm | 0.8 Seconds | f/10 | ISO125

Fujifilm XT5 | XF50-140mm | 50mm | 1/5th Second | f/9 | ISO125

Fujifilm XT5 | XF50-140mm | 140mm | 1/8th Second | f/9 | ISO125
On the face of it, having one lens can appear restricting, but while out in the field with my camera, it didn’t feel like that at all. It felt a little liberating in fact. There was no decision needed as to what lens to use, no faffing with gear and certainly less weight. It helped me to focus my mind and see in a specific way, resulting in me coming away from the shoot with a few photos I’m pleased with.
I hope you enjoyed this bite sized on-location post. In a bid to get more of my photos up on my website, look out for more like this throughout 2024.
Until next time.
Trevor
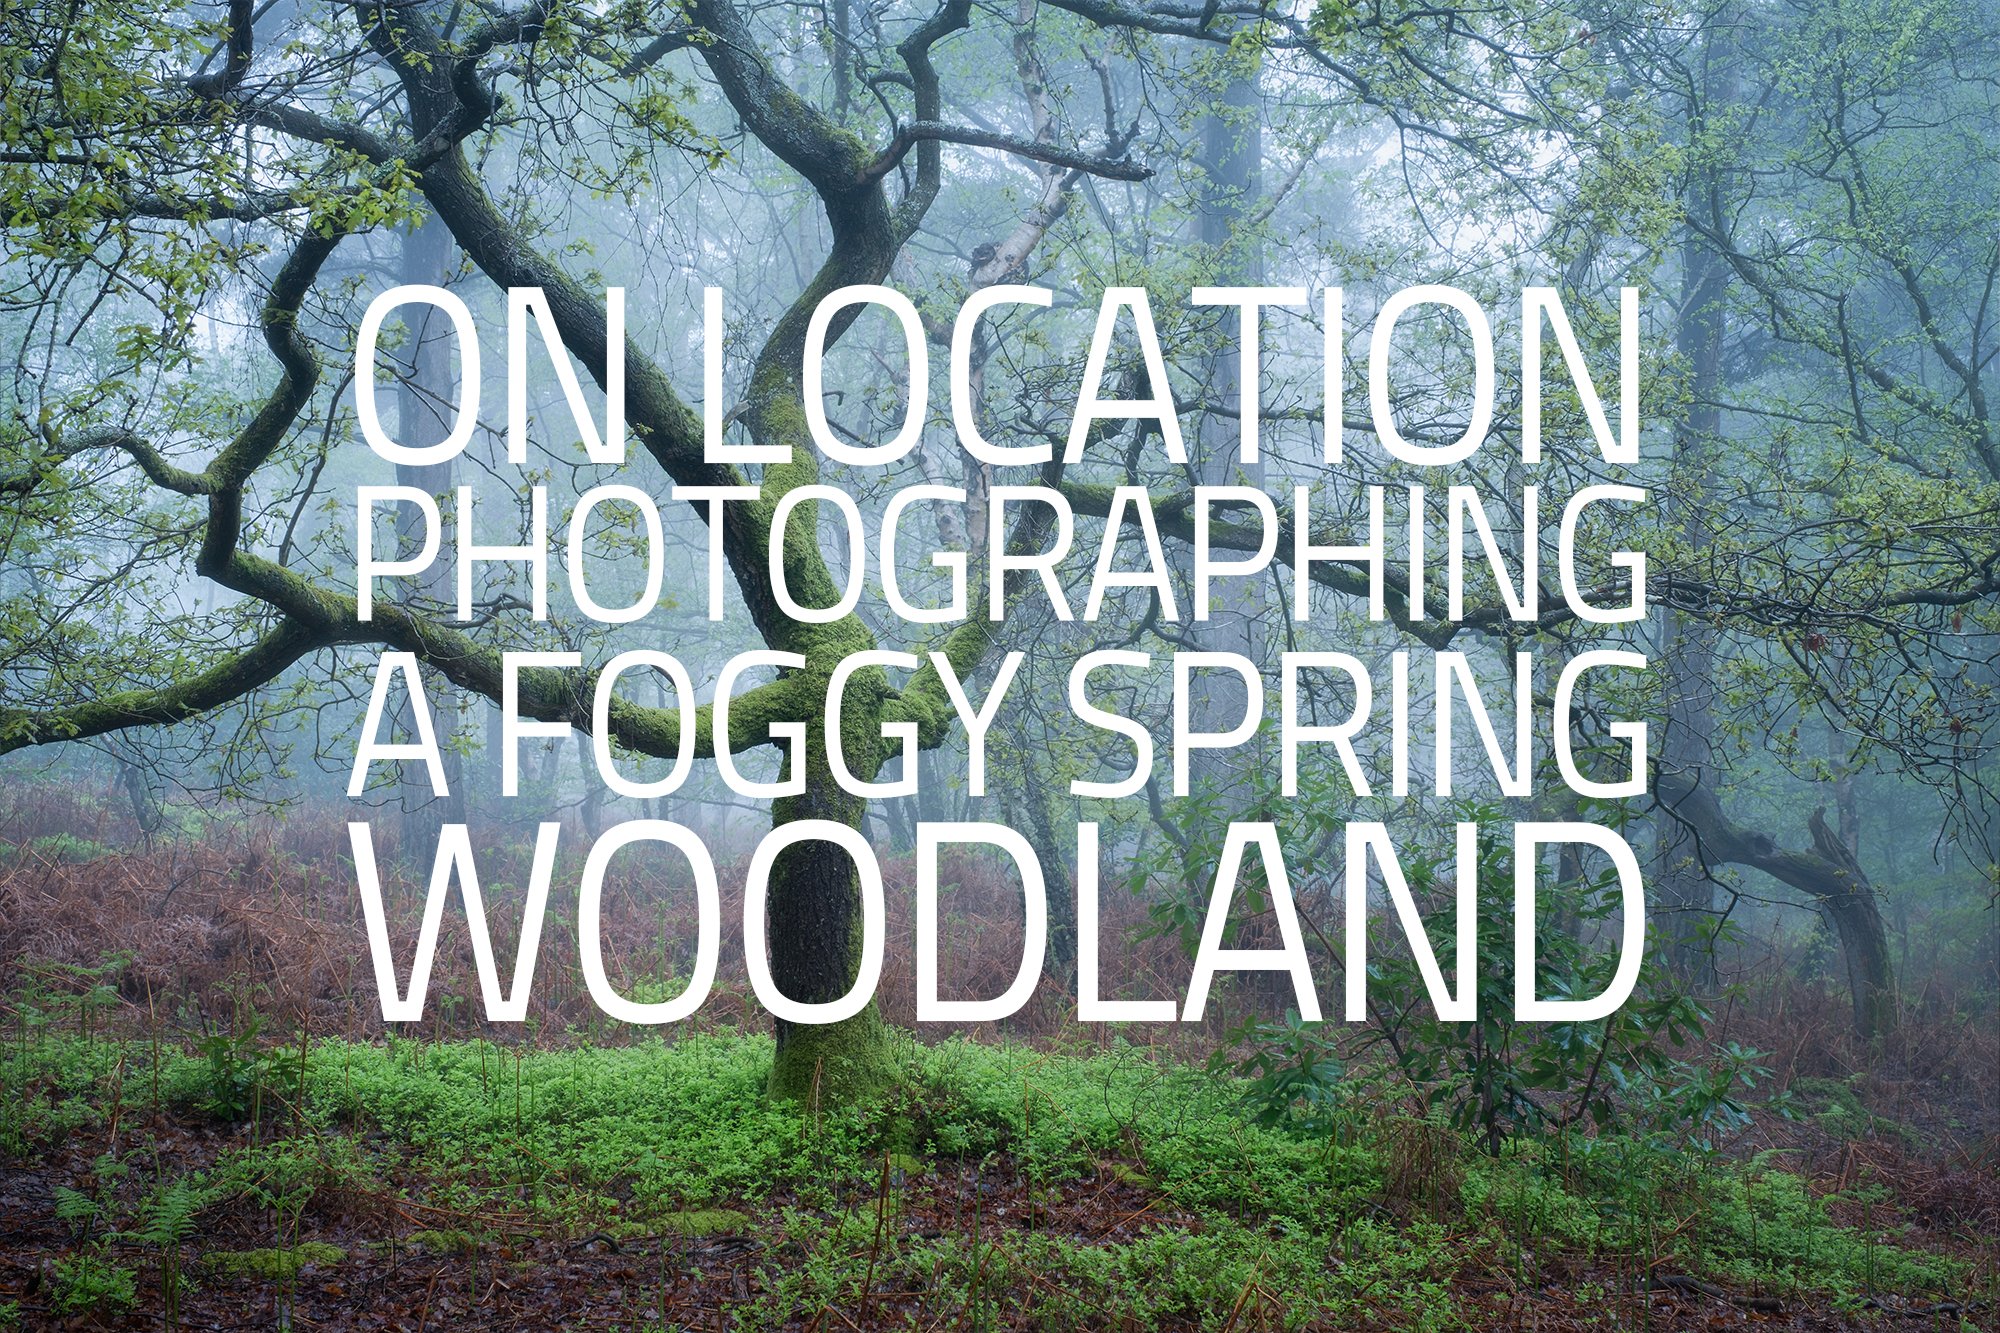
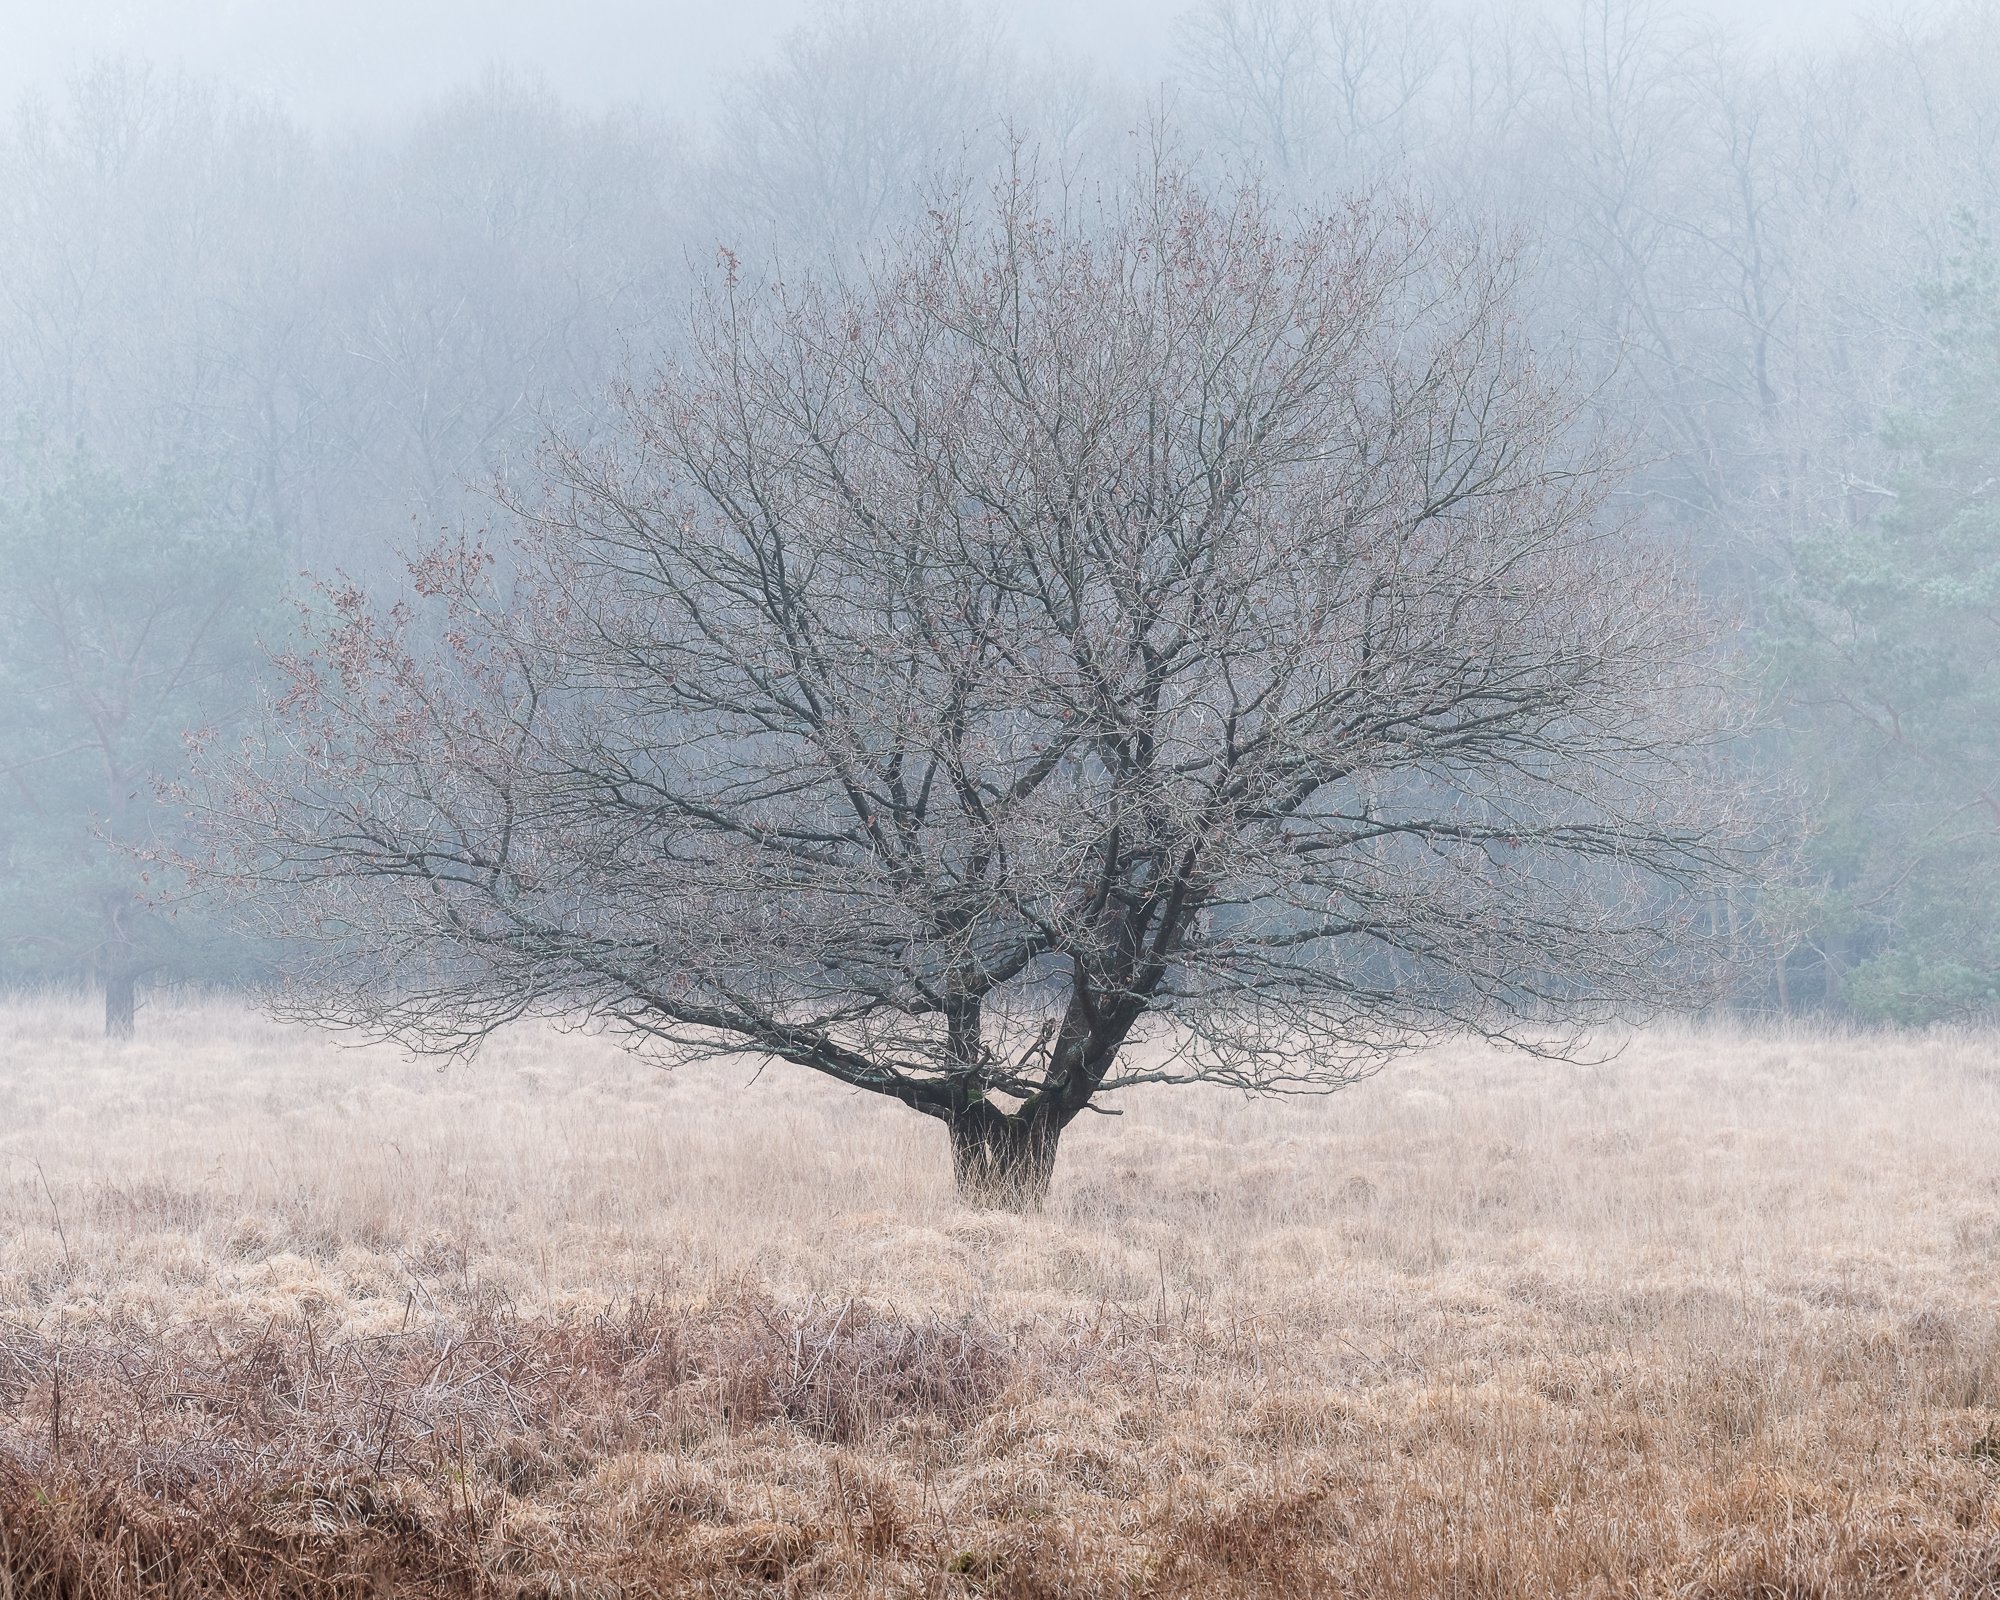
On Location Photographing a Foggy Spring Woodland
With fresh green leaves, a scattering of bluebells and some fantastic foggy conditions, I've shared some of the photos I took during a recent hike through my local woodland.
It’s always a bonus when out photographing woodland to have foggy conditions and that’s precisely what I had back in April, just before the spring growth arrived. I spent a couple of fantastic hours with my camera that morning and you can see some of the photos I took on my previous blog post On Location Photographing a foggy winter woodland.
Fast forward just a few weeks later and the forest had transformed from cold and colourless, to vibrant and very, very green. The colour of the new leaves was almost luminous and whereas it’s not a woodland known for having an abundance of bluebells, there were pockets of them all over the place. As luck would have it, on the day I chose to revisit the forest to photograph its fresh spring colours, I was again gifted with glorious foggy conditions. Lucky me!!
For this trip into the woodland, I used my standard landscape photography gear (which you can read all about here), which includes the fantastic Kase Magnetic filters. The Circular Polariser was particularly useful to add a touch of clarity and reduce a little reflective light from the foliage.

Fujifilm XT5 | XF16-55mm | 31mm | 10 Seconds | f/9 | ISO125
Just a quick note on this character above. This was our first encounter. Set back from the path I usually tread and only a few minutes into the walk, something told me to climb the small bank to my right and take a look around. I’m glad I did. By veering off the beaten track, I’ve now found a new woodland character that, without a doubt, I’ll be visiting time and again with my camera in different conditions.

Fujifilm XT5 | XF16-55mm | 55mm | 1 Seconds | f/9 | ISO125

Fujifilm XT5 | XF16-55mm | 41mm | 1 Seconds | f/9 | ISO125

Fujifilm XT5 | XF16-55mm | 44mm | 1 Seconds | f/9 | ISO125

Fujifilm XT5 | XF16-55mm | 40mm | 0.6 Seconds | f/9 | ISO125

Fujifilm XT5 | XF16-55mm | 31mm | 0.4 Seconds | f/9 | ISO125

Fujifilm XT5 | XF16-55mm | 55mm | 1/3rd Second | f/9 | ISO125

Fujifilm XT5 | XF16-55mm | 41mm | 1 Seconds | f/9 | ISO125

Fujifilm XT5 | XF16-55mm | 30mm | 1/2 Second | f/9 | ISO125

Fujifilm XT5 | XF16-55mm | 41mm | 1/3rd Second | f/9 | ISO125

Fujifilm XT5 | XF16-55mm | 16mm | 1/2 Second | f/9 | ISO125

Fujifilm XT5 | XF16-55mm | 31mm | 0.4 Seconds | f/9 | ISO125

Fujifilm XT5 | XF16-55mm | 24mm | 0.4 Seconds | f/9 | ISO125
Until next time.
Trevor

On Location Photographing a foggy winter woodland
Back in April 2023, when all my weather apps were aligned and fog was predicted for the next morning, I packed my bag and set the alarm for an early morning trip out to my local woodland.
What is the fascination many photographers have with a foggy woodland?

Fujifilm XT5 | XF16-55mm | 51mm | 0.4 Seconds | f/7.1 | ISO125
I’ll try to answer.
Along with simplifying and adding a sense of depth to a composition, nothing brings a sense of mood and atmosphere to a woodland like some mist or fog. Along with softer edges and textures, the diffused light falling on the trees creates an ethereal atmosphere and a sense of mystery in the photos and being drawn to lower contrast scenes in general, the resulting look and feel it can create appeals to my taste and style.
Like a lot of landscape photographers, as soon as the weather app shows even a tiny chance of fog in my local area, I’m immediately planning an early morning trip to one of the woodlands I like to photograph, keeping my fingers firmly crossed that any fog predicted comes to fruition.
So, back in April 2023, when all my weather apps were aligned and fog was predicted for the next morning, I packed my bag and set the alarm.
In my bag was my Fujifilm XT5 and both my XF16-55mm and XF50-140 lenses but during the shoot, I stuck with the standard zoom and the telephoto remained in the bag for the entire shoot.
Thankfully, on this occasion, the predictions were right and there was thick fog throughout the woodland. I decided to concentrate on just a small section of the woodland and in the two or so hours I was there, I must have only walked two or three hundred yards.

Fujifilm XT5 | XF16-55mm | 25mm | 1.3 Seconds | f/7.1 | ISO125

Fujifilm XT5 | XF16-55mm | 31mm | 1.3 Seconds | f/7.1 | ISO125

Fujifilm XT5 | XF16-55mm | 47mm | 0.5 Seconds | f/7.1 | ISO125

Fujifilm XT5 | XF16-55mm | 47mm | 0.4 Seconds | f/7.1 | ISO125

Fujifilm XT5 | XF16-55mm | 39mm | 0.4 Seconds | f/7.1 | ISO125

Fujifilm XT5 | XF16-55mm | 38mm | 1/3 Second | f/7.1 | ISO125

Fujifilm XT5 | XF16-55mm | 19mm | 0.6 Seconds | f/7.1 | ISO125
I hope you like the photos.
Until next time.
Trevor
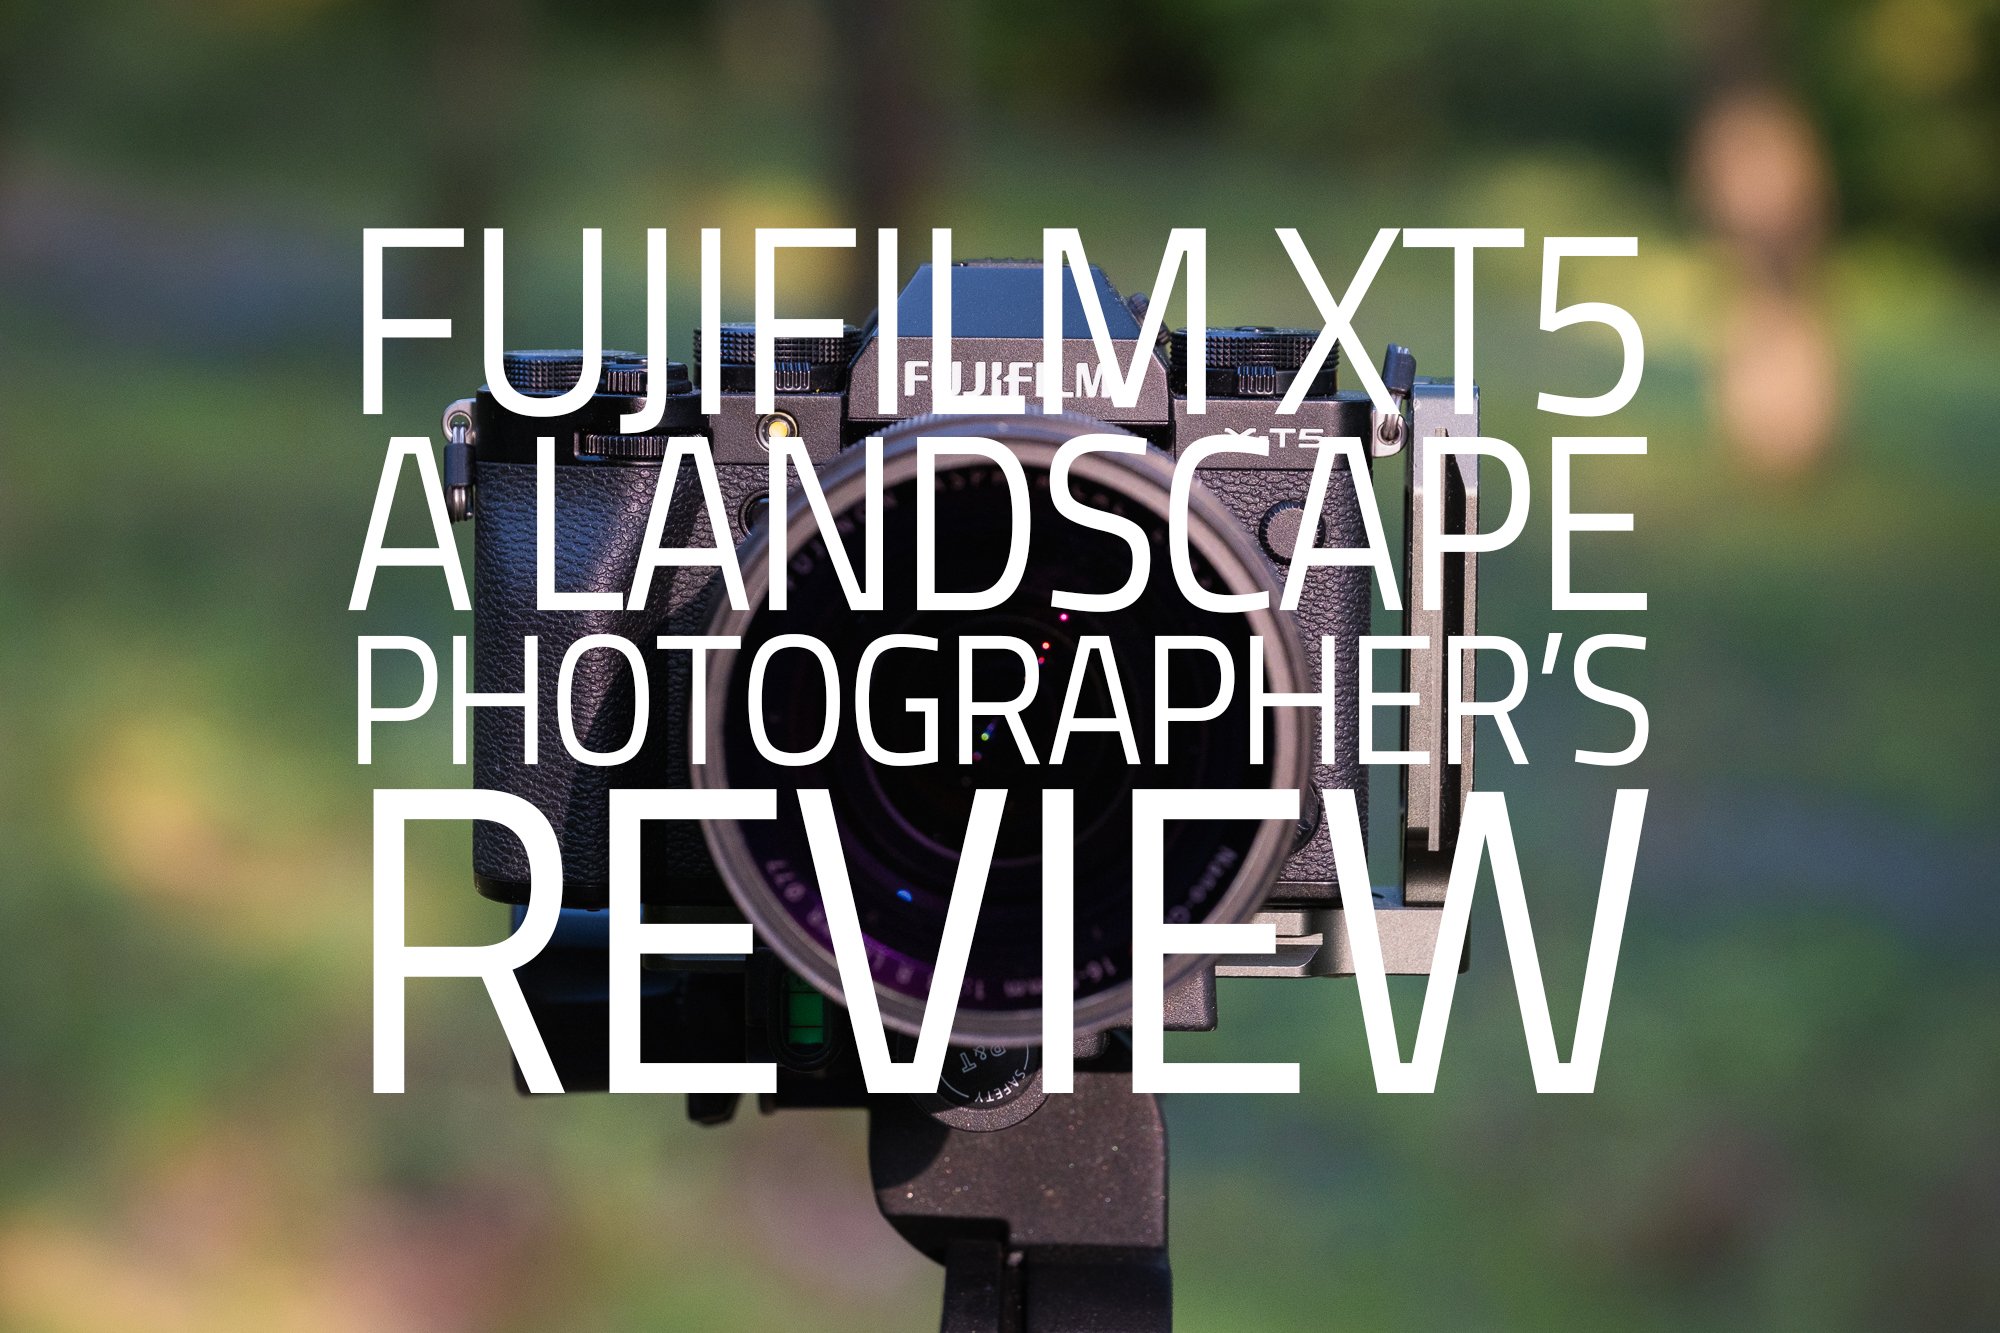
Fujifilm XT5 | A Landscape Photographer’s Review
My review of the Fujifilm XT5 from the perspective of a landscape photographer after 6 months of owning and using it in the field. How good is the new 40MP sensor? How is the image quality? Have a read and find out what I think.
Towards the end of 2022, while out in the field on a shoot, the screen on my Fujifilm XT2 started to flicker uncontrollably and after a few minutes of strange behaviour, it turned itself off and however much I tried, I couldn’t get it to turn on again. It seemed after 5 faithful years of service, the XT2 was dead. So, I had a decision to make. Do I fix it? Or do I invest in a new camera body? When it comes to cameras and lenses, unless there is a particular problem I need to solve, I never chase the latest gear.
I much prefer familiarity over shiny and new. If my camera does the job for me and I know it’s strengths and weaknesses (they all have them), I tend to stick with it.
After 5 solid years of use, I decided it was time to say goodbye to the XT2 and hello to the newly released XT5. Before buying the XT5, I briefly considered the recently released XH2 but decided against it as I wanted to stick with the familiar dials and ergonomics of the XT range.
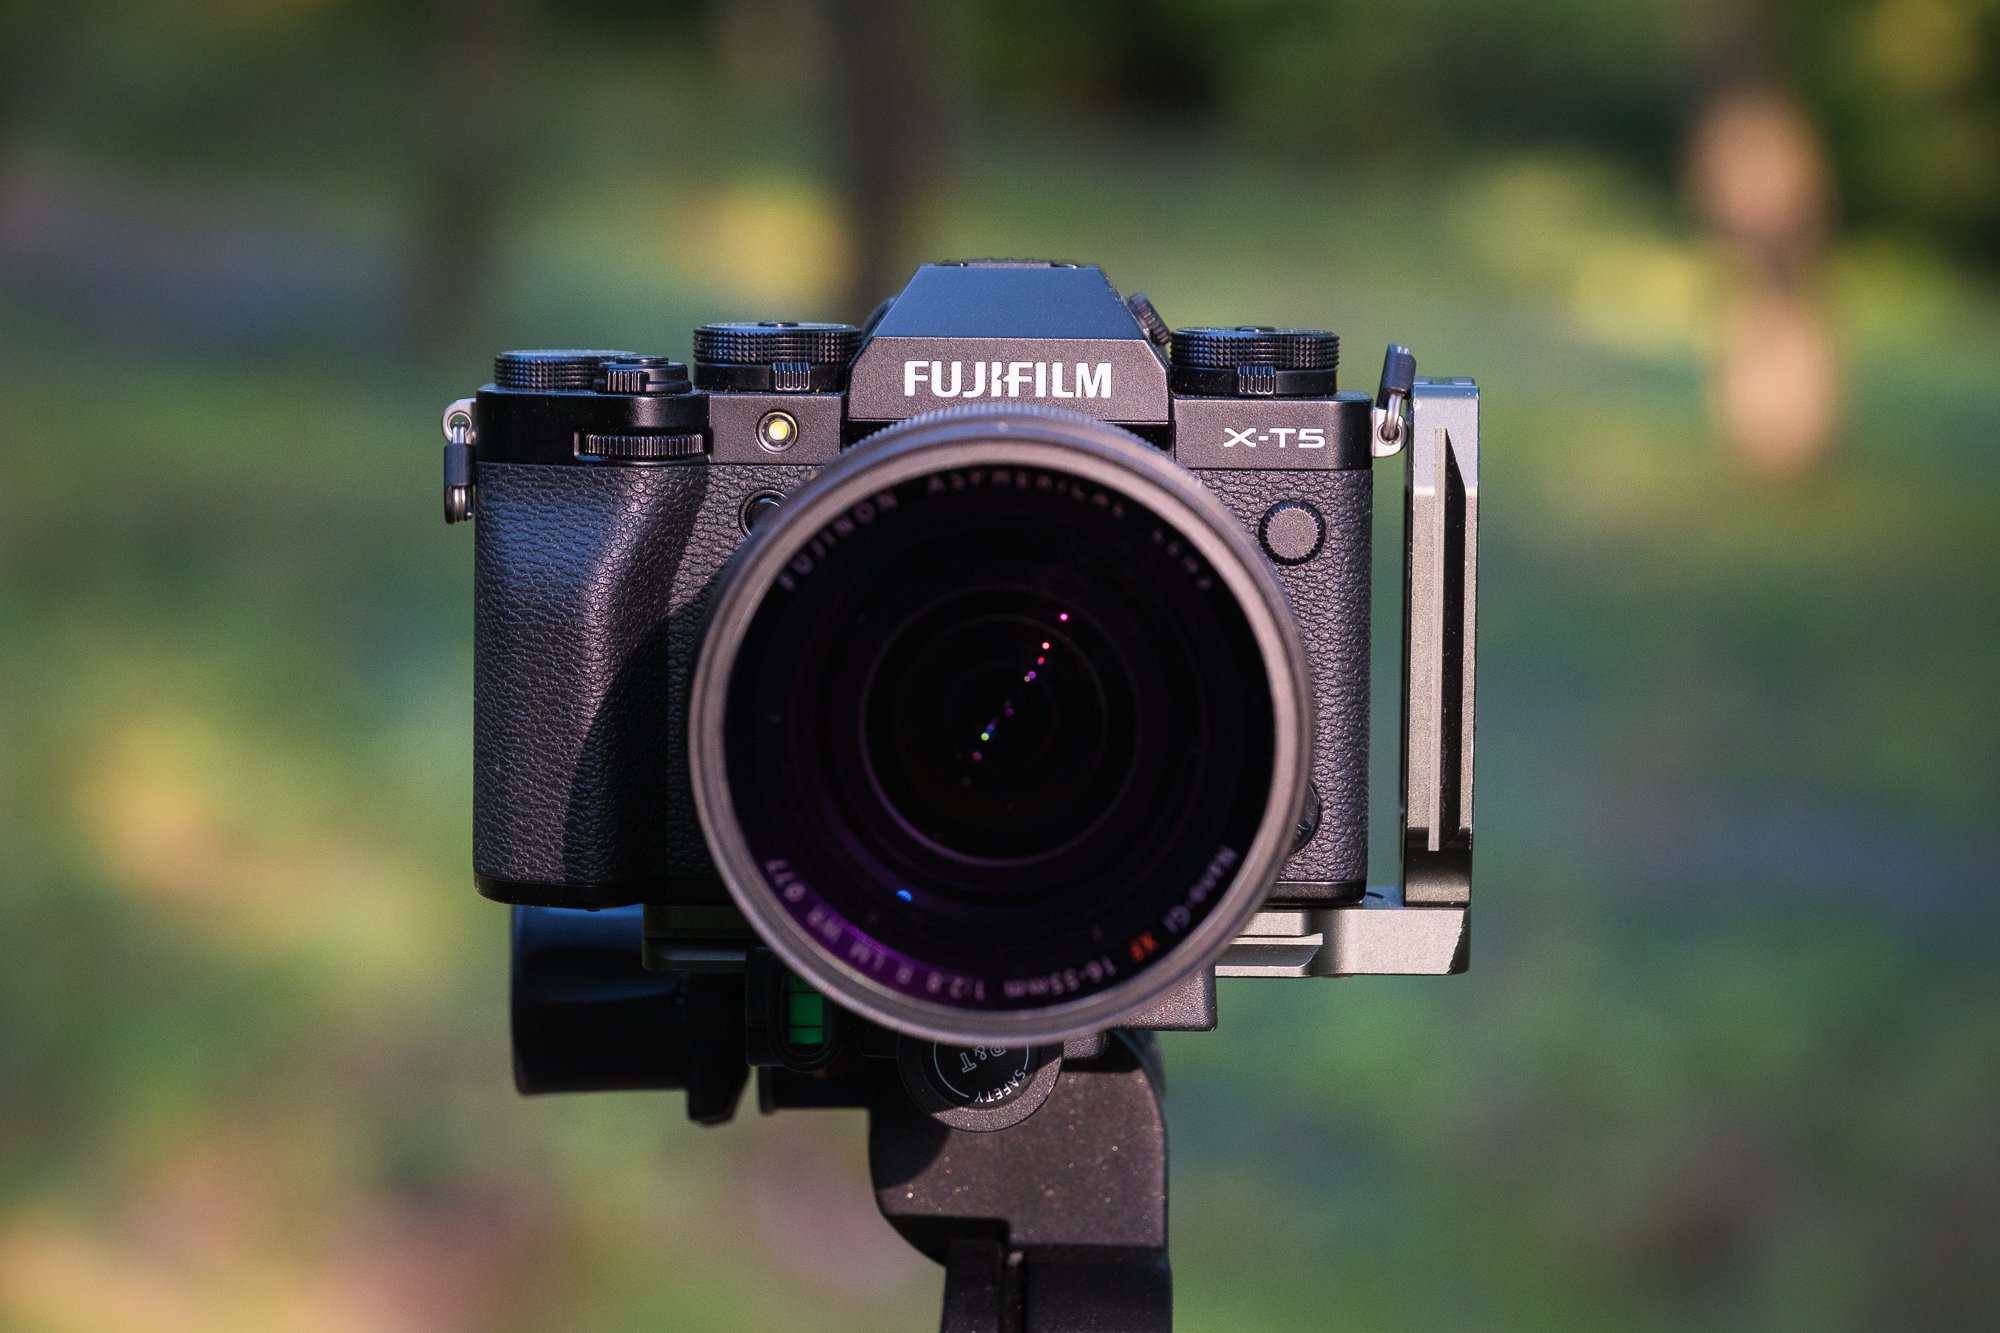
Having now used the camera for 6 months and along with a few of the photos I’ve taken with it, I wanted to share some of my thoughts and opinions on the Fujifilm XT5 from a landscape photographer’s point of view. As with my other gear reviews, this will be far from scientific (a simple Google search will provide you with those). I won’t talk about every new and improved feature this camera offers, these are my personal observations and opinions based on how I use the camera in the field and other people’s experiences may differ from mine.
What’s in my camera bag?
Before we get into the XT5, I wanted to mention what gear I currently carry with me while taking landscape photos. More specifically, the lenses I use with my XT5 on a day-to-day basis.
At the moment, I am quite happy carrying just 2 lenses, the XF16-55 f2.8 standard zoom and the XF50-140 f2.8 telephoto. These are red badge lenses so considered the best quality in the XF lens lineup and give me an effective focal range of 16 to 140mm (24mm to 200mm in 35mm terms) which is fine for 95% of the photos I take. That being said, with constant f2.8 apertures, they may be better quality but they’re also a lot heavier than Fujifilm’s variable aperture lenses. Worth thinking about if weight is a priority.

You may have also noticed the DJI Mini 3 Pro which I also reviewed from the perspective of a Landscape Photographer. You can read about that here.
For more details about all the gear I carry in 2023, pop over to my latest “Whats in my camera bag” blog post.
Is the Fujifilm XT5 bigger and heavier than its predecessors?
Well, yes and no. It would have been fair to assume that the XT5 wouldn’t be immune to the current trend that sees mirrorless cameras getting bigger over time and yes, compared to the XT2 (133 x 92 x 49mm, 507g) the XT5 (130 x 91 x 64mm, 557g) is slightly bigger and heavier, but Fujifilm has, to their credit, shaved off a little size and weight compared to the XT4.
However, in real terms, these numbers don’t really mean a lot to me. A few mm here, a few grams there won’t make a huge difference and although its important camera manufacturers keep the size and weight of their respective systems in check, it’s probably easier to say that the XT5 is around the same size as those before it. That’s a good thing.

Fujifilm XT5 | XF16-55mm | 16mm | 1/100th Second | f/5 | ISO125
I spend a lot of time hiking up hills, exploring woodland or even as per the picture of London above, climbing the 528 steps to the top of St Paul’s Cathedral. So, what’s even more important to me is that I choose to shoot with a smaller, lighter system compared to the full frame and medium format systems. Using an APS-C system allows me to carry the XT5 along with 2 heavier, flagship lenses and still have a lighter camera bag compared to other full-frame or medium format systems.
How good is the XT5 build quality and weather sealing?
Landscape photographers need to be able to shoot in almost any condition and in all but the most extreme weather, should be able to do so without the need of additional rain covers and shower caps. The Fujifilm XT5 has a weather-sealed body and when coupled with a weather-resistant lens such as my XF16-55mm or XF55-140mm, I’m able to shoot in most conditions. In the 6 months I’ve been using this camera, I’ve shot in many a wet and rainy woodland, the wintry mountains of Snowdonia and some stormy weather by the coast and so far, so good.
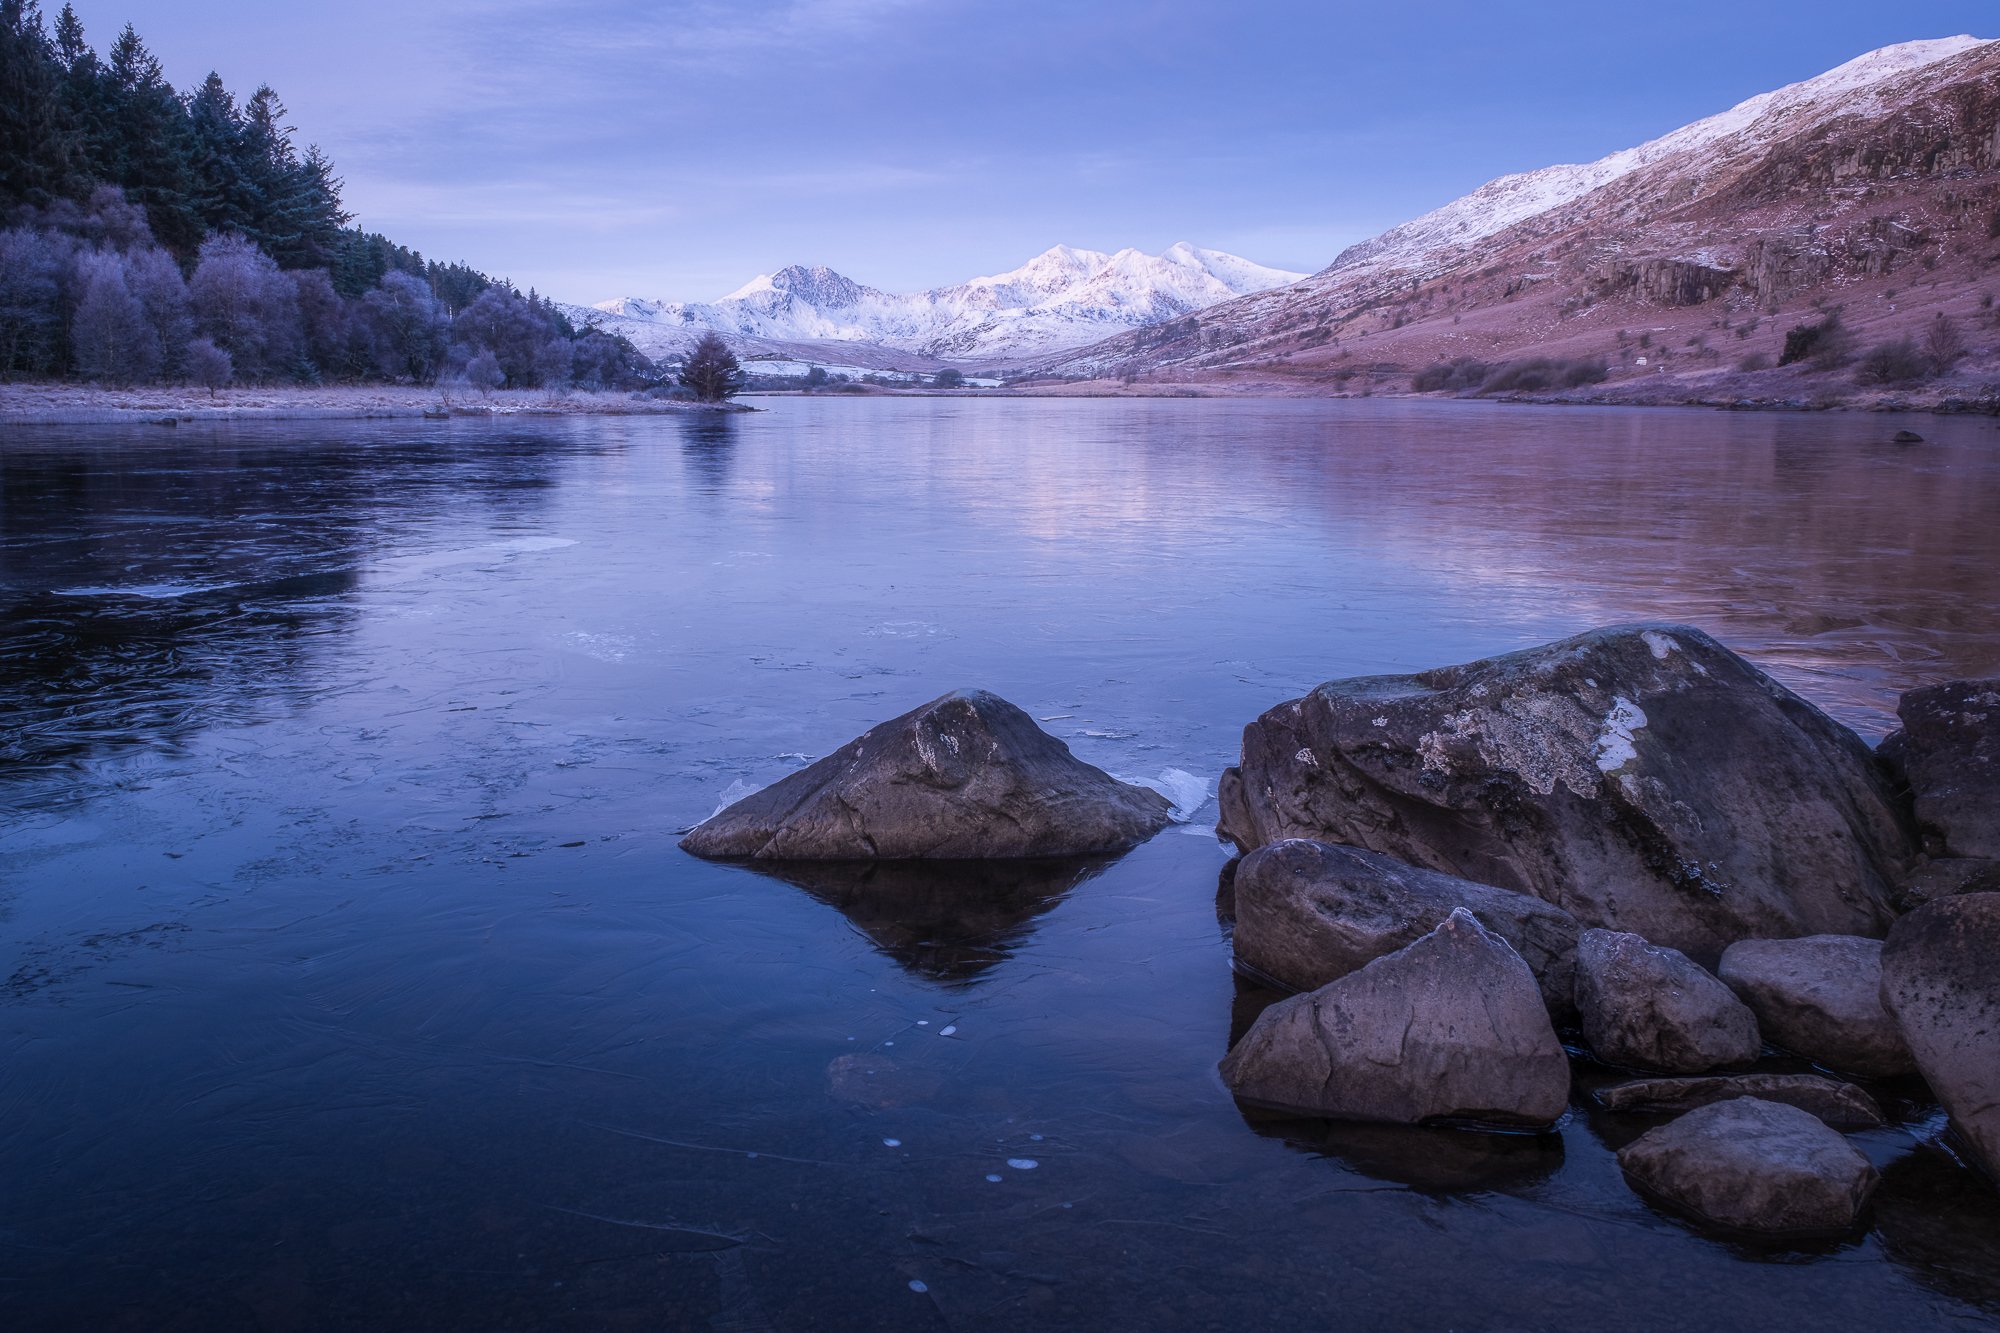
Fujifilm XT5 | XF16-55mm | 18mm | 2 Seconds | f/8 | ISO125
That’s all well and good but there have been questions raised about the amount of plastic used in the construction of the XT5 compared to previous models making it look and feel a little cheaper. I guess if being particularly pernickety, it probably does a little but in the 6 months since buying the camera, I’ve literally given it zero thought. In all fairness, Fujifilm makes no claims that the camera is fully waterproof and certainly doesn’t provide an IP rating. So, although I would happily shoot during an average rain shower, I would stop short of exposing it to a prolonged torrential downpour.
What about the XT5’s physical dials, dual memory card slots and tilting screen?
Although I already had dual memory cards, physical dials and a 3-way tilting LCD on the XT2, I now consider these a must when picking a camera to use for landscape photography.
Coming from the world of IT, I know too well how technology should not be relied upon, however robust it might seem. The last thing I want is for a whole day of shooting to be lost because my only memory card suffered a failure at the wrong time. This is why I’ve configured the XT5 to write my raw files to both cards simultaneously, creating an instant backup while out in the field.

Fujifilm XT5 | XF16-55mm | 16mm | 1 Second | f/8 | ISO125
Next up, those physical dials. For me, these were a game changer. Apart from the warm fuzzy feeling of nostalgia I get when using them, being able to fine-tune my exposure by feel, without a menu in sight makes life so much easier when out taking photos. This is especially true in the winter when using gloves or when the camera is low down to the ground like it was when photographing the Sussex coast as pictured above, which can make accessing menu buttons trickier.
Talking of having the camera low to the ground. As a landscape photographer, this will often be the case and having a tilting screen means I don’t have to be down there too. Whether I’m shooting in landscape or portrait mode, the 3-way tilting LCD means the screen will tilt in my direction whatever its position.

Fujifilm XT5 | XF16-55mm | 55mm | 1/10th Second | f/11 | ISO125
How good is the battery life on the XT5?
With the larger W235 battery used in the XT5 compared to the smaller X126s I was using in the XT2, for me at least, battery life has improved dramatically. A game changer in fact. This was my main gripe with the XT2 as I was constantly having to change out dead batteries midway through a shoot.
The extra battery life really came into its own during the 48 hours I spent in a wintry Snowdonia. The temperature during the day barely made it above freezing and being so cold will reduce the amount of charge the battery will hold, but irrespective of this, I was still able to shoot from sunrise to sunset on a single charge.
Fujifilm XT5 | XF50-140mm | 69mm | 1/2 Second | f/9 | ISO125
Even if upgrading from the XT4 which also uses the W235, Fujifilm still claims an improved battery over its predecessor due to the reduced power consumption of the X-processor 5. So, I think it safe to say that Fujifilm has made a big step forward in battery performance since introducing the larger W235 into their recent flagship cameras.
Is the XT5’s 40-megapixel sensor worth the upgrade?
Fujifilm announced their 40.2MP sensor a long time before it was released and the prospect of having the extra resolution was exciting, opening new possibilities for cropping in post or bigger prints. I was, however, slightly concerned about how cramming more pixels onto the same size sensor would affect image quality and, if it would result in noisier pictures.

Fujifilm XT5 | XF16-55mm | 55mm | 1.3 Seconds | f/6.4 | ISO125
I’m pleased to report that I’ve not found the pictures I’ve taken so far to have any more noise than I was used to with the XT2. That was a big surprise and a welcome one at that! Don’t get me wrong, Do I still see noise in some of my images? Of course. There will always be situations where the light levels are such that avoiding noise altogether is impossible, but overall and in my own unscientific way of pixel peeping, I don’t see any negative impact of those smaller pixels all bunched up together on this new X-Trans CMOS 5 HR sensor.
One thing that I was hoping for and something Fujifilm appear to have delivered is improved dynamic range performance. Again, not something one expects when increasing pixel density but given this sensor is a few generations newer than what I was using, I was very much hoping for this to be the case. I did a little research on this topic and for sure, many out there say the dynamic range has gone backwards slightly and still not as good as the XH2 which uses the same sensor but from my own real-world usage, the dynamic range has definitely improved for me. Sure, it’s still not up there with the full-frame and medium format systems (pesky laws of physics), but what I can say is that with my woodland photography, where high dynamic range scenes are commonplace, I’ve not had to bracket my images nearly as much as I used to. Saving me time during editing and saving space on my hard drive too!
Talking of hard drive space, with the increased resolution comes increased file sizes so if you’re tight on raw file storage space, consider shooting with the compressed raw enabled on the camera or prepare to invest in bigger hard drives.
Fujifilm XT5 | XF50-140mm | 140mm | 1/50th Second | f/7.1 | ISO125
Is the Pixel-Shift on the XT5 worth all the hype?
Remembering this article is about sharing my experience, I’m going to say no……for now.
Pixel Shift, which can be enabled in the menu, is where the camera will take 20 separate photos, shifting the sensor by half a pixel each time and by using a separate software on your computer, you can merge the photos together to create a huge 160MP image.
Taking landscape photos can often mean a static scene where 20 separate photos won’t capture any movement but add in some waves along the coast or some subtle breaths of wind in the woodland and suddenly things start to get a little trickier. I’ve used this feature a few times to see how well it works and if you have a static scene and need that extra resolution, then having this option available is great, but, given the extra disk space needed and the time it takes to merge them together in post-processing, it’s not something I think I will use very often personally.
Fujifilm XT5 | XF16-55mm | 53mm | 1/40th Second | f/8 | ISO125
What about the Fujifilm XT5’s improved autofocus?
This is where things went a little awry for me. Fujifilm boast that due to the higher pixel count in the XT5, the number of phase detection pixels also increases resulting in an improved AF-S focusing accuracy when taking landscape photos.
With the XT2, I preferred to use back button focus when taking landscape photos. When composing an image and selecting the autofocus area, the XT2 locked in nearly all cases without issue, and I only really needed to switch to manual focus in trickier, low-light situations. I didn’t really give it much thought as it just worked.
Fast forward to getting the XT5 out in the field and after setting the camera up to work in the same way, things were a lot different. When pressing the back-button focus, the XT5 was missing focus almost 50% of the time. It was incredibly frustrating and after a little research it seemed I wasn’t the only one to notice how poor the autofocus was on this camera.

Fujifilm XT5 | XF50-140mm | 66mm | 0.4 Seconds | f/9 | ISO125
With zero trust in the autofocus, I switched to manual focus 100% of the time which, although not the end of the world, did slow down my workflow a little.
This went on for about three or four months and although I’ve not seen anything specifically from Fujifilm on the subject, since applying the firmware updates released since, the issue has improved somewhat. I still refuse to default back to my previous workflow as my trust in the autofocus hasn’t been restored but when using features like focus bracketing, which depends on autofocus, I do have a little more confidence that the results will be sharp.
Again, this was my personal experience and there are built-in tools that can help your focusing workflow such as focus peaking, but for me, a quick zoom-in and out again to check the image sharpness works just as well.
Update: I wrote this post just before firmware v2.0 was released, which included some significant focus improvements for the XT5. Since applying this and subsequent lens updates, the camera has had far fewer issues with autofocus.
Does Adobe Lightroom play nice with the XT5 RAF files?
I’ve used Lightroom (Classic) to edit my raw files for many years, long before I swapped to Fujifilm in 2016 and I think it’s fair to say, Lightroom has not always played nice with Fuji raw files - worms anyone? If you know, you know. These days, life is a lot easier when it comes to editing Fujifilm RAF files in Lightroom, either Adobe has improved the compatibility, or I’ve just learned to avoid the pitfalls as I run through my usual workflow (step away from the sharpening slider). In truth, it’s probably a bit of both.
One approach I use is not to apply any sharpening in Lightroom and instead, when I want to prepare for print or screen, I export to Photoshop and use the High Pass filter on a separate layer (between one and two pixels radius) and the Overlay blending mode, masking in the areas I want to be sharpened. A method I still do today and works best for me.

Fujifilm XT5 | XF50-140mm | 140mm | 1/8th Second | f/9 | ISO125
There are, however, still times I feel Lightroom doesn’t render my raw file with the amount of detail I know the file contains. I’ve heard many times that other editing software is more sympathetic to the Fujifilm raw files, but I really don’t want to learn another software. Instead, for those times I need a little more detail I use a plug-in called DXO Pure Raw. I don’t run every picture I take through the software as I prefer some to be a little softer or painterly but when a bit more detail is called for, it seems to do the job nicely.
Conclusion
I’ve written a lot about the features and benefits of using the XT5 for landscape photography and there are many great features I decided not to talk about such as the 7-stops of IBIS, improved video modes, subject detection and white balance driven by AI (whatever that means) but in truth, my needs are quite basic meaning I probably only use about 10% of the camera’s features for my landscape photography and it would be wrong for me to review those I haven’t used extensively.
So, would I recommend this camera to other landscape photographers? The simple answer is yes. If size and weight is important to you, the XT5, with its fantastic image quality, intuitive ergonomics, weather sealing and much-improved battery life, packs a real punch.
I hope you found that useful and enjoyed some of the photos I shared. If you have anything to add such as any points I missed or questions about the camera, please leave a comment below or contact me directly here.
Until next time
Trevor
What's in my Camera Bag for Landscape Photography (2023 Edition)
Want to know what gear I take on a landscape photography shoot? This post provides a look inside my camera bag and lists the equipment I use in 2023.
With my last update now 2 years ago and with so much of my landscape photography gear changing in 2022, I thought it about time I posted an updated “What’s in my camera bag?” blog post. Here you will find a list of the camera equipment I use and a little bit of information about why it’s in my camera bag.
My primary landscape photography gear
Fujifilm Camera and Lenses
XT5 camera: Having used the excellent XT2 since 2017 and it decided to fail on me while out on a shoot, I held out repairing it or buying a new main camera body as based on the rumours I’d heard, it wasn’t going to be long before Fujifilm released the XT5. Sure enough, a few weeks later they did and the day they announced it, I placed the order.
XF16-55 F2.8 standard zoom lens: Although I still have the very capable XF18-55mm, in 2022, I decided to upgrade to the XF16-55 F2.8 as I wanted all of my main landscape gear to be weather sealed. The improved optics is a nice bonus, but the extra weight most certainly isn’t.
XF50-140mm F2.8 telephoto lens: For the same reasons I upgraded my standard zoom, I also traded in my XF55-200mm lens for the weather sealed XF50-140 F2.8. I do miss that extra reach now and again but my plan is to buy the 1.4x teleconverter to get that 200mm (300mm FF) reach for the odd occasion I need it.
DJI Mini 3 Pro drone
Last year, after what seemed like an eternity of indecision, I finally took the plunge and purchased my first drone. For a number of reasons, I opted for the DJI Mini 3 Pro. Having already posted about why I chose this drone and what I think about it 6 months on, there is a dedicated blog post you can read here: DJI Mini 3 Pro | A Landscape Photographer’s Review.
Filters and accessories
Kase Wolverine magnetic filters: I used to carry larger, square slide-in filters and would spend time fiddling with step-up rings for the different lenses and the holder before being able to slide in the filter I intended to use. That all changed when I got the Kase Wolverine filters. No more fuss! Snap the filter onto the lens and get shooting. I wrote more about my experiences with these filters in a previous blog post here: Kase Magnetic Filters | A Landscape Photographers Review.
Benro Mach3 TMA37AL tripod: After using my previous tripod for a number of years, I was after something a little sturdier and a little taller without relying on a less stable centre column. After a bit of research and getting a few recommendations, I eventually opted for the Benro Mach3TMA37AL.
Benro Gd3Wh geared tripod head: For years I’d been happy to use a ball head on my tripod but when I started taking woodland photos, the lack of precision and having to compensate for further movement while making small adjustments with the tripod head began to frustrate me a lot. I invested in this Benro geared head and although it has a bit more bulk, it has solved this problem for me completely.
Spare batteries: The Fujifilm NP-W235 used in the XT4 and XT5 is so much better than the last generation of batteries and I can shoot for much longer on a single charge. So far, I have one spare battery but I intend to add a couple more soon enough.
Memory cards: Can’t have too many memory cards. I still prefer to use Sandisk as they have been bulletproof for me so far but I know there are other brands just as good on the market.
3 Legged Thing L-bracket: Used to quickly switch from landscape to portrait orientation when using my tripod.
3 Legged Thing Toolz: A handy tool to tighten tripod legs, remove L-brackets, etc.
Headtorch: Not much to say about this one, other than it is bright, light, waterproof and rechargeable. It cost about £15 and lights my path on those dark treks before or after a shoot.
Power bank: Now that I carry the DJI Drone with me, the spare battery case can also charge my other devices if I start to run low so technically, I could do without this little guy, but being small and light, it doesn’t hurt to keep a bit more juice with me while out and about.
Camera Bag
Although I still have the bags I mentioned in my last “What’s in my camera bag” post, I now use the Vanguard VEO Active 46 as my primary means to carry my landscape photography gear around. Although I was on the lookout for a new bag when I went to the Photography Show back in September 2022, I hadn’t really considered Vanguard until I had a look around their stand and saw the VEO Active range. For the features I wanted, the size, weight and price, it ticked all of the boxes for me.
My lightweight/walk-about camera and lenses
In addition to my main landscape photography kit, the list below includes another Fujifilm camera body and a few smaller lenses I use when I want to travel a little lighter. Typically, I might swap my heavier camera gear with these smaller alternatives when I head out on a photo walk in London or I might pack lighter when taking a city break abroad. Also, on days out with my family, I will often take with me just the single X-T30 camera and prime lens so I can snap a few nice family photos without lugging around lots of gear with me.
Fujifilm Camera and Lenses
X-T30 camera: Apart from a few “Pro’ features such as weather sealing and dual card slots, etc, this is a very good camera. When my XT2 camera failed, this smaller, but very capable camera became my primary shooter for a few weeks and didn’t miss a beat.
XF18-55mm standard zoom lens: This is the very first Fujifilm lens I bought back in 2016 as it came in the kit with my since-retired X-T10. Although it looks a little beat up now, nearly 7 years on and it is still going strong and I will often grab it when I want to travel light with the versatility of a zoom lens.
XF16mm F2.8 prime lens: I love this range of small primes from Fujifilm. They are compact, light, weather sealed and most importantly, excellent quality. I will often head out onto the streets of London with a single camera and prime lens combo. The simplicity and lack of bulk can be quite liberating compared to when carrying a full bag of landscape photography gear.
XF23mm F2 prime lens: When it comes to primes, this is probably my favourite focal length. Equivalent on a full frame to 35mm, it’s a familiar focal length which is wide enough to include some background but not so wide that it can’t be used for more intimate subjects. It’s incredibly versatile.
Tripod and accessories
3 Legged Thing Corey tripod: I wanted a smaller, lighter tripod to use while in the city or when travelling and this was my choice. Nearly three years on and it works as well as the first day I used it.
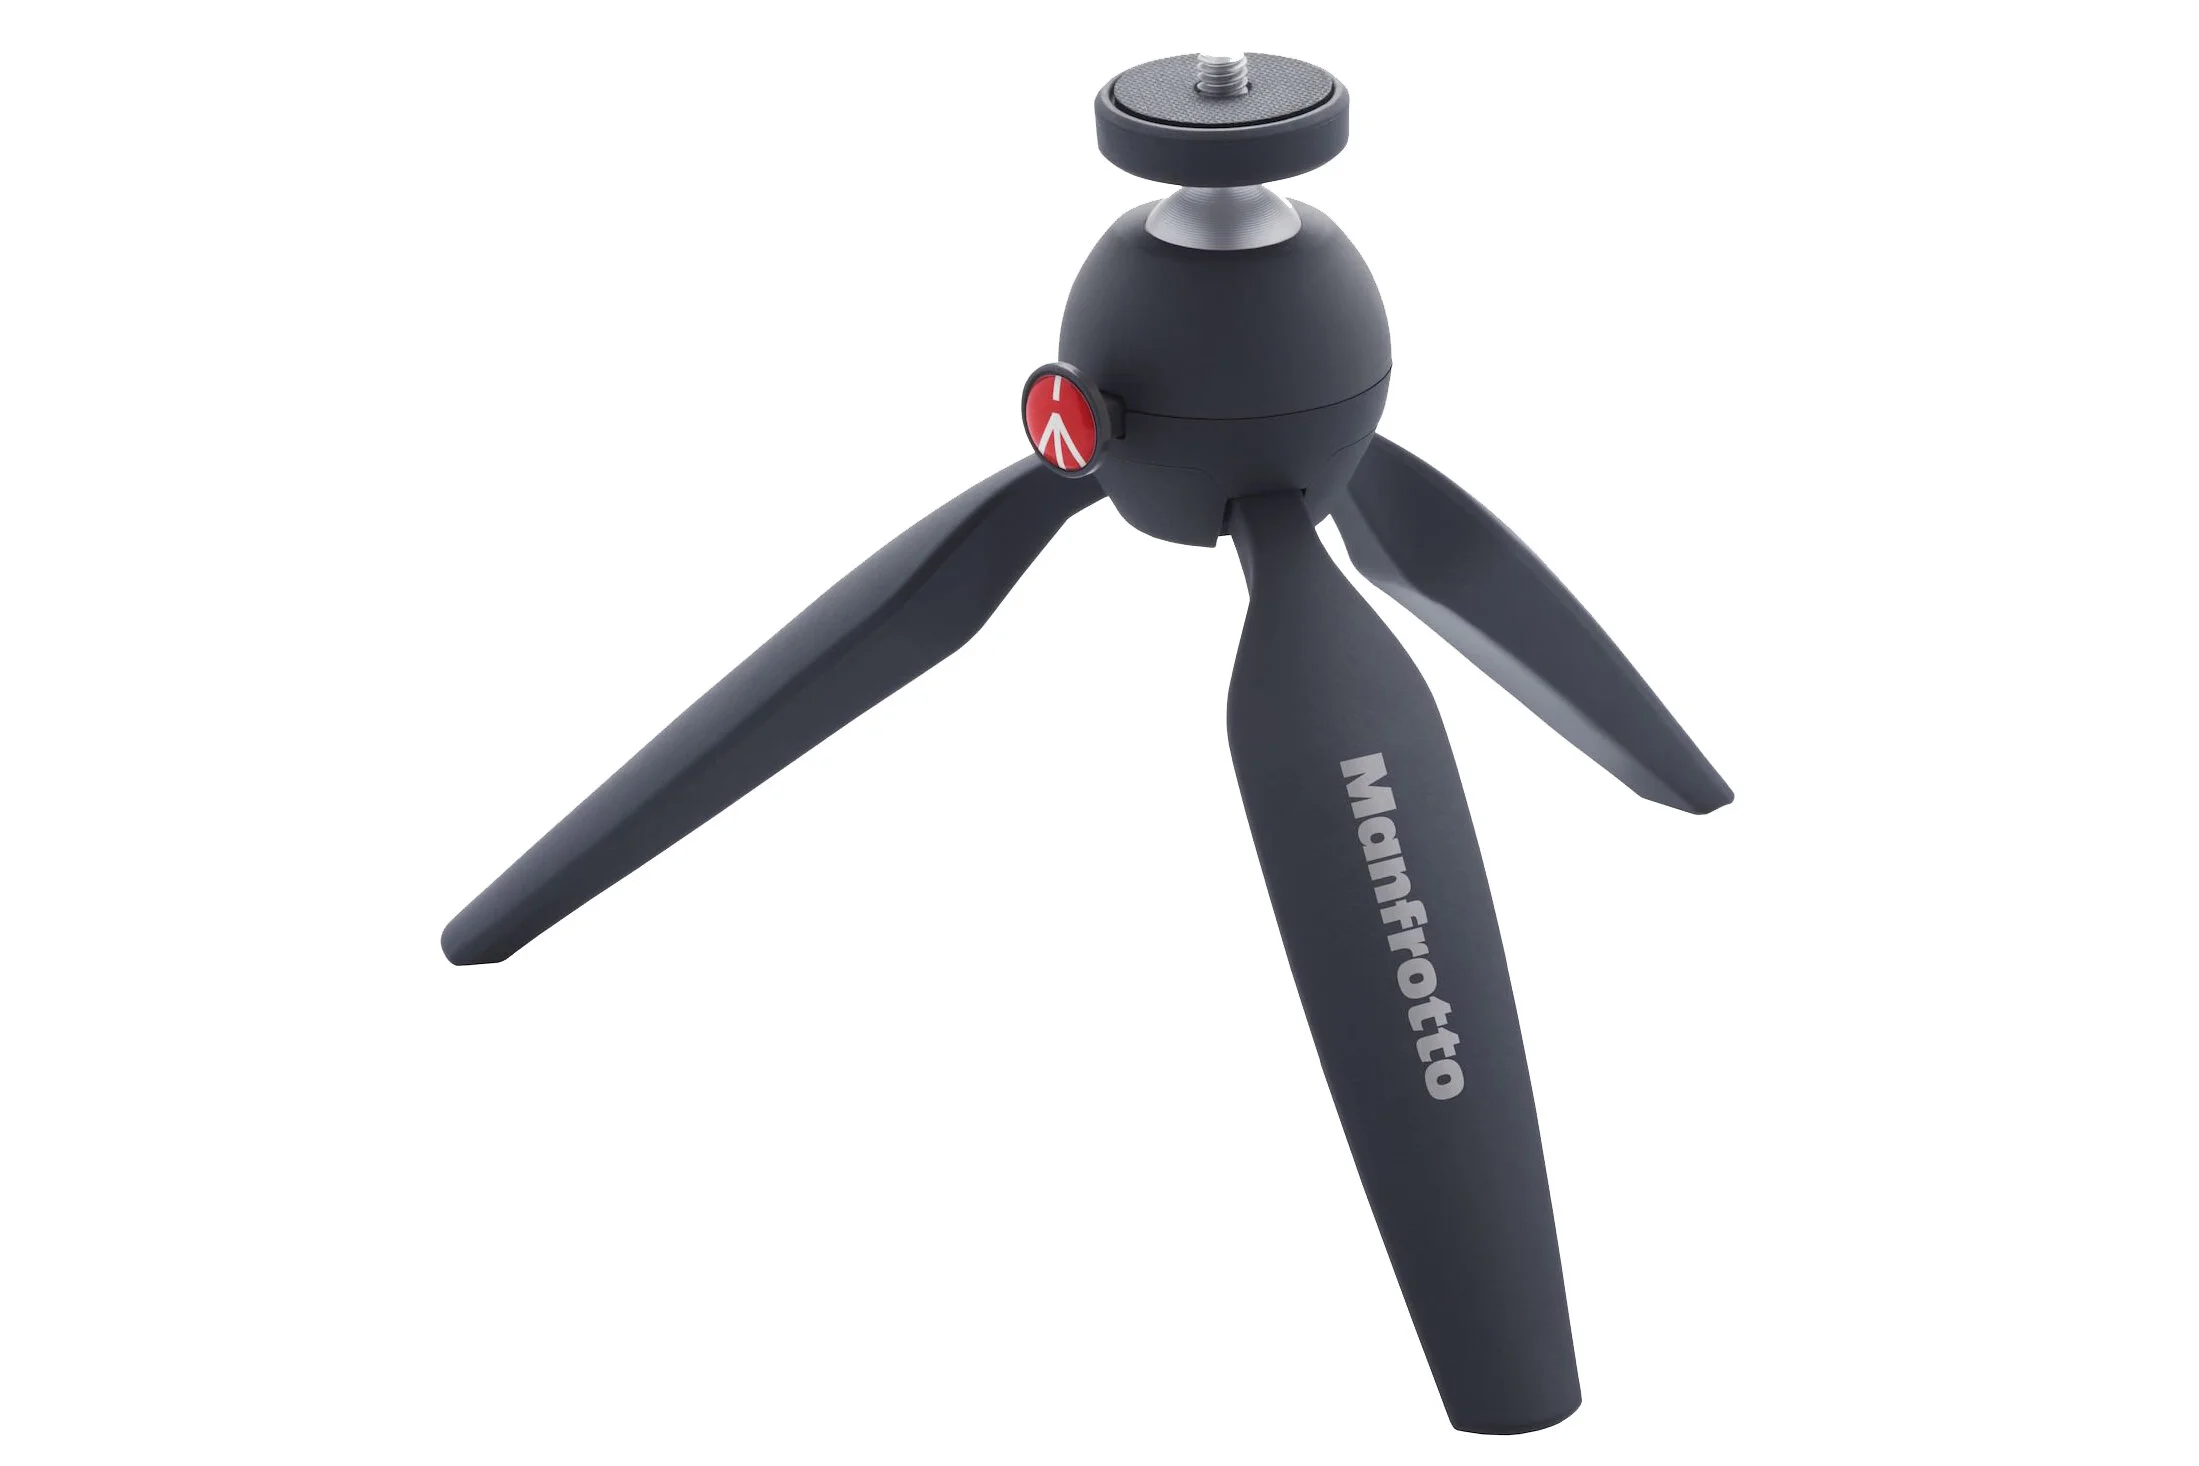
Manfrotto Pixi Mini tripod: A pocketable tabletop tripod which can support a surprising amount of weight. I’ll carry this with me when I want to keep my kit as light as possible.
Peak Design Slide Lite neck strap: A comfortable, strong neck strap which comes with a handy quick-release function for when I want to quickly remove the strap.
Spare batteries: Can’t have too many of these, especially when these smaller NP-W126S barely last a few hours when the temperature drops!

Something I’ve mentioned previously and worth reiterating is that I don’t get that excited by new camera equipment and if there is no good reason to upgrade, I’ll happily stick with what I have. After all, I used my previous Fujifilm XT2 camera body for around 6 years and had some of my lenses even longer. Don’t get me wrong, I enjoy new gadgets like everyone else, but when it comes to my photography gear, it’s different. I actually don’t look forward to using a new camera and I prefer familiarity over novelty. Even when upgrading to the newer version of a camera I already own (like I did last year), there is still a period of adjustment to get to grips with new features or changes to the menu system.
My advice to anyone buying new camera equipment is to invest in the gear you feel most comfortable using. If you can, visit your local camera store and hold it in your hands to get a feel for the size and weight. When you get it home, get to know it well and customise the menu and physical buttons so your most important settings are at your fingertips. This ensures the physical act of taking photos is as seamless as possible, allowing you, the photographer, to “focus” on being creative and working the light or composition in front of you.
Until next time.
Trevor

Photographing London with my Fujifilm Prime Lenses
After finally making my first photo trip into London of 2022, I took my Fujifilm prime lenses for a sunrise walk around Tower Bridge and an afternoon visit to St Paul’s Cathedral.
Those of you who have been following my work before, let’s say, 2019 would have seen me predominantly as a cityscape photographer, with photos of London representing about 90% of the images I took. Fast forward 2 or 3 years, my trips to London have been few and far between for obvious reasons and I started taking more photos outside of London, exploring the local countryside and coastline here in the southeast of England. So, when I get the opportunity to head into the city with my camera, I take full advantage.
A few weeks ago, I managed to carve some time out before and after work to take photos in London for the first time this year. Knowing I was a bit “cityscape” rusty; I didn’t have particularly high expectations, I was just happy to be out there again, soaking up the atmosphere in the city I love so much.

Fujifilm X-T30 | XF16mm f2.8 | 16mm | 1/50th Second | f2.8 | ISO160
When I travel to London, I usually end up at London Bridge Station, so it has become a bit of a ritual to start any shoot off surrounded by the modern architecture here at More London. I must have a thousand photos of The Shard, City Hall, and Tower bridge taken from this location, but I find it a great place to start things off, using some old faithful compositions to get that all so important first photo in the bag. I suspect that some of my fellow photographers might relate to the fact that when I’m out taking photos, I have to warm up a bit to get into the zone, so the sooner I start pressing the shutter button, the better.
This composition looking towards The Shard is a favourite of mine as I can use the thick, round rail around the scoop as a compositional lead-in line, adding interest as well as helping the viewer work their way around the frame and finish up at The Shard. The scene works both in portrait and landscape but the 16mm F2.8 lens I had with me could have done with being a little wider for the landscape composition above.

Fujifilm X-T30 | XF16mm f2.8 | 16mm | 1/40th Second | f2.8 | ISO160

Fujifilm X-T30 | XF16mm f2.8 | 16mm | 1/180th Second | f2.8 | ISO500

Fujifilm X-T30 | XF16mm f2.8 | 16mm | 1/80th Second | f4 | ISO160

Fujifilm X-T30 | XF16mm f2.8 | 16mm | 1/250th Second | f4 | ISO500
With the blue hour slowly giving way to sunrise and very little cloud around, the Belt of Venus started to cast its pastel-pink glow across London. As I left More London, crossing Tower bridge I had to stop and take a few photos of the view looking west along the River Thames. There was no direct light but the muted pre-sunrise colours were right up my street and it while crossing the bridge I took my favourite photo of the morning.
Framing up the classic view of More London and The Shard from across the water, I noticed behind me that one of the Uber Boats was approaching the bridge travelling up-stream and would soon appear from under the bridge below my feet be directly in front of me shortly after that.
Raising the camera a touch to show more of the river so the boat would have more room around it, I waited for the boat to enter the frame and as it approached the ideal spot, I rattled off a few shots with the one below, being the best of the bunch.
Once finished on Tower Bridge and with the pastel colours making way for the stronger, direct sunlight, I headed off towards my office, grabbing a few more snaps along the way.

Fujifilm X-T30 | XF16mm f2.8 | 16mm | 125th Second | f4 | ISO160

Fujifilm X-T30 | XF16mm f2.8 | 16mm | 1/160th Second | f4 | ISO160

Fujifilm X-T30 | XF16mm f2.8 | 16mm | 1/200th Second | f4 | ISO160

Fujifilm X-T30 | XF16mm f2.8 | 16mm | 1/320th Second | f5.6 | ISO200

Fujifilm X-T30 | XF16mm f2.8 | 16mm | 1/3,200th Second | f3.2 | ISO200
For this London shoot, I had my lightweight Fujifilm kit with me (which you can see in the photo here) and there were a couple of reasons I left the heavier gear at home and went for this compact setup.
First off and the most obvious is that it was lighter and more freeing to walk around with less gear weighing me down. Secondly, and the main reason was that I had decided to visit St Paul’s Cathedral later that day, to climb the dome and take photos from the very top, which is something I hadn’t done since 2019.
The Golden Gallery situated at the very top of the dome is very small with barely enough room for people to pass up there, so having a smaller bag, no tripod and a more compact camera system makes it a little easier and helps me keep out of the way from the other visitors.
For a more comprehensive list of the gear I own and the different configurations I use, check out my most recent “What’s in my camera bag” blog post.


Fujifilm X-T30 | XF23mm f2 | 23mm | 1/400th Second | f4 | ISO200

Fujifilm X-T30 | XF23mm f2 | 23mm | 1/800th Second | f4 | ISO200

Fujifilm X-T30 | XF23mm f2 | 23mm | 1/800th Second | f4 | ISO200
As you can see in the picture of my gear above, the three prime lenses I had with me were the 16mm F2.8, the 23mm F2 and the 35mm F2 and focusing predominantly on the city highrises and The Shard across the river, I spent the entire time I was up there switching between the three lenses, each one provided a different perspective of London’s cityscape.

Fujifilm X-T30 | XF35mm f2 | 35mm | 1/250th Second | f5.6 | ISO200
Fujifilm X-T30 | XF16mm f2.8 | 16mm | 1/250th Second | f6.4 | ISO200

Fujifilm X-T30 | XF16mm f2.8 | 16mm | 1/160th Second | f6.4 | ISO200

Fujifilm X-T30 | XF35mm f2 | 35mm | 1/200th Second | f5.6 | ISO200

Fujifilm X-T30 | XF35mm f2 | 35mm | 1/200th Second | f5.6 | ISO200

Fujifilm X-T30 | XF16mm f2.8 | 16mm | 1/320th Second | f6.4 | ISO200
I would have loved to carry on shooting from the top of St Paul’s until after sunset but the cathedral closes quite early so with a season ticket giving me access to The Shard’s viewing platform and it being on my route back to the train station, I popped up there for just a few minutes to check out the view. Unfortunately, the cloud cover prevented any chance of nice light and a brief rain shower covered the glass in droplets, so I only managed to take one useable photo which you can see below. It’s nothing special but gives you an idea of the conditions.

Fujifilm X-T30 | XF23mm f2 | 23mm | 1/30th Second | f2 | ISO160
Overall, a successful first visit of the year to London and coming away with at least one keeper was a real bonus. I certainly plan to get back out there as the days get longer as it gives me more opportunity to capture the best light after a day in the office so stay tuned for more!
Until next time.

What's in my Camera Bag for Landscape Photography (2021 Edition)
It’s that time of year again where I post this updated "What’s in my camera bag” blog post and give you all a little breakdown about the kit I use for landscape photography and importantly why I use it.
It’s that time of year again, where I post this updated "What’s in my camera bag” blog post and give you all a little breakdown about the kit I use for landscape photography and importantly why I use it. I’m not a gear head and won’t invest heavily unless I feel my photography will benefit and would much rather use and get to know my camera gear well, instead of swapping it out regularly. That way, while out in the field, I can focus on taking photos rather than working out how to change the settings on a new camera and missing the moment altogether.
I think it’s worth noting that I do believe that it is the photographer that has the vision, chooses the subject and creates the image. There are many photographers that successfully shoot with a single body and lens, a compact camera or even just their camera phone and still produce quite stunning work so, although it’s nice to get a new toy every now and then, I certainly don’t get fixated on the photography gear and always fixate on the craft of making photos.
That being said, if you are shooting with intent and have a particular style or subject you want to capture, then the right equipment can remove much of the friction and allow the photographer to focus on the creative side of the process, instead of working overly hard to get the shot, possibly taking much of the fun out of the process.
“The single most important component of a camera is the twelve inches behind it.” - Ansel Adams.
Cameras
I am a Fujifilm shooter and have been since 2016 which is when I first brought the X-T10 camera and after falling in love with the traditional feel, tactile controls and most importantly, the pictures it helped me take, I went all-in on mirrorless and sold my Nikon DSLR system.

Fujifilm XT2
Those that have followed me for some time know I am a Fujifilm shooter and this XT2 is still my primary camera. With the recent release of the XT4, there have been 2 updates to this model, but this camera still performs perfectly for me and I have no compelling reason to upgrade it just yet.
Fujifilm X-T30
Back in 2019, I upgraded my X-T10 to the X-T30 which to all intents and purposes is the same camera but with upgraded internals. I wrote a blog post about the switch which you can find here.
Camera Lenses
Zoom Lenses
Fujifilm XF 10-24mm lens F4 OIS
Fujifilm XF 18-55mm f2.8-4 R LM OIS
Fujifilm XF 55-200mm lens f/3.5-4.8 lens OIS
These three zoom lenses are my go-to for landscape photography. Between them, they cover a focal length of 10-200mm which is all I need when out, photographing the landscape.

Prime Lenses
Fujifilm XF 16mm F2.8 WR
Fujifilm XF 23mm F2 WR (New for 2021)
Fujifilm XF 35mm F2 WR
When travelling light or in need of a particular look, I will take these prime lenses with me. They are weather sealed so along with my XT2, I can head out in any conditions and still capture the shot I’m after.

Tripods

MeFoto Roadtrip
This MeFoto tripod has served me well over the years and has been the best compromise between weight and stability. It wasn’t expensive and up until only recently, since photographing woodland, I’ve been thinking about upgrading to a tripod with a little more reach.
3 Legged Thing Punks Corey (New for 2021)
Added to my gear in 2020, I purchased this tripod as I wanted a new lightweight but sturdy option when travelling around the city or further afield.
Filters

Kase Wolverine Magnetic Circular Filters 77mm Professional Kit (New for 2021)
I recently swapped to Kase filters as I love the simplicity of the magnetic system and as I heard so many good reviews, I took the plunge. So far so good. The filters are top quality and the magnetic system has made swapping the filters so much faster and less cumbersome.
My camera bags

Manfrotto Mover-30 Manhattan
I brought this bag in 2019 as I was after a bag that was large and comfortable enough to carry my cityscape gear but since last year, it has become my primary bag for all photo outings.
Manfrotto Pro Light
Relegated to my second landscape photography camera bag, the Pro Light is a little smaller and getting all my gear in is a little tighter so I’ve not used it so much over the last year.
Manfrotto Street
I use this bag when I need to travel light or I need to carry other bits as well as some camera equipment. This easily fits a camera and a couple of lenses leaving enough room in the top compartment for clothes and laptop etc.
So, how do I pack all of this landscape photography gear in my bag?
Although I have a healthy collection of camera gear, I certainly wouldn’t bring it all with me to each shoot. Below are 3 ways I might pack my bag, depending on where I’m heading to and the type of photographs I intend to take.

The collection above is my go-to landscape gear and everything I usually need when photographing landscape vistas or misty woodland scenes. I have my trusty XT2 camera, my tripod and zoom lenses that allow me to shoot between 10 and 200mm. The L-bracket is a must for any landscape photographer and helps me switch between portrait and landscape orientation without adjusting the tripod. Lastly, my Kase filters. I have a 3, 6 and 10 stop ND as well as a CPL stored in this handy carry case.

When I head out and want to travel a little lighter with my prime lenses, I might take this collection of camera gear. The lenses are small, light and super sharp and the 3 Legged Thing tripod is my go-to when heading into the city. If I know I won’t need a tripod, I might just slip the Manfrotto Pixi tabletop tripod into my bag and leave the 3 Legged Thing at home to shave off even more weight.

Travelling even lighter on days out with the family or just a casual photo walk, I tend to take my smaller X-T30, one or more prime lenses and the Peak Design Slide Lite camera strap. For a bit of stabilisation, I might pack the Manfrotto Pixi which can support quite a weight for its compact size.
So, there you have it, all of the gear I take with me in my camera bag to take landscape photos.
My plans for this year are fluid but as I mentioned previously, I may invest in a new tripod to give me a bit more reach while out in the woodland and depending on what Fujifilm release, I will keep my eye out for anything they announce, but however hard it might be, I’ll try to resist the temptation of new and shiny toys and only invest in new equipment if I know it will help my photography.
By all means, leave a comment if you want to ask me anything about my gear as I will always give an honest account of my own experience using it.
Until next time.
Trevor

On Location Photographing Ashdown Forest with the XF23mm F2
Here are some photos of Ashdown Forest, taken while I was on a walk with Holly (my dog) capturing photos of the forest with my Fujifilm X-T30 and XF23mm F2 prime lens.
A few weeks ago, I ventured out into the forest with my dog, Holly and Fujifilm X-T30 camera. Apart from taking Holly for a nice long walk, I wanted to try out my new Fujifilm XF23mm F2 prime lens I had recently bought to go with my other two 16mm and 35mm prime lenses. This line of Fujifilm prime lenses are fantastic. They are well made, fast focusing, light, and weather-resistant. All bases covered when needing a light-weight walkabout camera kit.
To test the camera, I decided to head into the forest and make a series of photos that told the story of the place I was in, the time of year and the conditions we had. I wasn’t looking for a portfolio worthy photo, I knew the conditions weren't great for some fine are woodland photography such as a recent image I shared here Forest Bliss | Weekly Photo #58. I just wanted to document my walk with Holly, play with a bit of depth of field, and have a bit of fun with the new lens.
I’ve not yet introduced you to Holly so here’s a little bit about her. Holly has been with us since December 2019. We’re not sure what breed she is but she is a rescue dog, brought over from Romania by a charity that looks to rehome dogs away from some quite awful conditions. Holly came to us underweight, riddled with flees and feeling quite sorry for herself but after a visit to the vets, the groomers, and a lot of love from her new family, she has settled in and is now loving her new life with us. Holly will undoubtedly become a regular feature on future posts.
After my walk, I wanted these photos to look like they belonged together. As I mentioned, none of these are portfolio worthy, alone they might look rather average but bringing them together as a sum of multiple parts makes the entire collection stronger in my opinion.
There were a few things I did in Lightroom to make them feel a part of the set. Firstly, I focused on colour and tones. I edited the first image in the set, played with the HSL sliders to get the colours the way I liked such as the deep, summer greens on the ferns, and the rich oranges and purples in the flowers. I then applied the same edits across all of the photos and tweaked each one individually to match the rest of the set. Next, I cropped each one to a square format, again, to help uniform the look of the photos and make them appear to be a part of this set.
With the sky full of dense cloud, light levels were really poor, especially amongst the trees in the forest so this was a really good test for how my new prime lens coped. Close focusing was a bit of a problem at the widest apertures but its far from a macro lens so that is easily forgiven. That aside, the camera and lens never missed a beat. Across all of the photos, the only setting I changed was the aperture. I set the camera to aperture priority, a target shutter speed of 1/125th second, and auto-ISO was set to a max of 800. I would then tweak the aperture depending on the light and look I was trying to achieve. You can select each image to get a larger view and see the settings that were used for each photo.
I’m pleased with the final collection of photos and hope to share more, presented in a similar way in the future. I would love to hear what you think about picture storytelling, this particular collection, or just to say you like dogs too!
Until next time.
Trevor

What's In My Camera Bag? (2020 Edition)
“What camera did you use to take that shot?” “What filter did you use for that long exposure?” These are just a couple of the questions I regularly receive when people see my photos, so, for those interested, here is my own What’s in my camera bag? 2020 edition.
“What camera did you use to take that shot?” “What filter did you use for that long exposure?” These are just a couple of the questions I regularly receive when people see my photos, so, for those interested, here is my own What’s in my camera bag? 2020 edition.
Before I start, it is worth noting that I firmly believe it’s the photographer that has the vision, chooses the subject and creates the image. There are many photographers that successfully shoot with a single body and lens, a compact camera or even just their camera phone and still produce quite stunning work so don’t get fixated on the photography gear, always fixate on the craft and seeking to create your own artistic style.
“The single most important component of a camera is the twelve inches behind it.” - Ansel Adams.
That being said, if you are shooting with intent and have particular style of image you want to capture, then the right equipment can remove all of the friction in the process and allow the photographer to focus on the creative instead of working overly hard to get the shot and maybe even taking some of the fun out of the process.
Lastly, this is not going to be an overly technical post. It won’t be about the features and specifications, just what gear I am currently using and why.
Cameras

Fujifilm XT2
Those that have followed me for some time know I am a Fujifilm shooter and this XT2 is my primary camera. Unless I am travelling super light (more on that below) I take this capable camera. It may no longer be the latest model but it is still super-fast, very capable and not going anywhere yet!

Fujifilm X-T30 (NEW for 2020)
When I moved over from Nikon to Fujifilm in 2016, I bought the X-T10 and I instantly fell in love with it. I loved the tactile dials and buttons, it literally changed my photographic life. Since the X-T10 was getting a little long in the tooth, last year I reluctnatly upgraded to the X-T30 which to all intents and purposes is the same camera but with upgraded internals. I wrote a blog post about the switch which you can find here.
Camera Lenses

Fujifilm XF 18-55mm f2.8-4 R LM OIS
This was the first Fujifilm lens I brought as it came with the X-T10 and is regarded as it’s kit lens. This may be true but normally kit lenses are considered entry level and not able to match the quality of more expensive lenses. The XF18-55mm breaks that mould as it has excellent image quality and a fantastic standard zoom. This versatile lens ca be found on my camera more often than any other.

Fujifilm XF 55-200mm lens f/3.5-4.8 lens OIS
For the weight and size, this is a fantastically compact zoom lens with great image quality to go with it. When I first purchased this lens, I was concerned as I had previously brought similar lenses for similar money when I shot Nikon and image quality was quite poor. This lens is different, it’s IQ is great and the optical image stabilisation is a godsend, especially at those longer focal lengths.

Fujifilm XF 35mm F2 WR
This 35mm F2 is one of Fujifilm’s “f2” range and it truly is a great lens. It may not be as fast as the f1.4 35mm Fujifilm also make but this compact little lens packs a punch and coupled with my X-T30 means I have a very lightweight system to wander around with and when used with my XT2 I have a full weather resistant system.

Fujifilm XF 16mm F2.8 WR (NEW for 2020)
This is the newest lens in my lineup. I really enjoy using my 35mm prime (above) but wanted something wider to go along with it in my lightweight kit. Since buying this lens I have put it through its paces and really like the results. Some of which you can see on this post here.

Fujifilm XF 10-24mm lens F4 OIS
A great and versatile wide-angle lens. Great for architecture and cityscapes, this lens will often come on a shoot with me. Not the fastest lens at f4 but I rarely shoot landscapes that wide and the OIS certainly helps when shooting handheld in low light situations.
Tripods

MeFoto Roadtrip
I don’t own any big, bulky tripods. This is as heavy as it gets for me which is all I need to capture my long exposure and low light photography. This will be in my bag if I know my photo shoot will include some extensive tripod use. The ball-head is strong enough to hold the weight of my heaviest combination which is the XT2 and 55-200mm lens.

Manfrotto Compact Light
I brought this tripod just before I took my first trip to Venice. I knew that tripods would be difficult in such a crowded place so a lightweight tripod seemed an ideal compromise between weight and frequency of use. Since then I now carry it as a part of my lightweight kit (see the differing kits below).
2020 Update: I will be looking to replace this tripod during 2020 as although I like the tripod, the ball head is starting to fail and needs replacing.
Manfrotto Pixi
This little table top tripod is excellent. It is super strong and super light and perfect to carry around for those just in case moments you need a little stability while out shooting.
Filters

Formatt-Hitech 85mm Filters
A great set for landscape and long exposure photography. The 85mm filters are perfect for the Fuji mirrorless system and more than big enough for all of the lenses with one small exception. The 10-24mm, which at its widest has a little vignetting at 10mm when the filters are attached. Currently, I have a 10 stop ND filter and a set of three ND graduated filters for those landscape photos where the dynamic range is too high.
Camera Bags
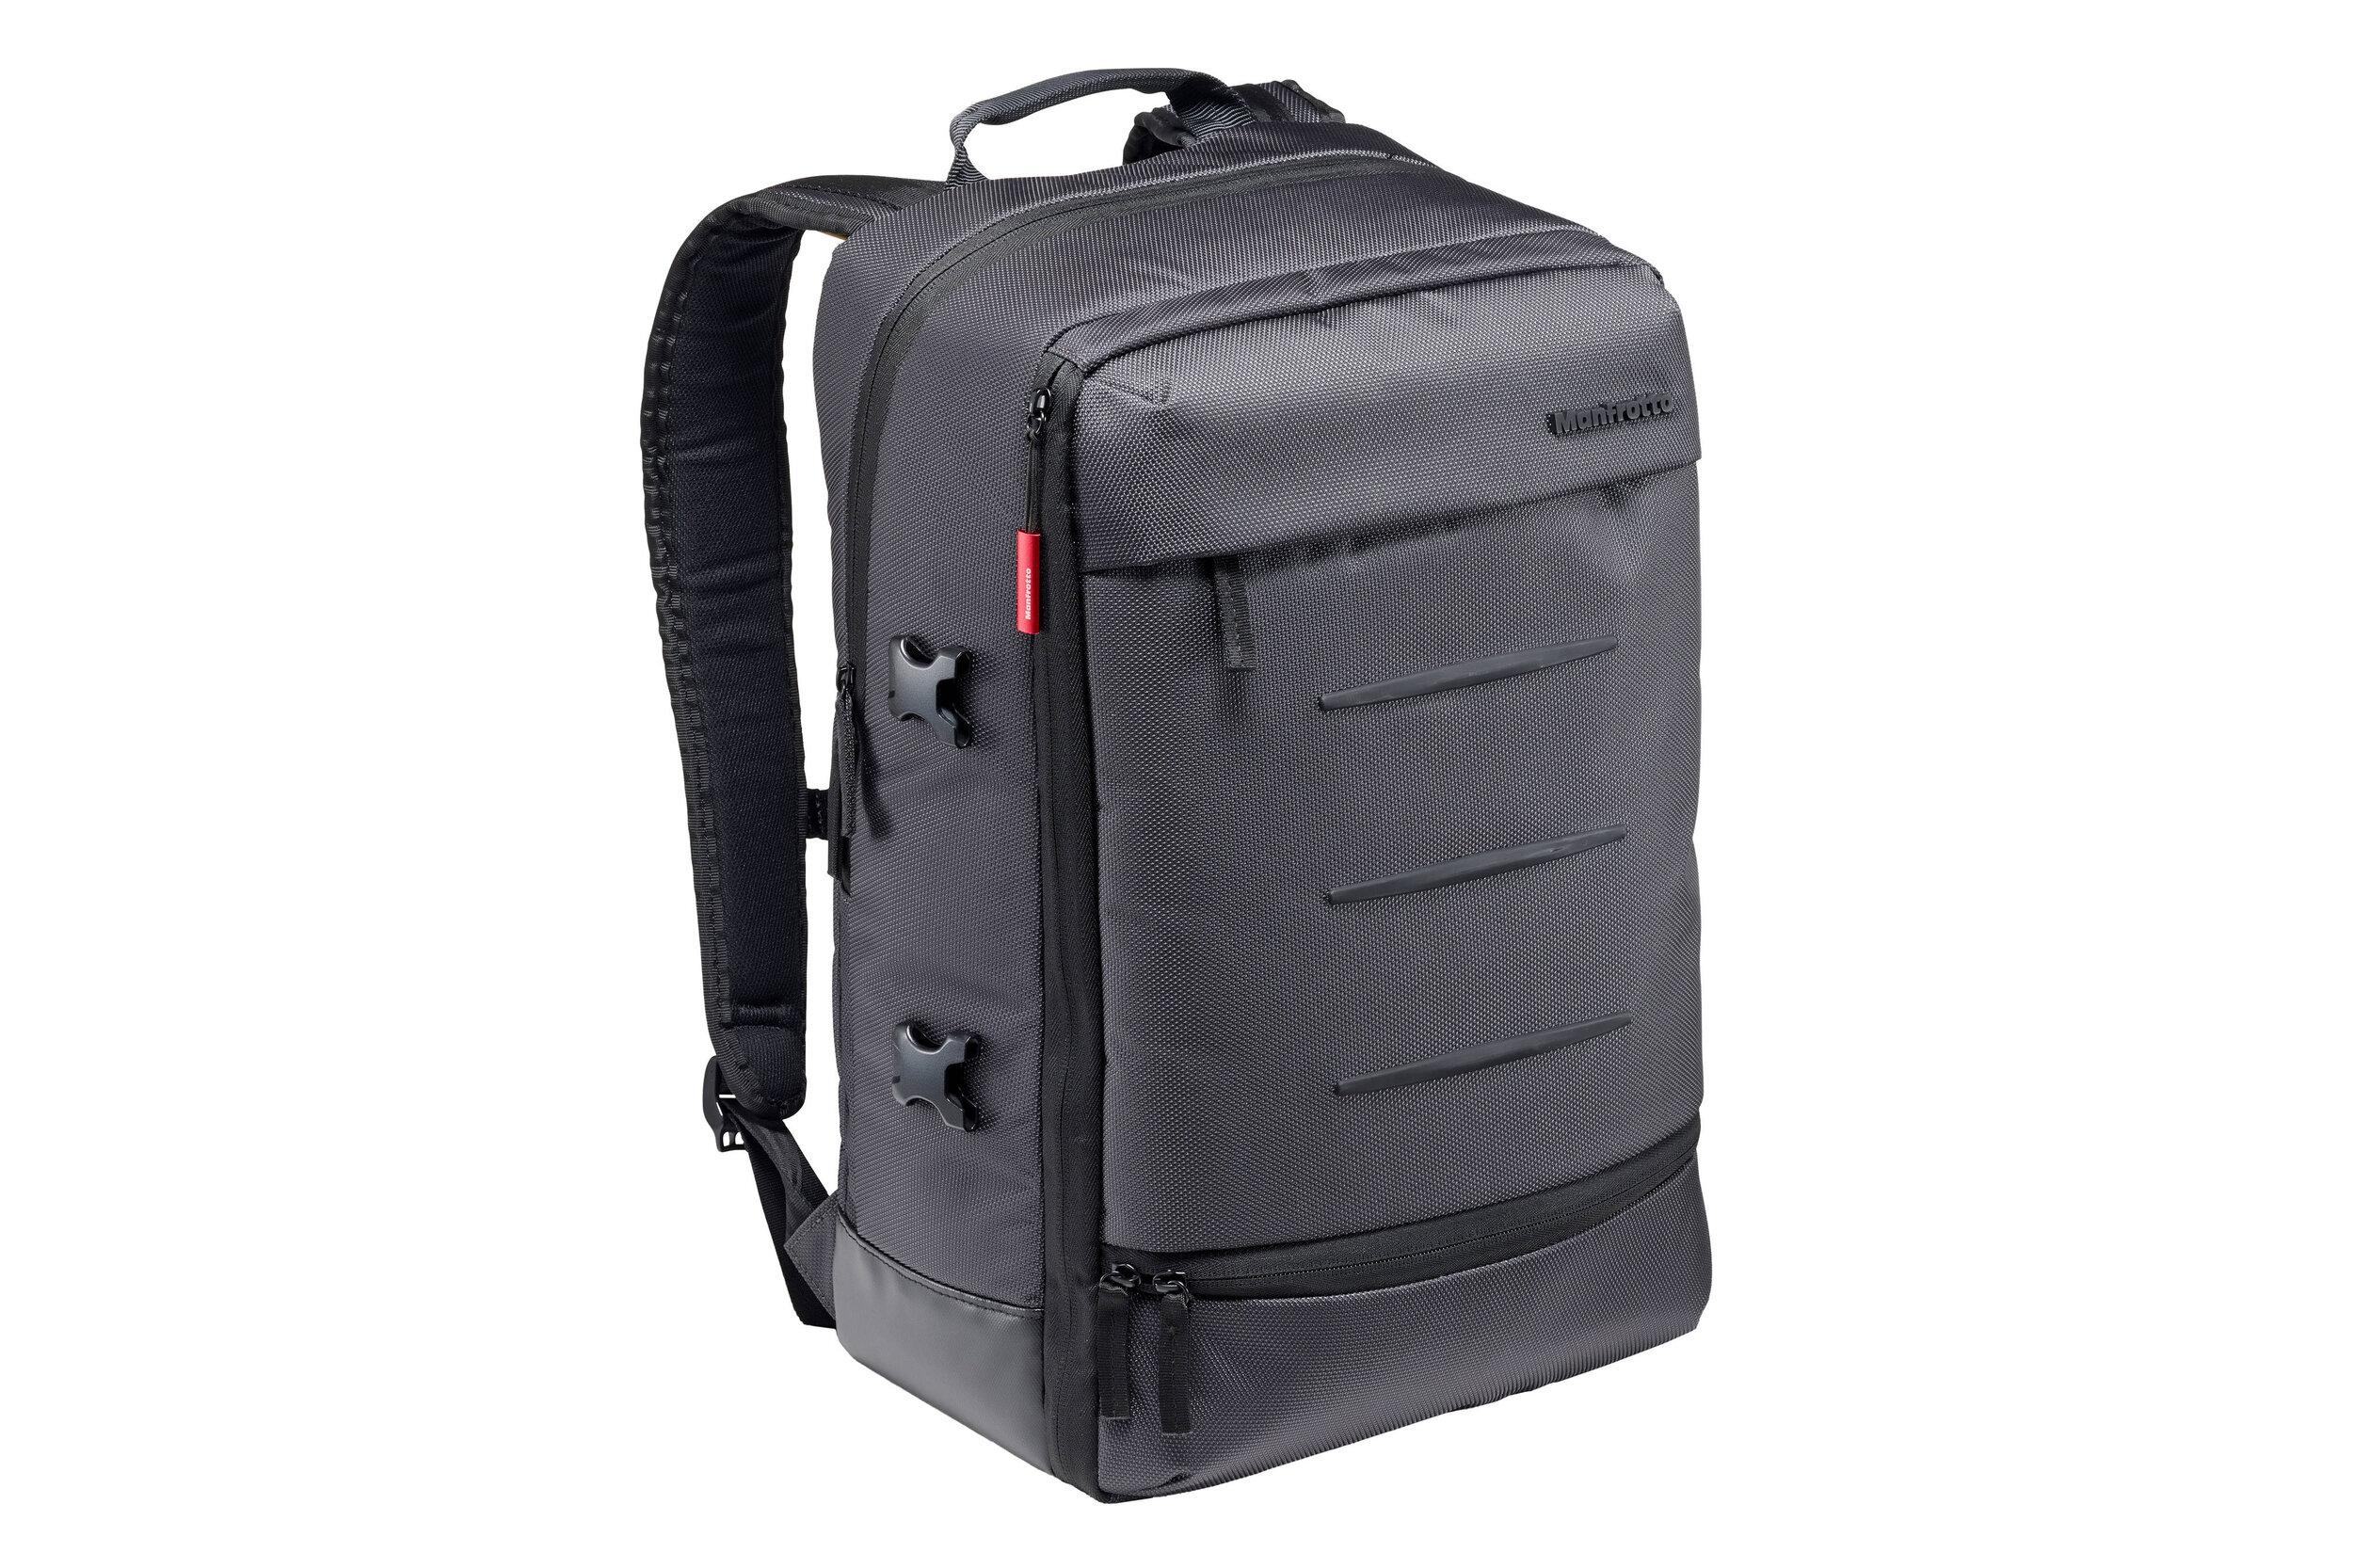
Manfrotto Mover-30 Manhattan Backpack (NEW for 2020)
I brought this bag in 2019 as I was after a bag which was large and comfortable enough to carry my lightweight, city gear but look a little more subtle so it didn’t draw as much attention and I could blend in a bit more as I walked about the city. At the time of writing, I’ve had this bag about a month and so far, enjoyed using it.

Manfrotto Pro Light Backpack
Having a mirrorless system means the size and weight of my kit is kept a little lower and that means I don’t need a huge bag to carry it all. I chose this bag as it both carries all of the kit I would take on a shoot with its multiple configuration options and it also allows me to carry my biggest tripod centrally to keep the bag balanced and takes the pressure off my back.

Manfrotto Street Backpack
I use this bag when I need to travel light or I need to carry other bits as well as some camera equipment. This easily fits a camera and a couple of lenses leaving enough room in the top compartment for clothes and laptop etc.
Accessories

3 Legged Thing L-Bracket
Perfect to quickly switching between landscape and portrait while using the tripod.

3 Legged Thing Toolz
Quite a critical tool as the 3 Legged Thing L-Bracket covers the battery compartment on my XT2 so when the battery needs changing, out comes this tool to quickly remove the L-bracket.

Ultimate Lens Hood
Perfect to help cut out those reflections when shooting through glass. I used the ULH when I was on this sunrise shoot in London.
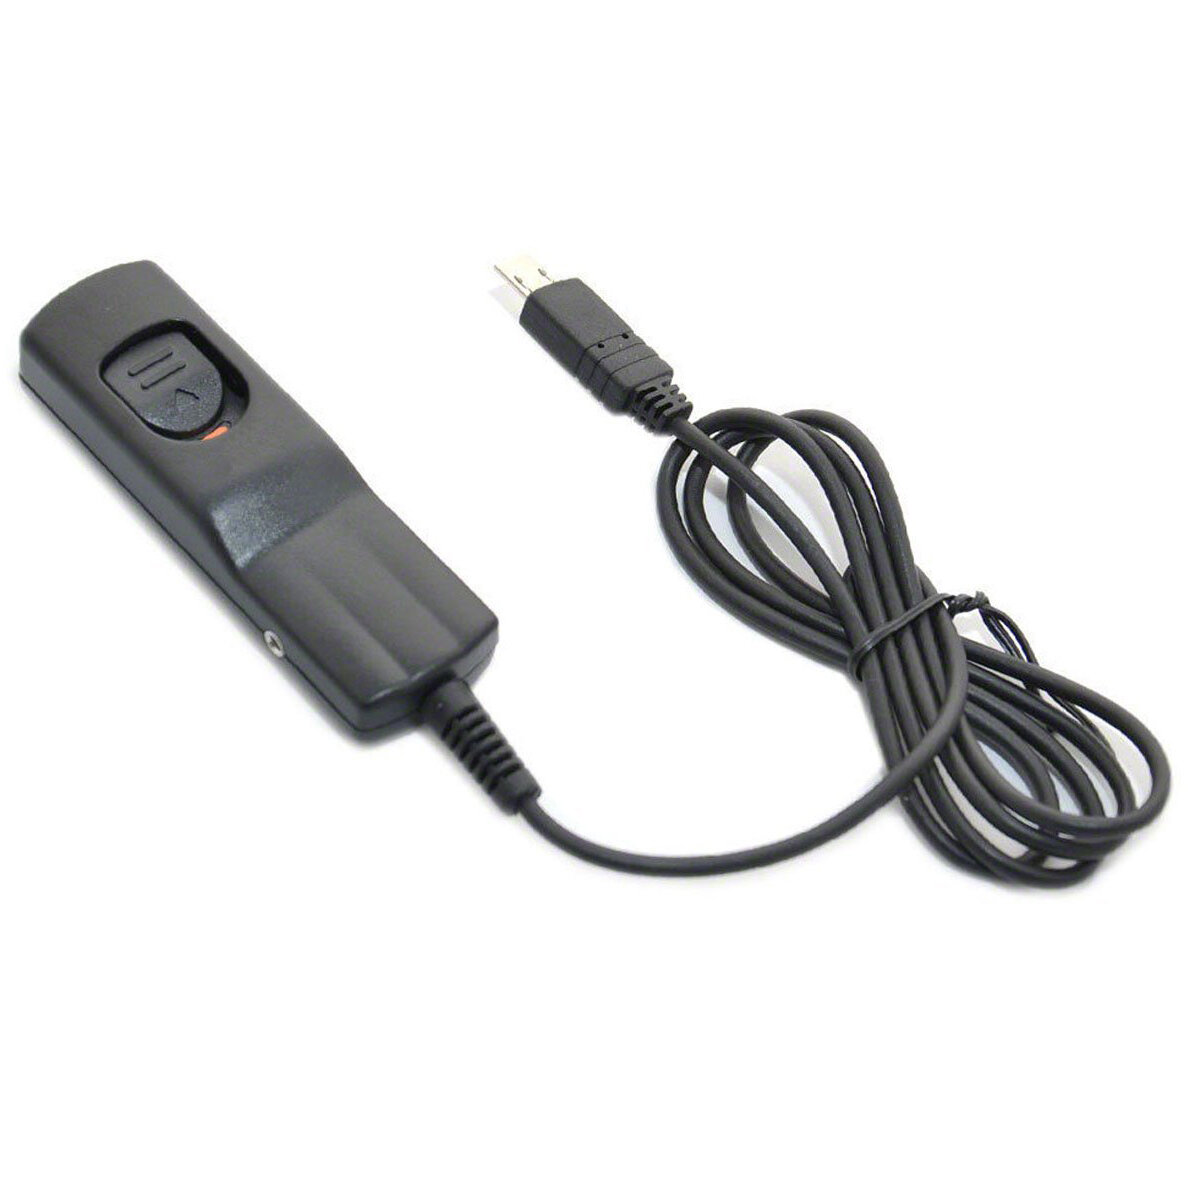
Remote cable Shutter Release
Critical to ensure no camera shake happens when pressing the shutter or keeping the shutter open during long exposure shoots.

Peak Design Slide
This is a great camera strap, it’s comfortable and the quick release anchors mean it can be removed with minimal fuss.

Sandisk Memory Cards
I use Sandisks memory cards because so far, during all of the years I have been photographing, I have not had one failure. I do retire cards when they start showing any sign of wear which I am sure helps avoid failures.

Fujifilm NP-W126s Battery
On a long shoot, I will go through many batteries. One downside of mirrorless is still the battery life. It is improving but still nowhere near what it was when I shot with a DSLR.

BC-W126s Charger
The charger comes with me on longer photography trips when I know my batteries might not last the entire time.

Puridea S2 10,000mAh
This neat little battery pack can charge my phone 4 times or using my other USB charger, can charge 6 or 7 camera batteries. An incredibly useful gadget.
So, how do I pack all of this gear in my bag?
Although I have a healthy collection of camera gear, I certainly wouldn’t bring it all with me to each shoot. Below are 3 of the most common ways I pack my bag, depending on the type of photography I intend to do.

FULL LANDSCAPE/ CITYSCAPE
When I am on a long shoot, capturing long exposure images, high level cityscapes or grabbing the odd time-lapse, this is the kit I will usually pack. There is not a lot of room left in the bag and it’s my heaviest configuration but at least I am prepared for anything.

LIGHTWEIGHT CITY/TRAVEL
Much more suitable for a long day walking around the city or while traveling where there will be a mix of intimate and sweeping landscapes to photograph. The shoulder strap for walking about and the very lightweight Manfrotto tripod to take photos in low light. Depending where I go and what I intend to shoot will depend on the combination of lenses I take.

ULTRA LIGHT-WEIGHT WALKABOUT/STREET
I tend to have this kit with me when I’m shooting handheld around the streets of London or when my primary focus for the day isn’t photography but I may sneak in an hour or two. Although I may pack the kit in my Manfrotto Street backpack to travel with, I will tend to leave the backpack in the car and take just the camera and strap out with me and keep the spare prime lens and tiny tripod in a pocket so I can travel as light as possible.

So, there you have it, all of the gear I take with me as of January 2020. I mentioned above that I plan to upgrade my Manfrotto Compact Light tripod this year but other than that, I don’t foresee any major upgrades in the camera and lens department…well, unless Fujifilm does something special with the XT4 that is. Never say never and all that!!
As my equipment evolves, I will try to refresh this post each year.
Until next time.
Trevor

On Location Photographing London With The Fuji XF16mm F2.8
One thing I like to do when I buy new photography gear is to really put it through its paces and to understand everything about it. Having purchased the recently released Fuji XF16mmF2 WR lens, I did just that and took the lens on a rainy walk along the Thames in London at night. Jump in to read how I and the lens got on.
One thing I like to do when I buy new photography gear is to really put it through its paces. To learn how it performs, to understand its characteristics, quirks and drawbacks so when it comes to packing my camera bag, I know what kit is going to help me get the most out of the shoot.
Earlier this year, I brought the pocket-rocket Fujifilm X-T30 and to get to know it well, I used it as my main camera during a recent trip to Ghent, Belgium.
You can read all about this trip in my post here: On-Location | Photographing Ghent
A little more recently I finally got around to purchasing the Fujifilm XF16mm F2.8 WR prime lens. I already had the XF35mm F2 which I really enjoyed using and wanted the same again but wider, so I splashed out the relatively reasonable £350 and bought one.
With the lens now in the bag, it was time to head out and get to know it properly, so a couple of weeks ago I decided to venture out into London after dark to see how it performed while on a walk from Westminster to Tower Bridge.
Just to make a quick note. This is by no means a technical or scientific review of the lens. You will find plenty of reviews that provide technical specifications and deep analysis of how well the lens performs against its rivals but in this post, I will show you the photos I took and talk about how I thought the lens behaved in the pretty tough conditions of a rainy night in London. In addition, this lens is relatively inexpensive compared to the likes of the XF16mm F1.4, the XF8-16mm F2.8 and XF16-55mm F2.8 so this particular review is based on me having realistic expectations of a lens at the particular price point.
To push the limits of the lens and myself as a photographer, I decided to head out to take a mix of street and cityscape photos with just the camera and lens and no tripod whatsoever. I was depending solely on the city to provide enough light to expose the photos enough for most to be taken handheld. I did, however, use the odd wall or ledge to rest the camera enough to enable me to drop the ISO or open the shutter longer on occasion. You can spot these easily by checking the settings I used under each of the photos below.
Photographing London with the XF16mmF2.8 WR
First stop was to capture the London Eye illuminated by these cool colours. As you can see, with no tripod to use, I ended up resting my backpack on the wall, then the camera on top of that which helped me get the angle I wanted. The wider 16mm focal length (equivalent to 83.2 degrees field of view) enabled me to capture the entire scene without having to point the camera too far upwards thus avoiding the distortion this inevitably brings.


Fujifilm X-T30 | XF16mm F2.8 | 16mm | 0.8 Seconds | f/2.8 | ISO160
The image below was about as tough as it got when it came to handheld shots using just the city lights. This area is pretty dark and I needed to up the ISO to 1600 to get close to a sharp image. Just as I had finished adjusting the ISO, this chap crossed the road in front of me and I just managed to capture him as he stepped into the light.

Fujifilm X-T30 | XF16mm F2.8 | 16mm | 1/17th Second | f/2.8 | ISO1600
For this photo walk, I was shooting in aperture priority set to f/2.8 to ensure I captured as much light as possible. One of the minor drawbacks this lens has is that the aperture doesn’t go as low as other lenses in the line up such as the XF35mm F2 WR. I could have done with that extra stop!
I generally set the camera to auto ISO800 but as you can see by the settings below, I had to adjust this for the odd photo. With the camera deciding the optimal shutter speed that left me to play with the exposure compensation dial on the fly which allowed me to manipulate the shutter speed by under or overexposing.
While up on the Golden Jubilee Bridge, I had to use all of the 16mm I had available to fit both the London Eye and sky swings into the image and still have enough room to correct some of the distortion later in post. It’s not a great composition, I know, but it demonstrates the field of view you can get with this lens pretty well.

Fujifilm X-T30 | XF16mm F2.8 | 16mm | 1/18th Second | f/2.8 | ISO800
If I could ask for one thing to improve this lens, it would be to somehow add image stabilisation without adding to the cost, size or weight. Yeah, I don’t ask for much, right? Here’s a couple of photos captured handheld as I walked along from South Bank to Embankment which were both taken at 1/10th of a second. That’s a pretty slow shutter speed and with no image stabilisation available from both camera or lens, I needed a very steady hand indeed.

Fujifilm X-T30 | XF16mm F2.8 | 16mm | 1/10th Second | f/2.8 | ISO800

Fujifilm X-T30 | XF16mm F2.8 | 16mm | 1/10th Second | f/2.8 | ISO800
The WR in the name stands for Weather Resistant. Not to be confused with Water Proof. This lens can withstand the odd rain shower but don’t go dunking it underwater as you may end up with a rather expensive paperweight.
Ideally, I would have had my XT2 camera with me on this photo walk as coupled with this weather-resistant 16mm prime, I would have had a fully weather-sealed set up but on this particular day, I forgot to check the weather and by the time I realised how wet it might get, I was already in London with the X-T30.
It took a few minutes for the right looking people to enter this scene in front of Shakespeare’s Globe Theatre to get the type of photo I was aiming for and although I had to be a bit careful about getting the X-T30 wet, at least I didn’t have to worry too much about the lens. This couple, shielded by their umbrella perfectly told the story about the wet conditions endured on this particular rainy night in London.

Fujifilm X-T30 | XF16mm F2.8 | 16mm | 1/40th Second | f/2.8 | ISO800
While the famous London Bridge is pretty plain and uninspiring during the day, it recently received a new light installation as a part of the Illuminated River Project and now shines bright and colourful at night making it a great subject for night photography. Closing down the aperture to f/10, (it ranges from f/2.8 to f/22) I was able to create these starbursts from the street lamps but the resulting 9-second exposure meant I needed to support the camera. Luckily, there was a nice flat wall right where I stood. What luck!

Fujifilm X-T30 | XF16mm F2.8 | 16mm | 9 Seconds | f/10 | ISO160
I finished up right next to Tower Bridge in the popular More London Estate. This area is pretty well lit and provides a great subject for night photography and allow me to continue testing this lens I was enjoying using so much.
In addition to letting more light through the lens, the wider aperture of F/2.8 allowed me to get a bit creative with the depth of field which you can see in a couple of the images below. The 9 blade aperture results in a nice, smooth bokeh (the blurry, out of focus part of the image).

Fujifilm X-T30 | XF16mm F2.8 | 16mm | 1/15th Second | f/2.8 | ISO800
This lens weighs only 155 grams and with the X-T30 weighing 383 grams including card and battery, I had a fantastic, lightweight set up of 538 grams (that’s about 1.2lbs). With such a light combination, carrying around this camera and lens all evening was absolutely no bother at all.

Fujifilm X-T30 | XF16mm F2.8 | 16mm | 1/25th Second | f/2.8 | ISO800

Fujifilm X-T30 | XF16mm F2.8 | 16mm | 1/20th Second | f/2.8 | ISO800
I know it’s hard to tell from looking at these photos on this web page but I was really pleased with how sharp the shots came out when using this lens wide open. In these low-light, rainy conditions and with the aperture at f/2.8, these shots taken around More London look really good. Like most lenses in this price range, when used wide open like this, you will rarely get corner to corner sharpness and this lens is no different. The images do soften slightly as you get closer to the corners but the softness is very subtle and only really visible when viewed at 100%. All in all, these photos are plenty sharp enough for me and totally useable.

Fujifilm X-T30 | XF16mm F2.8 | 16mm | 1/25th Second | f/2.8 | ISO800

Fujifilm X-T30 | XF16mm F2.8 | 16mm | 1/8th Second | f/2.8 | ISO800

Fujifilm X-T30 | XF16mm F2.8 | 16mm | 1/17th Second | f/2.8 | ISO800

Fujifilm X-T30 | XF16mm F2.8 | 16mm | 1/13th Second | f/2.8 | ISO800
As I mentioned at the beginning of this post, this is far from a formal review of this lens. A quick google will get you to one of those in no time. Instead, these are my real-world experiences of using this cracking little lens on a wet, windy night in London and if all you take away from this post is that this lightweight, inexpensive lens feels solid, performs well and is all around a pleasure to use then that’s good enough for me.
Until next time.
Trevor

On Location Photographing the Golden Hour in London
I recently took a walk along the River Thames, London with my Fujifilm XT2 and XF18-55mm lens starting at the London Eye to the Tate Modern and across the river, finishing at St Paul’s Cathedral. Along the way, trying to embrace the strong sunlight and deep shadows while capturing a mix of street and architecture photos.
“Light makes photography. Embrace light. Admire it. Love it. But above all, know light. Know it for all you are worth, and you will know the key to photography.”
This well-known quote increasingly resonates with me and I will be the first to admit, that I have a long way to go before I have mastered the art of seeing light…but I’m getting there. Not so long ago, it would have been rare to catch me without a tripod as I took photos in London. My eye was fixed on the city’s skyline or architecture which to a large degree still is but I when capturing a cityscape, the wide vistas rely heavily on an interesting sky with great light and with all of the planning in the world, once set up ready to take the shot, I have to wait for the light to find me. Sometimes it all comes together but more often than not, I am left without an image.
Back in 2018, I started a project called London Chrome. This project continues today and was started to help me develop my photographic craft by wandering the streets, unchained from a tripod helping me to develop my eye for shapes, composition and light with a degree of success.
These days, as I wander the city, camera in hand looking for compositions, I am now using light as a part of the composition much more effectively, embracing dark shadows while attempting to balance the composition with both the subject and light.
A few weeks ago, during a bright sunny morning, I took a walk along the River in London with my Fujifilm XT2 and XF18-55mm lens starting at the London Eye, crossing the river at the Tate Modern and finishing at St Paul’s Cathedral. Along the way I tried to take advantage of the strong sunlight and deep shadows while capturing a mix of street and architecture photos. In terms of mastering the light, I think I still have a long way to go but I’m comfortable with that. Mastering photography is a journey, probably a life long one and once that reality hits, the pressure to capture a winner every time is lifted. I’m really enjoying this phase of my photographic journey, embracing new challenges and seeing where it takes me.
If you ever feel wanting for some creative inspiration, maybe down in a photographic rut, then I urge you to change things up, take on a challenge or start a new personal project and just see what happens. Exploring the unknown can be quite liberating.
I will leave you with a few of my photos from my photo-walk along the River Thames.

Fujifilm XT2 | XF18-55mm | 18mm | 1/110th second | f/8 | ISO200

Fujifilm XT2 | XF18-55mm | 18mm | 1/150th second | f/9 | ISO200

Fujifilm XT2 | XF18-55mm | 55mm | 1/220th second | f/9 | ISO200

Fujifilm XT2 | XF18-55mm | 18mm | 1/400th second | f/9 | ISO200

Fujifilm XT2 | XF18-55mm | 18mm | 1/350th second | f/7.1 | ISO200

Fujifilm XT2 | XF18-55mm | 18mm | 1/1250th second | f/8 | ISO200

Fujifilm XT2 | XF18-55mm | 55mm | 1/1800th second | f/4 | ISO200

Fujifilm XT2 | XF18-55mm | 55mm | 1/340th second | f/4 | ISO200

Fujifilm XT2 | XF10-24mm | 10mm | 1/125th second | f/8 | ISO200

Fujifilm XT2 | XF10-24mm | 14mm | 1/250th second | f/8 | ISO200

Fujifilm XT2 | XF10-24mm | 14mm | 1/420th second | f/8 | ISO200

So Long Fujifilm X-T10 and Thanks For All The Photos
It seems a bit strange that I am writing a blog post about a camera, even more so about a camera I no longer plan on using but this little camera came along just at the right time and helped re-ignite my photography spark. Having now upgraded to a more recent model, I have decided to share a selection of photos I took with this cracking little Fujifilm camera.
In April 2016, I was a Nikon shooter. I had a Nikon D90 DSLR since 2011 and a D50 before that and for a long time, very happy. Yes, the camera was heavy and so were the lenses but at the time, I didn’t know any different. When I first got the D90, mirrorless cameras were in their infancy and lacked somewhat in image quality and performance. Back then, if you wanted a camera that was more capable than a point and shoot, then most chose a DSLR.
Fast forward to late 2015 and things weren’t going so well. I was in a bit of a photographic rut, feeling uninspired and a bit tired of lugging the long in the tooth D90 around. None of this was helping with my creativity and I was not enjoying my photography very much at all.
I needed a change.
Around the same time, the mirrorless market had been steadily growing. The cameras had come on leaps and bounds. They may not have been quite matching the performance and quality of the top end DSLRs but for the serious photography enthusiast, they were really, rather good.
Feeling frustrated photographically, open to change, I came across Fujifilm and their mirrorless camera line up. I have to admit, I knew almost nothing about Fujifilm cameras as at the time the market was still all about Nikon and Canon DSLRs and Sony Mirrorless but not being one to follow the crowd, the form factor and manual dials of the Fujifilm line-up turned my head and I started to look at these cameras more closely.
Introducing the Fujifilm X-T10
After researching the options, weighing up the pros and cons of each model in early 2016 I eventually settled on the X-T10 and XF18-55mm lens. I had heard nothing but good things about this combination and the X-T10 had all of the quality of the flagship XT1 but with only a few functional compromises and a lack of weather resistance, the smaller and lighter option won the day for me and full of excitement and anticipation, off I went to the store to pick up my new camera.

From my very first trip out with the X-T10, everything changed. I loved everything about this camera. It felt great to be able to adjust the shutter speed by twisting a dial or changing the aperture by twisting a mechanical ring on the lens.
With the mechanical knobs and dials, it felt like I was actually making a photo just like they did back in the film days. On top of that, the image quality was great, the camera bag was light and my creative spark was re-ignited!

Fujifilm X-T10 | XF18-55mm | 26mm | 14 Secs | f/18 | ISO200
The photo above was from my very first trip out with the camera along London’s Southbank in March 2016.
For the last 3 years, my enthusiasm to get out and take photos with this camera has not waned one bit. Being incredibly happy with the Fujifilm X system, in 2017 I decided to invest in the extremely capable XT2 which is a fantastic workhorse delivering fantastic pictures in any weather but throughout this entire time, the X-T10 has remained my favourite camera to take photos with. The camera would remain with me as I wandered the streets capturing London’s architecture or armed with a prime lens, out with the family documenting my children as they grow up.
Now fast forward to 2019, the camera has been released for 4 years which is a long time in the fast-moving camera market and the X-T10 was showing its age compared to the newer cameras being released and I knew the time would soon come for me to think about life after the X-T10. Don’t get me wrong, this camera is as good as the day it was released and a new camera model doesn’t render an older one bad. If money was a limiting factor, I would have no problems continuing to use the X-T10 for the foreseeable future as it still took great images but I was now open to something new.
But what camera could replace the X-T10? I didn’t want to change camera brands as I am heavily invested into Fujifilm and quite happy to remain in the family. The obvious choice was the X-T20 but as soon as I started to be open to investing in a new body, Fujifilm announced the X-T30. After looking at the improvements in image quality, resolution and focus speeds, I made up my mind and it was pre-ordered.
I’ve now had the X-T30 a few weeks and over the moon with my new camera but what about the X-T10? Well, that’s not going anywhere just yet. It’s not worth a great deal to sell and quite frankly I don’t want to part with it anyway. Feeling a tad sentimental about this small camera, I plan on keeping this camera for my daughters to use and with any luck, this camera may ignite a creative spark for a second time!
I had a rummage through my collection to leave you with a selection of photos taken with the X-T10 over the last few years.
So, as the title says, so long X-T10 and thanks for all of the photos.

Fujifilm X-T10 | XF18-55mm | 23mm | 58 Secs | f/11 | ISO200

Fujifilm X-T10 | XF10-24mm | 10mm | 0.9 Secs | f/13 | ISO200
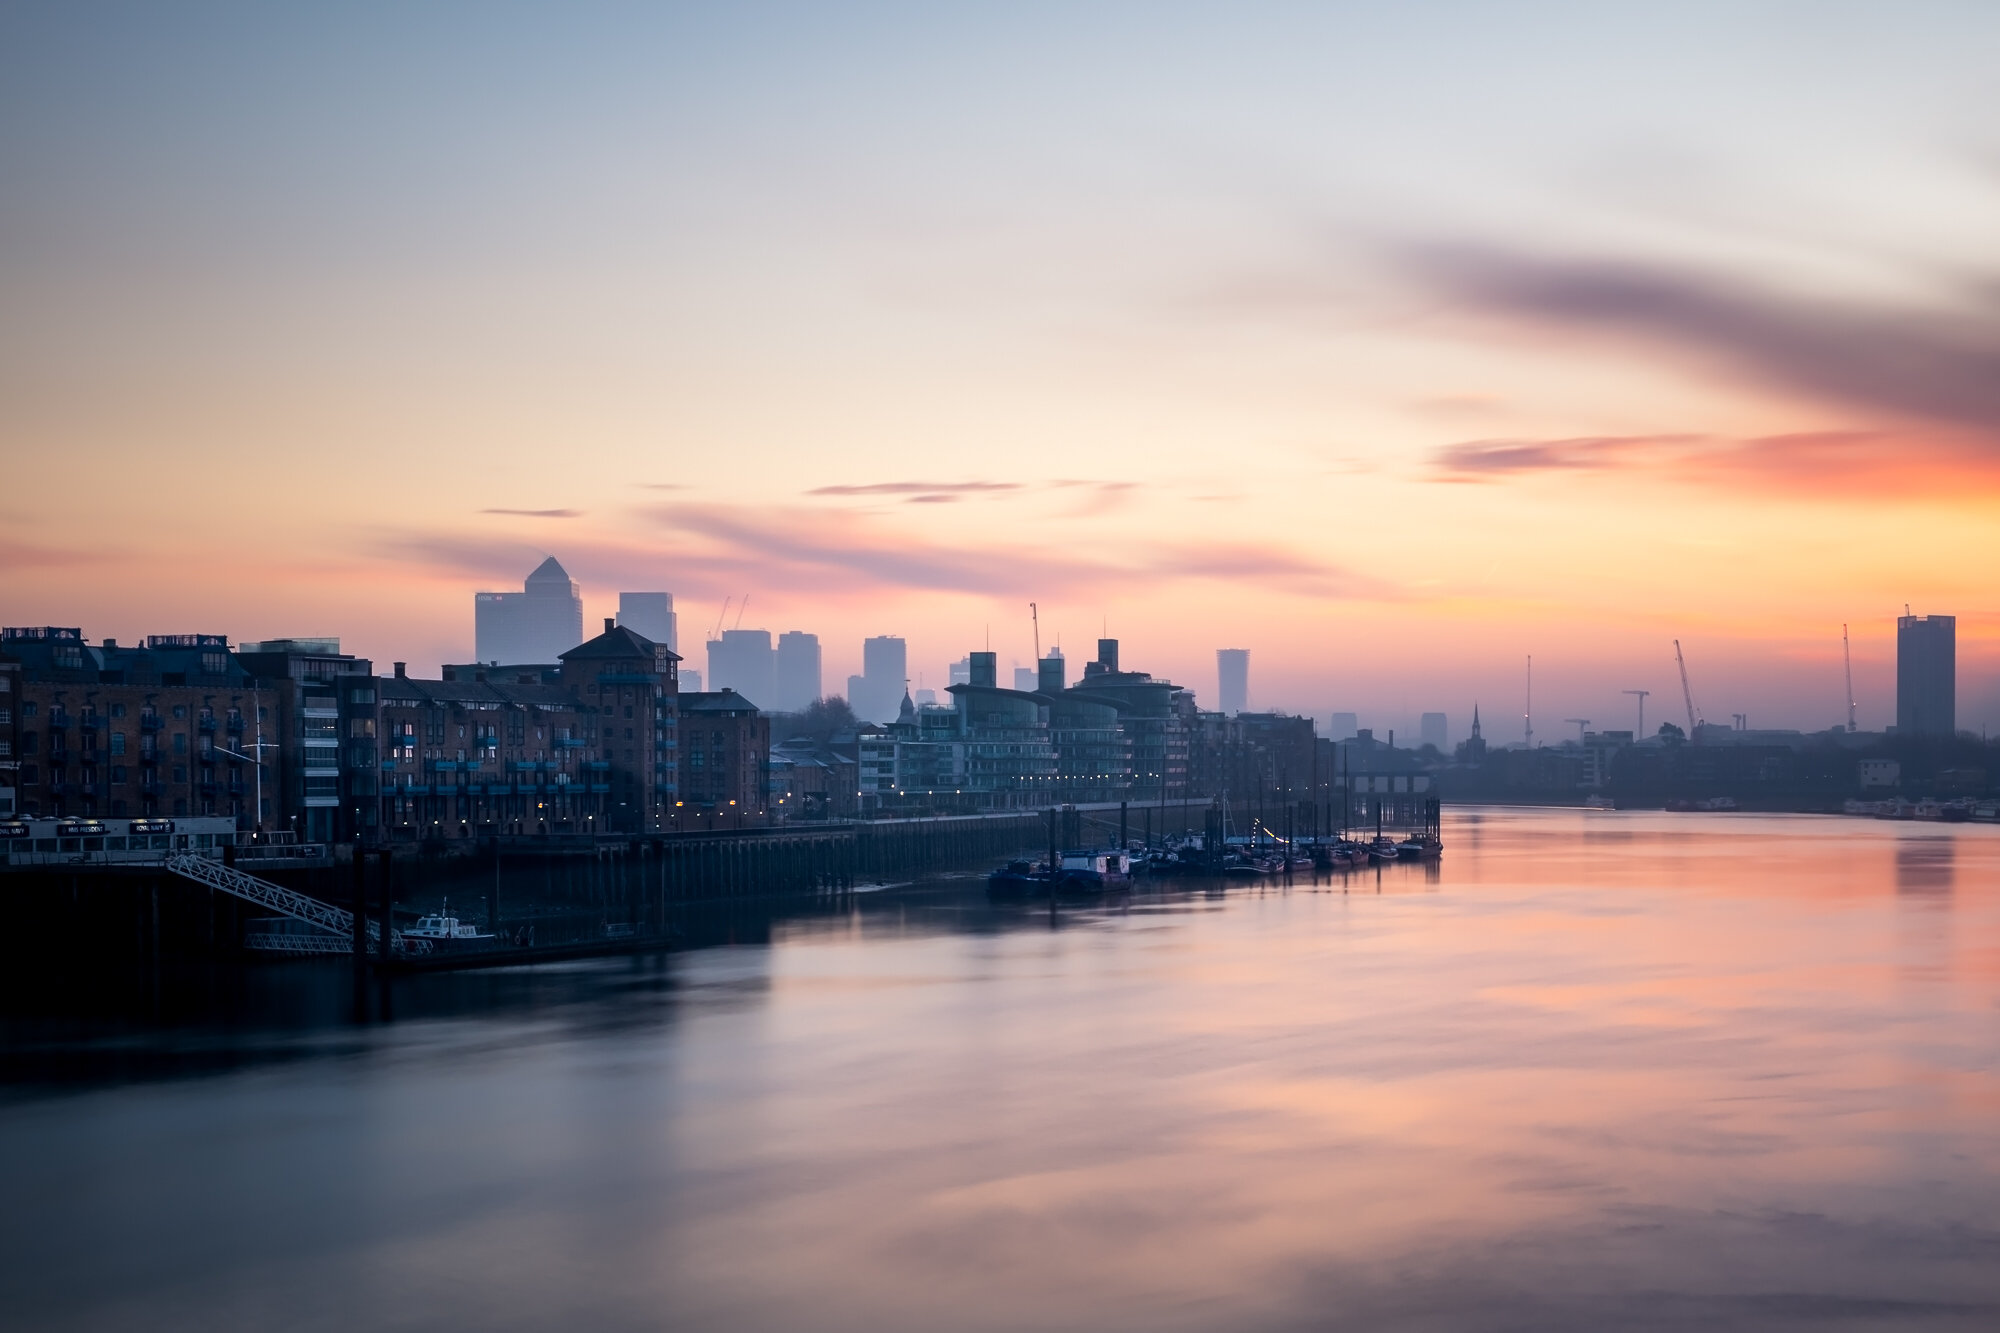
Fujifilm X-T10 | XF18-55mm | 39mm | 58 Secs | f/13 | ISO200

Fujifilm X-T10 | XF18-55mm | 18mm | 140 Secs | f/9 | ISO200

Fujifilm X-T10 | XF18-55mm | 18mm | 90 Secs | f/16 | ISO200

Fujifilm X-T10 | XF18-55mm | 18mm | 4 Secs | f/9 | ISO200

Fujifilm X-T10 | XF18-55mm | 55mm | 1/250th Sec | f/5 | ISO200

Fujifilm X-T10 | XF18-55mm | 21mm | 1/125th Sec | f/7.1 | ISO1250

Fujifilm X-T10 | XF35mm F2 | 35mm | 1/180th Sec | f/5 | ISO200

Fujifilm X-T10 | XF35mm F2 | 35mm | 1/20,000 Secs | f/2 | ISO200

Fujifilm X-T10 | XF35mm F2 | 35mm | 1/50th Secs | f/5.6 | ISO1600

Fujifilm X-T10 | XF35mm F2 | 35mm | 1/125th Sec | f/14 | ISO200

Fujifilm X-T10 | XF18-55mm | 33mm | 1/300th Sec | f/4 | ISO200

Fujifilm X-T10 | XF10-24mm | 15mm | 30 Secs | f/16 | ISO200

Fujifilm X-T10 | XF18-55mm | 18mm | 3.2 Secs | f/10 | ISO200

Fujifilm X-T10 | XF18-55mm | 44mm | 1/350th Sec | f/8 | ISO200

Fujifilm X-T10 | XF18-55mm | 18mm | 1/60th Sec | f/22 | ISO320

Fujifilm X-T10 | XF18-55mm | 18mm | 480 Secs | f/8 | ISO200
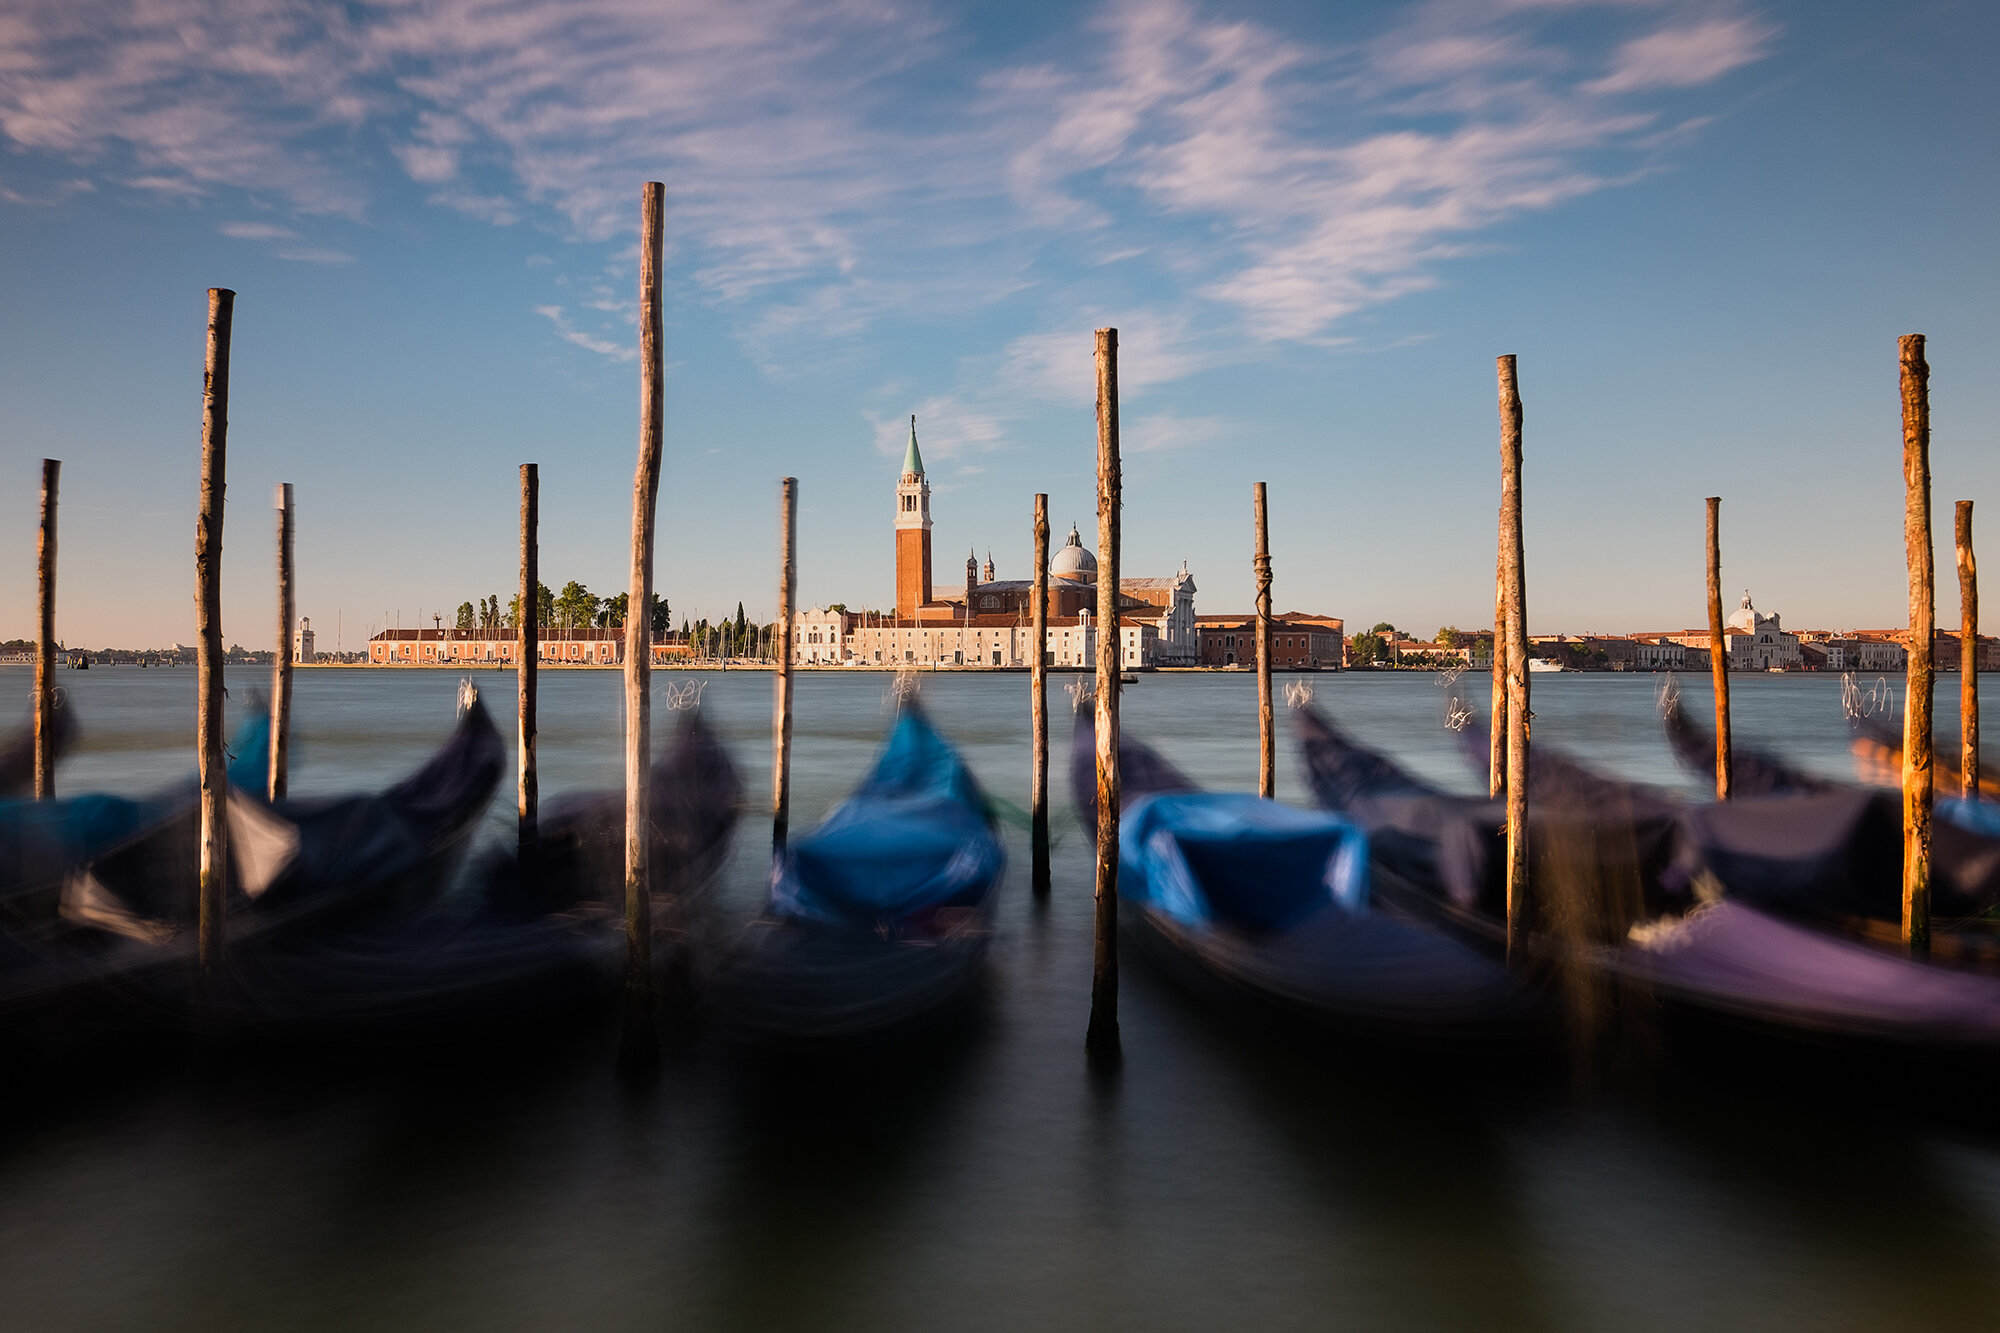
Fujifilm X-T10 | XF10-24mm | 17mm | 14 Secs | f/7.1 | ISO200

Fujifilm X-T10 | XF55-200mm | 61mm | 8 Secs | f/8 | ISO200

Fujifilm X-T10 | XF18-55mm | 34mm | 6 Secs | f/8 | ISO200

What's In My Camera Bag? (2019 Edition)
“What’s the best camera to get?” “That’s a great photo, what camera did you use to take that?” These are just a couple of the questions I regularly receive when people see my photos, so, for those interested, here is my own What’s in my camera bag? 2019 edition.
“What’s the best camera to get?” “That’s a great photo, what camera did you use to take that?” These are just a couple of the questions I regularly receive when people see my photos, so, for those interested, here is my own What’s in my camera bag? 2019 edition.
Before I start, it is worth noting that I firmly believe it’s the photographer that has the vision, chooses the subject and creates the image. There are many photographers that successfully shoot with a single body and lens, a compact camera or even just their camera phone and still produce quite stunning work so don’t get fixated on the photography gear, always fixate on the craft and seeking to create your own artistic style.
“The single most important component of a camera is the twelve inches behind it.” - Ansel Adams.
That being said, if you are shooting with intent and have particular style of image you want to capture, then the right equipment can remove all of the friction in the process and allow the photographer to focus on the creative instead of working overly hard to get the shot and maybe even taking some of the fun out of the process.
Lastly, this is not going to be an overly technical post. It won’t be about the features and specifications, just what gear I am currently using and why.
Cameras

Fujifilm XT2
Those that have followed me for some time know I am a Fujifilm shooter and this XT2 is my primary camera. Unless I am travelling super light (more on that below) I take this amazing camera. It may no longer be the latest model but it is still super-fast, very capable and not going anywhere yet!

Fujifilm X-T10
When I moved over from Nikon to Fujifilm in 2016, this is the camera I brought and I instantly fell in love with it. I loved and still love the tactile dials and buttons, it literally changed my photographic life. Yes, this camera is a little long in the tooth and at time of writing, I am waiting for the X-T30 to be delivered after I pre-ordered it but this little gem is going no-where and is what I carry with me when I am travelling super light or need a second camera in my bag.
Camera Lenses

Fujifilm XF 10-24mm lens F4 OIS
A great and versatile wide-angle lens. Great for architecture and cityscapes, this lens will often come on a shoot with me. Not the fastest lens at f4 but the OIS certainly helps when shooting handheld in low light situations.

Fujifilm XF 18-55mm f2.8-4 R LM OIS
This was the first Fujifilm lens I brought as it came with the X-T10 and is regarded as it’s kit lens. This may be true but normally kit lenses are considered entry level and not able to match the quality of more expensive lenses. The XF18-55mm breaks that mould as it has excellent image quality and a fantastic standard zoom. This lens ca be found on my camera more often than any other.

Fujifilm XF 55-200mm lens f/3.5-4.8 lens OIS
For the weight and size, this is a fantastically compact zoom lens with great image quality to go with it. When I first purchased this lens, I was concerned as I had previously brought similar lenses for similar money when I shot Nikon and image quality was quite poor. This lens is different, it’s IQ is great and the optical image stabilisation is a godsend, especially at those longer focal lengths.

Fujifilm XF 35mm F2 R WR
This 35mm F2 is one of Fujifilm’s “f2” range and it truly is a great lens. It may not be as fast as the f1.4 35mm Fujifilm also make but this compact little lens packs a punch and coupled with my X-T10 means I have a very lightweight system to wander around with and when used with my XT2 I have a full weather resistant system. I plan to add the 16mm f2.8 which Fujifilm has just announced later in the year.
Tripods

MeFoto Roadtrip
I don’t own any big, bulky tripods. This is as heavy as it gets for me which is all I need to capture my long exposure and low light photography. This will be in my bag if I know my photo shoot will include some extensive tripod use. The ball-head is strong enough to hold the weight of my heaviest combination which is the XT2 and 55-200mm lens.

Manfrotto Compact Light
I brought this tripod just before I took my first trip to Venice. I knew that tripods would be difficult in such a crowded place so a lightweight tripod seemed an ideal compromise between weight and frequency of use. Since then I now carry it as a part of my lightweight kit (see the differing kits below).

Manfrotto Pixi
This little table top tripod is excellent. It is super strong and super light and perfect to carry around for those just in case moments you need a little stability while out shooting.
Filters

Formatt-Hitech 85mm Filters
A great set for landscape and long exposure photography. The 85mm filters are perfect for the Fuji mirrorless system and more than big enough for all of the lenses with one small exception. The 10-24mm, which at its widest has a little vignetting at 10mm when the filters are attached. Currently, I have a 10 stop ND filter and a set of three ND graduated filters for those landscape photos where the dynamic range is too high.
Camera Bags
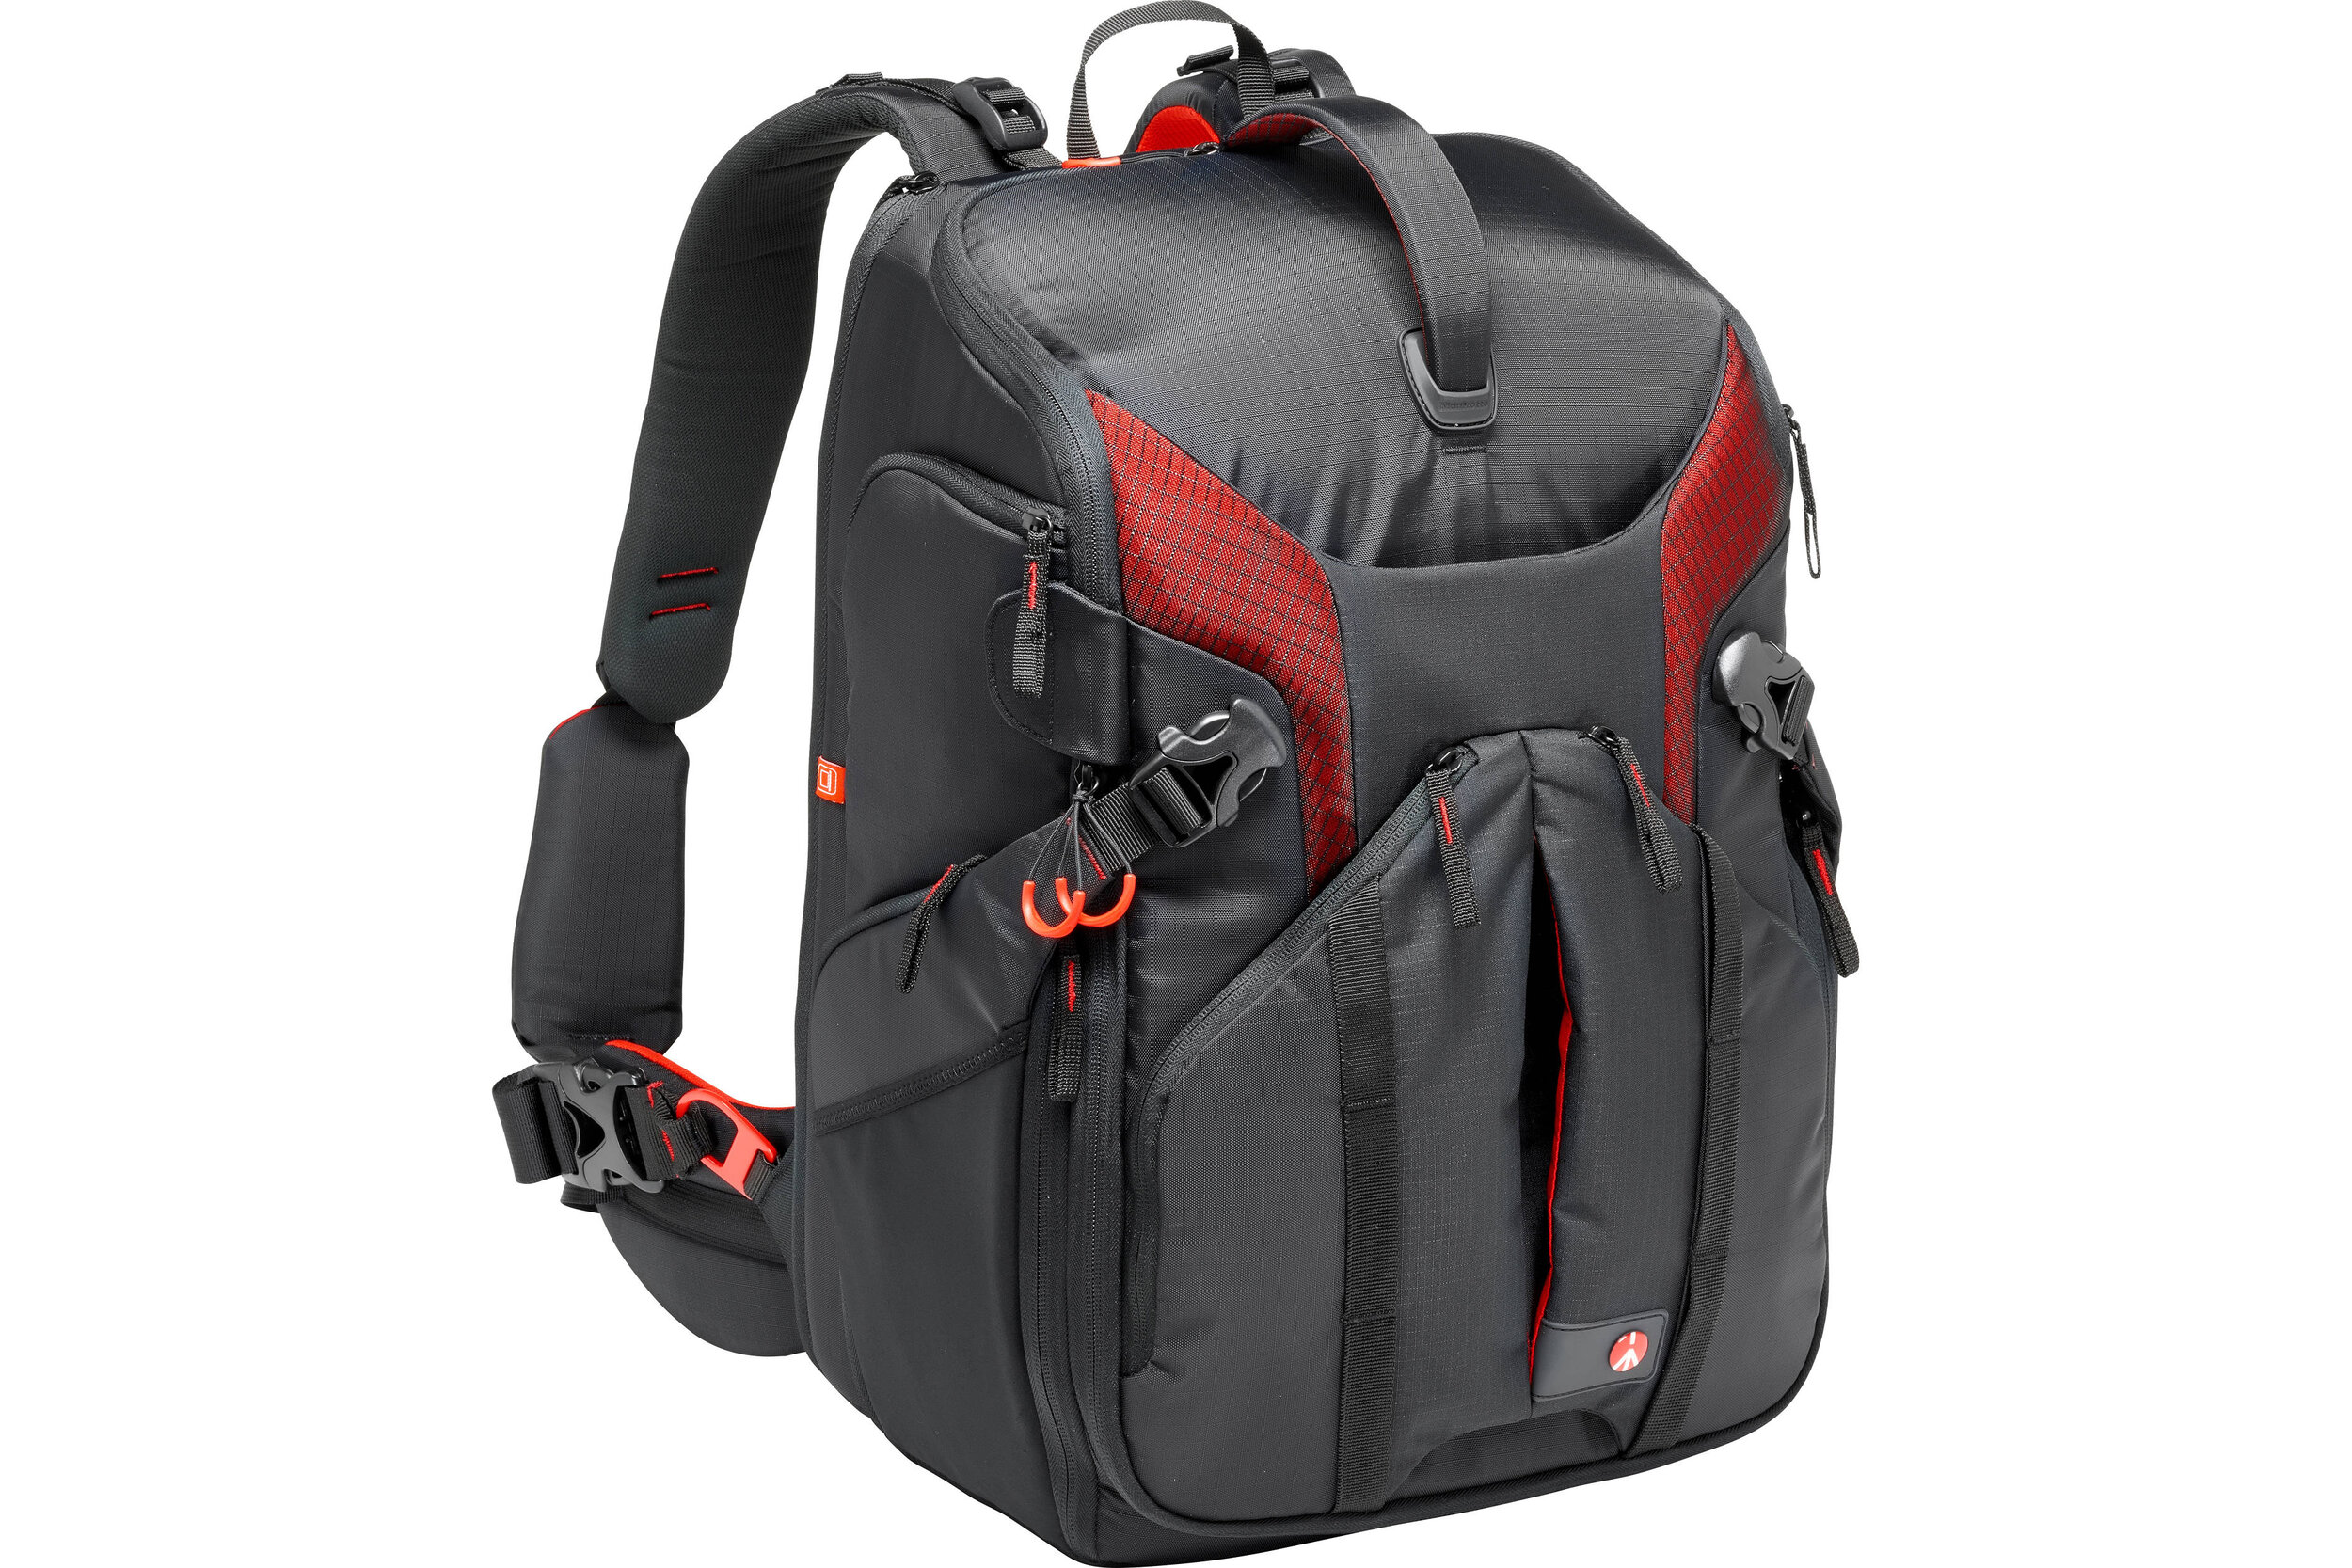
Manfrotto Pro Light Backpack
Having a mirrorless system means the size and weight of my kit is kept a little lower and that means I don’t need a huge bag to carry it all. I chose this bag as it both carries all of the kit I would take on a shoot with its multiple configuration options and it also allows me to carry my biggest tripod centrally to keep the bag balanced and takes the pressure off my back.

Manfrotto Street Backpack
I use this bag when I need to travel light or I need to carry other bits as well as some camera equipment. This easily fits a camera and a couple of lenses leaving enough room in the top compartment for clothes and laptop etc.

Camera Bag Insert
I use one of these camera bag inserts to combine a little camera gear with my standard backpack. I like to always have a camera with me just in case an opportunity presents itself so this insert fits a camera and a lens which is perfect when I need to travel ultra-light.
Accessories

3 Legged Thing L-Bracket
Perfect to quickly switching between landscape and portrait while using the tripod.

3 Legged Thing Toolz
Quite a critical tool as the 3 Legged Thing L-Bracket covers the battery compartment on my XT2 so when the battery needs changing, out comes this tool to quickly remove the L-bracket.

Ultimate Lens Hood
Perfect to help cut out those reflections when shooting through glass. I used the ULH when I was on this sunrise shoot in London.

Remote cable Shutter Release
Critical to ensure no camera shake happens when pressing the shutter or keeping the shutter open during long exposure shoots.

Peak Design Slide
This is a great camera strap, it’s comfortable and the quick release anchors mean it can be removed with minimal fuss.

Sandisk Memory Cards
I use Sandisks memory cards because so far, during all of the years I have been photographing, I have not had one failure. I do retire cards when they start showing any sign of wear which I am sure helps avoid failures.

Fujifilm NP-W126s Battery
On a long shoot, I will go through many batteries. One downside of mirrorless is still the battery life. It is improving but still nowhere near what it was when I shot with a DSLR.

BC-W126s Charger
The charger comes with me on longer photography trips when I know my batteries might not last the entire time.

Puridea S2 10,000mAh
This neat little battery pack can charge my phone 4 times or using my other USB charger, can charge 6 or 7 camera batteries. An incredibly useful gadget.
So, how do I pack all of this gear in my bag?
Although I have a healthy collection of camera gear, I certainly wouldn’t bring it all with me to each shoot. Below are 3 of the most common ways I pack my bag, depending on the type of photography I intend to do.
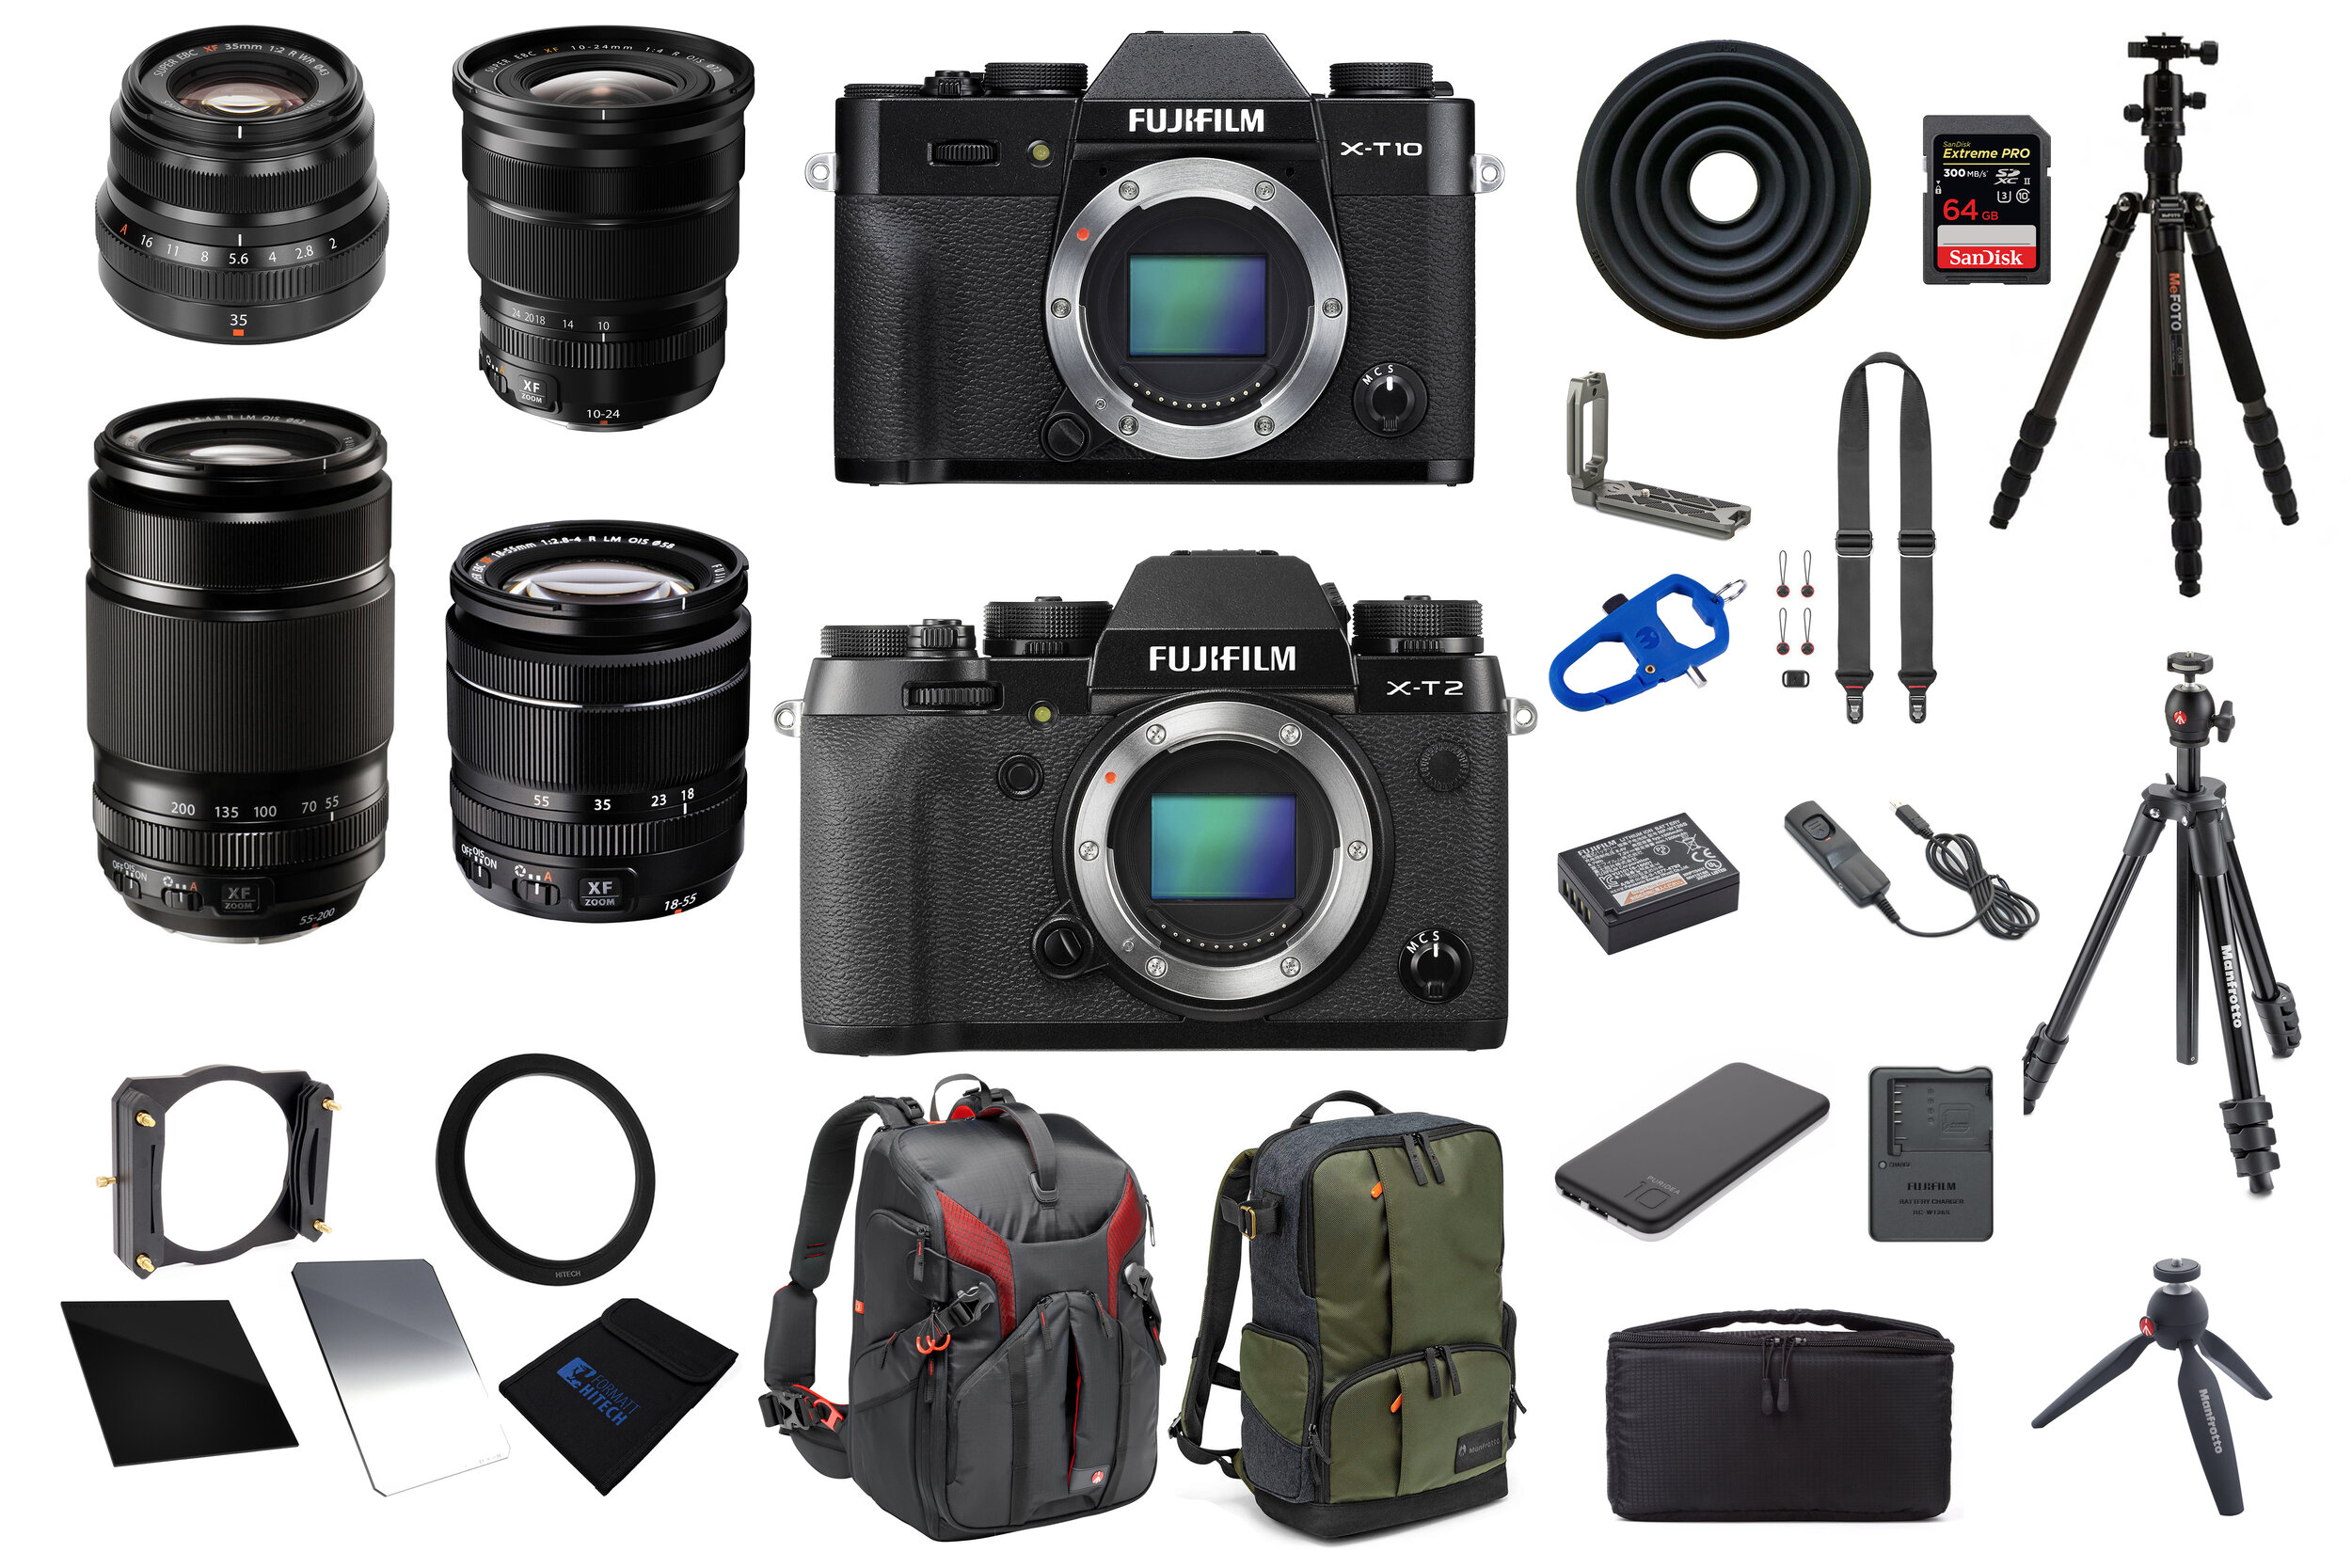
Full Landscape/ Cityscape
When I am on a long shoot, capturing long exposure images, high level cityscapes or grabbing the odd time-lapse, this is the kit I will usually pack. There is not a lot of room left in the bag and it’s my heaviest configuration but at least I am prepared for anything.

Lightweight City/Travel
Much more suitable for a long day walking around the city or while traveling where there will be a mix of intimate and sweeping landscapes to photograph. The shoulder strap for walking about and the very lightweight Manfrotto tripod to take photos in low light. Depending where I go and what I intend to shoot will depend on the combination of lenses I take.

Ultra Light-weight Walkabout/Street
I tend to have this kit with me when my primary focus for the day isn’t photography but I may sneak in an hour or two. I use a standard backpack with the camera insert which will fit the camera and lens ensuring it is protected while I go about my day.

So, there you have it, all of the gear I take with me as of March 2019. I mentioned previously, I will be making some changes very soon. I have already ordered the brand-new Fujifilm X-T30 to replace my X-T10 as my secondary/walk about camera and I am both excited to get this small but incredibly capable camera but sad that my favourite camera will be retired to the side-lines. I am also planning to buy the new Fujifilm 16mm f2.8 which is a member of the same family as my existing 35mm f2. Lastly, I plan to add the DJI OSMO Pocket. It looks like a fantastic little video camera and will compliment my kit nicely.
As my equipment evolves, I will try to refresh this post each year.
Until next time.